Fishing Guide: All Catchable Pals and Odds
All 78 catchable fishing entries in Palworld — which Pals appear at wild fishing spots (with shadow size, level range and time of day), what each of the six spot grades costs your rod and which Pals it opens up, the exact catch odds inside a base Fishing Pond along with the items each of those catches rolls, what every bait actually multiplies, and both salvage-fishing tables for the wrecks you pull with a magnet instead of bait. Boss-size catches are tougher, larger versions of the same Pal.
What You Need Before You Can Fish
Nothing here drops in the world — every rod, bait and pond is a Technology unlock, so your access to fishing is gated purely by the level you have reached. A rod alone will not cast; you need bait in your inventory too.
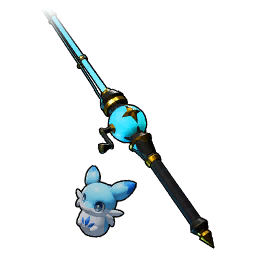
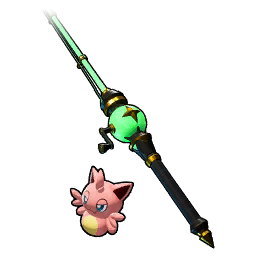

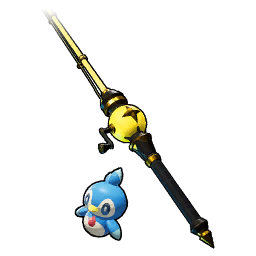

Both ponds are Production structures that need a Handiwork Pal assigned — build one and it fishes on its own while you are away, which is the only way to farm the odds in the table below without casting yourself. The Large Fishing Pond is the late unlock that opens the biggest shadows to you at home.
Neither pond takes a second worker. The slot caps at one Handiwork Pal and rank 1 clears it, so parking your best crafters at the water buys nothing — the extra bodies belong at a bench. Placement is fenced in as well: the ponds sit among the minority of builds that will only go down inside your base camp's radius, so you cannot plant one at a lakeside you like the look of and leave it running out there. And the upgrade is a project rather than a quick swap — the Large Fishing Pond asks 85,000 work to raise against the small pond's 23,500, about three and a half times the labour and one of the heaviest structures in the game to put up, so start it with a full Handiwork crew rather than late in a play session. What that buys in toughness is narrower than it looks: 5,500 structure HP against 4,500 helps only when something is attacking the base, because the larger pond also deteriorates proportionally faster and both hit zero on the same neglected clock. Repair them on the same rotation.
Spot Grades and What a Cast Costs Your Rod
Every wild spot is posted with one of six grades, and the grade decides three things at once: how hard the shadow fights the bar, the level band of whatever bites, and how much durability the cast strips off your rod. A cast at the bottom grade costs 1 point of rod condition; from Advanced upward it costs 4, so the same rod gives you a quarter as many casts at the top of the ladder. Pack spares before you go after the deep pools.
This is why the fishing partner skills below arrive out of order with how useful they are. Gloopie, Jelliette and Jellroy all sit in the Beginner pools, so you can have the drop and drain bonuses running on your very first rod. Whalaska does not show up until Advanced water, Solmora and Solmora Lux until Expert, and Whalaska Ignis — the strongest of the lot — appears at Grand Master spots only, against Lv 71–79 catches. The Pal that makes fishing easiest is the one you need to be good at fishing to get.
Wild Fishing Spots — Catchable Pals
Aggregated across every wild fishing spot: the shadow sizes each Pal appears as, its level range, and when it bites.
Fishing Pond Catch Rates
Your odds inside a base Fishing Pond, split by shadow size.
Small shadow
 KillamariLv 11–189.5%
 JellietteLv 11–189.5%
 TurtacleLv 11–189.5%
 JellroyLv 11–189.5%
 CelarayLv 11–189.5%
 PengulletLv 11–189.5%
 KelpseaLv 11–189.5%
 CroajiroLv 11–189.5%
 FuackLv 11–189.5%
 PenkingLv 11–184.8%
 AzurobeLv 11–184.8%KillamariBossLv 16–240.5%JellietteBossLv 16–240.5%TurtacleBossLv 16–240.5%JellroyBossLv 16–240.5%CelarayBossLv 16–240.5%PengulletBossLv 16–240.5%KelpseaBossLv 16–240.5%CroajiroBossLv 16–240.5%FuackBossLv 16–240.5%PenkingBossLv 16–240.2%AzurobeBossLv 16–240.2%
Medium shadow
 GloopieLv 16–2610%
 Celaray LuxLv 16–269.5%
 SurfentLv 16–269.5%
 DumudLv 16–269.5%
 PolapupLv 16–268.6%
 Pengullet LuxLv 16–267.6%
 Killamari PrimoLv 16–267.1%
 MunchillLv 16–266.7%
 FinsiderLv 16–266.7%
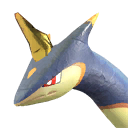 Surfent TerraLv 16–266.7%
 Kelpsea IgnisLv 16–266.7%
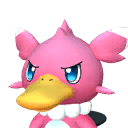 Fuack IgnisLv 16–266.7%Celaray LuxBossLv 22–290.5%SurfentBossLv 22–290.5%DumudBossLv 22–290.5%GloopieBossLv 22–290.5%Killamari PrimoBossLv 22–290.4%Pengullet LuxBossLv 22–290.4%PolapupBossLv 22–290.4%MunchillBossLv 22–290.3%FinsiderBossLv 22–290.3%Surfent TerraBossLv 22–290.3%Kelpsea IgnisBossLv 22–290.3%Fuack IgnisBossLv 22–290.3%
Large shadow
 Azurobe CrystLv 36–4811%
 Turtacle TerraLv 36–4810.1%
 Croajiro NoctLv 36–487.3%
 Penking LuxLv 36–487.3%
 WhalaskaLv 36–487.3%
 Whalaska IgnisLv 36–487.3%
 Ghangler IgnisLv 36–487.3%
 GhanglerLv 36–486.4%
 Finsider IgnisLv 36–485.5%
 Dumud GildLv 36–483.7%
 Gloopie PrimoLv 36–483.7%
 SolmoraLv 36–483.7%
 Solmora LuxLv 36–483.7%
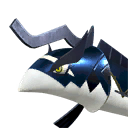 SkutlassLv 36–483.7%
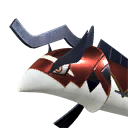 Skutlass IgnisLv 36–483.7%
 Polapup TerraLv 36–483.7%Turtacle TerraBossLv 44–540.5%Azurobe CrystBossLv 44–540.5%Croajiro NoctBossLv 44–540.4%Penking LuxBossLv 44–540.4%WhalaskaBossLv 44–540.4%Whalaska IgnisBossLv 44–540.4%Ghangler IgnisBossLv 44–540.4%Finsider IgnisBossLv 44–540.3%GhanglerBossLv 44–540.3%Dumud GildBossLv 44–540.2%Gloopie PrimoBossLv 44–540.2%SolmoraBossLv 44–540.2%Solmora LuxBossLv 44–540.2%SkutlassBossLv 44–540.2%Skutlass IgnisBossLv 44–540.2%Polapup TerraBossLv 44–540.2%
What the Pond Pays Out Besides Pals
The size split above is a menu, not a lottery you are stuck with. At the pond you set the target before the work starts — aim for a small, a medium or a large silhouette — and the assigned Pal chases only that band, so the column you want is the one you pick. What the pond then hands back comes in two piles you collect separately: the Pals it landed, and the items it landed alongside them.
Those items are the half of the pond nobody counts. Every catch carries its own loot table, and the table is bound to the individual Pal that bit rather than to the silhouette you targeted — so a single size band draws from two to four completely different payouts, and which one you get is decided by the same weights that decide the Pal. Each table is split into independent rolls; the percentages below are read inside a roll, not across the card, and where a roll shows one line that is the only thing it can produce.
Small silhouette — 2 loot tables
80% of small catches
Celaray, Croajiro, Fuack, Jelliette, Jellroy, Kelpsea, Pengullet, Turtacle Gold Coin×50–10031.6%
 Small Pal Soul×1–215.8%Gold Coin×1000–12009.5%
 Pal Sphere×1–38.8%
 Arrow×10–207.3%
 Copper Key×1–26.3%
 Mega Sphere×1–26.3%
 Frag Grenade×1–23.2%
 Low Grade Medical Supplies×1–23.2%
 Training Manual (S)×1–23.2%
 Training Manual (M)×1–21.9%
 Low Quality Recovery Meds×1–21.6%
 Medical Supplies×1–20.6%
 Beginner Fishing Rod (Gumoss) Schematic×10.5%
 Recovery Meds×1–20.3%
20% of small catches
Azurobe, Killamari, PenkingGold Coin×75–15033.2%Small Pal Soul×1–316.6%Gold Coin×1500–180010%Arrow×3–59.3%Mega Sphere×1–29.3% Giga Sphere×1–26.6%
 Silver Key×1–26.6%Training Manual (M)×1–23.3%
 Training Manual (L)×12%Medical Supplies×1–21.7%Recovery Meds×1–21%Beginner Fishing Rod (Gumoss) Schematic×10.5%
Medium silhouette — 4 loot tables
42% of medium catches
Dumud, Fuack Ignis, Gloopie, Kelpsea Ignis, Killamari PrimoGold Coin×100–20032.6% Medium Pal Soul×1–216.3%Gold Coin×2000–23009.8%
 Coarse Ammo×5–109.1%Giga Sphere×1–29.1%
 Hyper Sphere×1–28.2%Silver Key×1–26.5%Training Manual (L)×1–23.9%Medical Supplies×1–21.6%
 Training Manual (XL)×1–21.3%Recovery Meds×1–21%Beginner Fishing Rod (Gumoss) Schematic×10.5%
22% of medium catches
Finsider, Pengullet Lux, Surfent TerraGold Coin×100–20032.5%Medium Pal Soul×1–216.3%Gold Coin×2500–30009.8%Giga Sphere×1–28.8% Reinforced Arrow×5–108.8%Hyper Sphere×1–28.1%Silver Key×1–26.5%Training Manual (L)×1–24.2%Training Manual (XL)×1–22%Medical Supplies×1–21.6%Recovery Meds×1–21%Beginner Fishing Rod (Gumoss) Schematic×10.5%
20% of medium catches
Celaray Lux, SurfentGold Coin×75–15033.2%Small Pal Soul×1–316.6%Gold Coin×1500–180010%Arrow×3–59.3%Mega Sphere×1–29.3%Giga Sphere×1–26.6%Silver Key×1–26.6%Training Manual (M)×1–23.3%Training Manual (L)×12%Medical Supplies×1–21.7%Recovery Meds×1–21%Beginner Fishing Rod (Gumoss) Schematic×10.5%16% of medium catches
Munchill, PolapupGold Coin×3000–350039.1% Large Pal Soul×1–215%Training Manual (L)×1–210.2%Giga Sphere×1–37.8%Reinforced Arrow×5–107.8%Hyper Sphere×1–27.5%
 Gold Key×1–26%Training Manual (XL)×1–23.6%Medical Supplies×1–21.5%Recovery Meds×1–20.9%Intermediate Fishing Rod (Croajiro) Schematic×10.5%
 Diamond×144.4%Training Manual (L)×1–222.2%Training Manual (XL)×1–222.2%
 Ancient Technical Manual×15.6%
 Futuristic Technical Manual×15.6%
 Coralum Ore×1–3100%
Large silhouette — 4 loot tables
40.4% of large catches
Croajiro Noct, Dumud Gild, Ghangler, Penking Lux, Polapup Terra, Turtacle TerraGold Coin×3500–400045.4%Large Pal Soul×1–217.5% Assault Rifle Ammo×1–29.1%
 Ultra Sphere×1–29.1%
 Legendary Sphere×1–28.7%Gold Key×1–27%Medical Supplies×1–21.7%
 High Quality Recovery Meds×1–21%Intermediate Fishing Rod (Croajiro) Schematic×10.5%Diamond×146.9%Training Manual (L)×1–231.2%Training Manual (XL)×1–215.6%Ancient Technical Manual×13.1%Futuristic Technical Manual×13.1%Coralum Ore×2–4100%
32.7% of large catches
Azurobe Cryst, Finsider Ignis, Ghangler Ignis, WhalaskaGold Coin×4000–450045.3% Giant Pal Soul×117.4%
 Gatling Gun Ammo×1–29.1%Ultra Sphere×1–29.1%
 Ultimate Sphere×18.7%Gold Key×17%
 High Grade Medical Supplies×11.7%High Quality Recovery Meds×11%Advanced Fishing Rod (Depresso) Schematic×10.7%Diamond×1–246.9%Training Manual (XL)×1–231.2%Training Manual (L)×1–215.6%Ancient Technical Manual×13.1%Futuristic Technical Manual×13.1%Coralum Ore×8–18100%
19.2% of large catches
Gloopie Primo, Skutlass Ignis, Solmora Lux, Whalaska Ignis
 Gold Coin×7000–750045.2%
 Sol Sphere×1–328%Training Manual (XL)×1–216.1%Training Manual (L)×2–310.8%Coralum Ore×12–21100%
7.7% of large catches
Skutlass, Solmora Diamond×160.9%Gold Coin×4000–450032.8%High Grade Medical Supplies×13.9%High Quality Recovery Meds×12.3%Coralum Ore×18–27100%
Three things in there are worth targeting on purpose. Rod schematics drop from the pond itself, which means the pond can hand you the rod tier above the one you own: the Beginner schematic sits at 0.5% on both small tables and on three of the four medium ones, the Intermediate at 0.5% on the Munchill and Polapup table and on the largest of the big tables, and the Advanced schematic appears on exactly one table anywhere in the pond — the one Azurobe Cryst, Finsider Ignis, Ghangler Ignis and Whalaska pull, at 0.7% inside its roll. That works out to roughly one large-silhouette catch in 440, so it is a background project, not an evening.
Second, ancient tech. Sol Spheres, Ancient Spheres, Ancient Civilization Cores and Ancient Pal Manuscripts turn up on two tables only — Solmora and Skutlass at 7.7% of large catches, and Whalaska Ignis, Solmora Lux, Gloopie Primo and Skutlass Ignis at 19.2% — so a little over a quarter of large-silhouette work feeds the ancient bench, and nothing in the small or medium pools touches it at all. (The Ancient Technical Manual in the second roll of almost every table is a different item and no indication of that.) Third, Coralum Ore, which the pond quietly farms in bulk: it starts at 1–3 on the Munchill and Polapup table, and across the four large tables the stack size runs exactly inverse to how often the table comes up — 2–4, then 8–18, then 12–21, then 18–27 on the rarest. The Whalaska Ignis table also carries the pond's single heaviest gold roll at 7,000–7,500 a catch.
Two operating notes decide whether any of that actually accumulates while you are away. The pond will not take a new target while a caught Pal is still sitting in it, and it cannot hand that Pal over when your Palbox is full — so a full box stops the whole structure dead rather than just spilling the overflow. Clear space before a long unattended stretch. In exchange, this is one of only a dozen base jobs that cost the assigned Pal no sanity whatsoever — it shares that list with the ranch, the breeding farm and the oil pumps, where nearly every other station grinds morale down every tick. Park a Pal here and it will still be working when you get back. You cannot take a shift yourself, though: the pond has no player-operated mode, so with no worker assigned it does nothing at all.
Salvage Fishing: What the Rod Pulls Out of a Wreck
The same rod does a second job that shares none of the rules above. Cast at the floating wreckage out in open water and nothing bites — you hook a junk crate instead, so there is no shadow to read, no size to target, and bait does not enter into it. What you spend instead is a magnet, and which magnet you are carrying decides which of the two tables below you are rolling on. The plain Fishing Magnet costs nothing worth counting — Ingot ×1 for 10 — and asks for no Technology at all. The Powerful Fishing Magnet is the deep-water one and a research project in its own right: Lv 62 on the tree for 3 points, then Hexolite ×1 + Cryogenic Coolant ×1 + Bio Battery ×1 for 10, at ten times the work per batch.
The pull itself is a different minigame too, and a much shorter one: a cursor sweeps the bar at 66% of its length per second and you stop it inside a band 8% wide. That is a window of about 0.12 seconds. The band is not in the middle either — its far edge sits at 90% of the track, so the green you are aiming for is the stretch just before the end, and pressing on instinct as the cursor arrives is late rather than early.
Each crate pays several independent rolls, not one. A roll headed "every pull" fires without fail; the percentages inside a roll are read against each other rather than across the card, so a roll with a single line at 100% is a fixed payout, not a lucky one.
Grade 1 wreck — Fishing Magnet
Every pull
Gold Coin×1000–130038.8%Small Pal Soul×1–225.9%Silver Key×1–212.9%Hyper Sphere×16.5%Low Quality Recovery Meds×1–36.5%Recovery Meds×1–32.6% Advanced Technical Manual×1–31.3%Ancient Technical Manual×1–31.3%Medical Supplies×1–31.3%
 Ruby×1–31.3%Training Manual (M)×1–31.3%Training Manual (L)×1–30.4%
Every pull
Gold Coin×1300–150086.8%Giga Sphere×2–48.7% Pal Reverser×13.5%Beginner Fishing Rod (Gumoss) Schematic×11%
30% of pulls
Coralum Ore×1–2100%25% of pulls
 Simple Bait×2–3100%
0.5% of pulls
 Dog Coin×3–8100%
Grade 2 wreck — Powerful Fishing Magnet · every line carries a ×1.3 bonus experience rate
Every pull
Giant Pal Soul×144.2%Ultimate Sphere×1–222.1%Gold Key×1–217.7%Pal Reverser×18.8%High Grade Medical Supplies×14.4%High Quality Recovery Meds×12.7%Every pull
Dog Coin×10–2021.9%Training Manual (L)×2–321.9%Training Manual (XL)×1–221.9%Ultra Sphere×1–321.9%Flamethrower Schematic 1×12.6%Laser Rifle Schematic 1×12.6%Hexolite Armor Schematic 1×11.7%Hexolite Helmet Schematic 1×11.3%Cold Resistant Hexolite Armor Schematic 1×10.9%Heat Resistant Hexolite Armor Schematic 1×10.9%Flamethrower Schematic 2×10.5%Laser Rifle Schematic 2×10.5%Hexolite Armor Schematic 2×10.3%Hexolite Helmet Schematic 2×10.3%Cold Resistant Hexolite Armor Schematic 2×10.2%Heat Resistant Hexolite Armor Schematic 2×10.2%Flamethrower Schematic 3×10.1%Hexolite Armor Schematic 3×10.1%Hexolite Helmet Schematic 3×10.1%Laser Rifle Schematic 3×10.1%Cold Resistant Hexolite Armor Schematic 3×10%Cold Resistant Hexolite Armor Schematic 4×10%Flamethrower Schematic 4×10%Heat Resistant Hexolite Armor Schematic 3×10%Heat Resistant Hexolite Armor Schematic 4×10%Hexolite Armor Schematic 4×10%Hexolite Helmet Schematic 4×10%Laser Rifle Schematic 4×10%Every pull
Coralum Ore×6–11100%25% of pulls
 High Quality Bait×2–3100%
2.5% of pulls
Advanced Fishing Rod (Depresso) Schematic×19.4% Applied Cooling Handbook I×17.2%
 Applied Gathering Handbook I×17.2%
 Applied Generating Electricity Handbook I×17.2%
 Applied Handiwork Handbook I×17.2%
 Applied Kindling Handbook I×17.2%
 Applied Lumbering Handbook I×17.2%
 Applied Medicine Production Handbook I×17.2%
 Applied Mining Handbook I×17.2%
 Applied Planting Handbook I×17.2%
 Applied Ranching Handbook I×17.2%
 Applied Transporting Handbook I×17.2%
 Applied Watering Handbook I×17.2%
 Treasure Map×14.7%
The two grades are not the same table scaled up — they pay in different currencies. Shallow wrecks are a gold faucet: roughly 1,660 coins a pull once both guaranteed rolls are averaged, which makes them one of the steadiest early incomes in the game against a magnet that costs a single Ingot for ten of them. Deep wrecks pay no gold whatsoever. What they hand you instead is Dog Coins, 10–20 at a time on 21.9% of every pull, so a stretch of deep salvaging is a stocking run for the Medal Shop rather than a payday.
Three things on the deep table are worth going out for on purpose. Training Manuals first: Large and XL sit at 21.9% each inside a guaranteed roll, so getting on for half of all deep pulls hands you a serious block of experience to spend on whichever Pal you are pushing. Second, schematics — the twenty-four weapon and Hexolite armour entries add up to 12.4% of that same guaranteed roll, about one deep pull in eight, though the tiers fall away roughly fivefold per step, so tier 1 arrives regularly and tier 4 effectively never. Third, the Applied work-suitability Handbooks. All twelve share the rare fifth roll at equal weight, which comes to roughly one handbook every 46 pulls, with no way to steer which. The better route is sideways: those Dog Coins buy any handbook you like at the Medal Shop for 300, and at an average of about 3.3 coins a pull that is 90-odd pulls for the exact one you want against 46 for a random one. Salvage until the coins add up, then choose.
Two more habits worth forming. Coralum Ore comes out of wrecks in bulk the way it comes out of the pond: 6–11 on every deep pull against 1–2 on under a third of shallow ones. The two do not compete — the pond grinds it out unattended while wrecks want you in the water — so a base pond plus a salvage circuit is the fastest Coralum supply available to you. And salvaging is the only rod activity Jellroy is built for — its partner skill moves the salvage haul by +55% at rank 1 up to +95% at max and touches nothing else on this page, so it is the wrong Pal at a fishing spot and the only right one at a wreck.
Fishing Bait Compared
Bait is not a straight ladder — each one moves a different number, and two of them move nothing you would notice. Bite chance is the roll that a shadow takes your lure at all; catch bar is the width of the bar you steer onto the shadow; gauge drain and gauge fill are the two rates that decide the minigame. Simple Bait is the flat baseline every other number below is measured against, and Sweet Bait is mechanically identical to High Quality Bait.
Simple BaitThe basic lure for drawing Pals in, and a prerequisite for fishing at all.
High Quality BaitPal-attracting bait refined beyond Simple Bait, so Pals take it more often.
 Deluxe Bait
Bait that draws Pals in, refined so the bar in the fishing minigame runs a little wider.
Beginner BaitA step up from Simple Bait for drawing Pals in — the capture gauge in the fishing minigame empties more slowly with it on the line.
Sweet BaitA Simple Bait upgrade for drawing Pals in, reworked so they bite more often.
Lucky BaitA High Quality Bait upgrade for attracting Pals, tuned so each catch yields more items.
Quick BaitA High Quality Bait upgrade for attracting Pals, tuned so they bite more often.
 Alluring Bait
Bait that draws Pals in. This refined version widens the bar in the fishing minigame and yields more items per catch.
Risky BaitPal-attracting bait, reworked from Deluxe Bait with experienced anglers in mind. The minigame bar shrinks, but a successful catch yields far more.
If you are farming materials rather than Pals, Risky Bait is the one that matters — nothing else doubles both drop rolls, and it stacks on top of whatever your partner Pal is already adding. If you just want the fight to be winnable, the widest bar wins: Alluring and Risky both give you 1.3×, and Beginner Bait cuts the drain instead, which is the better trade on a high-grade spot where the shadow pulls hard.
Pals That Change What You Reel In
7 Pals carry a partner skill that does nothing except at the water — keep the right one at your side and the same cast pays more, drains slower, or hooks a better-rolled Pal. Values run rank 1 to rank 5, so raise the skill to max before judging it.
Reading these needs the minigame in front of you. Once a shadow bites you get a moving marker and a bar you slide onto it; a capture gauge climbs while the two overlap and falls back while they do not, and the catch lands when the gauge fills. So a skill that adds start progress hands you a gauge that is already part-full, one that cuts the failed amount slows the fall when you slip off, and one that raises the success amount speeds the climb when you are on target. None of them touch what you catch — only whether you land it.
Pick by what the trip is for, not by the biggest number. Chasing a Pal to keep, take Solmora Lux — its 74→82% roll on stat potential is the only effect here that changes the quality of what you pull out, and Solmora is the same skill two points weaker at every rank. Farming materials, take Jelliette: +95% at max on both the item haul and the Pal's own drops, doubled again if you are running Risky Bait. Salvaging wrecks rather than fishing, that same slot goes to Jellroy, whose bonus applies to salvage pulls and nothing else. Struggling with the fight itself, Whalaska Ignis is strictly better than Whalaska — 7→17% against 5→14% on both halves — while Gloopie's 12→35% cut to the drain is the largest single number on this page and the one you can get earliest.
Four of the seven double as mounts, and the two halves are independent in a way that saves you a lot of Technology points: every number above runs off the party slot alone, so a Pal walking beside you pays out with no saddle built and nothing spent on the tree. The saddle buys the ride and nothing else. Only Solmora and Solmora Lux are rated for water — 1,300 sprint on the surface with 220 stamina, and they still move at 900 once you beach them — so the Pal improving your talent roll is also the one that carries you out to the salvage wrecks and back, which is the one trip on this page that has no shoreline. Their saddles sit a level apart at Lv 65 and Lv 66, and the Lux version is the pricier build: the plain Solmora Saddle wants 20 Leather, 10 Cloth, 10 Coralum Ingots and 25 Paldium Fragments, where the Lux asks 24 Leather, 12 Cloth, 12 Coralum Ingots, 30 Paldium Fragments and 20 Electric Organs on top, for a fifth more work at the bench. Whalaska and Whalaska Ignis are rideable too, but both are registered as ground mounts at 750 sprint, so neither is a way across a lake. Two riding notes: mounted on Solmora Lux your ranged attacks convert to Electric and gain 5% at rank 1 up to 20% at max — the only combat effect anywhere in this list, and it is dead while the Pal is merely in your party — and the swim-speed bonus all four share is blank at rank 1, appearing only from rank 2 at +10% and reaching +25% at max.
The rank those five values are indexed to is the Pal's own star rank, not its level, so a Solmora you caught this afternoon is reading off the leftmost number and will keep doing so however far you level it. Two ways up. Condensing is the free one — feed duplicates of the same Pal into a Pal Essence Condenser — which is awkward here, because every one of these anglers is a fishing catch in its own right and the good ones sit in Expert and Grand Master water. The other is to buy the ranks outright: a Starfruit jumps one star with no duplicates involved, and the Medal Shop stocks all four at 50, 100, 200 and 400 Dog Coins, so 750 coins takes a fresh Pal from bottom row to top. That closes a loop with the salvage table above: deep wrecks are the Dog Coin faucet at roughly 3.3 a pull, which puts a maxed partner skill about 230 deep pulls away — and the Pal you would spend it on is the one that carries you out to the wrecks. If you would rather not commit to a specific star, a Ripe Starfruit raises whatever rank the Pal is at for 50 Successful Bounty Tokens at the Bounty Shop instead.
Build a Fishing Pond at your base to fish these pools any time. Related: Palworld structures · where to find every Pal · merchant wares.