Moonflower Tower XP Farm: Jetragon Route and Respawns
How the Moonflower Tower XP farm works in Palworld — the Sakurajima fast travel point, why Jetragon's Meteorain wipes the whole camp in one cast, the ~30 second respawn loop, and every Pal that spawns on top of it.
The Moonflower ninja camp outside Moonflower Tower in Sakurajima is the closest thing Palworld has to an infinite XP faucet — a dense pack of hostile humans and their Pals that a level-60 Jetragon deletes in a single cast, then rebuilds itself in about half a minute. This guide covers the fast travel point you start from, the exact move that makes the loop work, the respawn timing, everything that spawns on that patch of map, and how the numbers compare to dungeon and boss XP.
Moonflower Tower XP Farm at a Glance
Everything about this spot is about density and reset speed. The camp sits right next to a fast travel point, so a bad run costs you nothing but a loading screen, and the hostile ninjas there are flagged as an enemy faction rather than a settlement — killing them does not put a wanted level on your head the way slaughtering PIDF officers does. That single detail is what separates this from the old wanted-level XP tricks, which now end with an armed response instead of free experience.
| Detail | What to know |
|---|---|
| Location | The village below Moonflower Tower, Sakurajima |
| Fast travel | Moonflower Tower Entrance — one of 137 fast travel points on the main map |
| Enemies | Moonflower Genin (10 variants) and Moonflower Jonin (9 variants), plus their Pals |
| Their weapons | Katana, Bow Gun, thrown explosives, melee — no rifles, no rockets |
| Respawn | Roughly 30 seconds after you leave the area |
| Wanted level | None — the Moonflower are a hostile faction, not civilians |
| Best pilot | Jetragon at Lv. 60+ with Meteorain |
| Also here | 9 wild Pals, including 4 that spawn here more than anywhere else |
What You Need Before You Start
This is a late-game farm and it does not pretend otherwise. The gate is Jetragon itself — a level 70 alpha that never spawns as a normal wild Pal — plus the technology level to build its saddle. If you are short of either, the loop still works from the ground with any strong mount, it is just slower and you will actually have to fight the ninjas instead of erasing them from the air. Everything on this checklist is a hard requirement except the last row.
| Requirement | Number | Why it matters |
|---|---|---|
 Jetragon captured Jetragon captured | Alpha at Lv. 70 | The only Pal with Meteorain and the game's fastest flight |
| Jetragon at Lv. 60 | Move unlocks at Lv. 60 | Meteorain is the last big AoE on its learnset |
| Jetragon Saddle | Technology Lv. 79 | No saddle, no flying — see the Palworld Tech Tree |
| Sakurajima access | Boat or flying mount | Moonflower Tower sits on the eastern island |
| Player level | Around 50+ | The camp's Pals sit in the Lv. 45–67 band |
 Jetragon's Talisman Jetragon's Talisman | Optional | Raises your partner's Defense and its Dragon damage |
Why Jetragon Is the Only Mount That Runs This
Jetragon is the fastest mount in Palworld at a 3,300 sprint speed with 110 stamina, so repositioning between waves costs seconds. But the real reason it owns this farm is Meteorain, and specifically its minimum range. Beam Comet hits just as hard at 700 power, but it refuses to fire at anything closer than 1,000 units — useless when you are parked directly over a village. Meteorain has the same 700 power and the same 30 second cooldown with a minimum range of zero, so it lands on whatever is underneath you. That is the whole trick.
| Move | Learned at | Power | Cooldown | Min – Max range | Verdict |
|---|---|---|---|---|---|
| Meteorain | Lv. 60 | 700 | 30s | 0 – 5,000 | The farm move — max power, no minimum range |
| Beam Comet | Lv. 30 | 700 | 30s | 1,000 – 5,000 | Same damage, but dead weight directly overhead |
| Dragon Meteor | Lv. 50 | 600 | 30s | 500 – 5,000 | Solid backup if you are not Lv. 60 yet |
| Fire Ball | Lv. 40 | 600 | 30s | 500 – 5,000 | Fire element, worse against Dragon-resistant targets |
| Star Mine | Lv. 70 | 400 | 20s | 0 – 5,000 | Shorter cooldown, much weaker — good filler between casts |
| Flare Storm | Lv. 15 | 200 | 12s | 700 – 3,000 | Early-game filler only |
Star Mine deserves a mention because its 20 second cooldown is shorter than Meteorain's 30. Slot both and you can throw a Star Mine into stragglers while Meteorain recharges instead of hovering idle. Compare the full move list on the Palworld active skills list, and remember that power numbers only mean anything against other moves — a 700-power skill is not directly comparable to a weapon's attack stat.
How to Get Jetragon
Jetragon has zero normal spawn points anywhere on the map. It exists as exactly one level 70 alpha in the far west volcanic reaches, and once you have one, the only way to make more is to breed two Jetragons together — no other pairing produces it. Bring your best spheres and plan for a long fight; its 115 HP and 140 Shot Attack base stats put it near the top of the Paldeck, and the fight has no adds to distract it.
| Method | Detail |
|---|---|
| Alpha encounter | Lv. 70 field boss — see the Palworld Alpha Pal list |
| Wild spawns | None — 0 spawn points outside the alpha arena |
| Breeding | Jetragon × Jetragon only |
| Capture aid |  Legendary Sphere — the top sphere tier Legendary Sphere — the top sphere tier |
| Defeat reward |  Jetragon Bounty Token, a permanent team stat boost just for holding it Jetragon Bounty Token, a permanent team stat boost just for holding it |
| Pal gear | 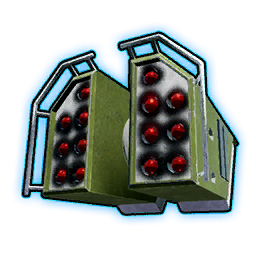 Jetragon's Missile Launcher — Technology Lv. 79, 5 points Jetragon's Missile Launcher — Technology Lv. 79, 5 points |
The Bounty Token is the sleeper here: it does nothing but sit in your inventory and permanently raise the stats of every Pal on your team, so never sell or store it somewhere you'll forget. Jetragon also drops 10 Soralite and 1–2 Thermal Cores on defeat at a 100% rate, with a 30% shot at a Diamond.
The Farm Loop, Step by Step
The whole cycle is four moves long and takes under a minute once you have the rhythm. Do not land, do not loot mid-wave, and do not chase runners — the value of this farm is entirely in how many times per hour you can reset it, and every second on the ground is a second you are not casting.
Step 1: Fast travel to Moonflower Tower Entrance
Unlock the Moonflower Tower Entrance waypoint first — it is the fast travel point built for the tower fight, and it drops you within flight seconds of the ninja camp. If you have not been to Sakurajima yet, the eastern island is reachable by boat or by any flier with the stamina to cross. Open the Palworld interactive map with the fast travel layer on to see it against the other 136 waypoints.
Step 2: Hover over the camp and drop Meteorain
Mount Jetragon, climb until the whole settlement fits under you, and fire Meteorain. At that altitude the Moonflower Genin's kit — Katana, Bow Gun and thrown explosives — has nothing that reliably reaches you, which is why this camp is safer than any Syndicate outpost with rifles and rocket launchers. One cast typically clears the pack outright; anything left standing dies to a Star Mine or a second Meteorain 30 seconds later.
Step 3: Fly out and wait about 30 seconds
Enemies will not respawn while you are sitting on top of them. Fly a short distance away — far enough that the camp unloads — and count roughly 30 seconds. Jetragon's 3,300 sprint speed means a loop out and back barely costs you more than the wait itself, which is exactly why slower fliers make this farm feel worse than it is.
Step 4: Turn around and repeat
Come back, re-hover, cast again. Each pass also seeds the ground with drops from whatever wild Pals got caught in the blast, so do one loot sweep every few cycles rather than every wave. If your Pal party is stocked with under-levelled Pals you want raised, this is where they gain — your active Pal shares in every kill, so rotate them in between passes.
Every Pal That Spawns at the Moonflower Tower Entrance
The ninjas are not the only thing dying to your Meteorain. Nine wild Pals share this spawn zone, and four of them — Dogen, Chillet Ignis, Yakumo and Bulldosu — have 69.2% of their entire spawn presence in the game concentrated right here. If you have been hunting any of those, this farm doubles as the single best capture route for them. Sootseer is the volume leader with 62 spots in the zone, but it is overwhelmingly nocturnal: 649 of its spawn points are night-only against just 10 by day, so run this at night if Sootseer is what you want.
| Pal | Element | Level band | Spots here | Share of its spawns | Map |
|---|---|---|---|---|---|
 Sootseer Sootseer | Dark / Fire | 45–67 | 62 | 9.6% | 649 spawn spots |
 Dogen Dogen | Neutral | 51–56 | 36 | 69.2% | 52 spawn spots |
 Chillet Ignis Chillet Ignis | Fire / Dragon | 40–80 | 36 | 69.2% | 52 spawn spots |
 Yakumo Yakumo | Neutral | 40–56 | 36 | 69.2% | 52 spawn spots |
 Bulldosu Bulldosu | Ground | 53–56 | 36 | 69.2% | 52 spawn spots |
 Verdash Verdash | Grass | 35–53 | 22 | 26.5% | 83 spawn spots |
 Wumpo Botan Wumpo Botan | Grass | 38–80 | 22 | 26.5% | 83 spawn spots |
 Quivern Botan Quivern Botan | Dragon / Grass | 45–80 | 15 | 25.4% | 59 spawn spots |
 Elphidran Aqua Elphidran Aqua | Dragon / Water | 33–80 | 7 | 12.7% | 55 spawn spots |
Note the level bands: nothing here caps below 33 and several run to 80, so this is not a place to bring a level 25 team. If you are farming for captures rather than XP, throw spheres before you cast — Meteorain does not leave much behind. The Palworld capture calculator will tell you what odds a given sphere gives you at these levels.
The Pals the Moonflower Fight With
The ninjas are not unarmed on the Pal side either. Their signature roster is a level-60 team built around Dark and Grass types, and it shows up whole in the battle arena as the Moonflower Genin opponent. None of it is a real threat from the air, but if you fight the camp on foot, Bushi Noct is the one that hurts — a Fire/Dark bruiser that closes distance fast.
| Pal | Element | Level | Notes |
|---|---|---|---|
 Bushi Noct Bushi Noct | Fire / Dark | 60 | The aggressive frontliner of the roster |
 Shroomer Noct Shroomer Noct | Grass / Dark | 60 | Ranged support, dies to a single AoE |
| Verdash | Grass | 60 | Also spawns wild in this exact zone |
| Dogen | Neutral | 60 | Also spawns wild in this exact zone |
 Croajiro Croajiro | Water | 60 | The weakest of the five |
Two of those five are the same Pals you will be scooping off the ground as wild spawns, which makes the camp a tidy one-stop for anyone building a Sakurajima-themed team. Check the Palworld type chart before you go in on foot — a Dark-heavy roster punishes Neutral teams.
Wanted Levels and the PIDF Problem
Older infinite-XP setups leaned on killing PIDF officers, and the game no longer lets that slide. PIDF response has escalated: guards now arrive on flying mounts, and pushing your wanted level high enough summons an Attack Chopper that will follow you home to your base. The Moonflower camp sidesteps all of it because the Moonflower are already a hostile faction — no crime, no wanted stars, no response force.
| Faction | Enemy types | Triggers a wanted level? | Response |
|---|---|---|---|
| Moonflower | Genin (10 variants), Jonin (9 variants) | No | None — they are hostile by default |
| PIDF | 10 unit types, from Rifleman to Interceptor | Yes | Escalating patrols, Patrol Drones and Attack Choppers |
| Islanders & settlements | Villagers, Guards, Pal Tamers | Yes | Settlement guards turn on you permanently |
Worth knowing which is which before you start swinging: the full breakdown of every faction and unit type lives on the Palworld NPC list. If you have already earned a wanted level somewhere else, clear it before you settle into this loop — a chopper arriving mid-farm turns a safe hover into a fight you did not want.
Why You Need an XP Farm Past Level 50
The reason a farm like this matters at all is how brutally the curve steepens at the top end. Getting a Pal to level 50 costs about 2.68 million XP. Getting that same Pal to 60 costs 16.6 million — over six times as much for ten more levels, and the last stretch from 55 to 60 alone is worth more than everything you earned up to 50. Levels stop arriving from questing and start needing a repeatable loop.
| Pal level | Total XP to reach it | Jump from previous row |
|---|---|---|
| Lv. 40 | 430,475 | — |
| Lv. 50 | 2,681,807 | ×6.2 |
| Lv. 55 | 6,678,888 | ×2.5 |
| Lv. 60 | 16,625,481 | ×2.5 |
| Lv. 70 | 75,860,655 | ×4.6 |
| Lv. 80 | 144,829,235 | ×1.9 |
| Lv. 100 | 282,766,395 | ×2.0 |
Those are Pal XP totals, and they are exact. Your active Pal earns from everything you kill, which is why rotating a fresh Pal into the party between passes is not a small optimisation — it is most of the value of running this farm at all. The Palworld Pal calculator will show you what stats a given level actually buys.
Other XP Sources Worth Your Time
The Moonflower camp wins on reset speed, but caverns win on multiplier — every dungeon tier carries a flat XP bonus rate, and it climbs cleanly by region. A Sunreach Isle cavern pays ×8.0, more than double the Grasslands' ×3.0, and Sakurajima's own caverns sit at ×6.5 if you want to stay on the same island. Run dungeons when you want XP plus loot, run Moonflower when you want XP with no downtime.
| Dungeon region | XP bonus rate | Map |
|---|---|---|
| Sunreach Isle | ×8.0 | Sunreach Isle caverns |
| Yakushima | ×7.5 | Yakushima caverns |
| Viking Ruins | ×7.0 | Viking Ruins caverns |
| Sakurajima | ×6.5 | Sakurajima caverns |
| Snowfields | ×6.0 | Snowfields caverns |
| Mount Obsidian | ×5.5 | Mount Obsidian caverns |
| Desert | ×5.0 | Desert caverns |
| Forest | ×4.0–4.5 | Forest caverns |
| Grasslands | ×3.0–3.5 | Grasslands caverns |
Beyond caverns, the other repeatable blocks of XP are alpha Pals — a full route is laid out in the Alpha Pal hunting route — and tower boss rematches, which scale hard on the second attempt. Selyne, the boss inside Moonflower Tower itself, jumps from a 54× HP multiplier on the first clear to 93× HP and 9× damage on the rematch, so treat it as a fight rather than a farm.
Summary
Fast travel to Moonflower Tower Entrance, mount a level 60+ Jetragon, hover over the ninja village, cast Meteorain, fly out for about 30 seconds, and come back. No wanted level, no travel time, no fight you can lose, and four Pals that spawn there more densely than anywhere else in the game as a bonus. Rotate the Pal you want levelled into your party before each pass and the loop pays twice.
Related Guides
Hubs and next steps:
- All Palworld Guides and the Palworld Interactive Map
- Jetragon Location, Stats, and Drops
- Best Stats to Level Up: Priority Order and Stat Caps
- Alpha Pal Hunting Route: Every Field Boss by Level
- How to Unlock Hard Mode Towers: Requirements and Boss List
- Palworld 1.0 Endgame Checklist: What to Do at Level 60+
- How to Min-Max Pals
- Best Team Comps: Boss Killer, Explorer, and Farming Teams
- How to Farm IV Fruits and Training Crystals Fast
- All Palworld Tower Bosses and the Palworld Dungeon List