How to Beat Hard Mode Lily and Lyleen: Team and Drops
Hard Mode Lily and Lyleen is a level 80 Grass rematch with 494,000 HP that only takes 12% of your damage — the second-longest fight on the tower ladder. Here's the Fire team that answers it, why its three Water casts punish that exact team, all nine attacks with power and cooldown, and the Legendary Drone Launcher Schematic it drops.
Lily and Lyleen on Hard Mode is the level 80 Grass tower rematch, and it hides a nasty trick: Fire is the only element that hurts it, and three of the nine attacks in its rotation are Water — the one element that hits Fire back. This guide covers the boss card, the arithmetic that decides whether you beat the clock, the Fire Pals worth building and the two typings that quietly wreck a run, every attack with power and cooldown, the gear and food to pack, and the Legendary Drone Launcher Schematic on the reward table.
 Lily and Lyleen (Hard) at a Glance
This is not a clean duel. Two Free Pal Alliance fighters walk in with the pair — a Believer and a Judicator — and neither of them shares Lyleen's element, so nothing you built for the boss reduces their damage. The unlock is the usual one for the ladder: put Lily and Lyleen down on Normal Mode, and the rematch door opens at the same tower you already have a fast travel point beside.
| Hard Mode | |
|---|---|
| Boss | Lily & Lyleen |
| Element | Grass |
| Weak to | Fire — and nothing else |
| Level | 80 |
| HP | 494,000 |
| Damage dealt | ×10 |
| Damage taken | ×0.12 |
| Cooldown | ×3 |
| Time limit | 5 minutes |
| Unlock | Clear Lily and Lyleen on Normal Mode |
| Other enemies | Free Pal Alliance Believer ×1, Judicator ×1 |
| First-clear reward |  Lily Hat Lily Hat |
| Paldeck | #186 |
The Number That Decides the Fight
Tower bosses are ordinary Pals wearing multipliers, and the rematch rewrites all four of them. The health bar quadruples, which sounds survivable — but the damage-taken line drops from full to 12%, and that is the column that ends runs. Multiply the two and the rematch is effectively 33 times the health bar of the first battle on the same five-minute clock. Its own output goes from ×1 to ×10 in the same step, and the ×3 cooldown is the only thing working in your favour.
| Multiplier | First battle | Hard Mode |
|---|---|---|
| HP | ×25 | ×100 |
| Damage dealt | ×1.0 | ×10 |
| Damage taken | ×1.0 | ×0.12 |
| Cooldown | ×2.0 | ×3.0 |
| Effective health | ×25 | ×833 |
Put the raw numbers together and you get the honest target: 494,000 health behind a ×0.12 wall means roughly 4.1 million raw damage inside 300 seconds, or about 13,700 a second, before the boss's own defense takes its cut. That is the single highest damage-per-second requirement on the eight-tower ladder outside Zoe and Grizzbolt, and it is why a team that misses the Fire weakness is out of the fight before the first cast lands. No amount of dodging closes a hole that size.
| Rematch | Element | HP × | Takes × | Effective health |
|---|---|---|---|---|
 Zoe & Grizzbolt Zoe & Grizzbolt | Electric | ×100 | ×0.10 | ×1,000 |
| Lily & Lyleen | Grass | ×100 | ×0.12 | ×833 |
 Axel & Orserk Axel & Orserk | Dragon / Electric | ×110 | ×0.15 | ×733 |
 Marcus & Faleris Marcus & Faleris | Fire | ×110 | ×0.15 | ×733 |
 Saya & Selyne Saya & Selyne | Dark / Neutral | ×93 | ×0.20 | ×465 |
 Auri & Shaolong Auri & Shaolong | Dragon / Water | ×88 | ×0.20 | ×440 |
 Bjorn & Bastigor Bjorn & Bastigor | Ice | ×75 | ×0.18 | ×417 |
 Victor & Shadowbeak Victor & Shadowbeak | Dark | ×100 | ×0.25 | ×400 |
Second-longest of the eight, and it is the second tower in the game — which is exactly the trap. The original Lily fight is a level 20 pushover, so it is the rematch most people book early and the rematch most people time out on. Do Victor and Shadowbeak or Bjorn and Bastigor first and come back with the souls and lotuses they pay out. Every multiplier for both phases lives on the tower boss list.
 Fire Is the Only Answer, and That's the Problem
Lyleen is pure Grass, so the counter list is one item long — Fire is the only element that gets bonus damage on the element matchup chart and counter finder. Against Bastigor, the other tower a Fire team answers, that same Fire partner also resisted two thirds of the incoming kit. Not here. Lyleen carries three Water casts worth 250, 300 and 600 power, and Water is the element that beats Fire, so the exact Pal you brought to kill it is the exact Pal it is built to kill. Fielding Fire is still correct — you just cannot leave it standing in the open for the whole five minutes.
| Your attacker | Bonus damage into Lyleen | What in its kit punishes you |
|---|---|---|
| Fire | Yes — the only element that does | Three Water casts at 250, 300 and 600 power |
| Water | No | Five Grass casts, up to 600 power |
| Ground | No | Five Grass casts, up to 600 power |
| Neutral | No | Poison Shower — Dark, and the weakest move it owns at 160 |
| Ice, Electric, Dark, Dragon | No | Nothing — it never casts their counters |
That last row is the sleeper. A pure Dragon or Dark Pal takes zero bonus damage from anything in the rotation, which makes it the perfect body to leave on the field while the Water phase plays out. It will not out-damage a Fire attacker, but it will not die either — and against a ×10 boss, a partner that survives is worth more than a partner that hits harder for twenty seconds and then needs a Revival Potion.
Best Pals for the Fight
Read the typing before the statline. Moldron is the standard recommendation for a Fire tower and it is the worst possible pick here — Fire/Ground means the Grass half of the kit hits its Ground side *and* the Water half hits its Fire side, so it eats bonus damage from all nine attacks. The Dragon/Fire hybrids are the opposite story: Lyleen casts no Ice, so their Dragon half is completely free, and Eidrolon Ignis turns out to be one of the best bodies in the fight rather than a liability.
| Pal | Element | Attack | Why bring it |
|---|---|---|---|
| Knocklem Ignis | Fire | 115 ranged | Flame Cutter is a 700-power Fire move no other Pal learns, and Iron Guardian Mode gives +210% attack and +210% defense at four stars — the biggest partner buff in the game |
 Eidrolon Ignis Eidrolon Ignis | Dragon / Fire | 130 ranged | Top Fire attack stat and the 4th-fastest mount in the game at 2,750 sprint — the Dragon half costs nothing here because there is no Ice in the kit |
| Faleris | Fire | 110 ranged | Raging Flame Wave at 650 power is exclusive to it, and at 1,400 sprint it is the fastest pure-Fire flyer — no Water-weak second typing to worry about |
 Flaracle Flaracle | Fire | 125 ranged | The best ranged number on a pure-Fire Pal, with Fire Ball at 600 and Volcanic Rain at 450 — fights at distance, which is where you want to be |
 Blazamut Blazamut | Fire | 150 melee | Highest melee attack of any pure-Fire Pal and Brawn Impact at 600 — the pick if you brawl rather than kite |
 Jormuntide Ignis Jormuntide Ignis | Dragon / Fire | 130 ranged | 130 HP is the fattest health pool of the Fire options, and Dragon typing means only the Water casts threaten it |
 Wixen Wixen | Fire | 110 ranged | Converts your own shots to Fire while it is summoned, and stacks up to +50% ranged attack — the fix for a gun that otherwise does nothing special to a Grass boss |
| Orserk | Dragon / Electric | 130 ranged | Every bullet you land adds 5% attack and defense to your active Pal, stacking 30 times for +150% — and it works from a party slot |
 Silvegis Silvegis | Dragon | 110 ranged | Aegis Shield keeps a shield up, and pure Dragon takes bonus damage from nothing in the rotation |
 Celesdir Noct Celesdir Noct | Dark | 115 ranged | Blessing of Chaos trades a slow health drain for +80% attack, the biggest flat damage boost you can hand a partner |
If you only build one, build Knocklem Ignis. Condensing it to four stars is not a small bump — it takes Iron Guardian Mode from +60% to +210% on both attack and defense, and that defense half is what lets it eat a Geyser Gush instead of being deleted by one. Pair it with Eidrolon Ignis as the swap body and you have a Fire attacker for the Grass casts and a fast flyer to leave the ground with when the water starts. Both sit high on the combat tier list.
Fire Damage Team
This is the comp for players who let the Pal do the work. Knocklem Ignis leads on Flame Cutter and its own +210% buff, Faleris takes the swap slot for the 650-power exclusive and a flyer to reposition on, and the three support Pals never leave the party — Orserk to convert your rifle fire into stacking buffs, Celesdir Noct for the +80%, and Silvegis for a shield that keeps you standing through the ×10 casts.
| Slot | Pal | Job |
|---|---|---|
| Active | Knocklem Ignis | Main damage — Flame Cutter at 700, plus +210% attack and defense |
| Active swap | Faleris | Raging Flame Wave at 650 and the fastest pure-Fire flyer |
| Support | Orserk | +5% attack and defense per bullet you land, to +150% |
| Support | Celesdir Noct | +80% attack on the Pal fighting beside you |
| Support | Silvegis | Aegis Shield — the buffer against Geyser Gush and Wind Burst |
Player-Damage Team
Your rifle does not care what element the boss is — which means against a Grass boss it is throwing away the only multiplier that matters. Wixen fixes that: it converts your attacks to Fire while it is simply summoned, so it works on foot with any weapon while you dodge, and it stacks up to +50% ranged attack on top. Everything else in this party exists to inflate your own numbers rather than the Pal's, and the whole team must be five different species or Solenne's buff switches off. The full conversion roster is in All Pals That Change Your Attack Element.
| Slot | Pal | Job |
|---|---|---|
| Active | Wixen | Turns your own shots into Fire damage, +50% ranged attack |
| Support |  Solenne Solenne | +80% to your own attack — needs five different species in the party |
| Support | Orserk | Bullet stacks, which a player-damage build reaches fastest |
| Support | Celesdir Noct | +80% attack when you do swap a fighter in |
| Support | Knocklem Ignis | Keeps a Fire body on the field between your reloads |
 Minimum Requirements Before You Walk In
Hard Mode rarely kills a competent party — it runs the clock out on them, which costs five minutes and teaches you nothing. Every line below is fixable before you enter, and at a 13,700-per-second target this is one of the two rematches where all of them genuinely have to be ticked. The soul ladder is the long pole, so finish one Fire attacker properly instead of half-building three; the min-maxing guide lays out the spending order and the rank-up guide covers the condenser itself.
| Requirement | Target | Why |
|---|---|---|
| Pal level | 80 | The level gap eats damage on top of the ×0.12 reduction |
| Condensed | 4 star | Takes Iron Guardian Mode from +60% to +210% — nothing else comes close |
| Pal Souls | HP +20, Attack +20, Defense +20 | Fed by  Large Pal Souls the towers themselves drop Large Pal Souls the towers themselves drop |
| Trust level | 7 or higher | Unlocks the top of the partner-skill payoff |
| Awakened | Yes | Fire gems for a Fire attacker — see the radiant gem guide |
| Weapon | Legendary for your level | See the best weapons by tech level |
| Armor | Full Ancient set or better | See the best armor by tech level |
If a Pal falls short, condensing the one you already own beats levelling a replacement, and raising its trust costs a few peaches rather than a few hours. Leave your spheres at home — nothing in the arena can be caught, including the two Alliance fighters.
 Weapons to Bring
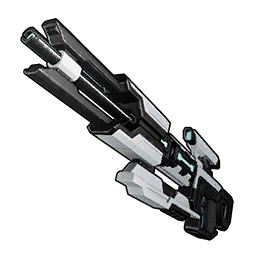
The Plasma Rifle carries the raw damage and its discharge chains between targets, which matters more here than on a solo boss because there are three things in the room at the start. The Drone Launcher is the one people leave in the chest and it is arguably the most important gun in the bag — its drones attack on their own, so they keep Orserk's stacks topped up while you are busy dodging. The Megaboost Gun exists to pump your own Pal's attack and defense between casts, and the Mechanical Bow is a status-application tool — its 20,000 is a bow figure and does not compare to a rifle's.
| Weapon | Unlocks at | Attack | Durability | Why bring it |
|---|---|---|---|---|
| Plasma Rifle | Lv 78 | 1,860 | 25,000 | Highest sustained damage of any rifle, and it chains between the boss and the escorts |
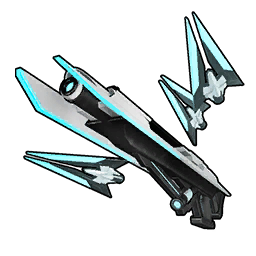 Drone Launcher Drone Launcher | Lv 77 | 200 | 6,500 | Nine autonomous drones stack Orserk's buff to the cap without your input |
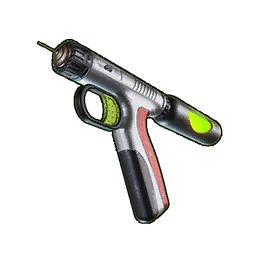 Megaboost Gun Megaboost Gun | Lv 63 | 250 | 400 | Shoot your own Pal to raise its attack and defense — 400 durability, so save it for the buff |
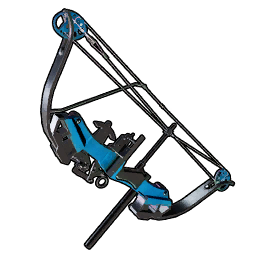 Mechanical Bow Mechanical Bow | Lv 67 | 20,000 | 2,000 | Status application on a separate damage scale to the guns |
 The Ring That Was Made for This Fight
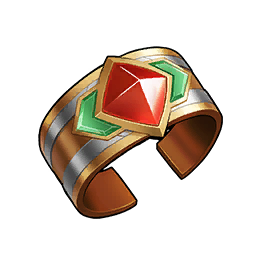
One accessory answers both halves of this fight in a single slot, and it is not the obvious one. The Blazehowl Ring stacks Grass damage reduction at rank 4 with Pal Fire damage enhancement at rank 4 — offense against the boss and defense against five of its nine casts, on the same ring. Its sibling the Faleris Ring carries the identical Fire boost but resists Ice instead, which does exactly nothing here, so check which one you actually socketed before you queue. For yourself, the Ring of Grass Resistance +2 is the budget equivalent. Recipes for the whole set are in List of All Pal Rings and on the accessories database.
| Accessory | Who wears it | What it does |
|---|---|---|
| Blazehowl Ring | Your Pal | Grass damage reduction Lv 4 and Pal Fire damage enhancement Lv 4 |
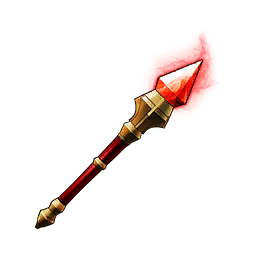 Flame Emperor's Baton Flame Emperor's Baton | Your Pal | Same Fire boost with Pal attack up Lv 4 instead of the resistance |
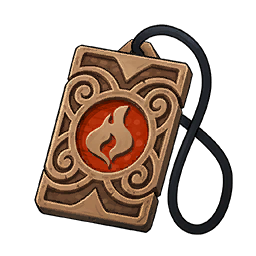 Blazamut's Talisman Blazamut's Talisman | Your Pal | Same Fire boost with Pal defense up Lv 4 instead of the resistance |
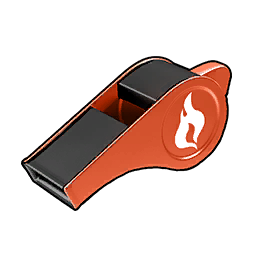 Fire Support Whistle +2 Fire Support Whistle +2 | Your Pal | Fire damage only — the cheap stand-in before the rings are craftable |
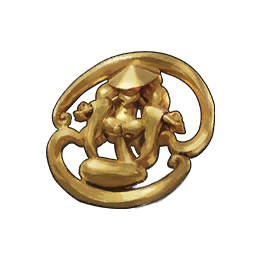 Dogen Emblem Dogen Emblem | You | Greatly raises your attack and your Pal's — never a wasted slot |
 Silvegis Emblem Silvegis Emblem | You | The defensive twin — raises your defense and your Pal's |
 Warsect Terra's Belt Warsect Terra's Belt | You | Defense and health together, for the ×10 hits you fail to dodge |
| Ring of Grass Resistance +2 | You | Grass damage reduction Lv 3 on your own health bar |
For armor, the Ancient set is the floor rather than the goal. Lightweight Ancient Armor is the body piece to beat at 840 defense and 2,400 HP, the Ancient Shield carries 2,200 shield that repairs itself once you go a moment without being hit, and the Ancient Helm is the best helmet available even though its Neutral and Dragon resistances do nothing against this particular boss — you wear it for the 500 defense and 1,200 HP. Put the element resistance in the accessory slots instead, where it actually matches.
| Gear | Unlocks at | HP | Defense | Added effect |
|---|---|---|---|---|
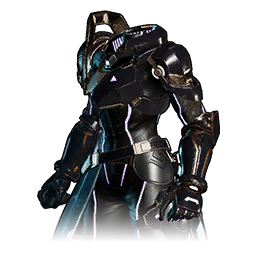 Lightweight Ancient Armor Lightweight Ancient Armor | Lv 79 | 2,400 | 840 | Cold and heat resistance Lv 2, carry weight Lv 4 |
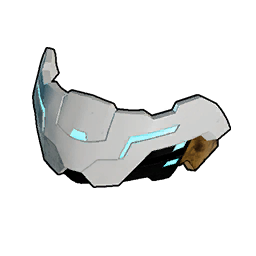 Ancient Helm Ancient Helm | Lv 68 | 1,200 | 500 | Neutral and Dragon damage reduction Lv 1 — neither applies here |
 Ancient Shield Ancient Shield | Lv 71 | — | 2,200 shield | Self-repairs after a spell without taking damage |
 Food and Healing to Pack
Because the tower runs on a timer, damage food beats defense food every time — a buff that keeps you alive through a run you time out on has achieved nothing. Mammorest Curry is the strongest at +25% ranged attack, with Broncherry Fried Noodles one step behind at +20%, and both refill enough hunger and sanity that you are not eating mid-fight. Eat before you walk through the door: the buff ticking down while you fight is fine, the arena seconds spent in your inventory are not.
| Consumable | Effect | Notes |
|---|---|---|
| Mammorest Curry | +25% ranged attack | Best damage buff on the menu — also restores 418 hunger and 52 sanity |
 Broncherry Fried Noodles Broncherry Fried Noodles | +20% ranged attack | The cheaper stand-in at 321 hunger and 40 sanity |
 Advanced Recovery Meds Advanced Recovery Meds | Rapid HP restore | The heal to reach for when a 600-power cast connects |
 High Quality Recovery Meds High Quality Recovery Meds | Strong HP restore | Cheap backup — and Lyleen drops 1 to 3 of these every clear |
 Revival Potion Revival Potion | Revives a downed Pal | Losing your Fire attacker to the Water phase is what ends attempts |
Every Attack in Lyleen's Hard Mode Kit
Nine moves across three elements, and only two of them — Solar Blast and Wind Burst — are things a wild Lyleen actually learns. The whole Water suite is bolted on for the tower, which is why players who fought it in the field are surprised by the second half of the rotation. The good news is the shape: the two 600-power casts sit on 30-second cooldowns that the ×3 multiplier stretches further, so the gaps between the dangerous hits are long enough to burst in. Watch for Raid Cutter in particular — outside this fight it is a move only Leafan knows. Powers and cooldowns for everything else in the game are on the active skills list.
| Attack | Element | Power | Cooldown | What it does |
|---|---|---|---|---|
| Wind Burst | Grass | 600 | 30s | Summons a wind vortex around itself and detonates it — get out of melee range |
| Geyser Gush | Water | 600 | 30s | Water pillars erupt under and around you — the cast that kills Fire partners |
| Crosswind | Grass | 500 | 24s | Wind blades converge in front of you into a cutting cross |
| Solar Blast | Grass | 450 | 20s | Charges, then fires a beam — the charge is your cue to move |
| Raid Cutter | Grass | 400 | 20s | A wall of wind swords flying straight at you — strafe, don't back up |
| Circle Vine | Grass | 300 | 16s | Roots sprout at and around your position |
| Curtain Splash | Water | 300 | 16s | Walls of water columns keep spawning where you stand |
| Torrential Blast | Water | 250 | 12s | A pressure stream that branches after a short delay — the delay is the part that catches people |
| Poison Shower | Dark | 160 | 8s | Poison orbs scattered in every direction — the filler between real casts |
Strategy That Changes the Fight
Four things decide this rematch and none of them are gear. The escorts are what kill you early, the Water casts are what kill your damage dealer, and the last two are where the missing damage comes from.
Delete the Two Escorts First
The Believer and the Judicator do not share Lyleen's element, so your Grass resistance and your Fire partner's typing do nothing about them. They also do not stop chipping at you while you try to burn a 494,000 health bar. Open on them, clear them inside the first thirty seconds, then start the real fight with a clean screen. A run that looks on pace at four minutes and falls apart at four-thirty is almost always a run where something else in the room was still shooting.
Recall Before the Water Casts
Geyser Gush, Curtain Splash and Torrential Blast all land on a Fire partner at the weakness multiplier on top of the boss's ×10. Recall your attacker when the water animation starts and resummon it once the pillars clear — you lose a few seconds of Pal damage and keep the whole rest of the fight. This is also the moment a pure Dragon body like Silvegis earns its slot: it can stand in the water and take no bonus damage at all while your Fire Pal sits safe in its sphere.
Stack Orserk's Buff With Drones
Orserk's partner skill adds 5% attack and defense to your active Pal for every bullet that connects, stacking 30 times for +150%. Hitting that cap by hand costs you the whole opening minute; the Drone Launcher deploys up to nine drones that fire on their own and get there in seconds. The catch is range — drift too far and the drones stop shooting, the stacks decay, and your damage quietly halves without any warning on screen. Stay in the fight while you dodge rather than kiting to the far wall.
Shoot Lily, Not Just Lyleen
Lily is a person standing next to a very large Pal, and headshots on the rider carry the weak-point multiplier. On a Wixen build that is where the bulk of your total output comes from, so treat every cooldown gap as a window to line up on her rather than as downtime. Even on a Pal-damage comp it is free damage while your active Pal's skills are recharging. The status effects guide covers what else you can stick on the pair while you are at it.
What Lily and Lyleen Drop
The Lily Hat is guaranteed the first time you clear the rematch, so the opening run is never wasted — though at 20 defense and 60 HP it is a wardrobe piece rather than an upgrade. The reason to keep queueing is the schematic at roughly one clear in ten, plus the large stat lotuses that feed the permanent stat elixirs, and a Training Crystal that skips a level of grinding on whatever you are still building.
| Reward | Chance | What it's for |
|---|---|---|
| Lily Hat | Guaranteed on 1st clear | 20 defense, 60 HP, 5,000 durability — a collection piece |
 Drone Launcher Schematic 4 Drone Launcher Schematic 4 | ~10% | Unlocks the legendary Drone Launcher at the Ancient Workbench |
 Life Lotus (L) and the other large lotuses Life Lotus (L) and the other large lotuses | Reward table | The components of the permanent stat elixirs |
| Training Crystal | Reward table | Raises a Pal's level by one with no grinding |
Underneath the tower rewards sits Lyleen's own drop table, and it is the quiet reason to farm this fight even after the schematic lands. Grass Radiant Gems at 10 to 20 a clear, guaranteed is the best rate you will find for awakening a Grass Pal, and the relic haul feeds straight into the Ancient Relic Recycler — which is itself one of the gamble sources for legendary schematics.
| Drop | Chance | Amount |
|---|---|---|
 Grass Radiant Gem Grass Radiant Gem | 100% | 10 – 20 |
 Decayed Ancient Relic Decayed Ancient Relic | 100% | 30 – 50 |
 Dormant Ancient Relic Dormant Ancient Relic | 100% | 10 – 20 |
 Gorgeous Ancient Relic Gorgeous Ancient Relic | 100% | 4 – 8 |
 Glowing Ancient Relic Glowing Ancient Relic | 50% | 2 – 3 |
 Glistening Ancient Relic Glistening Ancient Relic | 25% | 1 |
| High Quality Recovery Meds | 100% | 1 – 3 |
 Beautiful Flower Beautiful Flower | 100% | 1 – 2 |
 World Tree Holy Water World Tree Holy Water | 50% | 1 – 3 |
 Electric Radiant Gem Electric Radiant Gem | 50% | 1 – 3 |
 Innovative Technical Manual Innovative Technical Manual | 10% | 1 |
The Legendary Drone Launcher Schematic
This is the best reason to keep the tower on rotation. The Drone Launcher unlocks in the tech tree at level 77 for 4 points and craft costs Paloxite Ingot ×70, World Tree Holy Water ×40, AI Core ×8 and Ancient Civilization Core ×5. The legendary schematic pushes the craft from 200 attack to 240 and quadruples durability from 6,500 to 26,000 — read those against other launchers only, since a launcher's attack figure is not on the same scale as a rifle's.
| Version | Rarity | Attack | Durability |
|---|---|---|---|
| Drone Launcher | Common | 200 | 6,500 |
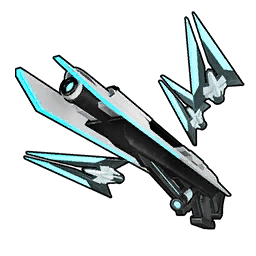 Drone Launcher Drone Launcher | Uncommon | 210 | 9,750 |
| Drone Launcher | Rare | 220 | 13,000 |
| Drone Launcher | Epic | 230 | 19,500 |
| Drone Launcher | Legendary | 240 | 26,000 |
That durability line is the real story. The base launcher wears out fast enough that you feel it inside a single tower run, and 26,000 means one craft lasts most of the endgame. It is also worth knowing how bad the alternatives are: outside this tower, the legendary schematic turns up from World Tree fishing, treasure map digs and the relic recycler, and the best of those sits at 0.36% of a loot roll. A 10% boss drop is in a different universe. The full Drone Launcher schematic breakdown has every source, and the schematic upgrade guide explains why the lower-rarity copies you pile up are still worth keeping — five of a tier combine into one of the next.
Where the Tower Is
The rematch happens behind the same door as the first battle, so if you beat Lily and Lyleen on Normal you already have the fast travel point. All eight main-landmass towers are pinned on the tower boss layer of our interactive map, with three more in the World Tree region on the World Tree view. If you want a Lyleen of your own rather than a fight with one, the wild population is 42 spawn spots, all in the World Tree, day and night alike, plotted on Lyleen's spawn map — plus a single alpha at level 58. Its own partner skill, Harvest Goddess, restores 90% of your party's health on activation, which makes the catch worth the trip.
Summary
Bring Fire because nothing else scratches it, but never leave that Fire Pal standing in a Water cast. Clear the two Alliance escorts first, keep Orserk's drone stacks alive, and put a Blazehowl Ring on your partner so one slot covers both the Grass damage coming in and the Fire damage going out. At ×833 effective health this is the second-longest rematch on the ladder despite being the second tower in the game — clear a shorter one first, come back properly condensed, and the payoff is a 10% roll at the best Drone Launcher in the game plus a guaranteed 10 to 20 Grass Radiant Gems every single run.
Related Guides
The rest of the hard rematch ladder:
Getting the team and the loot in order: