Best Pals for Cooling: Ranks, Spawns, and Coolers
Cooling ranked for all 38 Pals that have it — Bastigor's lone rank 8, the six Pals that clear the Ancient Furnace's hidden Cooling 6 gate, every structure that needs a chiller, and the cheapest work-speed research line in the whole lab.
Cooling is the job that keeps your food from rotting, your desert base survivable and your eggs hatching, and only 38 of the game's 288 Pals can do it. This guide ranks all 38 by base Cooling level, lists the spawn counts, level bands and food costs behind each one, covers every structure that needs a chiller, and explains the rank 6 gate on the Ancient Furnace that almost nobody knows about.
 Cooling at a Glance
Cooling is the third-narrowest of the twelve base jobs — only Farming's 29 Pals and Generating Electricity's 25 are smaller pools — and it is the only job in the game where every single Pal that has it shares one element. All 38 are Ice types, with no exceptions and no clever off-element pick. The other headline is the rank gate: six structures ask for a chiller and all six are happy with Cooling 1, so a rank 1 Pengullet legally runs your 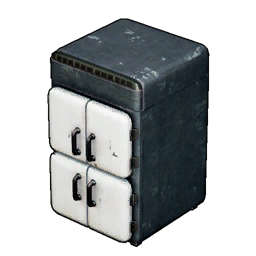 Refrigerator. The Ancient Furnace is the exception, and it is a big one.
| What | Detail |
|---|---|
| Pals with Cooling | 38 of 288 — the third-narrowest of the twelve base jobs |
| Rank ceiling | 8 — held by one Pal,  Bastigor Bastigor |
| Rank spread | 8×1 · 7×1 · 6×4 · 5×7 · 4×8 · 3×6 · 2×7 · 1×4 |
| Element rule | All 38 are Ice Pals — no other element gets Cooling |
| Structures that need it | 6, plus the  Ancient Furnace as a special case Ancient Furnace as a special case |
| Rank those six ask for | Lv. 1 across the board — no ordinary Cooling structure has a rank gate |
| The hidden gate | The Ancient Furnace wants Kindling 6 and Cooling 6 at the same time |
| Most common chiller |  Pengullet — 1,125 spawn points at Cooling 1 Pengullet — 1,125 spawn points at Cooling 1 |
| Best rank per food |  Univolt Cryst — Cooling 6 on an appetite of 3 Univolt Cryst — Cooling 6 on an appetite of 3 |
| Cheapest chiller of all |  Foxparks Cryst — Cooling 2 on an appetite of 1 Foxparks Cryst — Cooling 2 on an appetite of 1 |
| Speed levers | +40% from the research lab's Cooling line, +1 rank from a handbook, a Snowman, four passive slots |
| Bargain of the lab | The Cooling speed line costs 570,000 work — every other job's costs 5,750,000 or more |
Best Cooling Pals in Palworld
These 13 are every Pal at Cooling 5 or better. Read the food column next to the rank column, because Cooling's top end is expensive to feed: Bastigor and Frostallion both eat 9, the joint-highest appetite in this list, and Univolt Cryst delivers Cooling 6 on an appetite of 3. Below the top four, pick by the second job — Wumpo adds Lumbering 5 and Transporting 6, Icelyn adds Handiwork 5 and Medicine Production 4, and either one turns a single base slot into two jobs' worth of output.
| Pal | Cooling | Other jobs it does | Food | How to get it |
|---|---|---|---|---|
| Bastigor | 8 | Lumbering 6 · Mining 5 | 9 | 69 spawn points, Lv. 75-80 — catching is the only route, it breeds from nothing but itself — Bastigor spawn map |
 Frostallion Frostallion | 7 | — | 9 | No ordinary spawns — one Lv. 60 legendary fight, and it also breeds only from itself — Frostallion location |
 Whalaska Whalaska | 6 | Watering 5 | 8 | 187 spawn points from Lv. 42, plus a Lv. 55 alpha — Whalaska spawn map |
 Whalaska Ignis Whalaska Ignis | 6 | Kindling 5 | 8 | 112 spawn points at Lv. 71-80, plus a Lv. 74 alpha — Whalaska Ignis spawn map |
| Univolt Cryst | 6 | Lumbering 3 | 3 | 69 spawn points at Lv. 75-77, or 117 breeding pairs land on it — Univolt Cryst spawn map |
 Pierdon Cryst Pierdon Cryst | 6 | Mining 5 | 8 | 50 spawn points at Lv. 68-69, half of them by the Azure Covenant Tower — Pierdon Cryst spawn map |
 Reptyro Cryst Reptyro Cryst | 5 | Mining 5 | 7 | 133 spawn points, the widest spread at this rank — Reptyro Cryst spawn map |
 Mammorest Cryst Mammorest Cryst | 5 | Lumbering 5 · Mining 4 | 6 | 84 spawn points from Lv. 36, mostly the Pristine Snow Field — Mammorest Cryst spawn map |
 Elgrove Cryst Elgrove Cryst | 5 | Lumbering 3 · Mining 3 · Transporting 3 | 8 | 69 spawn points at Lv. 75-77 — Elgrove Cryst spawn map |
 Beakon Cryst Beakon Cryst | 5 | Gathering 2 · Transporting 5 | 5 | 69 spawn points at Lv. 75-77 — Beakon Cryst spawn map |
 Wumpo Wumpo | 5 | Handiwork 3 · Lumbering 5 · Transporting 6 | 7 | 53 spawn points, 81% of them in the Land of Absolute Zero — Wumpo spawn map |
 Icelyn Icelyn | 5 | Handiwork 5 · Medicine Production 4 · Transporting 2 | 5 | 38 spawn points, 84% of them in the Land of Absolute Zero — Icelyn spawn map |
 Moldron Cryst Moldron Cryst | 5 | Mining 5 | 8 | No ordinary spawns — one Lv. 78 alpha, or 57 breeding pairs — Moldron Cryst location |
Bastigor Is the Only Cooling 8 and You Have to Catch It
Bastigor is the single Cooling 8 in the game and it is unusually reachable for a best-in-slot worker: 69 spawn points in the Lv. 75-80 band, no boss fight required. The catch is that breeding cannot shortcut it — the only pair in the game that produces a Bastigor is Bastigor plus Bastigor, so the first one has to come off the map. It is worth the trip for more than the chiller job, because Lumbering 6 and Mining 5 ride along, and it doubles as a ground mount with a 1,100 sprint speed once you have the saddle at Lv. 73. Budget for the appetite of 9, though: this is one of the hungriest workers you can park in a base, so pair it with a stocked  Cold Food Box rather than a basic feed box.
Frostallion Is Cooling 7 With Nothing Else Attached
Frostallion has zero ordinary spawn points — it exists as a single Lv. 60 legendary encounter, and like Bastigor it breeds only from itself. Cooling 7 is the second-highest in the game, but it is also Frostallion's *only* work suitability, so a base slot spent on it does one thing and nothing else. That is a real cost when Whalaska gives up one rank and hands you Watering 5 in exchange. The honest use for a Frostallion is as a flying mount — 1,800 sprint speed, sixth-fastest of the game's 115 mounts — with base duty as the side job when it is benched. It is also the best Ice Organ drop in the game at a guaranteed 10 per kill.
Univolt Cryst Is the Best Cooling Per Bite
Food is the quiet tax on every base, and Univolt Cryst pays the least of any serious chiller: Cooling 6 on an appetite of 3, against 8 or 9 for every other Pal at rank 6 or better. Over a long session that is the difference between a cake-and-salad pipeline and a base that feeds itself on berries. It spawns at 69 points in the Lv. 75-77 band and 117 different breeding pairs land on it, which makes it the easiest rank 6 to acquire deliberately rather than by luck. If you only ever tame one Cooling Pal for a permanent base, make it this one — the Palworld breeding calculator will show you which of your current pair options gets there.
Whalaska and Whalaska Ignis Cover Two Jobs Each
Whalaska is Cooling 6 with Watering 5, and at 187 spawn points starting from Lv. 42 it is the earliest rank 6 chiller most players can realistically get — it covers the 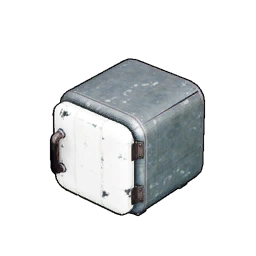 Cooler Box and the water wheel from one slot. Its Ignis variant is the more interesting Pal: Whalaska Ignis is the only Pal in the game carrying both Kindling and Cooling, which matters enormously for the Ancient Furnace below. Both are ground mounts, both eat 8, and both drop Ice Organ when you hunt them instead of catching them.
Every Structure That Needs Cooling
Six structures list a Cooling worker, and all six accept Cooling 1. The two that matter most on any base are the Cooler Box at Tech 13 and the Refrigerator at Tech 38, because both slow how fast the food inside them spoils — that is what lets you cook 40 cakes for a breeding run and still have them intact days later. The Cooler and 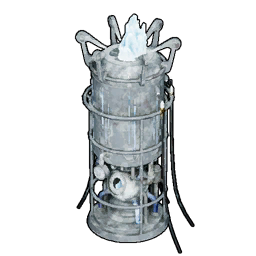 Electric Cooler are the temperature ones: park either in a desert or volcano base and your Pals stop wilting, and you stop swapping armour every time you visit. The odd one out is the
 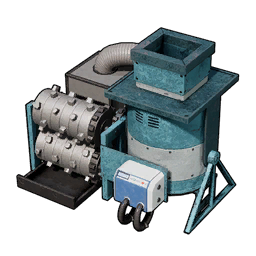 Cryogenic Crusher, a Tech 54 production station that takes Ore and converts it into other materials, and it needs 300 power on top of the chiller.
| Structure | Tech | Cooling | Power | Materials | What it does |
|---|---|---|---|---|---|
| Cooler Box | 13 | Lv. 1 | — | 10 Ingot · 10 Stone · 2 Ice Organ | Small food vault — slows spoilage on everything inside |
| Cooler | 18 | Lv. 1 | — | 20 Ingot · 20 Stone · 5 Ice Organ | Drops base temperature — the fix for a hot-region base |
| Refrigerator | 38 | Lv. 1 | 50 | 50 Refined Ingot · 20 Polymer · 10 Cryogenic Coolant · 5 Circuit Board | Large food vault — the cake and salad store for breeding |
| Electric Cooler | 42 | Lv. 1 | 100 | 30 Refined Ingot · 10 Circuit Board · 10 Cryogenic Coolant | Much stronger cooling than the basic Cooler, wider range |
| Cold Food Box | 51 | Lv. 1 | — | 20 Pal Metal Ingot · 20 Plasteel · 15 Cryogenic Coolant | Feed box that keeps Pal food fresh — stops the rot cycle |
| Cryogenic Crusher | 54 | Lv. 1 | 300 | 50 Pal Metal Ingot · 30 Plasteel · 25 Cryogenic Coolant · 20 Corrosive Solvent | Crushes Ore into other materials — very efficient, power hungry |
| Ancient Furnace | 66 | Lv. 6 | 3,000 | 100 Coralum Ingot · 20 Thermal Core · 30 Computer · 10 Ancient Civilization Core | Smelts every ingot type — needs Kindling 6 and Cooling 6 |
The Ancient Furnace Wants Cooling 6, Not Cooling 1
This is the gate that catches people out. The Ancient Furnace melts with fire and solidifies with ice, so it runs two work types at once — and it asks for rank 6 in both, not the rank 1 every other Cooling station accepts. Exactly six Pals in the game clear the Cooling half, and only eight clear the Kindling half, so this one station quietly dictates two late-game catches. Plan for it before you spend 100 Coralum Ingot and 10 Ancient Civilization Cores on the build.
| Pal | Cooling | Kindling | Verdict for the Ancient Furnace |
|---|---|---|---|
| Bastigor | 8 | — | The best ice half you can staff, and catchable at 69 spawn points |
| Frostallion | 7 | — | Clears it comfortably, but you are burning a legendary on a furnace slot |
| Whalaska Ignis | 6 | 5 | One rank short on fire — an Applied Kindling Handbook I fixes it and makes it the only Pal that covers both halves |
| Whalaska | 6 | — | Just clears it, and the easiest of the six to find early |
| Univolt Cryst | 6 | — | Clears it on an appetite of 3 — the cheapest body to leave standing there |
| Pierdon Cryst | 6 | — | Clears it and brings Mining 5 for the ore side of the pipeline |
The neat trick is Whalaska Ignis. It is the only Pal in the game with both Kindling and Cooling on its sheet, and its Cooling is already 6 — so a single Applied Kindling Handbook I pushes its Kindling from 5 to 6 and it satisfies both halves of the furnace by itself. Everyone else has to be paired: a Cooling 6 from the table above, plus a Kindling 6 like Dupin or Jormuntide Ignis from the best Pals for Kindling list.
 The Snowman Is a Free Cooling Speed Boost
The Snowman is not a station anyone works at — it is a decoration that passively speeds up every Cooling task on the base just by standing there. It unlocks at Tech 33 and costs 5 Ice Organ, 10 Wood and 5 Cloth, which makes it the cheapest permanent upgrade on this page by a wide margin. Pocketpair hasn't published the exact percentage, so don't build a plan around a specific number, but the in-game rule is explicit: a second Snowman does nothing. One per base, then spend the Ice Organ on Coolers instead. It also has 5,000 HP, so raiders will chew on it before they reach your Refrigerator.
Research, Handbook, and Passives
Every Pal starts on the same base work speed, so the levers are the research lab, the handbook, the Snowman and four passive slots — and the lab is where Cooling is absurdly good value. Five projects add +40% Cooling speed for 570,000 total work, while the equivalent line for Mining, Watering, Planting or Lumbering costs 5,750,000 and the ones for Handiwork and Kindling cost 17,250,000. Same lab, same kind of bonus, a tenth of the grind. The branch also carries the food-spoilage line (-30% in total), the egg-hatching line (+30%) and the Snowman unlock, which is why this is the first branch to clear if you breed at all.
| Research project | Effect | Work cost | Needs |
|---|---|---|---|
| Cooling Storage Lv. 1 | -10% food spoilage | 5,000 | — |
| Cooling Lv. 1 | +10% Cooling speed | 15,000 | Cooling Storage Lv. 1 |
| Snowman Development | Unlocks the Snowman | 15,000 | Cooling Lv. 1 |
| Cooling Lv. 2 | +5% | 30,000 | Snowman Development |
| Cooling Lv. 3 | +5% | 75,000 | Cooling Lv. 2 |
| Cooling Lv. 4 | +10% | 150,000 | Cooling Lv. 3 |
| Cooling Lv. 5 | +10% — +40% in total | 300,000 | Cooling Lv. 4 |
| Cooling Storage Lv. 2-4 | -20% more spoilage, -30% in total | 15,000 to 75,000 | Cooling Lv. 1 |
| Incubation Acceleration Lv. 1-4 | +30% egg hatching speed | 15,000 to 150,000 | Cooling Storage Lv. 1 |
| Cooling Research Tips Lv. 1-2 | +20% lab research speed | 15,000 + 30,000 | Cooling Storage Lv. 1 |
| Pals at Base Enhancement Lv. 1-3 | +2% defense, +4% attack for base workers | 100,000 to 300,000 | Cooling Research Tips Lv. 2 |
The whole Cooling branch costs 1,670 Ice Organ, 70 Swee Hair and 421 Ancient Pal Manuscript in materials, which sounds heavy until you notice that the Pals you are catching for the job drop the Ice Organ themselves. After the lab, the Applied Cooling Handbook I is the direct upgrade — it permanently adds +1 Cooling to whichever Pal reads it, which is how a Cooling 5 becomes furnace-legal. Passives are the last multiplier, and they stack across all four slots.
| Passive | Work Speed | Notes |
|---|---|---|
| Demon's Hand | +90% | The biggest in the game, but SAN drains 15% faster — pair it with a hot spring |
| Remarkable Craftsmanship | +75% | Pure upside, no drawback |
| Artisan | +50% | The one you'll actually roll — same family as Remarkable Craftsmanship, so they don't stack |
| Work Slave | +30% | Huge for a rank 1 passive, at the cost of 30% Shot Attack |
| Speedy Worker Lv. 4 | +25% | Top rung of the four-level Speedy Worker line |
| Serious | +20% | Rank 1 and easy to inherit through breeding |
| Conceited | +10% | Filler, and it costs 10% defense |
| Slacker | -30% | Check for this before you assign — it undoes the entire research line |
 Ice Organ: The Pals You Assign Also Build the Coolers
Ice Organ is the material behind the Cooler, the Cooler Box, the Snowman and — once refined into Cryogenic Coolant — the Refrigerator, Electric Cooler, Cold Food Box and Cryogenic Crusher. There's a tidy loop here: 31 Pals drop Ice Organ, and every single one of them is a Cooling Pal, so the exact species you hunt for the material are the ones you would otherwise be catching for the base. Every drop listed below is a 100% rate, so the only variable is how many you get per kill. Coolant itself is one Ice Organ plus one Aquatic Pal Fluids at the Production Assembly Line.
| Pal | Ice Organ | Cooling | Where it lives |
|---|---|---|---|
| Frostallion | 10 guaranteed | 7 | One Lv. 60 legendary — the biggest single haul in the game |
 Kingpaca Cryst Kingpaca Cryst | 3-6 | 4 | No ordinary spawns — a Lv. 46 alpha |
| Moldron Cryst | 4-5 | 5 | No ordinary spawns — a Lv. 78 alpha |
| Pierdon Cryst | 4-5 | 6 | 50 spawn points at Lv. 68-69 — the best repeatable farm |
| Bastigor | 2-5 | 8 | 69 spawn points at Lv. 75-80 |
| Reptyro Cryst | 3-4 | 5 | 133 spawn points — high volume, decent yield |
 Penking Penking | 1-3 | 2 | 313 spawn points from Lv. 15 — the early-game answer |
 Azurobe Cryst Azurobe Cryst | 1-3 | 4 | 259 spawn points from Lv. 50 |
 Polapup Polapup | 1-3 | 4 | 242 spawn points from Lv. 33 |
 Foxcicle Foxcicle | 2-3 | 4 | 187 spawn points from Lv. 15 — the cheapest farm before Lv. 40 |
Every Other Cooling Pal
These are the remaining 25, ranks 4 down to 1. None of them is a bad pick for an ordinary Cooler or Refrigerator, because those stations only ask for rank 1 — the difference is purely how fast the job finishes. Two stand out for reasons other than rank: Loupmoon Cryst has 461 spawn points, more than any other Cooling Pal above rank 2, and eats only 3; and Hangyu Cryst is the one night-only spawn in the whole list, so daytime searching for it is wasted effort. If you just want a body on a Cooler Box today, Pengullet has 1,125 spawn points from Lv. 2 and an appetite of 1.
| Pal | Cooling | Other jobs | Food | Spawn points |
|---|---|---|---|---|
 Loupmoon Cryst Loupmoon Cryst | 4 | Handiwork 4 | 3 | 461 — Lv. 40-66, plus a Lv. 66 alpha |
| Azurobe Cryst | 4 | — | 5 | 259 — Lv. 50-80 |
| Polapup | 4 | Watering 3 | 4 | 242 — Lv. 33-45 |
| Foxcicle | 4 | Farming 3 | 4 | 187 — Lv. 15-37, plus a Lv. 15 alpha |
 Frostplume Frostplume | 4 | Gathering 2 | 5 | 100 — Lv. 39-68 |
 Cryolinx Cryolinx | 4 | Handiwork 3 · Lumbering 4 · Transporting 4 | 7 | 39 — Lv. 36-49 |
 Polapup Terra Polapup Terra | 4 | Mining 4 | 4 | 26 — all of them on Suncrest Islet |
| Kingpaca Cryst | 4 | Gathering 2 | 4 | None — a Lv. 46 alpha only |
 Munchill Munchill | 3 | Watering 2 · Transporting 1 | 3 | 228 — Lv. 10-45 |
 Rayhound Cryst Rayhound Cryst | 3 | — | 4 | 145 — Lv. 35-77 |
 Sweepa Sweepa | 3 | Gathering 2 | 4 | 99 — Lv. 11-40, plus a Lv. 11 alpha |
 Reindrix Reindrix | 3 | Lumbering 3 | 4 | 64 — Lv. 32-80 |
 Sibelyx Sibelyx | 3 | Medicine Production 3 · Farming 3 | 5 | 48 — Lv. 36-45, plus a Lv. 40 alpha |
 Snugloo Snugloo | 3 | Handiwork 2 · Mining 3 · Transporting 2 | 5 | 21 — Lv. 32-34 |
 Hangyu Cryst Hangyu Cryst | 2 | Handiwork 3 · Gathering 2 · Transporting 3 | 1 | 335 — night only, Lv. 32-40 |
| Penking | 2 | Watering 2 · Handiwork 2 · Mining 3 · Transporting 3 | 4 | 313 — Lv. 15-44, plus a Lv. 15 alpha |
 Muffly Muffly | 2 | Transporting 1 | 3 | 270 — Lv. 15-65 |
 Vanwyrm Cryst Vanwyrm Cryst | 2 | Transporting 3 | 5 | 260 — Lv. 23-67 |
 Chillet Chillet | 2 | Gathering 1 | 3 | 117 — Lv. 11-80, plus a Lv. 11 alpha |
| Foxparks Cryst | 2 | — | 1 | 43 — 74% of them at the Unthawable Lake |
 Smokie Cryst Smokie Cryst | 2 | Gathering 2 | 3 | 8 — all on the Glacial Memento Islet |
| Pengullet | 1 | Watering 1 · Handiwork 1 · Transporting 1 | 1 | 1,125 — Lv. 2-45, the most common Cooling Pal alive |
 Swee Swee | 1 | Gathering 1 | 1 | 100 — Lv. 7-34, and it drops the Swee Hair the lab wants |
 Jolthog Cryst Jolthog Cryst | 1 | — | 1 | 69 — Lv. 10-24 |
 Mau Cryst Mau Cryst | 1 | Farming 1 | 1 | 3 — the rarest Cooling Pal on the map |
The Short Answer
Catch a Univolt Cryst and put it on your Refrigerator — Cooling 6 on an appetite of 3 is the best output-per-food deal in the job, and 117 breeding pairs reach it if the map is being stubborn. Go get Bastigor when you are in the Lv. 75+ band, because it is the only Cooling 8 and it brings Lumbering 6 and Mining 5 with it. Early on, don't overthink it: all six ordinary Cooling structures accept rank 1, so a Pengullet runs your Cooler Box on one food slot. And before your next catch, clear the lab's Cooling line — +40% work speed for 570,000 work is the cheapest speed research in the game, and it beats a two-rank upgrade on the Pal.
Related Guides
Hubs: all Palworld guides · Cooling work suitability list · Palworld interactive map · all Palworld structures
- Best Pals for Kindling: Ranks, Spawns, and Furnaces
- Best Pals for Watering: Ranks, Spawns, and Water Wheels
- Best Pals for Handiwork: Ranks, Spawns, and Workbenches
- Best Base Pals in Palworld: 7 Workers for Every Job
- How to Get the Cold Food Box and Keep Pal Food Fresh
- All Handbooks and the Best Pals to Use Them On
- Best Research to Rush at the Pal Labor Research Lab
- How to Get Pal Organs Fast: Best Sources
- All Cakes in Palworld and How to Make Them