How to Keep Items on Death: Settings and Recovery
How to keep items on death in Palworld: all five Death Penalty settings and their server config values, which difficulty preset drops what, the options-menu escape that skips the penalty entirely, and how to recover a Death Chest or a dropped Pal once it is already on the ground.
Dropping a full bag of endgame mats down a cliff face is the fastest way to quit a survival run, and Palworld lets you switch that off entirely with one world setting. This guide covers all five Death Penalty options and the config value behind each, which difficulty preset uses which, the options-menu escape hatch that skips the penalty completely, and how to get a Death Chest — or a dropped Pal — back once it is already lying on the ground.
 Death Penalty Settings at a Glance
Everything about item loss comes down to a single world setting called Death Penalty, and it has five values — one more than most players realise, because the middle option that costs you one random party Pal is easy to scroll straight past. Set it to No drops and dying costs you nothing but the walk back. The table below pairs each in-game option with the value a dedicated server uses for it, so you can match the menu wording to a config file without guessing.
| Death Penalty option | Server config value | What stays on you | What hits the ground |
|---|---|---|---|
| No drops | `None` | Everything — bag, equipment, and your whole party | Nothing |
| Drop all items except equipment | `Item` | Your equipped weapon, armor, shield, glider and accessories, plus every party Pal | The entire contents of your bag |
| Drop all items | `ItemAndEquipment` | Your party Pals only | Bag contents and everything you had equipped |
| Drop all items and one random Pal on team | `EquipmentAndItemAndRandomPal` | The rest of your party | Bag, equipment, and one party Pal chosen at random |
| Drop all items and all Pals on team | `All` | Nothing you were carrying | Bag, equipment, and every Pal in your party |
Drop all items except equipment is the sweet spot for most runs. You still eat a real punishment — the ore, the ingots, the ammo, the Pal Spheres you were hauling all go on the floor — but the gear you spent hours grinding AI Core for never leaves your character, so a bad death is an annoying trip rather than a rebuild. Pick No drops if you mostly play to build and breed, and only take the two Pal-dropping options if you want the run to actually threaten your team.
Which Difficulty Preset Drops What
If you never opened the custom settings, your difficulty preset already picked a Death Penalty for you. Casual switches it off, Normal drops your materials, and Hard drops your Pals along with them — which is why a lot of players hit Hard for the tougher combat, lose a team on Mount Obsidian, and assume item loss is just how the game works. It isn't, and Custom exists precisely so you can keep Hard's damage numbers without Hard's death tax.
| Difficulty | What happens when you die |
|---|---|
| Casual | No penalty at all. Pals are also easier to catch and everything gathers faster |
| Normal | All material items drop on the spot. Standard balance everywhere else |
| Hard | All items and Pals drop on the spot, on top of lower EXP and higher incoming damage |
| Custom | Whichever of the five Death Penalty values you set yourself |
| Hardcore | Permanent. Your character does not come back, and Pals that hit 0 HP are gone for good |
Very Easy and Very Hard sit on the same preset list if you want the extremes, but neither changes the shape of the answer: the only preset that guarantees you keep your bag is Casual, and the only preset that lets you tune loss independently of combat difficulty is Custom. Hardcore is a different animal entirely and gets its own section below.
How to Change the Death Penalty
You do not need a fresh save for this. Death Penalty lives in the same custom-settings panel you saw when the world was created, and it is not one of the values the game locks after the fact — the settings flagged as unchangeable once a world exists are Hardcore Mode, permanent Pal loss, and Random Pal Mode. Everything else, Death Penalty included, is editable later.
Three routes depending on where your world lives:
- New world — on the world creation screen, set Difficulty to Custom, open Custom Settings, and scroll to Death Penalty
- Existing single-player or co-op world — back out to the world list, open that save's settings, and change Death Penalty there before you load in
- Dedicated server — edit `DeathPenalty=` in your server settings file to one of the five values in the table above, then restart the server so it reloads. Updating your Palworld server walks through the restart and version-match side of that
 Emergency Escape Skips the Penalty, Emergency Respawn Doesn't
The options menu carries two different get-out-of-here buttons and they are absolutely not interchangeable, which is the single most expensive mix-up in this guide. One of them respawns you free of charge. The other one kills you properly, with your world's Death Penalty applied in full. Read the confirmation prompt before you click through it — each one states plainly which of the two you are about to do.
| Option | What its prompt tells you | Death Penalty applied? |
|---|---|---|
| Emergency Escape | You respawn without suffering death penalties. Meant for a character stuck in terrain and unable to move, and the game says outright it is not for regular travel or getting home | No |
| Emergency Respawn | You perish at your current location and respawn, with a note spelling out that the Death Penalty set in World Settings will be in effect | Yes |
So if you are wedged inside a rock with a full inventory of Soralite Ingot and no way to jump out, Emergency Escape is the one that gets you home with the bag intact. Use it as the last resort it is designed to be — it is not a free fast travel, and leaning on it to skip a long walk is how people end up using the wrong button on the day it actually matters.
Force-Quitting Before the Defeat Screen
The old panic move still works: hard-close the game the instant your health empties, before the defeat prompt finishes appearing, and you reload standing where you were with everything still on you. It is not a mechanic, though — it is a save rollback, and what it really does is throw away everything since the last autosave along with the death.
That last part is the catch worth understanding. Autosave interval is itself a world setting, and it ranges from 30 seconds at the tightest to 30 minutes at the loosest. On a tight interval you rarely lose much, but you also may not beat the save to the punch. On a loose one you might rewind half an hour of mining to save one bag. On a dedicated server it is the host's autosave that governs, so quitting your own client does nothing at all — the server already recorded the death.
 How to Get Your Items Back After You Die
Anything you drop is not deleted — it becomes a Death Chest where you fell, and the world map tags the spot with a Death Location marker so you can navigate straight back. When the respawn screen opens you pick your return point from the map rather than being sent to a fixed spot, so choose the statue nearest the body, not the one nearest your base. There are 137 Fast Travel Points across the main map plus 12 respawn statues, and you can check every Fast Travel Point location on the interactive map to work out which one leaves you the shortest run.
Follow the Pillar of Light
A Death Chest projects a beam of light straight up, which is what you are looking for once you are back in the area — it reads through trees and terrain from a long way off. The useful detail most players never learn is that the pillar itself is interactable from above, not just at the chest. That means a pile dropped somewhere you physically cannot swim back down to, like a deep lake bed or the sea floor off Sunreach Isle, can still be emptied from the surface by aiming at the beam.
 Buying Dropped Pals Back from a Pal Merchant
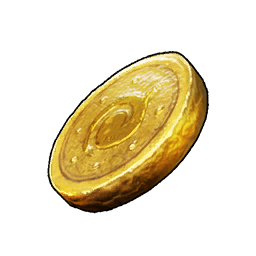
Pals are the exception to the go-and-fetch rule. If your Death Penalty includes Pals, the ones you lost turn up in stock at Pal merchants rather than sitting in the chest with your ore, so you buy them back with Gold Coin instead of walking to the corpse. Bring cash before you make the trip — showing up broke means leaving without your team. The Palworld merchant list covers where each Pal merchant stands and what else they carry.
In Co-op, the Chest Opens Up to Everyone
A Death Chest in multiplayer shows a countdown labelled Until anyone can pick up. Before it expires the pile is yours; after it expires anyone who wanders past can loot it, which on a public server is exactly as bad as it sounds. Get back fast, or get a guildmate to stand on it. Servers also cap how many dropped item piles can exist in the world at once — it is an adjustable setting, and raising it is worth doing on a busy server where piles from dozens of players compete for the same budget.
 What a Death Actually Costs You
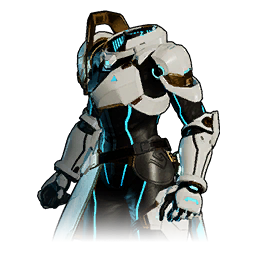
The reason Drop all items except equipment is the setting most long-run players land on is visible the moment you price out what you are wearing at the end of the tech tree. Your bag can be re-mined in an afternoon; the gear cannot. Everything below is a single-item craft cost, and the AI Core and Ancient Civilization Core lines in particular are not things you casually replace.
| Endgame gear | Tech level | Craft cost |
|---|---|---|
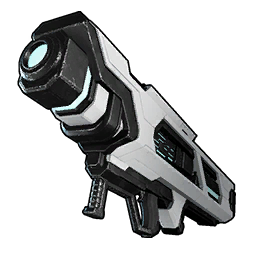 Beam Launcher Beam Launcher | 80 | Paloxite Ingot x100, Bio Battery x50, AI Core x10, Ancient Civilization Core x10 |
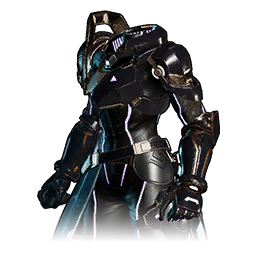 Lightweight Ancient Armor Lightweight Ancient Armor | 79 | Paloxite Ingot x30, AI Core x7, Corrosive Solvent x50 |
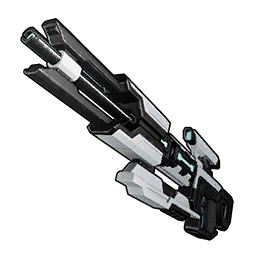 Plasma Rifle Plasma Rifle | 78 | Paloxite Ingot x80, Bio Battery x50, AI Core x8, Ancient Civilization Core x7 |
 Ancient Shield Ancient Shield | 71 | Ancient Civilization Parts x50, Paldium Fragment x250, Soralite Ingot x30, AI Core x5, Ancient Civilization Core x30 |
| Ancient Armor | 68 | Soralite Ingot x30, AI Core x3 |
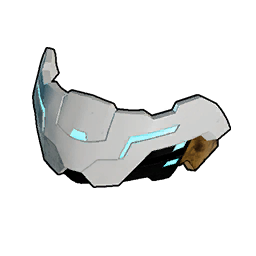 Ancient Helm Ancient Helm | 68 | Soralite Ingot x20, AI Core x2 |
Compare the two ends of that list and the gap is stark. An Ancient Helm is 20 Soralite Ingot and 2 AI Core — recoverable. A Ancient Shield wants 250 Paldium Fragment and 30 Ancient Civilization Core on top of its ingots, and losing that stack because you slipped off a ledge is a genuinely bad evening. Note these are craft costs within the gear tier, not damage numbers; for how a weapon's attack rating compares to its peers, check the Palworld weapon list and the Palworld armor list.
Hardcore Mode Has No Take-Backs
Hardcore is not a harsher Death Penalty value — it is a separate switch that overrides the whole discussion. A player who dies does not come back, and any Pal that reaches 0 HP is lost permanently rather than being revivable in the Palbox. Like permanent Pal loss, it cannot be toggled once the game has started, so it is a decision you make at world creation and live with.
There is a continuation path, and it is brutal: you can delete the fallen character and roll a new one in the same world. Doing that permanently erases the items and Pals that character dropped when they died, and if nobody else is in your guild, the base goes with them. Treat Hardcore as a fresh-start format rather than something to flip on partway through a long save.
Related Guides
More on survival, storage and settings:
- All Palworld guides and the Palworld interactive map
- How to get the Item Retrieval Machine — pull from every base chest at once so less has to ride in your bag
- How to drop items and Pals — the controls and the sharing rules for handing gear to a friend
- Weight explained: carrying capacity and item weights — the overloaded walk home that gets people killed in the first place
- How to heal Pals and player HP — the items and beds that stop the death happening
- List of all sicknesses and injuries — what your team catches on the way back to the body
- Palworld multiplayer guide — co-op, crossplay and server basics
- How to update your Palworld server — where the settings file lives and how to restart cleanly