How Many Pals Are in Palworld: Full Count by Element
Palworld has 288 Pals across nine elements. Here's the exact count per element, all 90 Alphas, the 10 tower bosses and 5 raid bosses with their battle multipliers, and how much map, tech and loot sits behind them.

Palworld has 288 Pals, and that is the smallest number on this page. This guide gives you the exact count, how the roster splits across the nine elements, every Alpha, tower and raid boss you can pick a fight with, and how much map, tech and loot is sitting behind all of it.
 How Many Pals Are in Palworld?
288. That is every Pal you can catch, breed or get flattened by, from Lamball at Paldex No. 1 to the endgame monsters. The body families are wildly lopsided — 123 Pals are Humanoid and 88 are FourLegged, which together account for nearly three quarters of the roster, while Birds (21), Fish (18) and Dragons (10) are the small clubs. On top of the 288 sit 105 boss encounters: 90 Alphas out in the world, 10 tower bosses, and 5 raid bosses you summon yourself.
| Palworld roster | Count |
|---|---|
| Pals in the Paldex | 288 |
| Elements | 9 |
| Pals with two elements | 86 |
| Alpha Pals in the field | 90, from Lv 11 to Lv 79 |
| Tower bosses | 10 |
| Raid bosses | 5 |
| Active skills they can learn | 300 |
| Passive skills they can roll | 312 |
| Breeding parent pairs | 41,616 |
| Biggest body family | Humanoid — 123 Pals |
The row worth staring at is 41,616 breeding parent pairings. That is why the roster feels bigger than 288 in practice — you are not choosing between 288 Pals, you are choosing between 288 Pals and every route to them, and almost none of those routes are obvious by eye. Work them out on the Palworld breeding calculator instead of guessing, and read how breeding works first if you have never hatched anything.
 Every Element and How Many Pals Use It
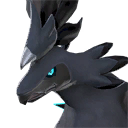
Nine elements, and they are nowhere near evenly stocked. Dark is the biggest group by a mile at 70 Pals — nearly a quarter of the game — while Electric and Dragon tie for rarest at 25 each. That matters more than it sounds: if your answer to every hard fight is a Dragon team, you are picking from a pool a third the size of the Dark one. The columns below add up to 374 rather than 288 because 86 Pals carry two elements and get counted twice.
| Element | Pals | Strong vs | Weak to | Example |
|---|---|---|---|---|
| Dark | 70 | Neutral | Dragon | Shadowbeak |
| Water | 47 | Fire | Electric, Grass | 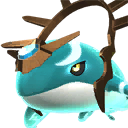 Panthalus Panthalus |
| Grass | 46 | Ground, Water | Fire |  Lyleen Lyleen |
| Ground | 44 | Electric | Grass | 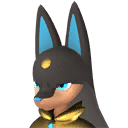 Anubis Anubis |
| Fire | 43 | Grass, Ice | Water | 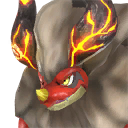 Blazamut Blazamut |
| Ice | 38 | Dragon | Fire | 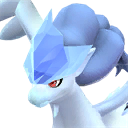 Frostallion Frostallion |
| Neutral | 36 | Nothing | Dark | Lamball |
| Electric | 25 | Water | Ground |  Grizzbolt Grizzbolt |
| Dragon | 25 | Dark | Ice |  Jetragon Jetragon |
The chart is almost a clean loop of one-for-one trades, with three exceptions worth memorising. Fire and Grass each punish two elements, which quietly makes them the most flexible things to keep benched. Water is the only element with two counters hanging over it. And Neutral is the odd one out at the far end: it beats nothing at all, and Dark eats it. A super-effective hit lands about half again as much damage, so bringing the wrong element to a boss is not a slower fight, it is a different fight. The Palworld type chart and counter finder will name the weakness for any target you're about to face, and the Pal tier list ranks who actually delivers it.
One catch that costs people boss runs: a Pal's element is not the same as its damage element. Moves carry their own type, so a Dark Pal holding a Fire move still burns a Grass target. Check the full active skill list before you assume your team can't cover a matchup — all 300 skills are there with their elements and power.
 How Many Bosses Are in Palworld?
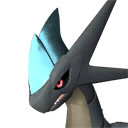
105 boss fights, in three flavours. The 90 Alphas are permanent map pins you can walk up to at any point; the 10 tower bosses are the story's gatekeepers, and nine of them have a hard rematch waiting once you've won; the 5 raid bosses are summoned at an altar and are the hardest content in the game. Every one of them is an ordinary Pal with its numbers rewritten — which is exactly why the multipliers below tell you more about a fight than its level ever will.
 The 10 Tower Bosses and Their Multipliers
First clears are gentle by design and the rematches are not. Grizzbolt is the softest opening fight in the game at ×12 HP, which is why it's everyone's first tower, while Bastigor opens at ×62 and Selyne at ×54. Flip to the hard rematch and the ranking scrambles completely: Astralym jumps to ×405 HP, and every rematch except Astralym's multiplies the boss's damage output by 8 to 13. Panthalus is the outlier with no rematch at all.
| Tower boss | Element | First fight HP | Rematch HP | Rematch damage |
|---|---|---|---|---|
 Astralym Astralym | None | ×40 | ×405 | ×5 |
 Bastigor Bastigor | Ice | ×62 | ×75 | ×10 |
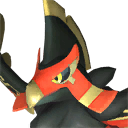 Faleris Faleris | Fire | ×27 | ×110 | ×8 |
| Grizzbolt | Electric | ×12 | ×100 | ×13 |
| Lyleen | Grass | ×25 | ×100 | ×10 |
| Orserk | Dragon · Electric | ×25 | ×110 | ×10 |
| Panthalus | Water | ×42 | — | — |
 Selyne Selyne | Dark · Neutral | ×54 | ×93 | ×9 |
| Shadowbeak | Dark | ×28 | ×100 | ×12 |
 Shaolong Shaolong | Dragon · Water | ×50 | ×88 | ×12 |
Read the rematch columns as one number, not two. Grizzbolt at ×100 HP and ×13 damage is a harder rematch than Astralym's ×405 HP at ×5, because the HP only costs you time while the damage costs you the run. The rematches also cut how much damage the boss takes — Grizzbolt only accepts 10% of yours, Lyleen 12% — so under-levelled DPS simply does not finish. Full multiplier sheets for every phase are on the tower bosses page, and the trickiest three have their own walkthroughs: Victor and Shadowbeak, Axel and Orserk, and Saya and Selyne.
 The 5 Raid Bosses
Raid bosses are the only ones you have to call down yourself — you build a Summoning Altar at your base, or use one of the 16 altar sites already standing out in the world. They scale in a near-straight line from Bellanoir to Xenolord. The HP column is only half the story — the damage taken column is what actually walls people. Bellanoir takes your damage in full; Xenolord takes 35% of it while dealing five times its normal output, so the same team that clears the first raid comfortably can stall out completely on the last one.
| Raid boss | Element | HP | Damage dealt | Damage taken | Rematch HP |
|---|---|---|---|---|---|
 Bellanoir Bellanoir | Dark | ×120 | ×1.5 | 100% | — |
| Bellanoir Libero | Dark | ×120 | ×2 | 40% | ×420 |
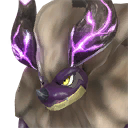 Blazamut Ryu Blazamut Ryu | Dragon · Fire | ×140 | ×2 | 40% | ×500 |
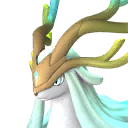 Hartalis Hartalis | Neutral | ×180 | ×4 | 50% | ×320 |
| Xenolord | Dark · Dragon | ×280 | ×5 | 35% | ×420 |
The rematch tiers are a different sport again: the hardest versions of Bellanoir Libero, Blazamut Ryu and Xenolord all drop to 9% damage taken, which is the single most punishing number in Palworld. That is the point where team composition stops being a preference — go read the best team comps before you burn a summon. Individual walkthroughs: Xenolord, Hartalis, Blazamut Ryu and Bellanoir Libero, with the summon items and altar rules on the raids page.
90 Alpha Pals Out in the World
Alphas are the everyday bosses: 90 of them, spread from level 11 to level 79, each parked on a fixed spot you can fast-travel next to. Their attack and HP aren't inflated the way a tower boss's are — what makes an Alpha a wall is armour: most of them only take about a quarter of the damage you deal, so an under-geared attempt doesn't fail, it just never ends. They respawn, and they drop materials the wild versions don't, which makes them the most reliable farm in the game once you can actually beat them. The level spread is the useful part: there is an Alpha worth hunting at essentially every stage of a playthrough, not just at the end. Jetragon at Lv 70 is the famous one, and it's also the fastest mount you'll ever ride.
Every pin is on the Alpha Pal locations page; Alpha hunting by level sorts them into the order your character can actually handle, and the six Legendary Pals covers the ones that come with the Legend passive attached.
 How Big Is the Palpagos Map?
Big enough that more than 40,000 marked things sit on it, sorted into 72 layers — 62 across Palpagos itself and 10 more in the World Tree region. Most of that total is resource nodes, but the hand-placed content is what shapes a playthrough: 137 fast travel points, 170 dungeon entrances, 58 enemy camps and 16 raid altars. The collectibles are the ones people miss — 866 stat lotuses and 360 Pal effigies are permanent character upgrades lying on the ground.
| On the map | Pins | Open the layer |
|---|---|---|
| Fast travel points | 137 (+15 World Tree) | Show fast travel |
| Dungeon entrances | 170 | Show Grasslands dungeons |
| Stat lotuses | 866 | Show stat lotuses |
| Pal effigies | 360 (+47 World Tree) | Show effigies |
| Fishing spots | 367 (+102 rare) | Show fishing spots |
| Grade-1 Pal egg nests | 1,168 | Show egg nests |
| Enemy camps | 58 | Show enemy camps |
| Journals to read | 55 (+9 World Tree) | Show journals |
| Raid altars | 16 | Show raid altars |
| Merchants | 12 | Show merchants |
| Loot caches — Feybreak | 3,588 | Show Feybreak caches |
| Treasure chests — Desert | 263 | Show desert chests |
Dungeons deserve their own note: those 170 entrances lead into 10 cavern types, and entrances are far from evenly spread — the Grasslands alone has 48 while Sunreach Isle and Yakushima have one each. Every cavern's loot pool, caged Pals and boss list is on the dungeons page. The 1,168 grade-1 egg nests are the other underrated number: nests are free Pals with no capture roll attached, and they respawn.
The gathering nodes are where the map stops being scenery and starts being a supply chain. 8,157 rock nodes against 10 ancient lava pools is the whole difficulty curve of Palworld crafting in two numbers — the stuff you need early is everywhere, and the stuff that gates your endgame builds is not.
| Gathering node | Pins | Worth knowing |
|---|---|---|
| Rock | 8,157 | The most common node in the game |
| Lumber | 4,654 | Large trees, not the little ones |
| Small Rock | 4,286 | Hand-mineable from level 1 |
| Red Berry | 1,906 | Early food, before you plant anything |
| Copper Ore | 1,632 | The first metal bottleneck |
| Grotto Mushroom | 1,445 | Cave-only pickup |
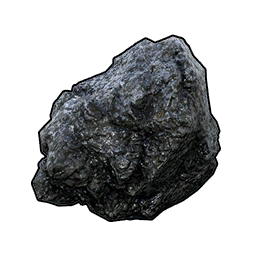 Coal Coal | 824 | Gates refined metal |
| Paldium Ore | 711 | Every sphere you throw comes from here |
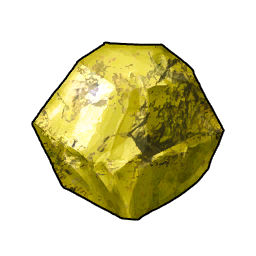 Sulfur Sulfur | 655 | Gunpowder, and therefore every gun |
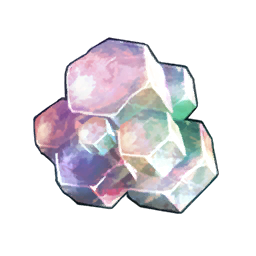 Hexolite Quartz Hexolite Quartz | 635 | Late-game armour material |
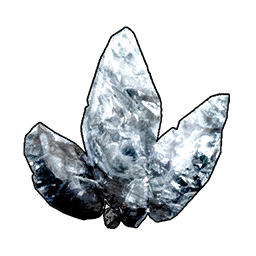 Pure Quartz Pure Quartz | 607 | Pairs with Soralite in the Ancient Furnace |
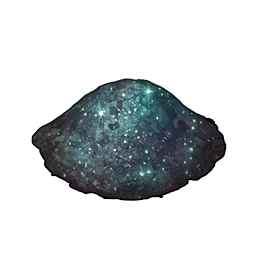 Nightstar Sand Nightstar Sand | 271 | Desert only — feeds the movement accessories |
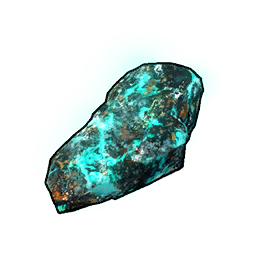 Soralite Soralite | 226 | Sunreach only — the tightest endgame ore |
| Oil Fields | 185 | Extractor sites, not a pickup |
 Dog Coin Dog Coin | 128 | Free medal-shop currency on the ground |
 Ancient Lava Ancient Lava | 10 | The rarest node on the map |
Two rows change how you plan an endgame session. Soralite has 226 nodes and only exists in Sunreach, so any recipe that eats Soralite Ingots is a trip, not an errand. And 128 Dog Coin nodes is a genuinely free income layer most players never switch on — that's schematic money lying in the grass. Everything else is on the interactive Palpagos map, where you can stack layers and plan a loop before you fly.
 How Much There Is to Build, Craft and Wear
The technology tree runs to 80 levels and 588 nodes, and 51 of those are Ancient technologies bought with the points tower bosses drop rather than ordinary ones. Building is where the bulk sits — 216 of the 588 nodes are structures, against 85 weapons and 42 armour nodes — which is a fair description of what most late-game hours actually go into. The full unlock order, costs and materials are on the technology tree page.
| Category | How many | Where to browse |
|---|---|---|
| Technology nodes | 588 across 80 levels | Tech tree |
| Ancient technologies | 51 | Tech tree |
| Buildable structures | 480 | Structures database |
| Weapons | 145 | Weapons database |
| Armour and shields | 128 | Armour database |
| Items in total | 1,962 | Item database |
| Merchant shops | 38 | Merchants and prices |
| Named NPCs | 129 | NPC list |
1,962 items sounds unmanageable and mostly isn't — a large slice is materials that exist to feed something else. The two counts that decide your power curve are the 145 weapons and 128 armour pieces, and both ladder cleanly by tech level. Best weapons at every tech level and best armour by tech level walk the ladder rung by rung so you skip the dead-end crafts.
The Short Answer
Palworld has 288 Pals across 9 elements, plus 105 boss encounters on top of them: 90 Alphas from Lv 11 to Lv 79, 10 tower bosses and 5 raid bosses. Dark is the largest element at 70 Pals, Electric and Dragon the smallest at 25 each, and 86 Pals carry two elements at once. Behind the roster are 41,616 breeding pairs, 588 tech nodes across 80 levels, 480 buildable structures, 1,962 items, and more than 40,000 map pins across 72 layers. For a game that arrived looking like a small survival experiment, the honest summary is that the Paldex is the least of it.
Related Guides
Start anywhere in the pile:
- Palworld Day One Checklist: What to Do First
- Best Early Game Pals and Where to Catch Them
- Palworld Endgame Checklist
- List of All Legendary Pals: Locations and How to Get Them
- Alpha Hunting by Level: The Order to Fight Them
- Best Team Comps for Bosses and Raids
- How Breeding Works in Palworld
- The Most Helpful Partner Skills
- All Pal Effigy Locations and Upgrades
- All Wildlife Sanctuary Pals and Locations
- Palworld Type Chart and Counter Finder
- Palworld Pal Tier List
- Every Alpha Pal and Where to Fight It
- All Tower Bosses and Their Battle Multipliers
- All Raid Bosses and How to Summon Them
- Interactive Palpagos Map: Every Node, Chest and Camp
- All Palworld Guides