How to Beat Hartalis (Ultra): Weakness, Team, and Drops
How to beat the Level 80 Hartalis (Ultra) raid boss in Palworld — the Grass/Water to Neutral phase flip, the x320 HP wall, all 13 attacks with power and cooldown, the team that covers both halves, and the Crown of Salvation payout.

Hartalis (Ultra) is the Level 80 tier of the Hartalis altar raid, and it is the one Ultra that does not fight as the Pal you catch — it opens as a Grass/Water boss and only becomes Neutral halfway through. Here is the full stat card, both phase rotations with power and cooldown on all 13 attacks, the team that covers each half, the gear worth crafting first, and the reward table with the Crown of Salvation.
 Hartalis (Ultra) Raid Stats
The number that decides everything here is ×0.2 damage taken. Every other Ultra shaves 91% or more off what you deal; Hartalis only shaves 80%, and it carries the smallest health multiplier of the four at ×320. Multiply those together and the wall you are chewing through is about 1,600 times a normal Pal's health bar — against Blazamut Ryu (Ultra) that figure is over 5,500. The catch is the other column: ×13 damage dealt ties it with Xenolord for the hardest-hitting Ultra in the game. It is the softest Ultra and one of the two deadliest at the same time, which is exactly why most players clear this one first.
| Hartalis (Ultra) | |
|---|---|
| Boss | Hartalis |
| Summon level | 80 |
| Phase 1 elements | Grass / Water |
| Phase 2 element | Neutral |
| Phase 1 weakness | Electric (and Grass) — Fire cancels out |
| Phase 2 weakness | Dark |
| Health pool | Roughly 1,952,000 HP across the whole fight |
| HP multiplier | ×320 — the lowest of the four Ultras |
| Damage it deals | ×13 — tied with Xenolord (Ultra) for the highest |
| Damage it takes | ×0.2 — the most generous Ultra by a wide margin |
| Cooldown rate | ×2 — the standard raid rate |
| Boss size | XL (the catchable Hartalis is L) |
| Summon cost | 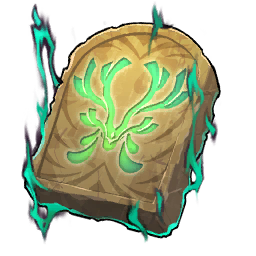 Hartalis (Ultra) Slab Hartalis (Ultra) Slab |
| Signature drop |  Crown of Salvation — 100%, nowhere else in the game Crown of Salvation — 100%, nowhere else in the game |
For context on how the four Level 80 fights stack up, effective toughness below is the HP multiplier divided by the damage-taken multiplier — how much raw damage you actually have to pump out relative to a normal Pal. Hartalis is under a third of the job every other Ultra asks for.
| Ultra raid | HP | Damage dealt | Damage taken | Effective toughness |
|---|---|---|---|---|
| Hartalis (Ultra) | ×320 | ×13 | ×0.2 | ≈1,600× |
 Bellanoir Libero (Ultra) Bellanoir Libero (Ultra) | ×420 | ×10 | ×0.09 | ≈4,667× |
 Xenolord (Ultra) Xenolord (Ultra) | ×420 | ×13 | ×0.085 | ≈4,941× |
 Blazamut Ryu (Ultra) Blazamut Ryu (Ultra) | ×500 | ×8 | ×0.09 | ≈5,556× |
What You Need Before You Summon It
There is no expedition rotation and no dungeon chest that hands you the Ultra slab — unlike the standard Hartalis Slab Fragment, the Ultra fragment has no farm. The only way in is to clear the Level 70 Hartalis fight first, because that clear guarantees a finished Hartalis (Ultra) Slab on the reward table. After that the loop pays for itself: every Ultra clear drops another Ultra Slab, so you never have to go back. If you would rather build one from parts, the recipe is 4× Hartalis (Ultra) Slab Fragment at 500,000 work — five times the crafting cost of the standard slab.
| Requirement | How you get it |
|---|---|
| Hartalis (Ultra) Slab | Guaranteed 100% drop from the Level 70 Hartalis raid — see the standard Hartalis fight |
| Summoning Altar | The same altar every other slab uses; slab locations are covered in the Hartalis slab guide |
| Player level 80 | Anything lower and a single ×13 hit deletes you outright |
| Raid Pals at 4-star condensed | Pal Condenser — the stat floor that lets a Pal survive more than one attack |
| Trust level 10 and Awakened | Maxed trust plus the awakening bonus on every Pal you field |
| Soul upgrades: HP +20, Atk +20, Def +20 | Feed Large Pal Souls into the Statue of Power |
| Tech level 78-79 gear | Plasma Rifle at 78 and Lightweight Ancient Armor at 79 |
Its Weakness Flips Halfway Through
This is the part that catches people who read the Hartalis Paldeck entry and packed a mono-Dark squad. The raid version overrides the Pal's typing: it starts the fight as Grass/Water, then transforms into the Neutral boss everyone expects. Dark is dead weight for the entire first half — Dark only gets a bonus against Neutral, and there is no Neutral on the field yet. Electric is the clean phase 1 answer because it hits the Water half for bonus damage and gets nothing thrown back. Grass works too, for the same reason. Fire is the trap: it beats the Grass half but the Water half resists it, so the two cancel and you end up doing flat damage while feeling clever.
| Your element | Phase 1 (Grass/Water) | Phase 2 (Neutral) |
|---|---|---|
| Electric | Bonus damage — beats the Water half | Flat |
| Grass | Bonus damage — beats the Water half | Flat |
| Dark | Flat | Bonus damage — the only element strong against Neutral |
| Fire | Cancels out — beats Grass, resisted by Water | Flat |
| Ground | Resisted by the Grass half | Flat |
| Water | Resisted by the Grass half | Flat |
| Neutral / Ice / Dragon | Flat | Flat |
Best Pals for Hartalis (Ultra)
Bellanoir Libero is the carry, and the reason is its 150 ranged attack — tied for the highest of any Dark Pal, on a frame that already owns three 600-power Dark moves. It has no elemental edge in phase 1, but a 150-attack Pal doing flat damage still out-damages most Electric Pals doing bonus damage, so it never has to leave the field. Everything else in the table is there to plug a specific hole: Orserk and Relaxaurus Lux convert phase 1 into bonus damage, Frostallion Noct is the only Dark Pal bulky enough to eat a ×13 hit and keep standing at 140 HP and 135 defense, and the support row exists purely to hold Trainer-targeted passives that buff you rather than themselves.
| Pal | Elements | Role | HP / Melee / Ranged / Def | Why bring it |
|---|---|---|---|---|
| Bellanoir Libero | Dark | Main carry | 120 / 100 / 150 / 100 | Highest Dark attack in the game and it learns Nightmare Bloom (600) exclusively — carries both phases without a swap |
 Necromus Necromus | Dark | Phase 2 damage | 130 / 100 / 145 / 120 | 145 ranged with Legend and Lord of the Underworld innate — the best Dark carry you can get without clearing another raid |
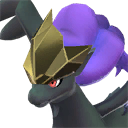 Frostallion Noct Frostallion Noct | Dark | Phase 2 tank | 140 / 100 / 140 / 135 | Most HP and defense of any Dark Pal, and it is a field alpha rather than a raid reward |
 Orserk Orserk | Dragon / Electric | Phase 1 damage | 120 / 100 / 130 / 115 | Best Electric attack stat available — bonus damage on the Water half, and Electric resists Water back |
 Relaxaurus Lux Relaxaurus Lux | Dragon / Electric | Phase 1 damage | 120 / 110 / 120 / 110 | Second Electric body so you are not down to one when phase 1 drags |
 Silvegis Silvegis | Dragon | Support | 120 / 100 / 110 / 115 | 115 defense on a support slot — survives long enough to keep a Stronghold Strategist stack alive |
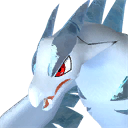 Vanwyrm Cryst Vanwyrm Cryst | Ice / Dark | Support | 90 / 100 / 120 / 95 | 120 ranged is real damage for a support slot, and the Dark half still counts in phase 2 |
 Hoocrates Hoocrates | Dark | Passive holder | 70 / 70 / 70 / 80 | Stat line is irrelevant — it is a body to carry Vanguard and Reload Master, which buff you, not it |
The passive stack on your carry
Four slots, and the strongest build spends none of them on defense. Twin-Edged Holy Blade is the biggest single attack passive in the game at +50%, and its −30% defense penalty is close to meaningless when a ×13 hit was going to one-shot the Pal anyway. Immortality is what makes the trade survivable: +100% auto health regeneration and 5% life steal mean your carry heals itself while it is attacking, which is the whole reason the fight is winnable without babysitting. Serenity cuts cooldowns 30%, and against a boss running the raid's ×2 cooldown rate that is more total damage than any flat attack buff would be. Siren of the Void is the Dark booster, and Bellanoir Libero carries it innately.
| Passive | Effect | Why it matters here |
|---|---|---|
| Twin-Edged Holy Blade | +50% Attack, −30% Defense | The largest attack passive available; the defense loss barely changes what survives a ×13 hit |
| Immortality | +5% Life Steal, +100% auto regen, +15% Attack | Self-sustain during the phase 1 grind — your carry heals as long as it keeps swinging |
| Serenity | −30% active skill cooldown, +10% Attack | More casts per minute beats a bigger single cast when the health pool is 1.95 million |
| Siren of the Void | +30% Dark damage, +30% Ice damage | The phase 2 multiplier; innate on Bellanoir Libero so it costs you no slot |
Support passives buff you, not the Pal
The four passives below all target the Trainer, which means whichever Pal is carrying them can be a 70-stat Hoocrates and it still works. That is the actual job of your support slots in an Ultra raid: park player-buff passives on bodies you do not mind losing. Idiosyncratic is the standout because it is the only one that helps both of you — +50% auto regeneration on the Pal *and* the player, plus a flat +25% defense and immunity to burn and poison.
| Passive | Effect | Target |
|---|---|---|
| Vanguard | +10% Player Attack | Trainer |
| Stronghold Strategist | +10% Player Defense | Trainer |
| Reload Master | +4% Player Reload Speed | Trainer |
| Idiosyncratic | +50% auto regen for Pal and player, +25% Defense, immune to poison and burn | Both |
Every Attack in the Ultra Fight
Thirteen attacks total, and none of them carry over — the seven Grass and Water moves are stripped out the moment it transforms and replaced with six Neutral ones. Powers below are the base values before the raid's ×13 multiplier and before Savior, Hartalis's innate passive, which adds 30% to Neutral *and* Grass damage. That is worth reading twice: Savior boosts four of the seven phase 1 moves and every single phase 2 move. Its Water attacks are the only ones in the whole kit that come in unbuffed.
Phase 1 rotation — Grass and Water
The two 600-power moves are the ones that end runs. Wind Burst is the phase 1 wipe button: it detonates around Hartalis itself at only 1,200 range, which sounds safe until you remember your melee Pals are standing inside that circle. Everything else in this half applies a status on hit — Grass moves leave your Pal Ivy-Covered, Water moves leave it Soaked — so the chip damage compounds even when the individual hit does not look scary.
| Move | Element | Power | Cooldown | What it does |
|---|---|---|---|---|
| Wind Burst | Grass | 600 | 30s | A vortex centred on Hartalis at 1,200 range — the one that catches your whole melee line at once |
| Geyser Gush | Water | 600 | 30s | Water pillars erupt beneath and around your position; a melee-category move despite the 5,000 reach |
| Crosswind | Grass | 500 | 24s | Wind blades converge in front of you into a cross-shaped cut — sidestep, do not back up |
| Aqua Surge | Water | 500 | 24s | Waves close in from every side and detonate at the centre — the centre is you, so leave it |
| Solar Blast | Grass | 450 | 20s | A charged beam with a 500 minimum range; standing close actually beats it |
| Circle Vine | Grass | 300 | 16s | Roots sprout at your feet and apply Ivy-Covered — low damage, constant pressure |
| Curtain Splash | Water | 300 | 16s | Rolling walls of water at your position, applying Soak |
Phase 2 rotation — Neutral
Four moves at 700 or more on identical 30-second cooldowns means there is no genuine safe window in the second half, only a rotating one. Sacred Rain is the headline at 800 power and 7,500 range — the longest reach in the entire kit, so retreating does nothing and only movement saves you. The two small moves are the mercy: Air Blade and Power Bomb sit at 160 and 120 power on 8-second timers and both have a minimum range, which means the safest place to stand in phase 2 is often uncomfortably close.
| Move | Element | Power | Cooldown | What it does |
|---|---|---|---|---|
| Sacred Rain | Neutral | 800 | 30s | Hartalis exclusive — it fades out, then drops a barrage of light pillars at 7,500 range. Keep moving; distance will not help |
| Radiant Barrage | Neutral | 700 | 30s | A slow tracking orb that splits into a burst of light bullets on approach — break line of sight or outrun it |
| Divine Wing | Neutral | 700 | 30s | Hartalis exclusive — it leaps back, sprouts wings and dives. The only melee move in phase 2 |
| Holy Burst | Neutral | 700 | 30s | A wide explosion at your position — pull melee Pals out and let ranged attackers keep working |
| Air Blade | Neutral | 160 | 8s | Fan of air blades with a 1,500 minimum range — closing the gap makes it whiff |
| Power Bomb | Neutral | 120 | 8s | A charged energy ball, 1,000 minimum range — the weakest thing it owns |
Fight Strategy
A 1.95-million health pool at ×0.2 damage taken makes this a long fight before it is a hard one. The runs that fail almost never fail to a single mistake — they fail because the squad was already half dead when phase 2 started.
Bank damage before the flip
Phase 1 is the half where you get an elemental bonus and the boss has not yet picked up Masochist's +15% defense. Lead with Electric, push hard, and treat every point of health you strip before the transformation as damage you did not have to grind out through a tankier phase 2. If you are still near the top of the bar when it flips, the run is already in trouble.
Keep the melee line out of Wind Burst
Wind Burst detonates around Hartalis at 1,200 range, and at ×13 it will clear multiple Pals in one cast. Keep your ranged carry working through it and pull anything melee out of the circle — if your carry is running Immortality, staying on the attack is also how it heals back what it took.
Withdraw everything the moment it transforms
The transformation animation comes with a nuke that will one-shot Pals and player alike. Recall the whole raid party, break line of sight behind one of the arena's ice blocks, and only redeploy once it lands. A Pal you lose here is a Pal that is not there for the 700-power rotation that starts thirty seconds later.
Dodge on foot, not on a mount
Almost everything in both rotations is an area attack, and a mount is a bigger target that dies to splash you would have walked out of. Play the fight defensively on foot, shoot for the head, and accept a lower personal damage number in exchange for still being alive at the 1.9-million mark.
 Bring more ammo and food than you think
At ×0.2 damage taken you will burn through magazines faster than any other fight in the game, so stock up before you drop the slab rather than midway through. A captured Legendary Ammo Merchant assigned to your base turns ammo into a gold problem instead of a crafting one. Build a Feed Box near the altar too — a raid party that ate Galeclaw Nikujaga before the pull holds its buff through the whole fight, and the feeding guide covers how the box works.
 Best Gear to Bring
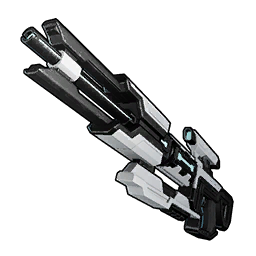
Attack numbers below are for the Legendary version of each schematic, and they only compare inside a weapon class — a bow's attack value and a rifle's are calculated on completely different scales, so the Mechanical Bow's 24,000 is not 10× a rifle. Within its own class the Plasma Rifle is the pick: 2,232 attack, a 46-round magazine and 100,000 durability means it carries a fight this long without a swap. The Drone Launcher is the sleeper — its drones keep attacking autonomously while you are busy dodging, which is most of this fight. And the Megaboost Gun is not really a weapon: shoot your own carry with it to raise its attack and defense, which is worth more than the 250 damage ever will be. Full class-by-class rankings are in the best weapons by tech level guide.
| Weapon | Attack (Legendary) | Magazine | Tech | Why bring it |
|---|---|---|---|---|
| Plasma Rifle | 2,232 | 46 | 78 | Highest sustained output of any rifle and 100,000 durability — your main gun for the whole raid |
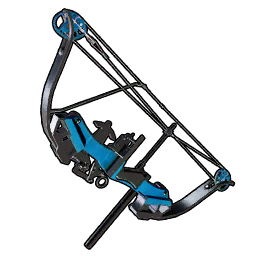 Mechanical Bow Mechanical Bow | 24,000 (bow scale) | 1 | 67 | Enormous per-shot damage for headshot windows; reloads between every arrow, so it is a burst tool |
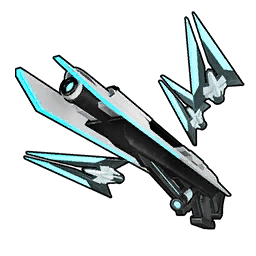 Drone Launcher Drone Launcher | 240 | — | 77 | Deploys drones that attack on their own — free damage during the long stretches where you are only dodging |
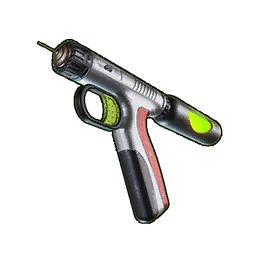 Megaboost Gun Megaboost Gun | 250 | 8 | 63 | Fire it at your own Pal to boost its attack and defense; damage output is beside the point |
 Armour and accessories
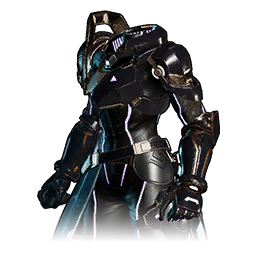
Lightweight Ancient Armor is the only body armour worth wearing here — 2,400 HP and 840 defense is the highest combined line in the game, and the carry-capacity bonus means you can actually haul the ammo the fight needs. Pair it with the Ancient Helm for another 1,200 HP and 500 defense, and note its Neutral damage reduction is specifically pointed at phase 2. On accessories, the two emblems are the strongest picks because they buff your Pal as well as you — the Dogen Emblem for attack, the Silvegis Emblem for defense. The full accessory list has the rest.
| Gear | Stats | Tech | Notes |
|---|---|---|---|
| Lightweight Ancient Armor | 2,400 HP / 840 Def | 79 | Best defensive line in the game, plus Cold and Heat Resistance Lv 2 and carry capacity Lv 4 |
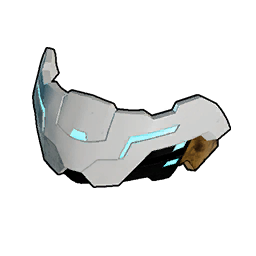 Ancient Helm Ancient Helm | 1,200 HP / 500 Def | 68 | Carries Neutral and Dragon damage reduction — the Neutral half applies to all of phase 2 |
 Ancient Shield Ancient Shield | 2,200 shield | 71 | Self-repairing once you stop taking hits, which is the only kind of shield that keeps up here |
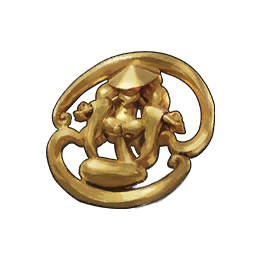 Dogen Emblem Dogen Emblem | Greatly raises Attack | — | Buffs you and the Pal fighting beside you, so it is worth double what a solo attack accessory is |
 Silvegis Emblem Silvegis Emblem | Greatly raises Defense | — | Same shared-buff mechanic on the defensive side — the difference between surviving a ×13 hit and not |
 Warsect Terra's Belt Warsect Terra's Belt | Greatly raises Defense and Health | — | The pure-survival slot if you are dying to Sacred Rain rather than running out of damage |
 Attack Pendant Attack Pendant | Slightly raises Attack | — | The budget filler while you are still hunting a Dogen Emblem |
For consumables, Mammorest Curry is the best pre-fight meal in the game at 418 hunger and 52 SAN restored, while Galeclaw Nikujaga is the cheap one you can mass-produce for the raid party. Carry Advanced Recovery Meds for yourself and stack Revival Potions for the Pals you will lose — you will lose some.
Hartalis (Ultra) Rewards
Every line on this table is a guaranteed 100% drop, which is unusual — most raid tables gate something behind a roll. The reason to keep running it is not the crown; it is the 10 Ancient Civilization Core and 10 Training Crystal per clear, double what the Level 70 fight pays, plus two Applied Handbooks of whichever work suitability you pick. Be honest about the Crown of Salvation before you chase it: 30 defense and 80 HP is a trophy, not an upgrade over the Ancient Helm. It exists nowhere else in the game, and that is its whole appeal.
| Reward | Ultra (Lv 80) | Standard (Lv 70) | Chance |
|---|---|---|---|
| Crown of Salvation | ×1 | — | 100% |
 Ancient Civilization Core Ancient Civilization Core | ×10 | ×4-7 | 100% |
 Training Crystal Training Crystal | ×10 | ×4-6 | 100% |
| Hartalis (Ultra) Slab | ×1 | ×1 | 100% — the fight funds itself forever |
 Applied Kindling Handbook I Applied Kindling Handbook I | ×2 | ×1 | Pick one of three |
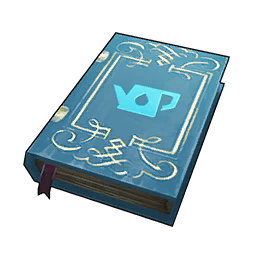 Applied Watering Handbook I Applied Watering Handbook I | ×2 | ×1 | Pick one of three |
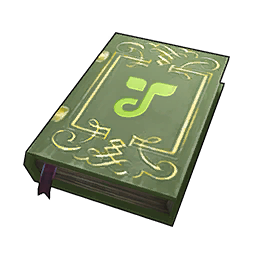 Applied Planting Handbook I Applied Planting Handbook I | ×2 | ×1 | Pick one of three |
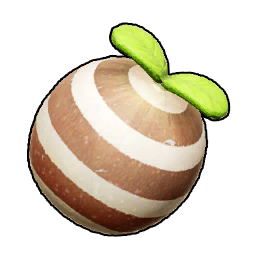 Skill Fruit: Holy Burst Skill Fruit: Holy Burst | — | ×1 | Standard fight only |
The raid also hands out an egg, and its roll is weighted 90% toward a regular Hartalis and 10% toward the alpha version — which is the only reason to hatch it rather than sell it, since the standard slab fight already gives you a Hartalis to catch. Hatch it at an incubator through the breeding system.
Summary
Bring an Electric hitter for the Grass/Water opening and a Dark carry for the Neutral second half — Bellanoir Libero at 150 ranged attack does both jobs well enough to never leave the field. Stack Twin-Edged Holy Blade, Immortality, Serenity and Siren of the Void on it, wear Lightweight Ancient Armor with a Plasma Rifle, recall everything when the transformation animation starts, and never stand still for Sacred Rain. At ×0.2 damage taken this is the softest of the four Ultras and the natural one to clear first — the ×13 damage is the only thing standing between you and the Crown of Salvation.
Related Guides
Start with the Level 70 fight if you do not have the Ultra Slab yet, then work through the other three Level 80 raids — the phase-flip pattern in this one repeats in two of them.
| Guide | What it covers |
|---|---|
| How to Beat Hartalis Raid Boss | The Level 70 fight that drops the Ultra Slab — the prerequisite for this page |
| How to Get Hartalis: Slab Locations and Raid Fight | Where the slab fragments come from and how to assemble one |
| How to Beat Bellanoir Libero (Ultra) | The Level 80 Dark raid that unlocks the best carry for this fight |
| How to Beat Blazamut Ryu (Ultra) | The tankiest Ultra, with its own mid-fight weakness flip |
| How to Beat Xenolord Raid Boss | The other ×13 damage dealer, behind a 91.5% damage cut |
| Palworld Raid Boss List | Every altar raid side by side with its battle multipliers |
| List of All Dark Type Pals | Every Dark Pal ranked by stats for the phase 2 half |
| List of All Electric Type Pals | Every Electric Pal for the phase 1 half |
| Best Team Comps | Boss-killer, explorer and farming squads |
| Best Armor at Every Tech Level | The full defensive upgrade path up to Lightweight Ancient Armor |
| All Palworld Guides | The full guide index |
| Palworld Paldeck | Stats, drops and locations for every Pal |