All Pal Stats Explained: HP, Attack, Defense, and IVs
Every Pal stat in Palworld explained: what HP, Attack, Defense, Work Speed and Support actually do, the highest and lowest base values across all 288 Pals, and every way to raise them.

Every Pal in Palworld carries the same short list of stats — HP, Melee Attack, Ranged Attack, Defense, Work Speed and a few hidden ones — and those numbers decide whether a Pal is a raid carry or a base worker. This guide covers what each stat does, the highest and lowest base values across all 288 Pals, and every method that raises them.
Every Pal Stat at a Glance
A Pal's card shows four numbers, but the game tracks more than that behind the scenes. Base stats are the species value — the number every Lamball starts from — before level, IVs, condensing or passives touch it. The spread is wider than most players expect: HP runs from 60 to 200 and Defense from 50 to 200, so a bad species is roughly a third of a good one before you invest a single point.
| Stat | What It Does | Base Range | Best in Class |
|---|---|---|---|
| HP | Health pool. Decides how many hits a Pal survives before it goes down. | 60 – 200 |  Astralym (200) Astralym (200) |
| Melee Attack | Damage on close-range moves and on a Pal's physical contact attacks. | 50 – 150 |  Jormuntide (150) Jormuntide (150) |
| Ranged Attack | Damage on projectile and beam moves — the number most active skills scale off. | 50 – 200 | Astralym (200) |
| Defense | Cuts incoming damage. Applies whether the Pal is fighting for you or working at base. | 50 – 200 |  Panthalus (200) Panthalus (200) |
| Work Speed | How fast a Pal completes base tasks. | 100 for every Pal | Everything ties |
| Support | Background modifier the card never shows you. | 30 – 150 |  Dinossom (150) Dinossom (150) |
| Mount Speed | Sprint speed while you are riding it. | Ridable Pals only |  Jetragon (3,300) Jetragon (3,300) |
| Capture Rate | Multiplier on your odds when a sphere lands. | 0.8 – 1.5 |  Chikipi (1.5) Chikipi (1.5) |
Two rows in that table matter more than the rest. Work Speed is flat at 100 for every single Pal, so no species is naturally a faster worker — base output comes entirely from work suitability levels, passives and condensing. And Melee versus Ranged Attack are separate numbers: Jormuntide hits 150 melee but only 120 ranged, while Bellanoir is the mirror image at 100 melee and 150 ranged. Match the Pal to the moves it actually uses.
Highest Base Stat Pals
Totals below add HP, the higher of the two Attack values, and Defense — the three numbers that decide a fight. Astralym is not close to the rest: 200 in three stats gives it a 600 total against a 295 median, and a 100-point gap to second place. Panthalus is the tank of the list at 200 Defense and 180 HP, and it also happens to be the fastest ground Pal in the game. Note that rarity is not power here — the two Pals on top are rarity 10, and they beat every rarity 20 Legendary.
| Pal | HP | Melee ATK | Ranged ATK | Defense | Total |
|---|---|---|---|---|---|
| Astralym | 200 | 100 | 200 | 200 | 600 |
| Panthalus | 180 | 100 | 120 | 200 | 500 |
 Frostallion Noct Frostallion Noct | 140 | 100 | 140 | 135 | 415 |
 Frostallion Frostallion | 140 | 100 | 140 | 120 | 400 |
 Shaolong Shaolong | 140 | 100 | 135 | 120 | 395 |
 Paladius Paladius | 130 | 110 | 120 | 145 | 395 |
 Necromus Necromus | 130 | 100 | 145 | 120 | 395 |
 Shadowbeak Shadowbeak | 120 | 130 | 120 | 140 | 390 |
 Bastigor Bastigor | 140 | 100 | 130 | 120 | 390 |
| Jormuntide | 130 | 150 | 120 | 100 | 380 |
Only 11 Pals reach 140 HP, 15 reach 130 Defense and 16 reach 140 Attack, so the top of each chart is a small club. Bastigor is the standout value pick — rarity 8, so it is far easier to obtain than the Legendaries it ties with on total. If you want the full ordering, the list of all Pals by Attack stat and the list of all Pals by Defense stat rank every species.
The Weakest Base Stats
The starter-area Pals sit at the bottom, and the gap is brutal — Chikipi totals 190 against Astralym's 600. That does not make them useless: they are cheap condensing fodder, they hold the highest capture rates in the game at 1.5, and Lamball and Cattiva are genuinely fine early base workers because Work Speed is flat anyway.
| Pal | HP | Melee ATK | Ranged ATK | Defense | Total |
|---|---|---|---|---|---|
| Chikipi | 60 | 70 | 60 | 60 | 190 |
 Fuack Fuack | 60 | 80 | 80 | 60 | 200 |
 Sparkit Sparkit | 60 | 60 | 75 | 70 | 205 |
 Lamball Lamball | 70 | 70 | 70 | 70 | 210 |
 Cattiva Cattiva | 70 | 70 | 70 | 70 | 210 |
What Each Stat Actually Does
Base numbers only tell you the starting point. Each stat feeds a different part of the game, and a couple of them behave differently from what the tooltip implies.
HP
HP is the raw health pool, and it grows with level on top of the species base — a Pal's displayed HP at level 50 is several times its base number. It is the stat that matters most for anything you send into a raid, because a Pal that gets knocked out contributes zero damage. Panthalus at 180 and Mammorest at 150 are the bulkiest non-Astralym options. Full breakdown in HP Stat Explained.
 Attack
Attack is split into Melee and Ranged, and the game only ever shows you one blended figure. Ranged Attack is the more important half for most builds because the majority of high-power active skills are projectiles. Bellanoir and Bellanoir Libero share the highest Ranged Attack outside Astralym at 150, while six Pals tie for the melee crown at 150 including Incineram and Blazamut. The damage formula and every multiplier is covered in Attack Stat Explained.
Defense
Defense reduces incoming damage rather than blocking it outright, so it has diminishing value against very high-hitting attacks and huge value against chip damage and swarms. It is also the stat most cheaply raised — Burly Body and Hard Skin stack to +30% between them. Paladius at 145 is the best Legendary tank; Leezpunk at 50 is the worst in the game. See Defense Stat Explained for how the reduction curve behaves.
Work Speed and Support
Work Speed is the one stat that is genuinely identical on every Pal — all 288 sit at 100. What separates a good base worker from a bad one is its work suitability levels, and there the ceiling is level 8: Knocklem leads Transporting at 7 while Solenne hits the cap in Handiwork. Support is a quieter number ranging from 30 on Mammorest to 150 on Dinossom; Pocketpair has never documented exactly what it feeds, so do not build around it. For stacking actual base output, Work Speed Explained lists every boost.
Mount Speed
Mount speed is a stat only ridable Pals carry, and it is the single biggest quality-of-life upgrade in the mid game. Jetragon tops the chart at 3,300 sprint, with Panthalus at 3,000 and Shaolong at 2,800 close behind. Compare the whole roster on the Palworld mount speed rankings.
How to Raise a Pal's Stats
Five systems stack on top of the base numbers, and they are independent — a maxed Pal has all five running at once. Roughly in order of how much they are worth: IVs (locked at capture or hatch), levels, passives, condensing, then souls.
 Levels and Training Crystals
Levelling is the plain answer and the biggest single source of stat growth — every level raises HP, Attack and Defense together. A Training Crystal adds one level instantly for the Pal you feed it to, which is the fastest way to drag a freshly bred Pal up to your party's level band. Plug any species and level into the Palworld Pal stat calculator to see the resulting numbers before you commit the XP.
 IVs and Stat Fruits
Individual values are rolled per Pal on capture or hatch and act as a multiplier on the species base, which is why two identical Bellanoirs can differ by a wide margin at the same level. You cannot reroll them, but three fruits nudge them upward, one stat each. They are rarity 4 and slow to farm, so spend them on a Pal you have already decided to keep.
| Fruit | Stat Raised | Rarity | Where It Goes |
|---|---|---|---|
| Life Fruit | HP | 4 | Best on raid tanks and mounts you ride into fights |
 Power Fruit Power Fruit | Attack | 4 | Best on a single damage carry, not spread thin |
 Stout Fruit Stout Fruit | Defense | 4 | Best on low-Defense high-Attack Pals to fix their weak side |
Because the fruits move IVs and not base stats, they are worth the most on a Pal that already has a high species base — a Power Fruit on a 150 Attack Pal returns far more than the same fruit on a 70. If you need them in bulk, how to farm IV fruits and Training Crystals covers the routes, and all Pals by max IV stats shows what a perfect roll actually reaches.
 Statue of Power and Pal Souls
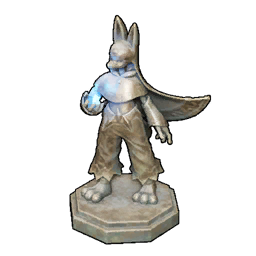
The Statue of Power unlocks at Technology level 9 and costs 20 Stone plus 10 Paldium Fragment, so you can have one standing very early. Feed it Pal Souls and it raises a chosen Pal's HP, Attack, Defense or Work Speed in ranks — larger souls contribute more per offering. Souls are the last few percent rather than a transformation, so save the Giant ones for a Pal you have already condensed.
| Soul | Rarity | Notes |
|---|---|---|
 Small Pal Soul Small Pal Soul | 1 | Common chest and dungeon filler — burn these on early workers |
 Medium Pal Soul Medium Pal Soul | 2 | The workhorse tier, worth spending freely once you have a stack |
 Large Pal Soul Large Pal Soul | 3 | Save for combat Pals rather than base staff |
 Giant Pal Soul Giant Pal Soul | 4 | Highest per-offering value — reserve for your finished raid carry |
 Pal Essence Condenser
The Condenser is the other permanent upgrade: sacrifice duplicates of the same species to raise a Pal's rank, which adds a flat bonus to HP, Attack and Defense at every star. It needs Technology level 14 and costs 20 Paldium Fragment, 20 Ingot and 5 Ancient Civilization Parts. This is the reason a farmable species with a good base beats a rare one you only own a single copy of — you can four-star Bastigor far sooner than you can four-star a Legendary.
Passive Skills
Passives are the largest percentage swing available and they are inheritable through breeding, so a bred Pal can arrive with all four slots already correct. Legend and Lucky are the rainbow-tier picks that hit two stats at once. Watch the trade-off passives: Musclehead is the biggest raw Attack boost in the game at +30%, but it halves Work Speed, which makes it a combat-only choice.
| Passive | Effect | Tier | Best For |
|---|---|---|---|
| Legend | Attack +20%, Defense +20%, Move Speed +20% | Rainbow | Any combat Pal — no downside |
| Lucky | Attack +15%, Defense +15%, Work Speed +20% | Rainbow | Hybrid Pals that fight and work |
| Musclehead | Attack +30%, Work Speed -50% | 2 | Pure damage carries kept out of the base |
| Ferocious | Attack +20% | 3 | The safe Attack pick with no penalty |
| Burly Body | Defense +20%, immune to flinch | 3 | Tanks and mounts you ride into fights |
| Sadist | Attack +15%, Defense -15% | 1 | Filler on a Pal that never gets hit |
| Hard Skin | Defense +10% | 1 | Filler defensive slot |
| Brave | Attack +10% | 1 | Filler offensive slot |
| Swift | Move Speed +30% | 4 | Mounts — the biggest travel-speed passive |
| Artisan | Work Speed +50% | 3 | Base workers only |
The strongest realistic combat spread is Legend, Ferocious, Musclehead and Burly Body if the Pal never works, or Legend, Lucky, Ferocious and Burly Body if you want it usable at base. The full Palworld passive skill list has every one of them, and all rainbow passive skills covers how to actually land the top tier.
What Drags Stats Down
Stats also move in the wrong direction. Hunger is the one that catches people out: a Pal at the Hungry threshold loses roughly a fifth of its Attack, Defense and Work Speed, and a starving Pal loses about half and stops recovering. Keep a stocked Feed Box in range of your workers and it never becomes a problem — how to eat food and feed Pals walks through the setup. Sanity does the same job over a longer timescale for base staff, and some of the strongest work passives deliberately trade sanity drain for output.
Related Guides
Go deeper on individual stats and on the systems that raise them:
- HP Stat Explained: Max Health and How to Raise It
- Attack Stat Explained: Damage Formula and How to Raise It
- Defense Stat Explained: Damage Reduction and How to Raise It
- Work Speed Explained: Every Boost and How to Stack It
- Best Stats to Level Up: Priority Order and Stat Caps
- How to Min-Max Pals: IVs, Passives, Souls, and Condensing
- All Pals by Max IV Stats
- Best Pal Builds: Top Passives, Skills, and Loadouts
- Palworld Pal Tier List
- Every Palworld guide