How to Beat Bellanoir Libero (Ultra): Team and Drops
The Bellanoir Libero (Ultra) raid lands at Level 80 with ×420 HP, ×10 damage and only 9% of your damage getting through. Here's the two-element team that covers both phases, every attack in the Dark and Ice rotations with power and cooldown, the passive stack it gains on the flip, the gear worth crafting, and the full reward list including the Witch's Crown.

The Bellanoir Libero (Ultra) raid is the Level 80 rematch you unlock by clearing the standard Bellanoir Libero fight, and it is the single most damage-resistant boss in the game — only 9% of what you deal actually lands. This guide covers her exact multipliers against the Level 45 version, the team that stays super-effective through both halves of the fight, all nine attacks in each phase with power and cooldown, the passive stack she gains at the mode change, the gear that keeps you alive, and everything the clear pays out.
 Bellanoir Libero (Ultra) Raid Stats
Read the bottom two rows together, because that is the whole story of this fight. Going from the Level 45 slab to the Ultra slab multiplies her health bar by 3.5× and cuts your throughput from 40% down to 9% — stacked, the Ultra takes roughly 15× longer to kill than the fight you already beat, with identical attack patterns. She is not the fattest raid boss (Blazamut Ryu's Ultra runs ×500 HP) and she does not hit the hardest (Hartalis and Xenolord both scale damage to ×13), but ×0.09 damage taken is the harshest reduction in the game, tied only with the other two Ultra tiers. Every raid multiplier sits side by side on the raid boss list with all battle multipliers.
| Standard (Lv 45) | Ultra (Lv 80) | |
|---|---|---|
| Boss | Bellanoir Libero | Bellanoir Libero |
| Summon item | 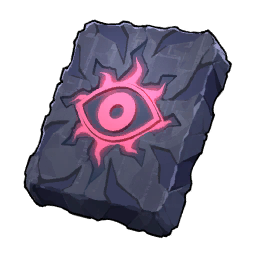 Bellanoir Libero's Slab Bellanoir Libero's Slab | 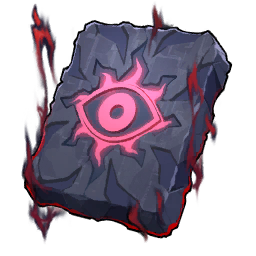 Bellanoir Libero (Ultra) Slab Bellanoir Libero (Ultra) Slab |
| Summon level | 45 | 80 |
| Starting element | Dark | Dark |
| Element after mode change | Ice | Ice |
| Weak to (phase 1) | Dragon | Dragon |
| Weak to (phase 2) | Fire | Fire |
| HP multiplier | ×120 | ×420 |
| Damage it deals | ×2 | ×10 |
| Damage it takes | ×0.4 — 60% of yours is eaten | ×0.09 — 91% of yours is eaten |
| Cooldown rate | ×2 | ×2 |
| Rematch fight | No | Yes — repeatable |
What You Need Before You Summon the Ultra
There is no fragment grind for this tier. Four Bellanoir Libero (Ultra) Slab Fragments do combine into a slab, but you will almost certainly never craft one — the Level 45 clear hands you a finished Ultra Slab outright, and so does every Ultra clear afterwards. That refund is the important part: the hard tier pays for its own re-entry, so once your first standard win seeds it, the only thing gating repeat runs is whether you can actually finish one. The slab is consumed the moment you offer it whether you win or lose, so a wipe costs you the loop until you beat the Level 45 fight again. The altar itself is Technology 33 and dirt cheap, and there are 16 altars already standing in the world if you would rather not build one — all of them pinned on the interactive map's raid altar layer.
| Requirement | How you get it |
|---|---|
 Summoning Altar Summoning Altar | Technology 33 — 100 Stone and 20 Paldium Fragment, or use one of the 16 world altars |
| Bellanoir Libero (Ultra) Slab | 100% drop from the Level 45 clear, and from every Ultra clear after |
| A Dragon attacker | For the Dark opening — see the team table below |
| A Fire attacker | For the Ice second half — non-negotiable, she swaps element mid-fight |
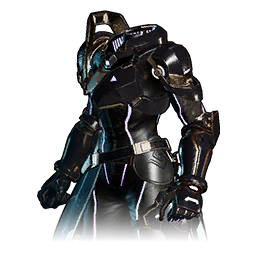 Lightweight Ancient Armor Lightweight Ancient Armor | Technology 79 — the armour tier that survives ×10 damage |
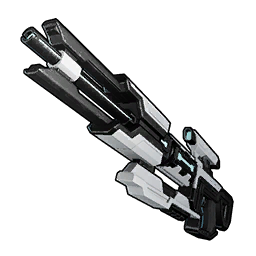 Plasma Rifle Plasma Rifle | Technology 78 — the sustained-fire weapon for a health bar that eats most of the ten-minute timer |
| A Dragon mount and a Fire mount |  Chillet (saddle at Technology 11) and Chillet (saddle at Technology 11) and  Pyrin (Technology 29) — they convert your own shots to the counter element Pyrin (Technology 29) — they convert your own shots to the counter element |
| A stocked Feed Box | Place it by the altar with  Galeclaw Nikujaga or Galeclaw Nikujaga or  Mammorest Curry so the raid party eats mid-fight Mammorest Curry so the raid party eats mid-fight |
| Level 55+ condensed Pals | She summons at 80; anything under-levelled contributes nothing through ×0.09 |
 She Has Two Weaknesses, Not One
Partway through the fight Bellanoir Libero changes element entirely, and the swap is total rather than additive — she drops Dark for Ice. That single mechanic is what wrecks first attempts, because Dragon is the answer to Dark and Ice is the answer to Dragon. Your perfectly-built Dragon squad goes from super-effective to actively vulnerable in one animation, and the mode change also slaps Freeze on everything on the field at once, so you eat the transition no matter how well you are playing. Fire is what beats Ice, so the correct read is to bring both elements and swap partners on the flip — or, better, bring a Pal that is Dragon *and* Fire and never swap at all. The element chart and counter finder has the full matchup grid if you want to plan around the rest of your roster.
| Matchup | Phase 1 (Dark) | Phase 2 (Ice) |
|---|---|---|
| Your Dragon attacks | Bonus damage — the only counter to Dark | Flat damage — no bonus |
| Your Fire attacks | Flat damage — no bonus | Bonus damage — the only counter to Ice |
| Her attacks vs your Dragon Pals | Flat — Dragon does not fear Dark | Bonus — Ice beats Dragon, this is the trap |
| Her attacks vs your Fire Pals | Flat | Flat — Ice does not beat Fire |
| Her attacks vs a Neutral Pal | Bonus damage — leave Neutrals at home | Flat |
| Dual Dragon/Fire Pals | Bonus damage | Bonus damage — covers the whole fight |
 Best Pals to Bring Against Bellanoir Libero (Ultra)
Only four Pals in the game are both Dragon and Fire, and they are the entire reason this fight is manageable — they hit for bonus damage in the Dark opening *and* the Ice second half, so you never lose a damage window to a swap. Jormuntide Ignis and Blazamut Ryu tie for the highest melee attack of the four at 150, but Blazamut Ryu is itself a raid boss you have to summon, so Jormuntide Ignis at 21 spawn points is the realistic top pick. Eidrolon Ignis is the one to bring if you keep dying: same 130 ranged attack, but 120 defense against Jormuntide Ignis's 100, and 26 spawn points to go find one right now. Skip Chillet Ignis unless it is all you have — the dual typing is right but 85 ranged attack and 80 defense will not survive ×10 damage. If you would rather run element specialists, Jetragon has the highest ranged attack of any Dragon at 140 for the opening, and Blazamut brings 150 melee for the Ice half. Full loadouts for any of these are on the best Pal builds guide.
| Pal | Elements | Attack (M / R) | HP / Def | Why bring it |
|---|---|---|---|---|
| Jormuntide Ignis | Dragon / Fire | 150 / 130 | 130 / 100 | Covers both phases at 150 melee — highest of any catchable dual-type here, 21 spawn points |
| Eidrolon Ignis | Dragon / Fire | 100 / 130 | 115 / 120 | Same 130 ranged as the top pick with 20 more defense — the survivable both-phase option, 26 spawn points |
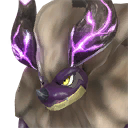 Blazamut Ryu Blazamut Ryu | Dragon / Fire | 150 / 130 | 105 / 125 | Best raw statline of the four, but you have to clear its own raid to own one |
 Jetragon Jetragon | Dragon | 100 / 140 | 115 / 120 | Highest ranged attack in the Dragon element — bench it the moment she turns Ice |
 Shaolong Shaolong | Dragon / Water | 100 / 135 | 140 / 120 | 140 HP is the beefiest Dragon frame, and 63 spawn points make it easy to get |
 Aegidron Aegidron | Dragon / Ground | 100 / 125 | 105 / 140 | 140 defense — the phase 1 body that holds aggro through the Blind windows |
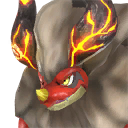 Blazamut Blazamut | Fire | 150 / 125 | 100 / 120 | Pure Fire specialist for the second half at 150 melee, 16 spawn points |
 Incineram Incineram | Fire / Dark | 150 / 100 | 95 / 85 | The cheap Fire answer — 105 spawn points, though 85 defense means it dies to a stray Ice hit |
 Chillet Ignis Chillet Ignis | Fire / Dragon | 100 / 85 | 90 / 80 | Correct typing, worst numbers of the four — a last resort only |
Every Attack in the Ultra Fight
Her rotation is split cleanly by the mode change: nine Dark moves before it, nine mostly-Ice moves after. Note the cooldown column is her baseline — the raid's ×2 cooldown rate means she cycles the whole list roughly twice as fast as the numbers read. The one to memorise is Nightmare Bloom, her exclusive 600-power beam barrage: she vanishes, reappears, and fires beams that spread outward like a flower, so the disappearance is your cue to already be moving sideways. Almost everything Dark applies Blind, which is genuinely dangerous here rather than annoying — losing your screen for two seconds while a ×10-damage attack is in the air is how runs end.
Phase 1 — the Dark rotation
This half is identical on the Level 45 slab and the Ultra slab — same nine moves, same powers, same cooldowns. Only the multipliers change. Dark Cannon and Umbral Surge are the 4-second fillers she throws constantly at 70 and 60 power; they are chip damage you should be tanking rather than dodging. Everything at 400 and up is a real threat, and Flame Waltz deserves a specific callout because it is a Dark move that visually reads as fire — expanding rings that then release homing flames, with a Burn on top. Do not group up for it.
| Move | Element | Power | Cooldown | Effect | What it does |
|---|---|---|---|---|---|
| Nightmare Bloom | Dark | 600 | 30s | — | Her exclusive: vanishes, reappears, fires a barrage of beams that spread outward |
| Dark Whisp | Dark | 600 | 30s | Blind | A menacing ball of dark energy that chases you — short range, 1,500 |
| Dark Laser | Dark | 450 | 20s | Blind | Charges up, then blasts a beam — the charge is your dodge window |
| Flame Waltz | Dark | 450 | 20s | Burn | Her exclusive: expanding rings of fire, then homing flames |
| Apocalypse | Dark | 400 | 20s | Blind | Spawns several dark vortexes around you — reposition, do not stand still |
| Nightmare Ball | Dark | 300 | 16s | Blind | Giant ball of darkness hurled from long range |
| Dark Arrow | Dark | 120 | 8s | Blind | Homing dark energy — you cannot dodge it, only outrange it |
| Dark Cannon | Dark | 70 | 4s | Blind | Fast filler energy ball, fired constantly |
| Umbral Surge | Dark | 60 | 4s | Blind | A spreading fan of high-speed orbs — wider the further back you stand |
Phase 2 — the Ice rotation (Ultra only)
Here is where the Ultra stops being the same fight. On the flip she discards Umbral Surge, Dark Cannon, Nightmare Ball and Dark Arrow, and picks up four Ice moves — and the Ultra's four are not the Level 45 version's four. The standard fight replaces them with Diamond Rain, Blizzard Spike, Crystal Breath and Icicle Cutter, which still includes 80- and 160-power filler. The Ultra swaps in Double Blizzard Spike and Absolute Frost at 700 power each, plus Icicle Line, and keeps Diamond Rain. The result: nothing in the Ultra's second-phase rotation is below 300 power, every Ice move carries a full-strength Freeze, and her two hardest hits are moves the Level 45 fight never shows you. Ice Skill Fruit options for your own team are listed on the Ice skill fruit guide.
| Move | Element | Power | Cooldown | Effect | What it does |
|---|---|---|---|---|---|
| Double Blizzard Spike | Ice | 700 | 30s | Freeze | New to the Ultra — two huge ice blocks fired back to back, with splash on impact |
| Absolute Frost | Ice | 700 | 30s | Freeze | New to the Ultra — icicles erupt in a wide area from under your feet |
| Diamond Rain | Ice | 600 | 30s | Freeze | Ice lumps dropped consecutively on your head from anywhere on the field |
| Nightmare Bloom | Dark | 600 | 30s | — | Kept through the swap — the beam barrage never leaves her kit |
| Dark Whisp | Dark | 600 | 30s | Blind | Kept — still the short-range pursuit orb |
| Dark Laser | Dark | 450 | 20s | Blind | Kept — charged beam |
| Flame Waltz | Dark | 450 | 20s | Burn | Kept — rings of fire plus homing flames |
| Apocalypse | Dark | 400 | 20s | Blind | Kept — dark vortexes around your position |
| Icicle Line | Ice | 300 | 16s | Freeze | New to the Ultra — three ice pillars travelling out in straight lines |
The Mode Change and the Passives She Gains
The transition is not just an element swap. She Freezes the entire field, turns Ice, and picks up five passives at once — and the Ultra's stack is a straight upgrade over the Level 45 version's. Adding it up, the Ultra gains +85% Shot Attack against the standard fight's +75%, and the real difference is the last row: the Level 45 version gets Lord of the Underworld, which boosts Dark damage only, on a boss that just threw away most of its Dark moves. The Ultra gets Siren of the Void, which boosts Dark *and* Ice by 30% each — so her brand-new 700-power Ice kit lands at full value while the standard fight's Ice kit gets nothing from its passive. That mismatch is most of why the Ultra's second half feels so much more lethal than the multiplier alone suggests. The one crumb in your favour: Sadist and Aggressive cost her defense, so she ends the flip 20% squishier than she started — which barely dents ×0.09, but it is real.
| Passive gained on the flip | Standard (Lv 45) | Ultra (Lv 80) | Effect |
|---|---|---|---|
| Ferocious | Yes | — | +20% Shot Attack |
| Demon God | — | Yes | +30% Shot Attack, +5% Defense |
| Musclehead | Yes | Yes | +30% Shot Attack |
| Sadist | Yes | Yes | +15% Shot Attack, −15% Defense |
| Aggressive | Yes | Yes | +10% Shot Attack, −10% Defense |
| Lord of the Underworld | Yes | — | +30% Dark damage only |
| Siren of the Void | — | Yes | +30% Dark damage and +30% Ice damage |
| Total Shot Attack gained | +75% | +85% | — |
Best Gear for the Ultra Raid
Because only 9% of your damage lands, this fight is a sustained-DPS problem, not a burst one — you want the weapon you can hold the trigger on for the full ten-minute timer without running dry. That is the Plasma Rifle at Technology 78: 2,232 attack on the Legendary schematic, a 46-round magazine and effectively unlimited durability. The base craft is 1,860 attack with 38 rounds, which still works but costs you reload windows you would rather spend shooting. Compare attack values only within a weapon class here — the Plasma Cannon's 13,000 is a two-shot launcher figure and means nothing next to a rifle's per-bullet number. On the defensive side, Lightweight Ancient Armor at Technology 79 is the only chest piece that makes ×10 damage survivable, and the Ancient Shield self-repairs between hits, which matters enormously in a fight this long. The whole Ancient tier and how to unlock it is broken down on the best ancient technology guide.
| Gear | Stats (Legendary) | Tech | Why bring it |
|---|---|---|---|
| Plasma Rifle | 2,232 attack · 46 rounds | 78 | Highest sustained rifle damage — the main gun for a 15×-length health bar |
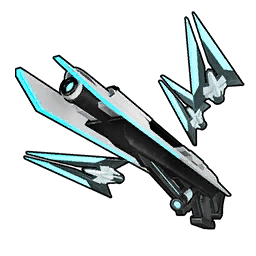 Drone Launcher Drone Launcher | 240 attack | 77 | Fires and forgets — keeps damage ticking while you are Blinded or Frozen |
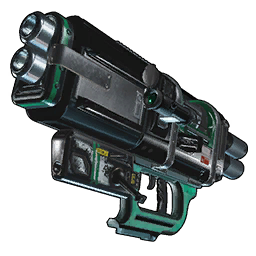 Plasma Cannon Plasma Cannon | 13,000 attack · 2 rounds | 61 | Burst opener only; launcher numbers are not comparable to rifle numbers |
| Lightweight Ancient Armor | 1,092 defense · 3,120 HP | 79 | The single biggest survivability jump available — craft this before you summon |
 Ancient Helm Ancient Helm | 650 defense · 1,560 HP | 68 | Another 1,560 HP on top of the armour |
 Ancient Shield Ancient Shield | 2,200 shield | 71 | Self-repairs after a lull — effectively free health across a long fight |
 Dogen Emblem Dogen Emblem | Attack — you and your Pal | — | Raises your damage and your partner's, which is where the ×0.09 bottleneck sits |
| Attack Pendant +2 | Attack | — | The pure-offence slot if you are already surviving comfortably |
 Silvegis Emblem Silvegis Emblem | Defense — you and your Pal | — | Keeps your Dragon partner alive through the Ice phase |
 Warsect Terra's Belt Warsect Terra's Belt | Defense and Health | — | The safest accessory for a first Ultra attempt |
Swap partners the instant she freezes the arena
The field-wide Freeze at the mode change is unavoidable and it is also your alarm. The moment it lands, your Dragon partner has gone from super-effective to taking bonus damage from every single move she now uses, and Ice is the one element Dragon actually fears. Recall it and send out Fire before the Freeze wears off. If you built around Eidrolon Ignis or Jormuntide Ignis you can ignore this entirely — that is the whole argument for the dual-typed picks.
Ride Chillet, then Pyrin, so your own bullets hit her weakness
Your Plasma Rifle is Neutral by default, which means the single biggest damage source in the fight — you — gets no element bonus in either phase. Fix that with the saddle. Riding Chillet turns every shot you fire into Dragon damage and adds 5–20% ranged attack depending on its condensation, so phase 1 becomes super-effective from your gun as well as your partner. On the flip, dismount and climb onto Pyrin, whose saddle converts your shots to Fire with the same ranged bonus. Do not reach for Chillet Ignis as a one-mount shortcut: its saddle converts to Fire only, so it is a phase 2 mount, not a both-phase one. Staying mounted also keeps you moving across the arena, which is how you get out from under Diamond Rain and Absolute Frost.
The flip comes late, and she heals when it does
Do not expect the Ice phase at the halfway mark. She holds the Dark form until her health is almost gone — somewhere around the last 5–6% — and then Freezes the field and refills to roughly a third of her bar as she turns Ice. Plan the timer around that: the second half is a fresh third of a health bar against her harder-hitting kit, so you need meaningful time left on the clock when she flips. Push damage hard in phase 1, while her rotation is mostly low-power filler, and switch to survival in phase 2. Dying does not end the raid, but the respawn walk back burns time you cannot spare inside ten minutes. Buy Plasma Rifle Ammo in bulk rather than crafting it — a captured Legendary Ammo Merchant at your base makes that a gold cost — and stock the Feed Box before you offer the slab; the feeding guide covers how it works.
Fight from the flanks and never line up with your party
Umbral Surge fires a fan that spreads as it travels, Icicle Line sends pillars out in three straight directions, and Nightmare Bloom's beams radiate outward from her. All three punish anything standing in a line in front of her. Keep your Pals and any co-op partners on opposite flanks so a single pattern can only clip one of you, and treat her vanish animation as the signal to break whatever line she was facing.
Never stop shooting through Blind
Blind appears on seven of her nine Dark moves, and with the raid's ×2 cooldown rate you will spend a large share of this fight unable to see. Disengaging every time it lands is how a 15×-length health bar becomes unbeatable. Keep firing at her last known position, and bring a Drone Launcher as your second weapon — it keeps putting out damage during the seconds you have no screen and during the Freeze on the transition.
Do not attempt it before you have farmed the Level 45 fight
The standard fight has the same attack patterns, the same mode change and the same Freeze, at 40% damage taken instead of 9%. It is a full-speed rehearsal that costs a slab you can actually replace — four Bellanoir Libero's Slab Fragments, and the fragment sources are all mapped in the Bellanoir Libero slab and summoning guide. Learn the timings there, then spend the Ultra Slab.
 Bellanoir Libero (Ultra) Rewards
Everything on the Ultra list is a flat 100% drop with fixed amounts — no rolling, no bad clears. Ten Ancient Civilization Cores is more than double what the Level 45 fight pays, and ten Training Crystals is the real prize, since each one raises a Pal's level by exactly one with no experience grind involved. The Witch's Crown is the trophy: it only ever drops here, but be clear about what it is — 30 defense and 80 HP, against the Ancient Helm's 650 and 1,560. Wear it because you earned it, not because it is armour. You also pick two of one Applied Handbook rather than the standard fight's one, each permanently granting a work suitability to a Pal that lacks it. And the fourth line is why you do this at all: another Ultra Slab, so the loop never closes.
| Reward | Ultra (Lv 80) | Standard (Lv 45) | Chance |
|---|---|---|---|
| Witch's Crown | ×1 | — | 100% |
 Ancient Civilization Core Ancient Civilization Core | ×10 | ×2–4 | 100% |
 Training Crystal Training Crystal | ×10 | — | 100% |
| Bellanoir Libero (Ultra) Slab | ×1 | ×1 | 100% |
 Training Manual (XL) Training Manual (XL) | — | ×4–6 | 100% |
 Dark Skill Fruit: Dark Whisp Dark Skill Fruit: Dark Whisp | — | ×1 | 100% |
 Applied Ranching Handbook I Applied Ranching Handbook I | ×2 | ×1 | Choose one of three |
 Applied Transporting Handbook I Applied Transporting Handbook I | ×2 | ×1 | Choose one of three |
 Applied Medicine Production Handbook I Applied Medicine Production Handbook I | ×2 | ×1 | Choose one of three |
Summary
Bring a Dragon/Fire Pal so you never lose a damage window to the element swap, craft the Plasma Rifle and Lightweight Ancient Armor before you offer the slab, expect a guaranteed Freeze at the mode change, and keep shooting through Blind rather than disengaging. The fight is not mechanically harder than the Level 45 version — it is the same nine Dark moves and the same transition — it is just 15× longer and hits 5× harder, with two 700-power Ice attacks the practice fight never showed you. Every clear refunds the slab, so the first win is the only one that costs you anything.
Related Guides
- Bellanoir Libero: slab locations and the Ice shift
- How to beat Bellanoir raid boss: weakness, team, and drops
- How to beat Hartalis raid boss
- How to beat Moon Lord raid boss
- How to get Xenolord: slab locations and raid fight
- How to get Blazamut Ryu: slab locations and raid fight
- All raid bosses and their battle multipliers
- Best ancient technology and how to unlock all 51
- List of Ice skill fruits: stats and how to get them
- List of Dark skill fruits: stats and how to get them
- Best Pal builds: top passives, skills, and loadouts
- The element chart and counter finder
- Every raid summoning altar on the interactive map
- All Palworld guides