2 Combat Pals at a Time Glitch and the Necklace Method
How the 2 combat Pals at a time glitch works in Palworld, why it never survives a relog, and the three necklaces that put a second fighter beside you permanently for 5 Leather and a level 6 workbench.
Palworld only lets one Pal out to fight at a time, and the 2 combat Pals at a time glitch is the input trick players use to get around that limit. This guide covers the exact sequence, why the second Pal vanishes the moment you close the game, and the three necklaces that give you a permanent second fighter without touching an exploit at all.
 Can You Have Two Combat Pals Out at Once?
Officially, no — the deploy slot holds one Pal, and sending out a second recalls the first. There are two ways around that. The glitch below squeezes a genuine extra fighter out of a summon-timing hole, but it is fiddly to land and dies with your session. The necklace route is the one worth building your loadout around: a collar Pal sits in your party and fights alongside whatever you have deployed, forever, with no inputs to nail. Most players who want a permanent second body end up on Daedream and never look back.
| Method | Works? | What you need | Survives a relog? |
|---|---|---|---|
| Summon-swap glitch | Yes, with practice | A downed Pal, a saddled mount, a third fighter | No — redo it every session |
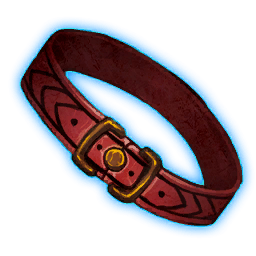 Daedream's Necklace Daedream's Necklace | Yes | Daedream + 5 Leather, 10 Fiber, 10 Paldium Fragment | Yes — it is a normal item |
| Dazzi's Necklace | Yes | Dazzi + 15 Leather, 15 Fiber, 10 Copper Ingot, 20 Paldium Fragment | Yes |
| Dazzi Noct's Necklace | Yes | Dazzi Noct + 10 Leather, 30 Fiber, 10 Dark Fragment, 40 Paldium Fragment | Yes |
2 Combat Pals Glitch Requirements
You need three specific party members before you start, and one of them has to be in a state most players avoid on purpose. The first slot is a Pal that has been knocked out cold — the one showing the red incapacitated panel, not one that is merely hurt. The second is any mount you have already built the gear for, because the ride input is what holds the extra body in the world. The third is whatever you actually want swinging: pick real damage here, since this Pal is the reason you are doing the trick in the first place.
| Requirement | Detail | Notes |
|---|---|---|
| A knocked-out Pal | Fully downed, red panel — not low HP | This is the Pal the game should refuse to deploy |
| A mount with its gear built | 140 of the 288 Pals are rideable | Cheapest entry is a 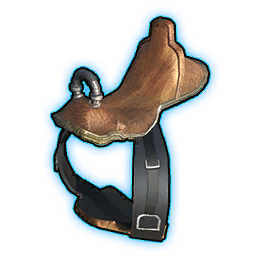 Rushoar Saddle at tech level 6 Rushoar Saddle at tech level 6 |
| A third combat Pal | Your actual damage dealer | Ends up as the second body on the field |
| Free party space | All three in the active team at once | Swapping from the Pal Box mid-attempt resets your timing |
How to Do the 2 Combat Pals at a Time Glitch
The whole thing is a timing trick on the deploy input — you are asking the game to start three summon actions faster than it can finish resolving the first one. Step one is the wall almost everyone hits: flicking between the downed Pal and the party members either side of it until the incapacitated one actually appears. Expect a run of failed attempts before it takes. Once it lands, do not admire it — the next two inputs have to come fast or the state collapses and you start over.
| Step | What to do | Where it goes wrong |
|---|---|---|
| 1 | Cycle rapidly between the knocked-out Pal and its neighbours in the party, sending out on each pass | Hardest part by far — the downed Pal usually just refuses to appear |
| 2 | Immediately deploy the mount and get on it without pausing | Any delay before mounting and the first Pal is recalled |
| 3 | Dismount and instantly send out the third Pal | A slow dismount drops you back to one Pal on the field |
When it works you finish with two Pals attacking at the same time and no downside in the fight itself. It is worth saying plainly that this is a bug, not a feature, so treat it as a toy rather than a build: it costs nothing to try, but nothing about it is guaranteed to survive the next update.
Why the Glitch Never Sticks
The extra Pal lives entirely in your current session. Quit to the menu, get disconnected, or close the game, and you load back in with a single deploy slot like everyone else — there is no saved flag to carry it over, so every play session starts from scratch with the full input sequence. Version 1.0.3 also went through the summon code for other reasons, fixing Pals that stopped fighting or stopped helping at base once deployed, and the notes for that patch never mention double summoning at all. Nothing there closes the trick, but it does mean this area of the game is actively being touched. If you want a second fighter you can rely on tomorrow, build a collar.
The Necklace Method: A Second Fighter With No Glitch
Four Pals in the game get a collar instead of a saddle, and three of those collars are combat gear: equip one, keep that Pal in your active team, and it fights beside you permanently while a completely separate Pal occupies your normal deploy slot. That is two Pals on the field, on demand, with zero timing involved. Daedream's Necklace is the obvious starting point — 5 Leather, 10 Fiber and 10 Paldium Fragment is close to free, and it is the lightest craft of the three. The fourth collar, Flopie's Necklace, is in the table for completeness: it makes Flopie hoover up dropped items instead of fighting, so it does not help here.
| Pal Gear | Pal | Materials | Effect |
|---|---|---|---|
| Daedream's Necklace | Daedream | 5 Leather, 10 Fiber, 10 Paldium Fragment | Fights at your side while another Pal is deployed |
| Dazzi's Necklace |  Dazzi Dazzi | 15 Leather, 15 Fiber, 10 Copper Ingot, 20 Paldium Fragment | Same effect, Electric damage |
| Dazzi Noct's Necklace |  Dazzi Noct Dazzi Noct | 10 Leather, 30 Fiber, 10 Dark Fragment, 40 Paldium Fragment | Same effect, Dark and Electric damage |
| Flopie's Necklace |  Flopie Flopie | 10 Leather, 20 Fiber, 5 Copper Ingot, 15 Paldium Fragment | Auto-collects nearby drops — not a fighter |
All four collars share one generic in-game icon, so the Pal portrait next to each row is the quick way to tell them apart. None of them appear in the technology tree either — they cost zero tech points, and the only real gate is owning the Pal.
Which Necklace Pal Should Ride Along?
Be honest about what you are getting: measured against other Pals, all three of these sit in D tier for combat, and none of them is carrying a fight on its own. The value is that they are free damage running in parallel with your real deploy — an extra body pulling aggro and chipping away while you and your main Pal do the work. Dazzi and Dazzi Noct both edge Daedream out on paper with 110 melee attack to his 100, and Dazzi Noct has the best defence of the trio at 75. Daedream still wins for most players on cost alone — his collar is a quarter of the material bill of Dazzi Noct's — and Dark damage covers a lot of the early and mid game. Pick Dazzi if you want Electric coverage in the slot, and Dazzi Noct if you are deep enough to have Dark Fragment lying around.
| Pal | Element | HP | Melee Atk | Shot Atk | Defense | Top Move | Combat Tier |
|---|---|---|---|---|---|---|---|
| Daedream | Dark | 70 | 100 | 75 | 60 | Dark Whisp — 600 power | D |
| Dazzi | Electric | 70 | 110 | 80 | 70 | Thunderstorm — 600 power | D |
| Dazzi Noct | Dark / Electric | 70 | 110 | 80 | 75 | Dark Whisp — 600 power | D |
Top move is the level 70 unlock in each case, so a low-level collar Pal is throwing much smaller numbers than that column suggests. Every one of the three is an XS Pal with a 1.0 capture rate, which means no sphere tier is wasted on them — see how catch rates and sphere tiers work if you want the maths behind that.
Where to Catch Daedream, Dazzi, and Dazzi Noct
Daedream is the easiest of the three to walk up to but only after dark — all 164 of its spawn points are night-only, and a third of them are packed into Sea Breeze Coast, right next to where most players start. Dazzi ignores the clock entirely across its 140 spots, but more than half sit in Anubis Dunes, so it is a desert trip rather than a stroll. Dazzi Noct is the awkward one: 135 spots clustered hard around Stone Pillar Cave Entrance, plus a level 60 alpha if you want the fight. Handy detail — Dazzi Noct drops a Dark Fragment every single time, which is exactly the material its own necklace asks for ten of.
| Pal | Spawn Points | Time | Top Area | Map |
|---|---|---|---|---|
| Daedream | 164 | Night only | Sea Breeze Coast — 54 spots (32.9%) | View Daedream spawns |
| Dazzi | 140 | Day and night | Anubis Dunes — 74 spots (52.9%) | View Dazzi spawns |
| Dazzi Noct | 135 | Day and night | Stone Pillar Cave Entrance — 57 spots (42.2%) | View Dazzi Noct spawns |
 Pal Gear Workbench: Unlock and Cost
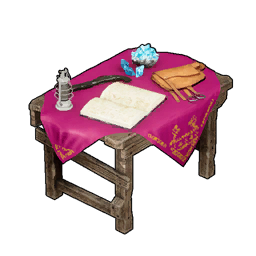
Collars are not built at a normal workbench. You need the Pal Gear Workbench, which unlocks at level 6 for 2 technology points and then costs a trivial pile of starter materials to place. Assign anything with Handiwork to it and the necklace comes out quickly. Level 6 is also where the first saddles appear, so a single trip to the tech tree covers both the mount you need for the glitch and the workbench that makes the glitch unnecessary.
| Requirement | Cost |
|---|---|
| Technology level | 6 |
| Technology points | 2 |
| Build materials | 10 Paldium Fragment, 30 Wood, 2 Cloth |
| Worker suitability | Handiwork (rank 1 is enough) |
 Stacking a Mount on Top of a Collar Pal
The collar Pal is not tied to your deploy slot, which opens up a trick with no exploit attached: mount up, and your collar Pal keeps fighting while you ride. That is a Pal attacking, a mount under you, and your hands free — useful for kiting anything that hits hard on the ground. Any of the 140 rideable Pals works, and the entry cost is low if you have not built gear yet. Rushoar takes 3 Leather, 10 Stone and 5 Paldium Fragment at tech level 6, the same level as the workbench itself, and Foxparks unlocks at 6 as well.
| Pal | Gear | Tech Level | Materials |
|---|---|---|---|
| Rushoar | Rushoar Saddle | 6 | 3 Leather, 10 Stone, 5 Paldium Fragment |
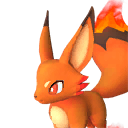 Foxparks Foxparks | 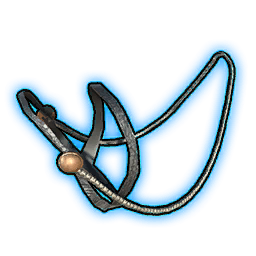 Foxparks' Harness Foxparks' Harness | 6 | 3 Leather, 5 Flame Organ, 5 Paldium Fragment |
 Melpaca Melpaca | Melpaca Saddle | 7 | 3 Leather, 5 Wool, 5 Paldium Fragment |
 Direhowl Direhowl | Direhowl's Saddled Harness | 9 | 10 Leather, 20 Wood, 15 Fiber, 10 Paldium Fragment |
 Eikthyrdeer Eikthyrdeer | Eikthyrdeer Saddle | 12 | 5 Leather, 20 Fiber, 10 Copper Ingot, 3 Horn, 15 Paldium Fragment |
The Short Answer
The 2 combat Pals at a time glitch is real and it does put a second attacker on the field, but it is a per-session party trick: a downed Pal, a fast mount input, a fast dismount, and it is gone again the next time you load in. If what you actually want is two Pals fighting for you, catch Daedream at night, put down a Pal Gear Workbench at level 6, and spend 5 Leather on the collar. It is one of the cheapest crafts in the game and it does the job permanently — which is why it shows up on so many builds in our best partner skills rankings.
Related Guides
Where to go next:
- Palworld Guides — every guide on the site
- Palworld Partner Skills List — what every Pal brings to your team slot
- Palworld Interactive Map — every spawn, node and chest
- Best Partner Skills and Their Effects
- List of All 140 Pal Gear: Tech Levels and Materials
- Palworld Duplication Glitch: Is It Patched and What Changed
- How to Catch Pals, All Sphere Tiers, and Capture Rate
- Best Support Pals: Healers, Party Buffs, and Drop Rate Boosters
- Palworld 1.0.3 Patch Notes: Every Change and Fix