All Pal Effigies and Player Upgrade Tracks Explained
Every collectible effigy upgrade track in Palworld — which of the 13 effigy species feeds which stat, how many of each are placed on the map, the full Lifmunk capture-power ladder (100 effigies, 15 ranks), and the three tracks with zero spare relics.

Those little glowing effigies scattered across Palpagos feed one of the game's most permanent progression systems: offer them at a statue and your own abilities rank up, forever. The classic green Lifmunk Effigy is only the start — the data holds thirteen separate upgrade tracks, and some of the newer ones pay absurdly well for absurdly few collectibles. Here's every ladder with exact numbers.
 The Lifmunk Effigy Ladder: Capture Power
The original track: Lifmunk Effigies offered at the Statue of Power raise your capture power through 15 ranks costing 100 effigies in total. The curve steepens fast — the first rank costs a single effigy, but from rank 8 onward every step demands 9 more:
| Rank | Effigies for This Rank | Cumulative |
|---|---|---|
| 1 | 1 | 1 |
| 2 | 2 | 3 |
| 3 | 3 | 6 |
| 4 | 4 | 10 |
| 5 | 5 | 15 |
| 6 | 6 | 21 |
| 7 | 7 | 28 |
| 8 | 9 | 37 |
| 9 to 15 | 9 each | 46 to 100 |
Capture power stacks with everything else in the catching toolkit — sphere modules add up to +3 more, and the freeze/ivy partner tricks from the status guide pile on top. An early habit of grabbing every effigy you pass pays off the whole game.
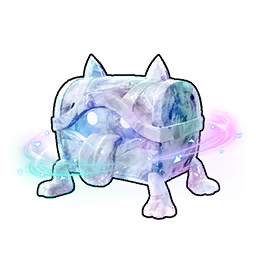 All 13 Upgrade Tracks
The newer effigy species (Lamball, Pengullet, Rooby, Yakumo and friends) each feed one of the other stat tracks at their own statues. The totals and payoffs vary wildly — some tracks max out from a handful of collectibles, one is a genuine marathon:
| Upgrade Track | Ranks | Total Relics | Max Bonus |
|---|---|---|---|
| Capture Power | 15 | 100 | Higher catch odds every rank |
| Movement Speed | 92 | 287 | +50% |
| Swim Speed | 20 | 20 | +100% |
| Climb Speed | 20 | 20 | +100% |
| Jump Power | 20 | 20 | +50% |
| Glider Speed | 20 | 20 | +30% |
| Hunger Reduction | 20 | 20 | 50% slower hunger |
| Food Decay Reduction | 20 | 20 | 50% slower spoilage |
| Stamina Reduction | 20 | 20 | 50% less stamina drain |
| Status Ailment Resist | 20 | 20 | 50% resist |
| EXP Bonus | 4 | 4 | +50% EXP |
| Sphere Homing | 4 | 4 | 100% homing |
| Rainbow Passive Rate | 4 | 4 | +4% rainbow passives |
Three standouts deserve a hunt the moment you learn they exist: the EXP Bonus track hits +50% from just 4 relics — probably the best per-collectible value in the game — Sphere Homing reaches 100% from another 4, and Movement Speed is the opposite story, a 287-relic pilgrimage across 92 ranks for its +50%. Swim and Climb both doubling at max quietly change how you traverse water and cliffs.
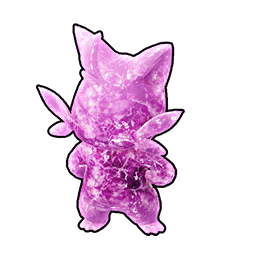 Which Effigy Feeds Which Track, and How Many Exist
The tracks above are useless knowledge until you know which species pays into which one, because you cannot spend a Rooby Effigy on swim speed. Every species is locked to exactly one ladder. More usefully, the world only holds a fixed number of each — we counted every effigy actor placed on the map, so the last column tells you how much slack you have:
| Effigy | Upgrade Track | Placed in the World | Needed to Max | Spare |
|---|---|---|---|---|
| Lifmunk Effigy | Capture Power | 155 | 100 | 55 |
| Lamball Effigy | Hunger Reduction | 30 | 20 | 10 |
| Pengullet Effigy | Swim Speed | 30 | 20 | 10 |
| Munchill Effigy | Food Decay Reduction | 30 | 20 | 10 |
| Rooby Effigy | Jump Power | 30 | 20 | 10 |
| Herbil Effigy | Glider Speed | 30 | 20 | 10 |
| Tanzee Effigy | Climb Speed | 30 | 20 | 10 |
| Depresso Effigy | Status Ailment Resist | 30 | 20 | 10 |
| Cattiva Effigy | Stamina Reduction | 30 — all in the World Tree | 20 | 10 |
| Lunaris Effigy | Sphere Homing | 4 | 4 | 0 |
| Relaxaurus Effigy | EXP Bonus | 4 | 4 | 0 |
| Yakumo Effigy | Rainbow Passive Rate | 4 — 2 in the World Tree | 4 | 0 |
| Mimog Effigy | Movement Speed | none placed | 287 | — |
Three of these are unforgiving. Sphere Homing, EXP Bonus and Rainbow Passive Rate each need 4 relics, and the world contains exactly 4 — there is no margin, so every one of those twelve pickups is mandatory if you want those maxed. They are also the three cheapest maxes in the game, which makes hunting all twelve the single highest-value collectible route on Palpagos. Two of the four Yakumo Effigies sit past the World Tree gate, so that track cannot finish before you get there.
Cattiva is the other geography trap: all 30 Stamina Reduction effigies are in the World Tree region, none on the main island. If you are running out of sprint on the mainland, that ladder is simply not open to you yet. The other nine species are mainland-only, and Lifmunk is the one that spans both — 140 on the main map, 15 more in the World Tree. Toggle the Pal Effigies layer on the interactive map to plan a sweep.
The Odd One Out: Mimog Effigies
Twelve effigy species sit out in the world waiting to be found — the Mimog Effigy is different, and the table above shows why: it has no placed copies at all. Its official description says it outright: it suddenly comes into your possession when you capture many Pals. So one of the thirteen tracks effectively pays you for doing what you were doing anyway — another reason the catch-everything habit from the day-one checklist compounds. It is also the only reason a 287-relic Movement Speed track is finishable at all.