How to Hatch Eggs Fast: Temperature, Research, and Pals
Every hatching speed modifier in Palworld and what each is worth — why a comfortable egg incubates at full speed, the +60% Incubation Acceleration research and the line that costs 27 times less workload for it, Dynamoff's +40% partner skill, and the incubator to build at every stage.

An egg timer in Palworld is not a fixed number — temperature, lab research, one partner skill and your world's difficulty all pull on the same clock, and most players only ever touch one of them. Here is every hatching speed modifier in the game, exactly what each one is worth, and the incubator setup worth running at each stage of a playthrough.
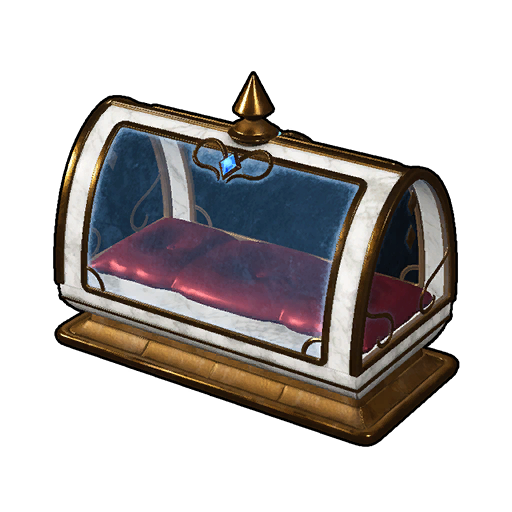 Every Hatching Speed Modifier
Five separate things touch how fast an egg cracks, and they are not equal. Temperature is the one you fix first because it is free and because a badly placed incubator can stall an egg completely — no research bonus saves an egg sitting in the wrong biome. After that the ranked bonuses are the Pal Labor Research Lab's Incubation Acceleration line at +60% and Dynamoff's partner skill at up to +40%, which together put +100% of listed hatching-speed modifiers behind every egg you own. The last two rows are about throughput rather than speed: a multi-egg incubator does not hatch any single egg faster, it just hatches eight of them on the same clock, and the difficulty setting quietly doubles or halves the base timer before any of the rest applies.
| Speed source | What it is worth | What it costs |
|---|---|---|
| Comfortable temperature | Full-speed incubation — the difference between an egg ticking and an egg frozen | A 10 Wood Campfire at technology level 2, or an incubator that self-regulates |
| Incubation Acceleration research ×8 | +60% total, applied to every incubator you own | 270,000 research workload on the Cooling line, 7,200,000 on the Kindling line |
 Dynamoff partner skill Dynamoff partner skill | +20% at skill level 1, rising to +40% at level 5 | Catching one, and condensing four more to max the skill |
| World difficulty | Casual halves the base timer, Hard and Hardcore double it | A world settings choice, adjustable on a custom world |
| Multi-egg incubators | No faster per egg — but a whole backlog finishes on one clock | 5 Ancient Technology Points at level 48, 8 at level 76 |
 Temperature Is the First Thing to Fix
Open an incubator and the panel tells you how the egg is doing — comfortable, a little too warm or cold, or badly off in either direction. That reading is the whole mechanic. A comfortable egg incubates at full speed, an egg that is slightly off runs at roughly half, and an egg that is far too hot or far too cold barely moves at all. This is why a base parked in the desert or the snowfields eats hatch times that a base in the starting grasslands never sees, and why the first Egg Incubator you build usually ends up ringed by campfires. Two fixes exist: heat or cool the area around it, or buy an incubator that handles its own climate.
| Egg reading | What happens | What to do about it |
|---|---|---|
| Comfortable | Full-speed incubation — nothing is being wasted | Leave it alone and check the other bonuses below |
| Slightly too hot or cold | Roughly half speed, so a hatch takes about twice as long | One heat or cooling source next to the incubator is usually enough to tip it over |
| Far too hot or cold | Progress crawls to nearly nothing | Move the incubator indoors, relocate the base, or jump to a self-regulating model |
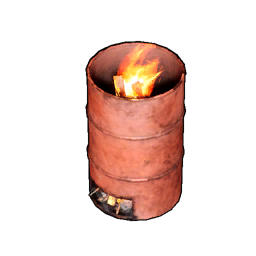 Campfires, Heaters and Coolers
The cheapest answer is the oldest one. A Campfire costs 10 Wood at technology level 2 and warms the ground around it, which is all a cold egg needs — most players are already hatching eggs long before the proper Heater shows up at level 17. The purpose-built pair are more interesting for their point cost than their materials: Heater and Cooler are ordinary technology points, 2 each, so unlike almost everything else in the hatching chain they do not compete with your Ancient point budget. The electric versions at levels 41 and 42 cost 3 points and 100 power apiece, and they are only worth wiring in if you are running a base somewhere genuinely hostile. All four still need a Pal standing on them with the right work suitability.
| Structure | Tech level | Points | Materials | Power | Worker |
|---|---|---|---|---|---|
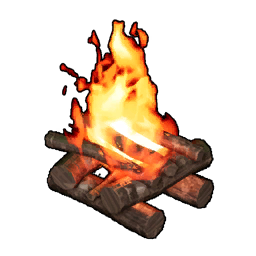 Campfire Campfire | 2 | 1 | 10 Wood | None | Kindling rank 1 |
| Heater | 17 | 2 | 20 Ingot · 10 Charcoal · 5 Flame Organ | None | Kindling rank 1 |
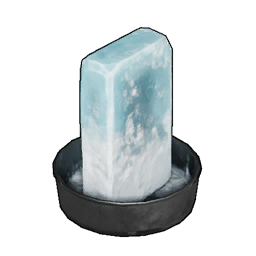 Cooler Cooler | 18 | 2 | 20 Ingot · 20 Stone · 5 Ice Organ | None | Cooling rank 1 |
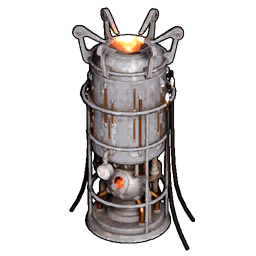 Electric Heater Electric Heater | 41 | 3 | 30 Refined Ingot · 10 Circuit Board · 5 Cryogenic Coolant · 10 Flame Organ | 100 | Kindling rank 1 |
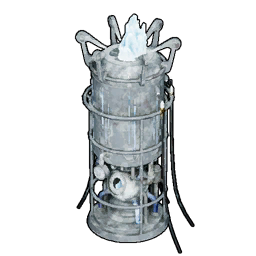 Electric Cooler Electric Cooler | 42 | 3 | 30 Refined Ingot · 10 Circuit Board · 10 Cryogenic Coolant | 100 | Cooling rank 1 |
 The Pals That Run Them
Rank 1 is all any of these structures asks for, so this is one of the few base jobs where the best Pal in the category is pointless — Renjishi at Kindling 8 lights a Campfire exactly as fast as Foxparks does. Pick on availability instead. Pengullet is the standout: Cooling rank 1 with 1,125 spawn spots, more than any other Cooling Pal in the game, and you walk past dozens of them in the first hour. On the fire side Flambelle and Kelpsea Ignis are the easy early picks, and Bushi is worth knowing about purely because it is everywhere — 1,838 spots — if you happen to want a fighter doing the job.
| Pal | Job | Rank | Spawn spots | Why this one |
|---|---|---|---|---|
 Pengullet Pengullet | Cooling | 1 | 1,125 | The most common Cooling Pal in the game, and catchable from the opening area |
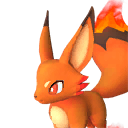
| Foxparks | Kindling | 1 | 94 | The classic starter torch — one of the first Fire Pals anyone catches |
 Flambelle Flambelle | Kindling | 1 | 232 | More spots than Foxparks and it doubles as a Flame Organ source |
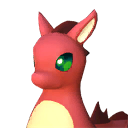 Kelpsea Ignis Kelpsea Ignis | Kindling | 1 | 786 | The most common rank 1 Kindling Pal — grab one on any coastal trip |
 Jolthog Cryst Jolthog Cryst | Cooling | 1 | 69 | A tiny second cooler if Pengullet is already busy elsewhere |
 Swee Swee | Cooling | 1 | 100 | Drops Swee Hair, which the Cooling research line needs anyway |
 Incubators That Handle Their Own Temperature
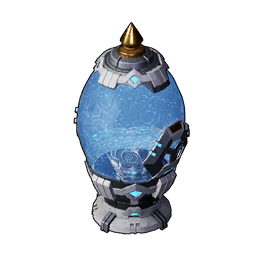
Four of the five incubators regulate themselves, which deletes the temperature problem outright. The jump worth planning for is the Electric Egg Incubator at level 36 — it is the first one that does it, and from there the campfire ring stops being part of your base layout. The Large Incubator at 48 is the sweet spot of the whole list because it is the only multi-egg incubator that draws no power at all, so it needs neither a generator nor a Pal to keep it fed. Above it, the Large-Scale Electric wants 20 Ancient Civilization Core and 800 power for capacity you probably do not need yet, and the Ancient Hatchery at 76 is a different machine entirely — it produces the eggs and incubates them in the same unit. Note the currency: every incubator in the game is bought with Ancient Technology Points, which come from bosses rather than from levelling.
| Incubator | Level | Ancient points | Materials | Power | Temperature |
|---|---|---|---|---|---|
| Egg Incubator | 10 | 1 | 10 Paldium Fragment · 5 Cloth · 30 Stone · 2 Ancient Civilization Parts | None | Your problem — one egg, and the ambient temperature decides its speed |
| Electric Egg Incubator | 36 | 5 | 50 Refined Ingot · 15 Circuit Board · 5 Ancient Civilization Parts · 2 Ancient Civilization Core | 200 | Self-regulating — still one egg at a time |
| Large Incubator | 48 | 5 | 50 Pal Metal Ingot · 20 High Quality Cloth · 20 Ancient Civilization Parts · 4 Ancient Civilization Core | None | Self-regulating, multiple eggs, no grid required |
 Large-Scale Electric Egg Incubator Large-Scale Electric Egg Incubator | 58 | 5 | 100 Hexolite · 50 Circuit Board · 30 Ancient Civilization Parts · 20 Ancient Civilization Core | 800 | Self-regulating, multiple eggs, heavy power bill |
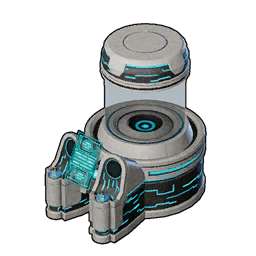 Ancient Hatchery Ancient Hatchery | 76 | 8 | 100 Paloxite Ingot · 50 AI Core · 30 Ancient Civilization Parts · 20 Ancient Civilization Core | 1,200 | Lays and hatches in one unit, at speed, with better rare-skill inheritance |
 Incubation Acceleration: +60% From the Research Lab
This is the biggest permanent gain available and the one most players never finish, because it is hidden inside two different branches of the Pal Labor Research Lab. Incubation Acceleration appears twice — four levels hanging off the Cooling branch and four identical levels off the Kindling branch — and the two stack, so clearing all eight is +60% hatching speed on every incubator you own, permanently. The catch nobody spots is how wildly unequal the two routes are for the same reward. All four Cooling levels total 270,000 research workload. All four Kindling levels total 7,200,000 — about 27 times the work for exactly the same +30%. Run the Cooling side first, every time, and treat the Kindling side as a late-game cleanup project.
| Research node | Hatching speed | Cooling-line workload | Kindling-line workload |
|---|---|---|---|
| Prerequisite (branch Lv1) | — | 5,000 | 50,000 |
| Incubation Acceleration Lv1 | +5% | 15,000 | 200,000 |
| Incubation Acceleration Lv2 | +10% | 30,000 | 500,000 |
| Incubation Acceleration Lv3 | +5% | 75,000 | 1,500,000 |
| Incubation Acceleration Lv4 | +10% | 150,000 | 5,000,000 |
| Line cleared | +30% each | 270,000 | 7,200,000 |
| Both lines cleared | +60% | 7,470,000 workload all in |
The materials follow the branch, and the Cooling side wins there too. Its four levels want 450 Ice Organ, 200 Pure Quartz, 15 Swee Hair and 20 Ingot, and its prerequisite — Cooling Storage Lv1, a 5,000-workload node — asks for only 30 more Ice Organ. The Kindling side runs on 430 Flame Organ plus a metal ladder that climbs all the way to 50 Plasteel at the top. Both lines want 35 Ancient Civilization Parts and 70 Ancient Pal Manuscript across their four levels, so bank manuscripts whenever you clear a camp. Organs are the bulk of the bill either way — the Pal organ guide lists the Pals that hand over Ice and Flame Organs at a 100% rate.
Dynamoff's Partner Skill: Up to +40%
Dynamoff is the only Pal in the game whose partner skill touches hatching speed directly. Keep it in your party and Electro-Massage Incubation adds +20% at skill level 1, climbing to +40% once the skill is maxed — and the way to max it is the Pal Condenser, feeding it duplicate Dynamoffs until it reaches rank 5. That is the single largest bonus any one Pal contributes to egg timers, and it is worth setting up before a long breeding project rather than after. Catching one is the hard part: Dynamoff has just 26 spawn spots on the whole map, and 25 of them sit in one place.
| Detail | Value |
|---|---|
| Pal | Dynamoff |
| Partner skill | Electro-Massage Incubation — Pal Egg Hatching Speed |
| Skill level 1 / 2 / 3 | +20% · +22% · +26% |
| Skill level 4 / 5 | +32% · +40% |
| Element | Electric |
| Where to catch it | 26 spawn spots — 25 of them at Waterlily Gorge |
| Alpha version | Level 67 |
| Saddle | Dynamoff Saddle at technology level 66 — it is a flying mount as well |
 The Breeding Side: Passives and Base Pals
Hatching faster only helps if eggs keep arriving, and the Breeding Farm has its own speed stack that has nothing to do with incubators. Two passive skills and one partner skill do the work here. Philanthropist is the big one — a straight +100% breeding speed on a Pal assigned to the farm, and it is an ordinary passive you can roll or inherit through breeding. Babysitter is rarer and doubles up: +30% egg production and +30% incubation speed for Pals on a Breeding Farm, but it is a mutation passive, so it only turns up through the routes in the mutated egg guide. Braloha rounds it out with a partner skill worth up to +50% breeding speed at base — and unlike Dynamoff it is genuinely easy to find, with 247 spawn spots across the southern islands.
| Source | Effect | How to get it |
|---|---|---|
| Philanthropist (passive) | +100% breeding speed when assigned to a Breeding Farm | A rank 3 passive — roll it, or inherit it through a breeding line |
| Babysitter (passive) | +30% egg production and +30% incubation speed at a Breeding Farm | Rank 4 mutation passive — see how to get mutated eggs |
| Braloha partner skill | Breed speed in base camp: +20% at skill level 1, up to +50% at level 5 | 247 spawn spots — 17% of them around the Isle of Murmurs |
 Grintale partner skill Grintale partner skill | A chance at a bonus egg — 50% at skill level 1, up to 75% at level 5 | 619 spawn spots, and an alpha at level 17 |
 Keep the Incubators Fed
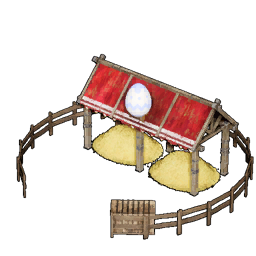
There are two taps. The Breeding Farm unlocks at level 19 for 2 Ancient points, costs 10 Wooden Board, 20 Stone and 50 Fiber, and needs a Cake in its feed box to produce anything — the pairing alone decides what you get, which is what How Breeding Works unpacks. If throughput is the goal, bake Vegetable Cake instead of the plain one: it makes the pair lay two eggs at once for the same slot. The other tap is free. Wild egg nests are scattered across every region in four grades and cost nothing but the walk, so a nest sweep on a trip you were already taking is the cheapest way to fill a Large Incubator.
| Egg nest grade | Pins on the map | Worth routing? |
|---|---|---|
| Grade 1 nests | 1,168 on Palpagos, plus 30 in the World Tree | Grab them in passing — they are everywhere |
| Grade 2 nests | 446 | The best ratio of density to contents — the ones to actually route |
| Grade 3 nests | 146 | Yes, plan a circuit around these once you can travel freely |
| Grade 4 nests | 26 | The rarest nests in the game — learn all 26 and check them every session |
What comes out of a nest is not random guesswork either — every pool has fixed odds, and the egg hatch list has all 11 egg colours with the exact chances for each of the 14 wild nest pools, including which ones can hand you an alpha.
World Settings Change the Base Timer
Before any bonus applies, your world's difficulty has already set the length of the clock. Casual runs egg incubation at half the standard duration; Normal is the baseline; Hard and Hardcore both double it. That is a bigger swing than every research level combined, and on a custom world it is a slider you own — you can drag incubation time down to near-instant and skip this entire guide, or crank it up if waiting on eggs is the part you enjoy. It is worth checking before you assume your setup is broken: a Hard world with no research and a cold incubator is a genuinely miserable place to breed.
| Difficulty | Egg incubation time | Effect |
|---|---|---|
| Casual | ×0.5 | Half the standard wait, on top of everything else you build |
| Normal | ×1.0 | The baseline every other number here assumes |
| Hard | ×2.0 | Double the wait — research and Dynamoff matter far more here |
| Hardcore | ×2.0 | Same doubled timer as Hard |
| Custom world | Your call | The incubation setting is exposed directly in world settings |
The Fastest Setup at Each Stage
The right answer changes four times over a playthrough, and the mistake most people make is skipping the middle of this table — sitting on a single level 10 incubator with a campfire well past the point where the Cooling research line would have been trivial. Levels 36 to 48 are where hatching stops being a chore, because that is where temperature stops mattering and the research is affordable. Everything after 58 is comfort rather than speed.
| Stage | Build this | And do this |
|---|---|---|
| Level 10–18 | Egg Incubator with a Campfire beside it | Site the base somewhere temperate — that alone is worth more than any bonus you can buy yet |
| Level 19–35 | Add a Breeding Farm and a Heater or Cooler | Start the Cooling research branch — its Lv1 prerequisite is only 5,000 workload |
| Level 36–47 | Electric Egg Incubator | Temperature is solved. Clear all four Cooling-line Incubation Acceleration levels for +30% |
| Level 48–57 | Large Incubator — multi-egg, zero power | Bake Vegetable Cake from level 47 so the farm lays two at a time |
| Level 58+ | Large-Scale Electric if you have the Cores spare | Catch Dynamoff at Waterlily Gorge and condense it toward +40% |
| Level 76+ | Ancient Hatchery | Lay and hatch in one machine; grind out the Kindling research line for the last +30% |
The short version for anyone who scrolled: get the egg comfortable, finish the Cooling-branch Incubation Acceleration research for +30% at a fraction of the Kindling cost, keep Dynamoff in the party for up to +40% more, and build the Large Incubator at 48 so a whole batch finishes together. Check your world difficulty before any of it — on Hard you are fighting a doubled timer from the start.
Related Guides
Start here:
- All Palworld Guides — every walkthrough, list and calculator on the site
- Palworld Breeding Calculator — the pair that makes the Pal you want, with reverse lookup
- Pal Labor Research Lab — every research node, its workload and its materials
- All Palworld Structures — build costs and power draws for every base facility The incubators:
- How to Get Large Incubator: Unlock Level and Materials — the multi-egg incubator that needs no power
- How to Get the Ancient Hatchery: Level 76 and Materials — the machine that lays and hatches
- How to Get More Technology Points and Ancient Points — where every Ancient point comes from
- Best Research to Rush at the Pal Labor Research Lab — what to clear before Incubation Acceleration Filling them up:
- How Breeding Works: Combi Ranks, Unique Combos, and Inheritance — what decides the child
- Egg Hatch List: All Egg Types and What Hatches — exact odds for all 14 wild nest pools
- How to Make Cake: All Recipes and Effects — including the one that lays two eggs
- List of All Exclusive Breeding Combos and Offspring — the pairs worth queueing What hatches out:
- List of All 104 Large Egg Pals and Where to Farm Them
- List of All 73 Huge Egg Pals and Where to Farm Them
- Ominous Egg Locations and All 42 Pals That Hatch
- How to Get Mutated Eggs and All Mutation Passives — where Babysitter comes from