Sunreach Island Location, How to Get There Early, and Loot
Sunreach Island is Palworld's endgame sky region, and nothing hard-locks it — the altar on top of the Feybreak Tower works the moment you can physically reach it. Here is the intended route, the early flight, all 6 fast travel statues with coordinates, all 8 Alphas, the 14 Pals that live nowhere else, and what is actually worth farming before level 66.
Sunreach Island is the floating endgame region Palworld 1.0 hangs above the Palpagos map, and you reach it through an altar rather than by flying up to it. This guide covers the intended route, the early shortcut that skips most of the story, all 6 fast travel statues with coordinates, the 8 Alphas and 14 exclusive Pals living up there, and the honest answer on whether an early trip actually gets you anything.
Sunreach Island at a Glance
Sunreach is small and dense. It spans roughly 1.8 km east to west and 1.3 km north to south — less than half the footprint of Feybreak, the other endgame island — but it packs 8 Alphas, a tower boss, 76 treasure chests and 574 loot caches into that space. Seven named zones sit on it, and only six of them have a statue, so two of them (Dragonmark Peak and Azure Woodland) have to be walked or flown into every time. On the Palworld interactive map the region's layers are labelled Sunreach Isle, which is what you should search for when toggling loot layers.
| Detail | Value |
|---|---|
| What it is | A raised endgame region reached by altar, not by flight |
| Size | About 1.8 km east to west, 1.3 km north to south |
| Named zones | 7 — The Azure Tapestry, Waterlily Gorge, Dragonmark Peak, Farcry Marsh, Azure Woodland, Crystalline Archipelago, Enchanted Firmament |
| How you get in | The altar on top of the Feybreak Tower |
| Hard unlock | None — you do not have to beat Bjorn to use the altar |
| Fast travel statues | 6 |
| Field level band | Level 63 to 69 |
| Alpha Pals | 8, level 65 to 70 |
| Tower boss |  Auri & Shaolong, Level 68, Dragon / Water Auri & Shaolong, Level 68, Dragon / Water |
| Dungeon | 1 — Sunreach Skies, level 65 to 69 |
| Pals found nowhere else | 14 species |
| Signature material | 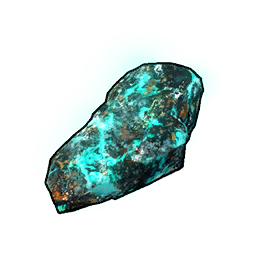 Soralite — 208 of the game's 226 nodes Soralite — 208 of the game's 226 nodes |
How to Get to Sunreach Island
There is no portal item, no key and no quest flag you have to trip. The way in is a single altar sitting on top of the Feybreak Tower, and interacting with it warps you up. That means the real question is not "how do I unlock Sunreach" but "how do I get my body to the roof of the Feybreak Tower" — and there are two very different answers to that, one that follows the story and one that ignores it.
 The Intended Route: Clear the Towers, Then Take the Altar
Played straight, Sunreach is the last stop before the World Tree. The main line runs you through Sakurajima and then out to Feybreak, and by the time the story hands you the Feybreak Tower you are already sitting around level 60 with gear to match. The two fights that gate the run are Saya and Selyne at the Moonflower Tower and Bjorn and Bastigor at the Feybreak Tower, and Bastigor is the meanest health sponge in the tower ladder at ×62 — more padding than any boss before it. Full levels and multipliers for the whole ladder are in the list of all bosses.
| Step | Fight or place | Level | Where |
|---|---|---|---|
| 1 |  Saya & Selyne Saya & Selyne | 55 | Moonflower Tower, middle of Sakurajima |
| 2 | Cross to Feybreak | — | 724 m of open water from Mount Obsidian's southwest shore |
| 3 | Bjorn & Bastigor | 60 | Feybreak Tower — -1287, -1667 |
| 4 | The Sunreach altar | — | Top of the Feybreak Tower |
| 5 | Auri & Shaolong | 68 | Azure Covenant Tower — -422, -1428 |
Step 3 is the one you can skip. Beating Bastigor is not a condition on the altar — you only need to be standing on the tower, which means the fight below it is optional scenery if all you want is the trip up. That single detail is what makes an early run possible at all.
 The Early Route: Fly Straight to the Feybreak Tower
Feybreak has no unlock of its own — it is just far southwest, across 724 m of water from Mount Obsidian, and the shortest landfall is the Scorched Ashland statue at -811, -829. From there the Feybreak Tower entrance at -1287, -1667 is another 4.4 km diagonally across the island, over ground that spawns level 60-plus Alphas the whole way. So the actual gate on an early Sunreach trip is a flying mount with a saddle, and the earliest one in the game unlocks embarrassingly cheap: Nitewing's saddle sits at technology level 15.
The table below sorts flyers by saddle level and gives the flat-out flight time for that 4.4 km Feybreak leg. Treat the times as best-case — every one of these runs out of stamina long before the far side, so you will be gliding and re-sprinting, and the slow birds realistically take twice as long as listed.
| Mount | Saddle level | Sprint speed | Stamina | 4.4 km Feybreak leg |
|---|---|---|---|---|
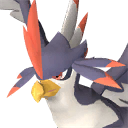 Nitewing Nitewing | 15 | 750 | 100 | ~9 min 50 s |
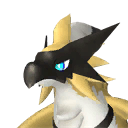 Beakon Beakon | 29 | 1,200 | 160 | ~6 min 10 s |
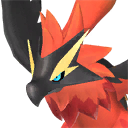 Ragnahawk Ragnahawk | 33 | 1,300 | 150 | ~5 min 40 s |
 Astegon Astegon | 39 | 1,100 | 300 | ~6 min 45 s |
 Frostallion Frostallion | 62 | 1,800 | 300 | ~4 min 5 s |
 Eidrolon Eidrolon | 68 | 2,750 | 130 | ~2 min 40 s |
| Jetragon | 79 | 3,300 | 110 | ~2 min 15 s |
Speed matters less than survivability here, which is why Astegon's 300 stamina beats Ragnahawk's extra 200 sprint on this specific run — fewer forced landings in Alpha territory. Whatever you ride, light up every fast travel statue you pass on the way. Dying on Feybreak with no statue nearby sends you back across the ocean, and the trip is only painful once if you bank the checkpoints.
Minimum Requirements Before You Try It Early
None of these are hard locks the game enforces — they are the difference between arriving and repeatedly respawning. The flying mount and its saddle are the only genuinely non-negotiable entries; everything else just cuts the number of deaths. Cold and heat gear matters more than people expect, because the Feybreak crossing runs you through ash flats and the sky region sits in an open storm.
| Requirement | What you need | Why it matters |
|---|---|---|
| Flying mount | Any flyer plus its saddle — Nitewing at technology level 15 is the floor | The only way across the 724 m water gap and the 4.4 km Feybreak leg |
| Player level | Comfortably 45+; below 40 you get one-shot by the field | Sunreach's field band is level 63 to 69 |
| Glider | Any upgraded glider | Stamina runs out mid-crossing and you will finish legs in a glide |
| Weather gear | Heat- and cold-resistant armor | The Feybreak route and the sky region both apply environmental damage |
| Spheres | Bring your best tier — see how to catch Pals and every Sphere tier | Everything you meet is 20 to 30 levels above an early player, and the level gap tanks capture rate |
| A revive plan | Statues activated behind you | There is no shortcut back if you die before banking a checkpoint |
All 6 Fast Travel Statues on Sunreach Island
Six statues cover the whole region, and getting them all lit should be the first thing you do on any trip, early or not. The Azure Tapestry at -478, -1384 is the one that matters most because it drops you next to the Azure Covenant Tower entrance, and Farcry Marsh at -325, -1413 is the best all-round hub — four of the eight Alphas sit within a short flight of it. Crystalline Archipelago is the statue to use for loot runs, since the single dungeon entrance and the island's only Kinship Fruit are both a short hop north of it.
| Fast travel statue | Coordinates | What it puts you next to |
|---|---|---|
| The Azure Tapestry | -478, -1384 | The Azure Covenant Tower and the boss fight |
| Azure Covenant Tower Entrance | -432, -1426 | The tower door itself |
| Farcry Marsh | -325, -1413 |  Snock, Snock,  Slowatt and the marsh Alphas Slowatt and the marsh Alphas |
| Waterlily Gorge | -531, -1500 | 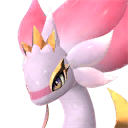 Ophydia and the western Soralite belt Ophydia and the western Soralite belt |
| Crystalline Archipelago | -386, -1539 | The Sunreach Skies dungeon entrance and the Kinship Fruit |
| Enchanted Firmament | -213, -1515 |  Flaracle and the eastern chest cluster Flaracle and the eastern chest cluster |
All six are pinned on the interactive map with the fast travel layer switched on — drag northwest of Feybreak and the cluster is unmistakable, six markers floating clear of the coastline.
All 8 Alpha Pals on Sunreach Island
Eight of the game's 90 Alphas live up here, and they are the densest high-level cluster on the board — every one between level 65 and 70, packed into a region a quarter the size of Feybreak. Jetragon at level 70 is the headline: the fastest mount in the game, standing at -553, -1334, and the single best reason to make the trip at all even if you cannot fight it yet. Eidrolon at 69 is the practical prize, because its own saddle unlocks at technology level 68 and it is the fastest flyer you can realistically field before Jetragon.
| Alpha | Elements | Level | Coordinates | Why you want it |
|---|---|---|---|---|
| Jetragon | Dragon | 70 | -553, -1334 | Fastest mount in the game at 3,300 sprint |
| Eidrolon | Dragon, Dark | 69 | -488, -1523 | 2,750 sprint with 130 stamina — the best flyer before Jetragon |
| Ophydia | Grass, Water | 69 | -589, -1481 | Top-tier Planting worker with a Water second element |
| Flaracle | Fire | 68 | -243, -1522 | Endgame Kindling body for a furnace base |
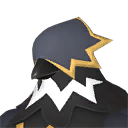 Dynamoff Dynamoff | Electric | 67 | -307, -1525 | Generating Electricity plus an egg-incubation partner skill |
| Slowatt | Electric | 66 | -367, -1359 | Generating Electricity for a late-game power grid |
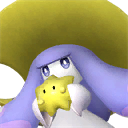 Wistella Wistella | Dark | 66 | -231, -1417 | Handiwork specialist for an endgame crafting base |
| Snock | Electric | 65 | -368, -1416 | Third Electric option and the easiest of the eight |
Three of the eight are Electric, which is unusually lopsided and genuinely useful — if your base is still running on a Grizzbolt from the opening hours, one Sunreach trip fixes your entire power problem. Every Alpha here also drops Ancient Civilization Parts, and all 90 across the map are catalogued on the Alpha Pal location list.
Auri and Shaolong: The Azure Covenant Tower Boss
The Azure Covenant leads Sunreach, and its tower sits under a permanent storm that keeps the door shut. Before the fight opens you have to knock out six Defense Modules scattered across the region — that is the actual content of Sunreach Island, and it is why the place is a multi-hour zone rather than a single boss room. Once the storm drops, Auri and Shaolong is a level 68 Dragon and Water fight carrying a ×50 health multiplier on a five-minute timer.
| Detail | Value |
|---|---|
| Boss | Auri & Shaolong |
| Level | 68 |
| Elements | Dragon / Water |
| Weak to | Ice, Electric |
| First-fight HP multiplier | ×50 |
| Gate | Six Defense Modules destroyed across the region |
| Location | The Azure Tapestry — -422, -1428 |
| Reward for catching Shaolong | 2,800 sprint flyer, saddle at technology level 77 |
The Ice and Electric double weakness is the softest matchup on the back half of the tower ladder — Frostallion and any of the three Electric Alphas you just caught on this very island all hit it hard. That ×50 is also lower than Bastigor's ×62 one tower earlier, so if you cleared Feybreak's tower you are already over the hump. There is a rematch tier too, covered in the Hard Mode Auri and Shaolong guide, and the unlock conditions for the whole rematch ladder are in how to unlock Hard Mode towers.
What's Worth Farming on an Early Trip
This is where the early-access dream usually falls apart, so here is the blunt version: the loot splits cleanly into things you can use at any level and things the technology tree refuses to hand you until level 66 or higher. The permanent player upgrades are the real prize — 46 Pal Effigies and 6 Stat Lotuses are pure profit at any level, and 46 effigies in one small region is a bigger haul than most whole biomes offer. The materials are the trap.
| What's up there | Count | Usable early? |
|---|---|---|
| Soralite nodes | 208 of the game's 226 | No — refining is gated at technology level 66 |
| Pal Effigies | 46 | Yes — permanent capture power, no level gate |
| Stat Lotuses | 6 | Yes — permanent player stat boosts |
| Skill Fruit trees | 4 | Yes — usable on any Pal you own |
| Kinship Fruit | 1 | Yes |
| Treasure chests | 76 | Yes — schematics and gear rolls |
| Loot caches | 574 | Yes — the densest cache field outside Feybreak |
| Elemental-Sealed Chests | 8 | Only with the matching element damage |
| Hack Terminals | 7 | Yes |
| Grade 1 Pal Egg Nests | 39 | Yes |
| Auri's Diary journals | 6 | Yes — the region's full backstory |
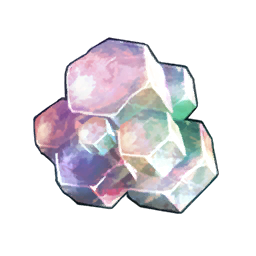 Hexolite Quartz nodes Hexolite Quartz nodes | 20 | Depends on your tech level |
Chests and caches are worth the trip on their own — 574 caches is second only to Feybreak's 3,588 and well ahead of the Grasslands' 2,362, which is a startling density for a region this size. Flip on the effigy layer and the Sunreach Isle chest layer before you go and you can route the whole sweep in advance.
Soralite and Everything It Unlocks
Soralite is the reason people want to come here early, and it is the one thing an early trip cannot cash in. The ore itself has no level requirement, but it is inert until you turn it into Soralite Ingot — 2 Soralite plus 2 Pure Quartz at an Ancient Furnace, which the technology tree does not open until level 66. Every single thing below is built from that ingot, and the cheapest entry on the list still wants level 66. Stockpiling ore at level 40 is legitimate; expecting to craft with it is not.
| Craft | Tech level | Soralite Ingot cost | Other key materials |
|---|---|---|---|
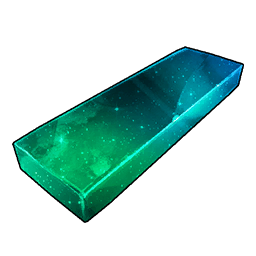 Soralite Ingot Soralite Ingot | 66 | — | 2 Soralite, 2 Pure Quartz |
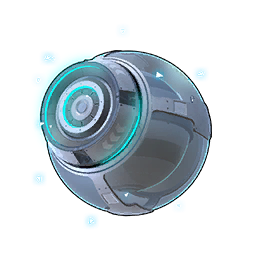 AI Core AI Core | 67 | 10 | 5 Computer, 2 Thermal Core, 1 Ancient Civilization Core |
 Sol Sphere Sol Sphere | 67 | 2 | 30 Paldium Fragment, 10 Hardwood |
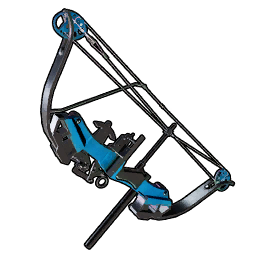 Mechanical Bow Mechanical Bow | 67 | 40 | 20 Carbon Fiber, 200 Paldium Fragment, 3 AI Core |
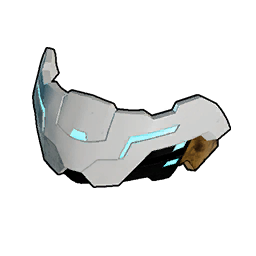 Ancient Helm Ancient Helm | 68 | 20 | 2 AI Core |
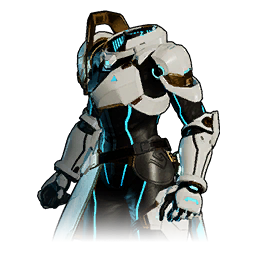 Ancient Armor Ancient Armor | 68 | 30 | 3 AI Core |
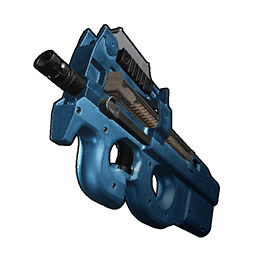 Combat SMG Combat SMG | 68 | 50 | 30 Carbon Fiber, 20 Cryogenic Coolant, 4 AI Core |
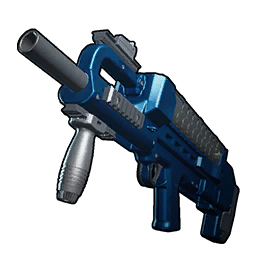 Prototype Shotgun Prototype Shotgun | 69 | 60 | 40 Carbon Fiber, 5 Thermal Core, 5 AI Core |
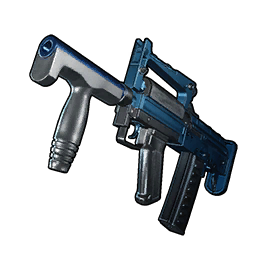 Heavy Assault Rifle Heavy Assault Rifle | 70 | 100 | 50 Carbon Fiber, 30 Bio Battery, 5 AI Core |
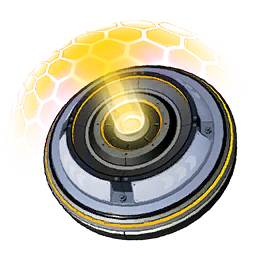 Ancient Shield Ancient Shield | 71 | 30 | 50 Ancient Civilization Parts, 5 AI Core, 30 Ancient Civilization Core |
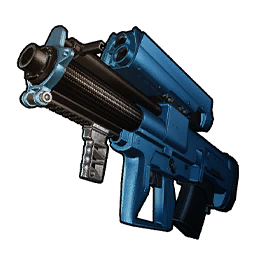 Tactical Grenade Launcher Tactical Grenade Launcher | 72 | 80 | 15 Corrosive Solvent, 5 Thermal Core, 5 AI Core |
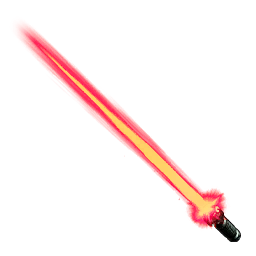 Laser Sword Laser Sword | 73 | 50 | 250 Paldium Fragment, 30 Bio Battery, 3 AI Core |
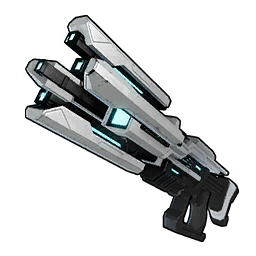 Beam Scatter Beam Scatter | 75 | 50 | 50 Paloxite Ingot, 5 AI Core, 5 Ancient Civilization Core |
The Heavy Assault Rifle is the most expensive item on that list at 100 ingots, which is 200 raw Soralite and 200 Pure Quartz for one gun. Pure Quartz is the quiet bottleneck there — only 7 of its 607 nodes are on Sunreach, so you refine with quartz hauled up from the mainland. Where each of these sits against the rest of the arsenal is laid out in the best weapons at every tech level and the best armor at every tech level.
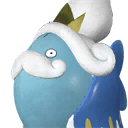 The 14 Pals That Spawn Only on Sunreach Island
Fourteen species have every one of their field spawns inside the sky region, which makes Sunreach a mandatory stop for anyone finishing the Paldeck. Almost all of them sit in the level 63 to 69 band, so an early visitor will struggle to hold them — the level gap wrecks capture rate even with a good Sphere. The standouts are Solmora, which anchors Waterlily Gorge and appears nowhere else on the map, and Hoodle, a Dark Handiwork body that is genuinely good in a late base.
| Pal | Elements | Level | Best work | Where it lives |
|---|---|---|---|---|
| Solmora | Water | 66 – 67 | Watering | Waterlily Gorge |
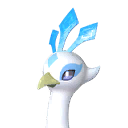 Frostplume Frostplume | Ice | 39 – 68 | Cooling | Crystalline Archipelago, The Azure Tapestry |
 Bakemi Bakemi | Dark | 65 – 69 | Medicine Production | Farcry Marsh, Enchanted Firmament |
 Hoodle Hoodle | Dark | 65 – 69 | Handiwork | Farcry Marsh, Enchanted Firmament |
 Souffline Souffline | Grass | 63 – 69 | Planting | Enchanted Firmament |
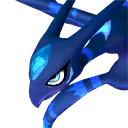 Suzaku Aqua Suzaku Aqua | Water | 42 – 80 | Watering | The Azure Tapestry |
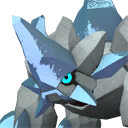 Pierdon Cryst Pierdon Cryst | Ice | 68 – 69 | Cooling | The Azure Tapestry |
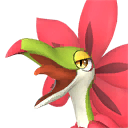 Tropicaw Tropicaw | Grass | 63 – 69 | Planting | The Azure Tapestry |
| Slowatt | Electric | 65 – 66 | Generating Electricity | Farcry Marsh |
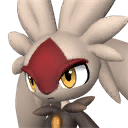 Lapiron Lapiron | Ground | 63 – 69 | Gathering | Farcry Marsh |
| Snock | Electric | 63 – 69 | Generating Electricity | Farcry Marsh |
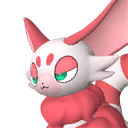 Valentail Valentail | Neutral | 63 – 69 | Gathering | Farcry Marsh |
 Lapure Lapure | Neutral | 65 – 69 | Handiwork | Crystalline Archipelago |
| Dynamoff | Electric | 63 – 69 | Generating Electricity | Waterlily Gorge |
Farcry Marsh alone hosts five of the fourteen, so if you only have time for one statue, make it that one. You can pull up any of these on the map's Pal spawn view to see the exact day and night clusters before you commit to a route.
Sunreach Skies: The Island's Only Dungeon
One dungeon entrance sits on the whole region, just north of the Crystalline Archipelago statue at -364, -1557. Sunreach Skies runs at level 65 to 69 and has the smallest boss pool in the game at just 7 Pals, all of them sky natives — which makes it the single best place to farm a specific one like Valentail or Tropicaw, because the odds of the roll landing on your target are better than in any other cavern. Its chests are also where Sol Spheres and Ancient Spheres start showing up. The full roster and loot table are in the Sunreach Skies dungeon guide.
So Should You Go Early?
Yes, but for the right reasons. Nothing hard-locks Sunreach Island — the altar on top of the Feybreak Tower works whether or not you have beaten Bjorn, and a technology level 15 Nitewing saddle is technically enough to make the 724 m water crossing and the 4.4 km run to the tower. What you cannot skip is the technology tree: every craft Soralite feeds starts at level 66, so an early ore haul is a deposit, not a payday. Go early for the 46 effigies, 6 lotuses, 4 skill fruit trees, 76 chests and 6 fast travel statues, bank the checkpoints, and come back at 66 with the whole region already unlocked and mapped.
Related Guides
Hubs and databases:
Getting there and clearing it: