How to Beat the Attack Chopper: Weapons, Team, and Drops
Where the Attack Chopper spawns, what triggers it, the launchers and Pals that actually reach a hovering target, and the full loot table of the crate it is guarding.

The Attack Chopper is the gunship the Rayne Syndicate scrambles when you crack the goal crate on their biggest oil rig, and it fights under the title Syndicate Secret Weapon. This guide covers exactly where it spawns, the level the game expects you to be, the weapons and Pals that can actually hit a target that hovers out of reach, and the full loot table of the crate it is protecting.
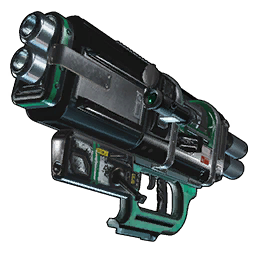 Attack Chopper at a Glance
The single most useful thing to know before you start shooting: the Attack Chopper has no element at all. Most Palworld bosses hand you a counter-type to lean on — this one doesn't, so there is no clever elemental pick that trivialises it. What decides the fight is raw damage per shot, projectile speed against a moving target, and whether you can stay alive on an open deck while a level 55-58 Syndicate garrison shoots at your back. It also isn't a Pal, so no sphere you throw will do anything.
| Detail | What You're Fighting |
|---|---|
| Boss title | Syndicate Secret Weapon |
| Where | Rayne Syndicate Platform Oil Rig |
| Recommended level | 60 |
| Element | None — no elemental weakness to exploit |
| Health bar | Full boss gauge across the top of the screen |
| Trigger | Interacting with the rig's goal crate and starting the hack |
| Capturable | No — it is a machine, not a Pal |
| Second version | A field build exists with a 300% health multiplier and double the damage output |
| Garrison around it | Level 55-58, 142 fixed spawn points plus 6 endless spawners |
| Rig defences | 9 anti-air machine guns, 5 laser towers |
| Reward | The goal crate: 150-300  Crude Oil guaranteed, plus tier-2 and tier-3 endgame schematics Crude Oil guaranteed, plus tier-2 and tier-3 endgame schematics |
That "second version" line matters if you have fought this thing twice and it felt wildly different. The game runs two builds of the Attack Chopper. The titled one that guards the crate deals half damage on its shots. The other build carries three times the health multiplier and hits at full strength — same silhouette, roughly six times the fight.
Where the Attack Chopper Spawns
Palworld has three Rayne Syndicate rigs and the chopper only turns up at the biggest one, the Rayne Syndicate Platform Oil Rig. It sits in open water almost due west of the Feybreak Shipwreck fast travel point, which is the closest warp to it — Exile's Cape and Oilfield Overlook are the next nearest and both are further out. There is no fast travel on the rig itself, so you fly the last stretch, and the nine anti-air machine guns start tracking on approach. Pin the crate layer on the Palworld Interactive Map before you leave: 27 of the game's 56 oil rig crates are on this one platform, and it is easy to leave a third of them behind.
| Rig | Level | Crates | Garrison | Attack Chopper? |
|---|---|---|---|---|
| Rayne Syndicate Platform Oil Rig | 60 | 27 (22 standard, 5 goal crates) | Level 55-58 | Yes |
| Rayne Syndicate Oil Rig | 55 | 16 (12 standard, 4 goal crates) | Level 55 | No |
| Rayne Syndicate Test Drilling Rig | 30 | 13 (11 standard, 2 goal crates) | Level 15-20 | No |
The level column is the game's own recommendation for each site, not a guess, and the gap between the small rig and this one is the whole story: 30 versus 60. If you have only ever done the Rayne Syndicate Test Drilling Rig and expect more of the same, the Platform rig will end you in under a minute. Its 22 standard crates are worth the trip on their own — 73% of them roll 10,000 Gold Coins, 54% roll 15-20 Coralum Ore, and 31% roll a Giant Pal Soul — but the chopper only shows up for the five goal crates.
Minimum Requirements Before You Go
This is the gate check. You do not need every line below, but missing two or more of them means you are going to burn a full ammo stack and still lose the crate. Level 60 is the number the game itself puts on this rig, and the practical floor is whichever launcher you can craft — the Guided Missile Launcher at tech 56 is the earliest one that is genuinely viable here.
| Requirement | Target | Why It Matters |
|---|---|---|
| Character level | 60 | The rig's own recommended level; the garrison is 55-58 |
| A launcher | Tech 56 or higher | Rifles and shotguns lose too much to distance against a hovering target |
| Ammo stack | 60+ rockets or missiles | The boss gauge is long and every miss is a wasted craft |
| Armour | Plasteel tier or better | You are taking chip damage from the garrison the entire fight |
| Flying mount | Saddle unlocked | There is no warp on the rig — you fly in and you fly out |
| Healing |  High Grade Medical Supplies High Grade Medical Supplies | The goal crate pool rolls these, but bring your own for the first clear |
 Homeward Thundercloud Homeward Thundercloud | 1-2 | Getting out with 300 Crude Oil in your bag is its own problem |
Best Weapons to Beat the Attack Chopper
Launchers are the answer, and the pick inside that class comes down to a trade between damage per shot and how easy the shot is to land on something that keeps moving. The Plasma Cannon is the best all-round choice at this stage: it matches the Rocket Launcher on raw attack, its projectile travels fast enough that you barely have to lead the target, and it holds two rounds instead of one. The Guided Missile Launcher trades roughly 40% of that damage for missiles that track on their own — if you are missing shots, that trade is worth taking every time. The Beam Launcher out-damages everything here but sits at tech 80, so it is a weapon you bring back to the rig later, not one you unlock for this fight.
| Weapon | Attack | Tech | Mag | Ammo | Why Bring It |
|---|---|---|---|---|---|
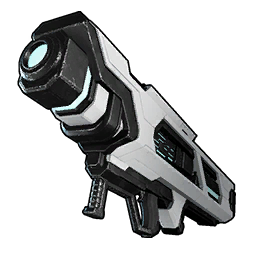 Beam Launcher Beam Launcher | 14,000 | 80 | — |  Beam Launcher Ammo Beam Launcher Ammo | Hardest-hitting launcher in the game, but tech 80 is well past this fight |
| Plasma Cannon | 10,000 | 61 | 2 |  Plasma Cartridge Plasma Cartridge | The pick: top-tier damage, fast projectile, and two shots before a reload |
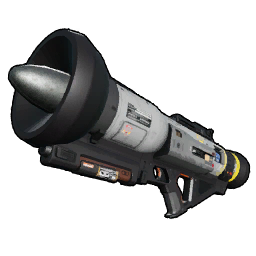 Rocket Launcher Rocket Launcher | 10,000 | 65 | 1 |  Rocket Ammo Rocket Ammo | Same damage, slower rocket — you have to aim ahead of the chopper |
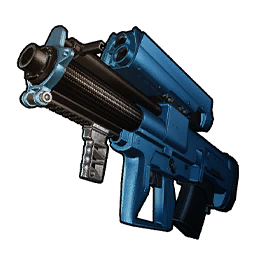 Tactical Grenade Launcher Tactical Grenade Launcher | 6,722 | 72 | 8 | 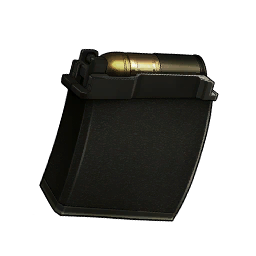 Tactical Grenade Launcher Ammo Tactical Grenade Launcher Ammo | Eight rounds loaded means you can spam through a dodge pattern |
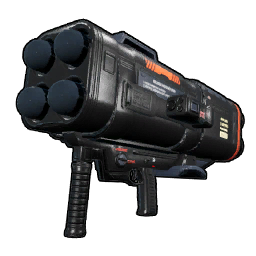 Multi Guided Missile Launcher Multi Guided Missile Launcher | 5,900 | Schematic only | 4 | 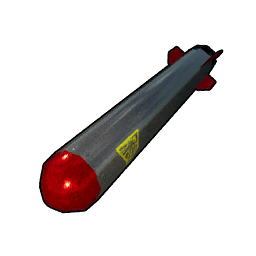 Missile Ammo Missile Ammo | Tracking missiles and a 4-round magazine — the most forgiving option |
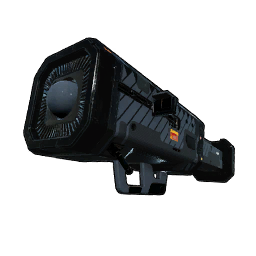 Guided Missile Launcher Guided Missile Launcher | 5,900 | 56 | 1 | Missile Ammo | Earliest launcher that works here; missiles chase the target for you |
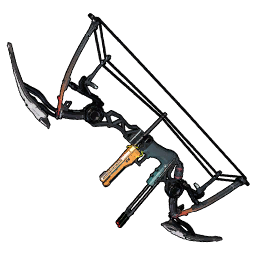 Advanced Bow Advanced Bow | 5,800 | 57 | 1 | 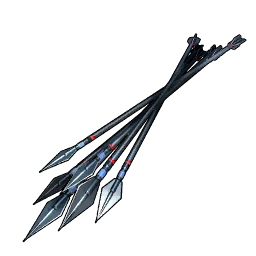 Advanced Arrow Advanced Arrow | Cheapest ammo of the bunch — arrows cost Plastic and Carbon Fiber, not Thermal Cores |
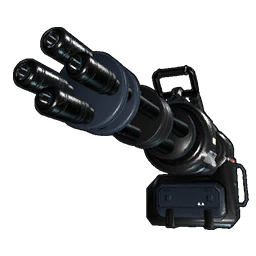 Laser Gatling Gun Laser Gatling Gun | 530 per shot | 59 | 100 | 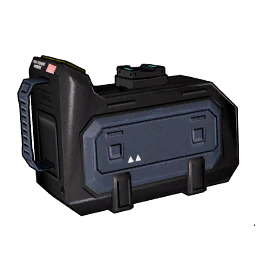 Laser Gatling Cartridge Laser Gatling Cartridge | Sustained fire for the garrison; do not read its number against a launcher's |
That last row needs a caveat: 530 is damage per individual bullet out of a 100-round magazine, while a launcher's number is one rocket. Those figures are not comparable — only compare a gatling to another gatling and a launcher to another launcher. Ammo economy is the other thing worth planning. A Plasma Cartridge costs a Thermal Core and 2 Hexolite each, and Missile Ammo wants a Circuit Board per round, so 60 shots is a real crafting session. The good news is that the crate you are fighting for restocks you: it rolls 40-100 Plasma Cartridges, 20-100 Missile Ammo and 20-100 Rocket Ammo at 20% each.
 Best Pals for the Attack Chopper Fight
With no element to counter, pick your partner on two things instead: how hard its ranged attack hits, and whether that attack reaches. The chopper hovers and drifts, so a Pal whose best move is a 1,000-range melee swing will spend the whole fight flailing at nothing. Jetragon is the complete answer — 140 shot attack, a 700-power Beam Comet that reaches 5,000 units, and the fastest flying mount in the game underneath you for the trip out. Necromus has the highest shot attack of any practical pick at 145, and its Rock Lance cycles on a 20-second cooldown instead of the usual 30, so it lands more casts over a long boss bar. If you are not at tech 79 yet, Shadowbeak is the honest early answer: a saddle at tech 47 and a 600-power Dark attack that still reaches 2,500.
| Pal | Shot Attack | Best Long-Range Move | Power / Range / Cooldown | Mount | Why It Works Here |
|---|---|---|---|---|---|
| Jetragon | 140 | Beam Comet | 700 / 5,000 / 30s | Flying, saddle 79 | Best damage-and-reach combination, and the fastest ride to the rig |
 Necromus Necromus | 145 | Rock Lance | 400 / 5,000 / 20s | Ground, saddle 61 | Highest shot attack available and the shortest cooldown on this list |
 Frostallion Noct Frostallion Noct | 140 | Double Blizzard Spike | 700 / 5,000 / 30s | Flying, saddle 62 | Jetragon-tier damage seventeen tech levels earlier |
 Neptilius Neptilius | 145 | Thalassonic Laser | 700 / 5,000 / 30s | Water, saddle 64 | Ties for top shot attack — just don't count on it to get you there |
 Shaolong Shaolong | 135 | Meteorain | 700 / 5,000 / 30s | Flying, saddle 77 | Second-fastest flyer in the game, so the approach costs you less health |
 Orserk Orserk | 130 | Meteorain | 700 / 5,000 / 30s | No | Pure damage partner if you already have your mount slot solved |
 Eidrolon Eidrolon | 125 | Meteorain | 700 / 5,000 / 30s | Flying, saddle 68 | Fast flyer with full-range damage, unlocked well before Jetragon |
 Shadowbeak Shadowbeak | 120 | Divine Disaster II | 600 / 2,500 / 30s | Flying, saddle 47 | The earliest saddle here by a mile — the realistic pick on a first clear |
Those shot attack numbers only mean something against each other, and the spread from 120 to 145 is smaller than it looks once move power enters the maths — a 700-power move on a 125-attack Pal beats a 400-power move on a 145-attack one. Read the power and range columns first, the stat column second. The full breakdown for any of them is on their Pal page, and the ride speeds are ranked on the Palworld Mount Speeds list.
How to Beat the Attack Chopper
The fight is a set piece: you start the hack on the goal crate, the chopper arrives, and you have to survive until the hack finishes while a rig full of Syndicate troops is already aware of you. Everything below is about controlling that second problem before you create the first one.
Clear the Deck Before You Touch the Crate
There are 142 fixed enemy spawn points on this rig plus 6 endless spawners that keep feeding troops in. You cannot clear all of it, but you can clear the section around the goal crate you are opening, and you should — fighting an airborne boss while three level-58 Syndicate Elites fire rocket launchers into your back is how most attempts end. Take the towers first if you can: 9 anti-air machine guns and 5 laser towers cover this deck, more than any other rig in the game.
Use the Container Wall as Cover
The chopper attacks from long range and in a straight line, which means solid geometry beats dodging. The storage containers stacked near the goal crates block its fire completely. Work the fight as a rhythm: step out, fire one rocket, step back behind steel while its volley passes, repeat. You lose a little damage uptime and you keep almost all of your health bar, which is the trade you want when the hack has a timer and you don't.
Lead Your Shots — or Stop Aiming Entirely
The Rocket Launcher fires a slow projectile, so against a drifting target you aim where the chopper is going, not where it is. If that never quite clicks, swap to the Guided Missile Launcher or the Multi Guided Missile Launcher and let the missiles do the tracking. Four guided missiles that all connect beat two rockets where one sails past, even though the rocket hits for nearly double on paper.
Leave the Explosive Barrels Alone
This rig is littered with 31 explosive barrels and 28 gas tanks. They are genuinely useful for thinning the garrison — one shot into a cluster clears a walkway — but they detonate whatever sets them off, including a stray rocket of yours during the chopper fight. Pop them deliberately while clearing, then keep your fire away from them once the boss gauge is up.
 Attack Chopper Rewards and Goal Crate Drops
The chopper itself drops nothing — the payout is the crate it was defending, and it is the richest single container in Palworld. Every goal crate on the Platform rig hands over 150-300 Crude Oil with no roll involved, which is more oil than the entire small rig produces in a full clear. On top of that, 44% of crates roll 1-5 Ancient Civilization Cores, the material gating your best endgame crafts. The schematic slots are the real prize though: this is one of the few places that rolls tier-2 and tier-3 versions of the top-end weapons, including upgrades for the Plasma Cannon you probably just used to win the fight.
| Reward | Chance per Goal Crate | Amount | Why It Matters |
|---|---|---|---|
| Crude Oil | 100% | 150-300 | Guaranteed, and up to 15x what a small-rig crate pays |
| Ancient Civilization Core | 44% | 1-5 | The endgame bottleneck material — 10 of these go into one Beam Launcher |
 Training Manual (L) Training Manual (L) | 30% | 5-7 | Bulk Pal experience without grinding dungeons |
 Training Manual (XL) Training Manual (XL) | 20% | 5-7 | The top experience tier, five to seven at a time |
| Plasma Cartridge | 20% | 40-100 | Restocks the exact ammo you spent on the chopper |
| Missile Ammo | 20% | 20-100 | Feeds both guided launchers |
| Rocket Ammo | 20% | 20-100 | Rocket Launcher refill |
| Laser Gatling Cartridge | 20% | 100-200 | Two full magazines minimum for garrison clearing |
| Advanced Arrow | 20% | 100-200 | Cheap-to-craft ammo handed to you in bulk |
 Plasma Cannon Schematic 2 Plasma Cannon Schematic 2 | 14.8% | 1 | Direct upgrade to the best launcher you can craft at this level |
| Multi Guided Missile Launcher Schematic 2 | 14.8% | 1 | The tracking launcher has no tech unlock — schematics are the only route |
| Laser Gatling Gun Schematic 2 | 14.8% | 1 | Sustained-fire upgrade for clearing the rest of the rig |
| Advanced Bow Schematic 2 | 14.8% | 1 | Cheapest endgame damage per crafted round |
| Tier-3 versions of those four schematics | 9% each | 1 | One tier above, from the same slot |
 Life Lotus (L) and the four other large lotuses Life Lotus (L) and the four other large lotuses | 10% each | 1-3 | Permanent stat raises, three at a time |
Two things to plan around. First, that 150-300 Crude Oil is heavy — clear your inventory before you start the hack or you will be choosing which schematics to leave on the deck. Second, the accessory schematic slot on this crate is enormous: it can roll any of roughly forty different accessory blueprints at around 1% each, including every element baton and talisman. You will not target-farm a specific one, so treat those as bonus and come here for the oil, the cores and the weapon schematics.
Summary
Short version for anyone who scrolled: fly to the Rayne Syndicate Platform Oil Rig west of the Feybreak Shipwreck warp at around level 60, clear the deck around a goal crate before you start the hack, and fight the chopper with a Plasma Cannon or a guided launcher while stepping in and out of container cover. It has no element, so nothing counters it — reach and connected shots do. The crate behind it pays 150-300 Crude Oil guaranteed and rolls the best weapon schematics in the game, and there are five of those crates on the platform.
Related Guides
Start from the hubs: All Palworld Guides and the Palworld Interactive Map. Then — Rayne Syndicate Test Drilling Rig: Location and Loot for the beginner rig with no chopper on it, Feybreak Location, How to Get There, and What's On It because the Platform rig sits in Feybreak's waters, Best Guns Tier List: All Guns Ranked to see where these launchers actually sit, Best Weapons at Every Tech Level: Full Upgrade Path if you are still short of tech 56, All Legendary Weapon Schematic Locations in Palworld and Multi Guided Missile Launcher Schematic Location and Stats for the schematics this crate rolls, List of All Bosses in Palworld 1.0: Levels and Locations for everything else worth killing at this level, and Best Team Comps: Boss Killer, Explorer, and Farming Teams to build the squad you bring.