How to Beat Panthalus and Enter the World Tree
Panthalus is the Water boss that gates The World Tree, and it is the only boss fight in the game that takes 20% extra damage while attacking at full speed. Here are all four Echobone locations with their nearest fast travel points, the Echoing Flute recipe, the full attack list with power and cooldowns, the Electric team that wins, every drop, and what the World Tree region actually holds.

Beating Panthalus is the only way into The World Tree, and the whole quest runs on four Echobones scattered across giant skeletons on the Palpagos map. This guide covers every Echobone location with the fast travel point nearest to it, the Echoing Flute recipe, Panthalus' full attack list with power and cooldowns, the battle multipliers that make this fight unlike any other boss, the Electric squad that shreds it, both drop lists, and everything waiting for you inside the World Tree once the door opens.
 Panthalus Boss Fight Stats
Read the two rows near the bottom of this card before you read anything else, because they are what make Panthalus strange. Every tower boss in the game either takes normal damage or actively resists you — Panthalus takes 20% extra damage, the only boss fight in Palworld that hands you a bonus. In exchange, its cooldown rate sits at ×1, where the tower bosses all run ×2 or slower, so it fires roughly twice as often as anything you have fought up to this point. It is a glass-cannon fight in both directions: you hit harder than usual, and so does it, just at reduced power. The health pool is the third-largest first-time boss fight in the game, behind only Bastigor and Astralym.
| Panthalus | |
|---|---|
| Paldex No. | 203 — the second-to-last entry in the Paldex |
| Element | Water — weak to Electric |
| Size / Genus | XL, Fish |
| Base HP | 180 — 2nd highest of all 288 Pals, and the highest of all 47 Water Pals |
| Base Defense | 200 — the joint highest Defense stat in the game |
| Base Shot Attack | 120 — 6th among Water Pals |
| Boss HP multiplier | ×42, applied to that 180 base |
| Damage it deals | ×0.83 — 17% below a normal Pal's output |
| Damage it takes | ×1.2 — the only boss that takes *more* damage than normal |
| Cooldown rate | ×1 — tower bosses run ×2 or slower, so this one attacks about twice as often |
| Rematch | None — there is no hard-mode version of this fight |
| Summon item | 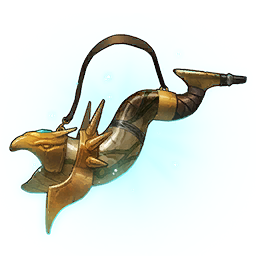 Echoing Flute Echoing Flute |
| Quest | Panthalus — "Search the islands for the giant remains", then "Build the item depicted in the Faded Schematic" |
Once it is yours, Panthalus is not just a trophy. That 200 Defense is tied with Astralym for the best in the game, and 180 HP puts it second overall, so nothing in your box soaks damage better. Its partner skill is Resonant Guardian. On the attack side it learns Aqua Tornado at Lv. 60 for 800 power on a 40-second cooldown, the hardest-hitting move in its kit, and it picks up the Neutral move Holy Burst at Lv. 50 so it is not locked into a single element. Full ranks for every stat are on the best Pals rankings by stat.
Requirements Before You Start
This is a late-game quest and the game does not stop you from starting it early — it just kills you. The fight puts you on a single small island ringed by open water with a ten-minute clock running, so the real gate is not your level, it is whether you can keep hitting a flying target while relocating constantly. Bring a flying mount you actually like steering, because you will be in the air for most of the ten minutes. Everything below is the honest floor, not a comfort zone.
| Requirement | What you need | Why |
|---|---|---|
| Player level | Lv. 70+ | The recommended level for the encounter; below it your gear tier is the problem, not your health bar |
| Pal levels | Lv. 70+ | Your squad has to burn a ×42 health pool inside ten minutes |
| Flying mount | Any reliable flyer | The arena is one island surrounded by water — ground-only teams have nowhere to stand |
| Ranged weapon | Best tier you can craft, plus deep ammo reserves | The weak points are on its head and back, and it spends the fight airborne |
| Armor and shield | Top tier available to you | Its cooldown rate is ×1, so attacks land roughly twice as often as a tower boss |
| Capture sphere |  Pal Sphere ×1 Pal Sphere ×1 | The capture at the end is guaranteed — do not waste a high-tier sphere on it |
| Summon item | Echoing Flute ×1 | Crafted from the four Echobones below |
That last row is the one people get wrong and regret. When Panthalus' health empties the game prompts a capture that cannot fail, so a basic Pal Sphere does the same job as an Ancient Sphere here. Save the good spheres for the alpha Pals with their locations and levels, where catch rate actually matters. On weapon choice, compare within a class rather than across one — a shotgun's raw attack number is not directly comparable to a rifle's — and the full ladder is on the weapon list with attack, ammo and tech level.
 All Four Echobone Locations
The quest starts by talking to the Ancient Civilization Researcher on the Deserted Islet, a tiny island at roughly -172, 33 that is far easier to reach with a flying or swimming mount than a boat. From there you are hunting four giant skeletons, one per Echobone, spread from the volcanic west to the frozen north. Each one sits on or inside the remains rather than beside them, so look up at the skull and the ribs, not at the sand. The table pairs the in-game coordinates with the closest fast travel point on our map, which is the fastest way to reach each of them once you have that statue unlocked — the Silent and Tidewind bones are practically on top of their teleports, while Marine and Seafoam need a short flight after you land.
| Echobone | Coordinates | Nearest fast travel point | Where exactly |
|---|---|---|---|
| Marine Echobone | 122, -525 | Small Settlement, or Grassy Behemoth Hills | West of the Grasslands, on top of the skull of a huge sea-creature skeleton in shallow water |
 Seafoam Echobone Seafoam Echobone | -519, -548 | Eternal Pyre Tower Entrance | On the Mount Obsidian landmass, tucked underneath the ribcage of the skeleton |
 Silent Echobone Silent Echobone | 356, -110 | Altar of the Windcaller | A short walk from the statue, inside the skeleton's skull |
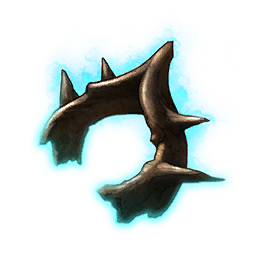 Tidewind Echobone Tidewind Echobone | -262, 485 | Land of Absolute Zero | In the snowfields, on the skeleton sitting on a small frozen lake beside the teleport |
All four are Essential-category items weighing nothing, so there is no inventory pressure and no reason to do this in two trips. Their flavour text is the only thing that distinguishes them — Marine hums with rhythmic waves, Seafoam with popping bubbles, Tidewind with a sea breeze, and Silent with, fittingly, silence. If you want to plan a single loop, open the interactive map with every fast travel point turned on and route between the four statues above; all 137 Palpagos fast travel points are pinned there, so you can see exactly which ones you still need to unlock before the run.
How to Craft the Echoing Flute
Bring all four bones back and the researcher hands over the Faded Schematic, which turns into a recipe you can build at the humble Primitive Workbench — the same one you unlocked in the first hour of the game. There is no ancient station, no ingot, no gate. The recipe is one of each Echobone and 300 work, which is a few seconds of crafting even solo. Because the flute is a stackable Essential item with zero weight, there is also nothing stopping you gathering a second set of bones later if you want another attempt at the summon.
| Material | Qty | Station |
|---|---|---|
| Marine Echobone | 1 | Primitive Workbench |
| Silent Echobone | 1 | Primitive Workbench |
| Seafoam Echobone | 1 | Primitive Workbench |
| Tidewind Echobone | 1 | Primitive Workbench |
| Total | 4 bones, 300 work | Produces 1 Echoing Flute |
With the flute in your bag, head back to the Deserted Islet and interact with the shrine standing next to the researcher. That is the point of no return for the ten-minute timer, so sort your team, your ammo and your food buffs *before* you touch it. The team builder for planning a five-Pal squad is worth a pass here if you have not locked in your five.
 Best Pals to Bring Against Panthalus
Panthalus is pure Water, and Electric is the element that beats Water, so this is one of the cleanest counter picks in the game — no split typing, no second element muddying the maths. The table is ordered by Shot Attack because the fight is fought at range against an airborne target, which makes ranged output the stat that matters and melee power close to irrelevant. Orserk is the top pick outright: it has the highest Shot Attack of any Electric Pal at 130, and its partner skill stacks a buff on your own bullet hits. If you would rather have the counter element *and* your mount in one slot, Helzephyr Lux and Beakon are the two flyers on this list, and Beakon's Thunderous skill adds Electric damage to your shots while you ride it.
| Pal | Shot Atk | Mount | Why bring it |
|---|---|---|---|
| Orserk | 130 | No | Highest Shot Attack of any Electric Pal; Ferocious Thunder Dragon stacks a buff as your bullets connect |
 Helzephyr Lux Helzephyr Lux | 125 | Yes — flying | The counter element on a flying mount, so one slot covers damage and mobility |
 Relaxaurus Lux Relaxaurus Lux | 120 | Yes | Missile Party gives you a ranged salvo of your own while it fights |
 Azurmane Azurmane | 120 | Yes | Plasma Dash closes and reopens distance fast when the arena floods |
 Beakon Beakon | 115 | Yes — flying | Thunderous adds Electric damage to *your* attacks while mounted — the best rider buff for this fight |
 Grizzbolt Grizzbolt | 105 | Yes | Yellow Tank turns it into a mounted minigun, trading its lower Shot Attack for sustained fire |
 Jetragon Jetragon | 140 | Yes — flying | Not the counter element, but the fastest flyer in the game and the highest Shot Attack here — pure mobility pick |
One caveat on Jetragon: it is Dragon, not Electric, so it gets no elemental bonus against Water and its 140 Shot Attack is doing all the work by itself. Bring it as your transport and let the Electric Pals do the typed damage. If you want to check the matchup both ways before you commit, the element chart and counter finder shows what Water resists as well as what beats it, and the mount speed rankings compare every flyer in the game by sprint speed.
How to Beat Panthalus
The arena is a single small island with open water in every direction, and Panthalus spends most of the fight above the water rather than on it. Its whole kit is Water except one Neutral move, and the pattern is easy to read once you know what each attack is worth. The table below is its full move list with power and cooldown — note that the two heaviest hits, Grand Breach at 700 and Aqua Tornado at 800, sit on 30 and 40-second cooldowns, so there are long windows where it can only reach for the cheap 200-power bubble attacks. Those windows are your damage phases.
| Attack | Element | Power | Cooldown | Type |
|---|---|---|---|---|
| Bubble Rain | Water | 200 | 12s | Ranged |
| Creeping Bubbles | Water | 200 | 12s | Ranged |
| Aqua Blade | Water | 300 | 16s | Ranged |
| Tidal Charge | Water | 400 | 20s | Melee |
| Maelstrom | Water | 500 | 24s | Ranged |
| Grand Breach | Water | 700 | 30s | Melee |
| Holy Burst | Neutral | 700 | 30s | Ranged |
| Aqua Tornado | Water | 800 | 40s | Ranged |
Shoot the blue crystal on its head
Panthalus carries a large blue crystal on its head, and the top of its back is the second soft spot. Body shots anywhere else are wasted damage against a Pal whose base Defense is the joint highest in the game at 200. Stay airborne, keep the crystal in your sights, and remember the fight's ×1.2 damage-taken multiplier is already working in your favour — every bullet that lands on a weak point is worth more here than the same bullet would be in any other boss fight.
Fly through the wind columns when the wave comes
The attack that ends runs is the tidal wave. Panthalus rises into the air, the camera pulls back, and a wall of water crosses the entire arena — getting caught by it is effectively fatal at any gear level. The counter is not dodging sideways, it is going up. Circular columns of wind turbulence appear around the arena; fly into one, ride the lift, and jump over the wave as it passes underneath. Learn to spot the columns during the calm phases, before you need one.
Save ammo during the hover phase
Periodically Panthalus drifts down and hovers directly over the island. That is your free window: swap to melee, close in, and beat on it without spending a round. Ten minutes is a long fight and running dry on ammo at 20% health is the most common way people lose it. When it climbs back into the sky, a wind column will usually open beneath it — take the lift, get level with the crystal, and go back to shooting.
 Panthalus Drops and Rewards
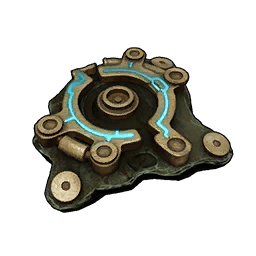
There are two separate payouts here and it is worth knowing which is which. Beating the boss drops a large stack of Ancient Civilization Parts plus Precious Entrails, both at a 100% rate — eight to nine Parts in one fight is a serious haul for anyone still building out ancient tech. The second list is what Panthalus itself yields once it is in your box, and that includes a guaranteed Giant Pal Soul, the top-tier soul you feed to a Statue of Power. The real reward, of course, is not on either list: capturing it is what opens The World Tree.
| Source | Item | Amount | Rate |
|---|---|---|---|
| Boss fight | Ancient Civilization Parts | 8–9 | 100% |
| Boss fight |  Precious Entrails Precious Entrails | 2–3 | 100% |
| The Pal itself |  Diamond Diamond | 1 | 100% |
| The Pal itself |  Giant Pal Soul Giant Pal Soul | 1 | 100% |
Ancient Civilization Parts are the bottleneck material behind most of the ancient tech tree, so a guaranteed stack of eight to nine is a bigger deal than the drop table makes it look — the guide to Ancient Civilization Cores and their uses covers where the rest of that chain comes from. The Diamond is worth 50,000 gold at a merchant if you would rather cash it out.
 How to Enter the World Tree
Once Panthalus is captured, the quest To the World Tree opens up. Fly to the very top of the map and you will find a circular platform with an altar set in front of a wall — interact with it and the wall opens. Panthalus does not need to be in your active party for this, it only needs to be in your possession, so feel free to box it. Past that point the main quest keeps going through *Surviving the World Tree*, *Sin*, *Path to the Abyss* and *The Sealed Calamity*, and it ends at Awakening, the fight against Astralym — the only Pal in the game with no element at all, a ×40 health multiplier on its first fight and a brutal ×405 on the rematch.
The first thing the World Tree does is try to kill you with its own scenery. Surviving the World Tree asks you to obtain a Paloxite and a Mythical Wood, and Paloxite corrodes anyone who touches it unprotected. Two items solve that: World Tree Holy Water, which stops World Tree resources vanishing as you approach them for a while, and the Corrosive Mist Mask, built from 10× Toxin Filtering Membrane and 30× Paloxite. Get the Holy Water first — every source of World Tree Holy Water lists the field pickups and the 50 Pals that drop it.
What's Inside the World Tree
The World Tree is a full second region, not a dungeon, and it is dense. It has its own 15 fast travel points — Shinespore Root, Lacrymal Shoal, Spore Cloister, Alluvion Lakefront, Within the Seal, The Verdant Rootpath, Gilded City Ruins, Whimsical Wisteria Grove, Dusty Ravine, Remnant Riverside, Corroded Hollow, Boreal Summit, Forbidden Laboratory, Abandoned Laboratory and Rotmist Root — and 52 different Pals spawn inside it. Five alphas roam the region, all between Lv. 75 and 79: Celesdir Noct and Aegidron at 79, Mycora and Moldron Cryst at 78, and Dualith at 75. The loot cache count is the number that surprises people — there are 690 of them, more than any single Palpagos region has.
| What's there | Count | Open it on the map |
|---|---|---|
| Loot Caches | 690 | World Tree loot caches |
| Fishing Spots | 55 standard + 22 rare | World Tree fishing spots |
| Pal Effigies | 47 | World Tree Pal Effigies |
| Treasure Chests | 38 | World Tree treasure chests |
| Pal Egg Nests | 30 | World Tree egg nests |
| Fast Travel Points | 15 | World Tree fast travel points |
| Skill Fruit Trees | 12 | World Tree skill fruit trees |
| Journals | 9 | World Tree journals |
| Tower Boss Arenas | 3 | World Tree tower bosses |
The materials are the reason to keep coming back. Paloxite and Mythical Wood are exclusive to this region, and Paloxite feeds into Paloxite Ingot — 1× Soralite + 2× Paloxite + 1× World Tree Holy Water — which is a component in 44 different recipes. That list includes all three Ancient Armor lines, the Ancient Sphere, the Wing Pack glider, and the Beam Launcher at 16,800 attack, which needs 200 ingots on its own. The region also drops the Ancient Relics and Ominous Eggs you will not find anywhere on Palpagos.
In short: talk to the researcher on the Deserted Islet, collect four Echobones from four giant skeletons, build the Echoing Flute at a Primitive Workbench, bring Electric Pals and a flyer to a ten-minute fight against a boss that takes 20% extra damage, shoot the blue crystal, and capture it for free at the end. The altar at the top of the map does the rest.
Related Guides
Endgame progression:
Boss fights and gear: