Sakurajima Location, How to Get There, and What's On It
Sakurajima sits in the northwest corner of the Palpagos map and nothing unlocks it. Here are the exact coordinates, the 831 m sea crossing, all 7 fast travel statues, the 8 Pals that spawn nowhere else, the three Alphas, and the level you actually need.
Sakurajima is the cherry-blossom island off the northwest corner of the Palpagos map, and the reason most players never set foot on it is that they go looking in the wrong quadrant. This guide gives you the exact coordinates, the shortest water crossing and how long each mount takes to fly it, all seven fast travel statues, the eight Pals that live nowhere else, and the level band you are walking into.
 Sakurajima Location at a Glance
Sakurajima is part of the same world as everything else — no loading screen, no separate map, no menu to warp into. It sits due west of the northern snowfields and well north of Mount Obsidian, which is the part people get wrong: the volcano is at the bottom-left of the map and Sakurajima is the top-left. Open the Palworld interactive map, drag to the upper-left corner, and the pink landmass is it. The table below is everything you need before you commit to the flight.
| Detail | Value |
|---|---|
| Where it is | Northwest quadrant of the Palpagos map, offshore from the snowfields |
| Coordinate span | X -763 to -427, Y 50 to 361 |
| Size | About 1.4 km north to south, 1.5 km east to west |
| Shortest crossing | 831 m from Pristine Snow Field at -344, 270 |
| Anything gating it | Nothing — no quest, no key item, no boss |
| Fast travel statues | 7 |
| Named zones | 4, plus the Dancing Sakura Shrine and Moonflower Tower |
| Dungeon entrances | 14 on the island, all Cherry Blossom Cave |
| Tower | Moonflower Tower at -602, 215 — Saya and  Selyne Selyne |
| Alphas in the field | 3, levels 55 to 58 |
| Pals found nowhere else | 8 species |
| Signature resource | 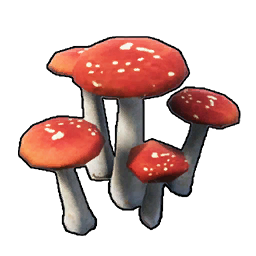 Mushroom — 74 nodes, the densest patch in the game Mushroom — 74 nodes, the densest patch in the game |
 How to Get to Sakurajima
There is no unlock. The island is loaded into the world from the moment you start a save, and the only obstacle between you and it is open water. Because a statue only becomes a warp destination after you have physically touched it, the first trip has to be flown or swum under your own power — after that you can fast travel in from anywhere. The crossings are short by Palworld standards, and the launch point you pick matters more than the mount you pick.
 Fly West from the Snowfields
The shortest hop from the Palpagos mainland is 831 m, from the Pristine Snow Field statue at -344, 270 straight west to Cherry Blossom Crossroads at -516, 214. That is the correct landfall for a first visit: the Crossroads statue is central, it sits 97 m from a dungeon entrance, and the ground around it is the tamest part of the island. If you are coming down from the far north instead, Garden Beneath the Astral Mountains at -405, 506 gives you a 922 m run to the Northern Rock Field statue.
| From | Coordinates | Land at | Water crossing |
|---|---|---|---|
| Isle of Murmurs | -353, 77 | Sakurajima - Mushroom Wetlands | 569 m |
| Isle of Silence | -543, -29 | Sakurajima - Southern Sandbar | 704 m |
| Suncrest Islet | -880, 135 | Sakurajima: West Coast | 746 m |
| Pristine Snow Field | -344, 270 | Cherry Blossom Crossroads | 831 m |
| Garden Beneath the Astral Mountains | -405, 506 | Sakurajima - Northern Rock Field | 922 m |
The three shortest entries are all islets rather than the mainland, so they only help if you have already tagged their statues — but if you have, Isle of Murmurs is the cheapest way onto Sakurajima in the game at 569 m. Treat Pristine Snow Field as the reliable answer, because almost everyone picks that statue up while working through the snow region.
 Which Mount Makes the Crossing
Any flying mount clears 831 m without drama — this is a short crossing, not a Feybreak-length haul, and even the earliest flyer in the game does it in under two minutes. The table is sorted by saddle tech level so you can see the cheapest thing that works rather than the fastest. Sprint speeds here are flyer-to-flyer comparisons only.
| Flying mount | Saddle level | Sprint speed | Stamina | 831 m crossing |
|---|---|---|---|---|
 Nitewing Nitewing | 15 | 750 | 100 | ~111 seconds |
 Vanwyrm Vanwyrm | 21 | 850 | 150 | ~98 seconds |
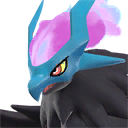 Helzephyr Helzephyr | 25 | 1,100 | 170 | ~76 seconds |
| Beakon | 29 | 1,200 | 160 | ~69 seconds |
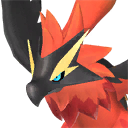 Ragnahawk Ragnahawk | 33 | 1,300 | 150 | ~64 seconds |
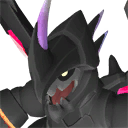 Astegon Astegon | 39 | 1,100 | 300 | ~76 seconds |
| Shadowbeak | 47 | 1,200 | 250 | ~69 seconds |
| Selyne | 53 | 1,600 | 300 | ~52 seconds |
 Jetragon Jetragon | 79 | 3,300 | 110 | ~25 seconds |
Beakon at saddle level 29 is the sweet spot — it is the first mount that crosses in about a minute, and you will have it long before you are ready for what lives on the island. Ragnahawk shaves five more seconds off. Going higher is pointless for this trip specifically; Jetragon's saddle sits at tech level 79, which is fifty levels past the point where you would want Sakurajima opened up. If you have no flyer at all, a swimmer works: Jormuntide needs a level 40 saddle and covers the same 831 m in roughly 46 seconds, and Surfent does it in about 58 at saddle level 16. Compare swim speeds against other swimmers, not against the flyers above.
 All 7 Fast Travel Statues on Sakurajima
Once you are on the island, sweeping the statues is the first job — each one you touch becomes a warp point, and they double as the anchor names for the island's spawn zones. They are listed north to south below. The two worth prioritising are Cherry Blossom Crossroads, which is the closest thing the island has to a hub, and Moonflower Tower Entrance, which puts you 82 m from a dungeon and directly outside the tower. Sakurajima - Northern Rock Field is the odd one out: it is 406 m from the nearest dungeon entrance, so it is a mining stop rather than a farming base.
| Fast travel statue | Coordinates | Nearest dungeon entrance | Nearest loot cache |
|---|---|---|---|
| Sakurajima - Northern Rock Field | -521, 342 | 406 m | 41 m |
| Secluded Cemetery | -668, 266 | 124 m | 32 m |
| Moonflower Tower Entrance | -602, 215 | 82 m | 34 m |
| Cherry Blossom Crossroads | -516, 214 | 97 m | 53 m |
| Sakurajima: West Coast | -722, 175 | 225 m | 26 m |
| Sakurajima - Mushroom Wetlands | -464, 132 | 136 m | 41 m |
| Sakurajima - Southern Sandbar | -650, 81 | 475 m | 78 m |
 What Level You Need Before You Go
Sakurajima has a reputation as a level-50-and-up zone, and that is a fair rule of thumb, but the island's actual floor is friendlier than that. The lowest island-exclusive spawns start in the mid-30s, so you can land, grab statues and run loot at a much lower level than people assume — you just cannot fight anything that objects. The gap between the field spawns and the Alphas is what catches people out: you can be comfortably clearing level 40 mobs and then walk into a level 58 Lyleen.
| Threat | Level | What it means for you |
|---|---|---|
| Lowest field spawns | 35 to 40 | Statue runs and loot sweeps are safe from the late 30s |
| Cherry Blossom Cave enemies | 40 to 50 | The 14 dungeon entrances open up around level 45 |
| Cherry Blossom Cave bosses | 47 to 52 | Bring a counter element rather than raw levels |
| Menasting Terra Alpha | 55 | 130 defense — the tankiest thing in the field |
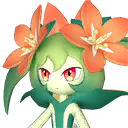 Lyleen and Lyleen and 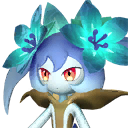 Lyleen Noct Alphas Lyleen Noct Alphas | 58 | They stand 20 m apart — do not pull them together |
| Toughest field spawn | 61 to 62 | 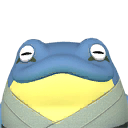 Croajiro Noct roams the wetlands Croajiro Noct roams the wetlands |
Practically: level 45 is enough to explore and loot, level 50 is where the dungeons stop being a coin flip, and level 55-plus is when the Alphas become farmable rather than survivable. The tower is its own conversation — Saya and Selyne are a fight you plan for, not one you wander into.
 The Four Zones and What They're For
Sakurajima is one landmass, but it is split into separate spawn zones and each one carries its own roster rather than sharing an island-wide table. That is why flying a lap of the coast catches you far more species than parking in one spot. The Mushroom Wetlands is the loot-and-catch half, the Northern Rock Field is where you mine, the Southern Sandbar is the dry strip in the south, and the West Coast catches the overflow from both. The shrine and the tower sit in the middle.
| Zone | What it's for | Headline spawn | Open it on the map |
|---|---|---|---|
| Sakurajima - Mushroom Wetlands | Densest loot and the wettest ground | Shroomer — 69.5% of all its spawns | Shroomer spawn map |
| Sakurajima - Northern Rock Field | Ore, rock and the island's mining runs | Helzephyr Lux — 62.5% | Helzephyr Lux spawn map |
| Sakurajima - Southern Sandbar | Sandy southern strip | 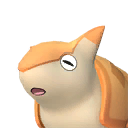 Kikit and Kikit and 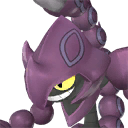 Prixter — 55.7% each Prixter — 55.7% each | Kikit spawn map |
| Sakurajima: West Coast | Mixed shoreline, easiest landing | 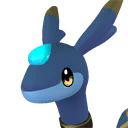 Elphidran Aqua — 43.6% Elphidran Aqua — 43.6% | Elphidran Aqua spawn map |
| Dancing Sakura Shrine | The island's landmark shrine | — | All fast travel points |
| Moonflower Tower | Saya and Selyne's arena | Selyne | All 8 tower boss pins |
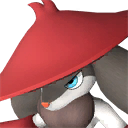 The 8 Pals That Live Only on Sakurajima
Eight species have every single one of their spawn points on this island, which makes the trip mandatory rather than optional if you are filling the Paldeck. Wumpo Botan and Verdash are the easiest to find at 166 spawn points each, and they share a zone, so one lap of the Cherry Blossom Crossroads area usually turns up both. The three dogs — Dogen, Bulldosu and Yakumo — all cluster around the Moonflower Tower approach, so clearing the statue there sets up the whole set. Lullu is the hard one: 40 points, all of them in the Secluded Cemetery, and it is the smallest spawn pool of the eight by a wide margin.
| Pal | Elements | Spawn points here | Share of all its spawns | Where to look |
|---|---|---|---|---|
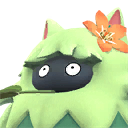 Wumpo Botan Wumpo Botan | Grass | 166 | 100% | Cherry Blossom Crossroads, West Coast |
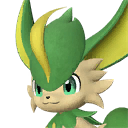 Verdash Verdash | Grass | 166 | 100% | Cherry Blossom Crossroads, West Coast |
| Helzephyr Lux | Dark / Electric | 160 | 100% | Northern Rock Field |
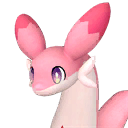 Chillet Ignis Chillet Ignis | Fire / Dragon | 104 | 100% | Moonflower Tower approach |
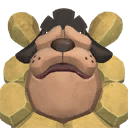 Bulldosu Bulldosu | Ground | 104 | 100% | Moonflower Tower approach |
| Dogen | Neutral | 104 | 100% | Moonflower Tower approach |
| Yakumo | Neutral | 104 | 100% | Moonflower Tower approach |
 Lullu Lullu | Grass | 40 | 100% | Secluded Cemetery |
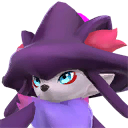 Wixen Noct Wixen Noct | Fire / Dark | 178 | 96.7% | West Coast, Rock Field, Sandbar — night only |
| Kikit | Ground | 128 | 91.4% | Southern Sandbar |
| Prixter | Dark / Ground | 128 | 91.4% | Southern Sandbar |
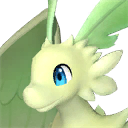 Quivern Botan Quivern Botan | Dragon / Grass | 98 | 83.1% | Cherry Blossom Crossroads |
The four below 100% still count as island Pals in practice. Wixen Noct has the biggest spawn pool of the twelve at 178 points, but every one of them is a night spawn — turn up at midday and you will swear it does not exist. Kikit and Prixter share the Southern Sandbar and the same 91.4% share, so the sandbar run gets you both in one pass.
The Three Alphas in the Field
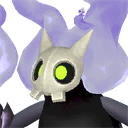
Three field Alphas sit on Sakurajima, and all three are packed into the northern third of the island above the tower. Lyleen and Lyleen Noct stand just 20 m apart, which is close enough that a stray shot pulls the second one into the first fight — open on Lyleen Noct, since it is the rarer of the two and the one you actually came for. Menasting Terra is the lowest level of the three at 55 but the hardest to burn down, with 130 base defense against the Lyleens' 110 and 115.
| Alpha | Level | Element | Base defense | Coordinates |
|---|---|---|---|---|
| Lyleen Noct | 58 | Dark | 115 | -628, 305 |
| Lyleen | 58 | Grass | 110 | -632, 302 |
| Menasting Terra | 55 | Ground | 130 | -581, 318 |
 What's Worth Farming Once You're There
For its size, Sakurajima is one of the most loot-dense pieces of land in the game — 302 loot caches packed into roughly two square kilometres, plus 56 treasure chests and 37 Pal Effigies. The mushrooms are the standout: 74 of the game's 274 Mushroom nodes grow here, so if you are stocking a kitchen or feeding a ranch this is the single best harvest route on the map. There are also 20 oil fields, which makes the island a viable Crude Oil site without flying all the way to the western oil rigs.
| What | Count on the island | Turn the layer on |
|---|---|---|
| Loot caches | 302 | Sakurajima loot caches |
| Treasure chests | 56 | Sakurajima treasure chests |
| Dungeon entrances | 14 | Sakurajima dungeon entrances |
| Pal Effigies | 37 | All 360 effigies |
| Stat lotuses | 27 | All stat lotuses |
| Grade 1 egg nests | 30 | Grade 1 egg nests |
| Mushroom nodes | 74 of 274 in the game | Mushroom nodes |
| Oil fields | 20 | All oil fields |
| Skill fruit trees | 4 | Skill fruit trees |
| Elemental-sealed chests | 6 | Elemental-sealed chests |
| Fishing spots | 22, 3 of them rare | Rare fishing spots |
| Enemy camps | 3 | All enemy camps |
One quirk worth knowing if you compare our counts to the map's own totals: the Sakurajima loot layers reach a little past the island and pick up the islets just offshore, so the layer badges read 347 caches and 68 chests. The 302 and 56 above are what is actually on Sakurajima itself. Same story with the dungeons — 15 entrances carry the Sakurajima tag, and the fifteenth is over on the Isle of Murmurs.
Moonflower Tower and Cherry Blossom Cave
Both of the island's set-piece encounters are worth planning a trip around rather than stumbling into. Moonflower Tower, at -602, 215, is the only tower in the game that puts two opponents in the arena at once — Saya fights alongside Selyne rather than sending her in alone — and it becomes the best experience loop in the game once you can clear it quickly. Cherry Blossom Cave is the island's only dungeon type, and all 14 entrances feed into it: enemies run level 40 to 50, its bosses 47 to 52, and its loot table includes Legendary Spheres, Gold Keys and Training Manual (XL).
If you want the fight breakdowns, the tower rematch is covered in How to Beat Hard Mode Saya and Selyne, the experience route is in the Moonflower Tower XP farm, and the full loot and boss list is in the Cherry Blossom Cave guide.
Summary: Is the Trip Worth It?
Yes, and earlier than most people go. Sakurajima is in the northwest corner of the map, nothing unlocks it, and the crossing is 831 m from Pristine Snow Field — under a minute on a Beakon. You can land safely around level 45, and once you are there you have eight Paldeck entries that exist nowhere else, three Alphas, 302 loot caches, the densest mushroom fields on the map and a tower that turns into an experience farm. Grab the seven statues on your first visit and the island stops being a trip and becomes a shortcut.
Related Guides
Hubs: Palworld Interactive Map · All Palworld Guides · All Palworld Locations · All Palworld Regions
More on Sakurajima: Sakurajima Update: All New Pals, Weapons, and Features · Cherry Blossom Cave Guide: Pals, Bosses, and Loot · Moonflower Tower XP Farm: Jetragon Route and Respawns · How to Beat Hard Mode Saya and Selyne
Other islands: Feybreak Location, How to Get There, and What's On It · Sunreach Island Location, How to Get There Early, and Loot · Tides of Terraria Islands: All 7 Locations and Loot
Catching what's out there: Night Exclusive Pals: All 13 and Where to Catch Them · All Alpha Pals and Locations · Palworld Mount Speed Rankings · All Tower Bosses and Weaknesses