How to Beat Moon Lord (Master): Team, Gear, and Drops
How to beat the Moon Lord (Master) raid in Palworld: the Level 80 stat card with its ×790 HP and ×7 damage, how to get the Master sigil, every weak point and attack at Master values, the best Pals and gear, and the full drop list including the 100% Moon Lord Statue Schematic.
Moon Lord (Master) is the Level 80 rematch of the Tides of Terraria raid boss, unlocked with the Celestial Sigil (Master) that the standard fight drops. Below is the Master stat card, how to get the sigil, every weak point and attack at Master values, the Pals and gear that survive it, and the drop table that makes it the only way to build the Moon Lord Statue.
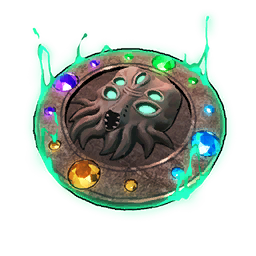 Moon Lord (Master) Raid Stats
Read the damage rows first, because they decide the whole fight. You deal a quarter of your normal damage, it deals seven times its normal damage, and there is ×790 health to chew through across four separate bars. Put the two sides together and the Master kill needs roughly 15 times the effective damage of the standard one (×790 HP at ×0.25 damage taken, against ×210 at ×1). Moon Lord still has no element, so there is still no type matchup to chase in either direction, and it still can't be flinched, knocked back or stunned.
| Moon Lord (Master) | |
|---|---|
| Boss | Moon Lord — Tides of Terraria crossover, Master difficulty |
| Summon level | 80 |
| Element | None — no weakness, no resistance |
| Weak to | Weak *points*: two hands, the head, and the core |
| Total HP multiplier | ×790 (×480 core, ×150 head, ×80 per hand) |
| Damage you deal | ×0.25 |
| Damage it deals | ×7 — True Eye adds included |
| Damage to wood and stone | ×5 — it will break your base |
| Crowd control | Immune to flinch, knockback and stun |
| Summon item | Celestial Sigil (Master) — dropped at 100% by every Moon Lord kill |
| Signature reward |  Moon Lord Statue Schematic at 100% Moon Lord Statue Schematic at 100% |
For scale against the other hard-mode raids: every Pal Ultra fight hits harder per point of power (×8 to ×13) and all four cut your damage further (down to ×0.09 on three of them). Moon Lord (Master) is not the most punishing multiplier set in the game. It earns its reputation from the combination — a base health stat of 100 stretched to ×790, four bars that must be cleared in order, no stun window, and a standard-version cooldown rate of ×1 where Pal raids run ×2. Every hard-mode multiplier is lined up on the raid boss list with battle multipliers.
| Hard-mode raid | HP multiplier | Damage it deals | Damage you deal |
|---|---|---|---|
| Moon Lord (Master) | ×790 (base HP 100) | ×7 | ×0.25 |
 Hartalis (Ultra) Hartalis (Ultra) | ×320 (base HP 130) | ×13 | ×0.2 |
 Xenolord (Ultra) Xenolord (Ultra) | ×420 (base HP 130) | ×13 | ×0.09 |
 Bellanoir Libero (Ultra) Bellanoir Libero (Ultra) | ×420 (base HP 130) | ×10 | ×0.09 |
 Blazamut Ryu (Ultra) Blazamut Ryu (Ultra) | ×500 (base HP 130) | ×8 | ×0.09 |
How to Get the Celestial Sigil (Master)
You can't craft the Master sigil. It drops at a flat 100% from the standard Moon Lord raid, which means your first Master attempt costs one standard clear — and that clear costs one Celestial Sigil, or 100 Hallowed Bar. The good part is that the Master fight re-drops its own sigil on every kill too, so after the first clear you never pay for it again. Losing is the expensive outcome: a sigil is spent the moment you summon, so a wipe sends you back to a standard run to get another.
| Step | What it takes |
|---|---|
| 1. Get the schematic |  Celestial Sigil Schematic — 100% from the top-grade chests in the Sealed Realm of Terraria Celestial Sigil Schematic — 100% from the top-grade chests in the Sealed Realm of Terraria |
| 2. Farm the bars | 100×  Hallowed Bar — 20–40 per top-grade chest, 4–10 per regular chest Hallowed Bar — 20–40 per top-grade chest, 4–10 per regular chest |
| 3. Build the altar | Summoning Altar at Technology 33 |
| 4. Clear standard Moon Lord | Level 50 raid; guaranteed Celestial Sigil (Master) |
| 5. Summon Master | Level 80 raid; drops another Master sigil on a win |
Hallowed Bar only comes out of the Sealed Realm, and there's a single entrance pin on the interactive map with the Sealed Realm layer on. The full standard-fight walkthrough, including the bar route and the Level 50 rotation, is in how to beat the Moon Lord raid boss.
 Minimum Requirements Before You Try
The Master fight has a hard floor. Your damage is already quartered, so anything short of top-tier kit simply can't finish four bars before the countdown ends — and at ×7 incoming damage, weak armour means one Phantasmal Deathray ends the run. Treat this list as the go/no-go check.
| Requirement | Why it matters |
|---|---|
| A cleared standard Moon Lord | It's the only source of the Master sigil |
| Pals at or near Level 80 | The boss summons at 80 and doesn't scale down |
| Legendary-grade armour | Ancient Armor (1,040 defence) or  Hallowed Plate Mail for its 30% collab damage cut Hallowed Plate Mail for its 30% collab damage cut |
| Your best weapon at top rarity |  Charge Rifle (15,000 attack) or Charge Rifle (15,000 attack) or  Laser Sword (2,400) — the top of each class Laser Sword (2,400) — the top of each class |
| A throwaway location | Master hits wood and stone at ×5 — never summon it next to a base you care about |
| A fast mount | The Deathray is outrun, not blocked |
 Weak Points at Master Values
The four bars keep the same order as the standard fight but grow unevenly. The hands go from ×20 to ×80 each and the head from ×40 to ×150, so the three warm-up bars total ×310 — 39% of the fight. The core carries the other 61% on its own at ×480. That split is your pacing guide: if the hands and head take longer than about two-fifths of your time, the core won't fall before the countdown does.
| Weak point | Master HP multiplier | Share of the fight | Standard for comparison |
|---|---|---|---|
| Left hand | ×80 | 10% | ×20 |
| Right hand | ×80 | 10% | ×20 |
| Head | ×150 | 19% | ×40 |
| Core | ×480 | 61% | ×130 |
| Total | ×790 | 100% | ×210 |
 Every Attack at ×7
The move list doesn't change on Master — four elementless attacks, each on a 45-second base cooldown — but the ×7 multiplier changes which ones you can afford to eat. On standard, Phantasmal Eye at 25 power is background noise. On Master it hits harder than a standard Phantasmal Bolt, and it's also the attack that now smashes structures. Phantasmal Deathray at 450 power stays the only true run-ender, and cover still does nothing against it.
| Attack | Power | Standard threat | Master threat | What to do |
|---|---|---|---|---|
| Phantasmal Deathray | 450 | Heavy | Lethal | Break away from the beam's line on a mount the moment it starts casting |
| Phantasmal Sphere | 180 | Moderate | Heavy | Stop shooting and reposition; resume in its recovery |
| Phantasmal Bolt | 80 | Light | Moderate | Your damage window — shoot through it with a healing item ready |
| Phantasmal Eye | 25 | Chip | Real damage + base damage | Don't stand still; keep it pointed away from structures |
 Best Pals for Moon Lord (Master)
Typing is still irrelevant, so rank by raw attack and survivability. The bar for survivability is higher here than on standard: a Pal that dies to one ×7 Sphere contributes nothing for the rest of the countdown. That's why Astralym is even further ahead on Master — 200 ranged attack and 200 defence, both the highest in the game, on an elementless frame. Frostallion Noct moves up for the same reason: its 140 HP and 135 defence ride out hits that fold glassier picks, and Black Steed's ranged-attack boost applies while you're mounted and dodging.
| Pal | Ranged Atk | HP / Def | Why it works on Master |
|---|---|---|---|
| Astralym | 200 | 200 / 200 | Highest attack and highest defence in the game — the only Pal that's both carry and tank here |
 Frostallion Noct Frostallion Noct | 140 | 140 / 135 | Bulkiest of the high-attack Dark Pals, and Black Steed boosts your own ranged damage while riding |
 Necromus Necromus | 145 | 130 / 120 | Strong attack with solid bulk, and it arrives with attack-boosting innate passives |
 Neptilius Neptilius | 145 | 105 / 125 | Matches Necromus on attack with more defence than most top hitters |
| Bellanoir Libero | 150 | 120 / 100 | Joint second-highest attack, but the thinnest defence here — keep it back |
 Jetragon Jetragon | 140 | 115 / 120 | The mount for dodging the Deathray, with enough attack to stay useful between casts |
On passives, favour ones that keep your Pal alive long enough to deal damage over pure glass-cannon stacks: Legend (+20% attack and defence) pulls more weight here than on standard, while Musclehead, Ferocious and Serenity remain the damage core. Element-boost passives still work on your own skills, you just never get a type bonus on top. Full values are on the passive skills list, and the Pal min-maxing guide covers souls and condensing to push a squad to raid shape.
Best Gear for the Master Fight
The choice is the same as on standard — raw Ancient-tier numbers or the collab set's bonuses — but the math tilts toward the collab armour on Master. Ancient Armor gives triple the defence, yet Hallowed Guard's flat 30% cut scales with how hard the boss hits, and at ×7 that's worth more than it is at ×1. A common split is Hallowed Plate Mail for the body with your strongest Ancient weapon in hand. Weapon attack only compares within a class, so the table groups them that way.
| Gear | Class | Attack / Defence | Why bring it |
|---|---|---|---|
| Charge Rifle | Assault rifle | 15,000 attack | Top assault rifle — the most damage per second into the core |
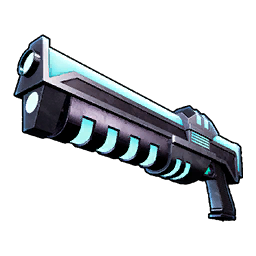 Vortex Beater Vortex Beater | Assault rifle | 300 attack | Homing missiles stay on a hand while you're moving away from the Deathray |
| Laser Sword | Melee | 2,400 attack | Top melee weapon for clearing the hands up close |
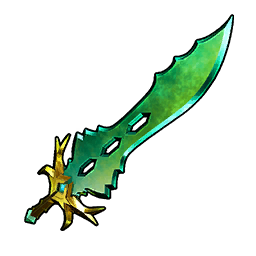 Terra Blade Terra Blade | Melee | 425 attack | Best collab melee attack, with shockwaves that reach parts you can't stand beside |
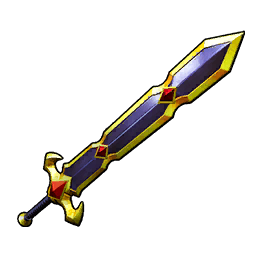 Excalibur Excalibur | Melee | 360 attack | Ring shockwaves for when the ×7 True Eyes close in |
| Hallowed Plate Mail | Body armour | 320 defence, 1,040 HP | Hallowed Guard: −30% collab damage, which is all of it |
| Ancient Armor | Body armour | 1,040 defence, 3,120 HP | Highest raw defence and HP if you skip the collab set |
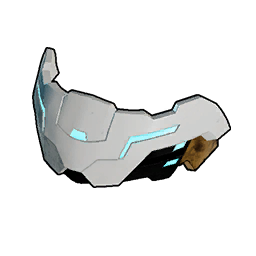 Ancient Helm Ancient Helm | Head armour | 650 defence, 1,560 HP | Best head slot by defence |
If you run a collab weapon, match the Hallowed head piece to its class for the extra +20% damage — mask for melee, helmet for ranged, headgear for magic, hood for summons. Every tier and schematic is in the Hallowed Plate Mail schematic guide, and every weapon by class and attack has the rest.
Moon Lord (Master) Strategy
Standard Moon Lord is a damage race. Master is a damage race you lose the moment you get careless, so every tactic below trades a little damage for not dying.
Pick the arena before you pick the team
With structure damage at ×5, summoning at home turns a raid into a rebuild. Put a Summoning Altar in an open spot far from anything you've invested in — open ground also helps, since you'll be mounted and circling for most of the fight. The best base locations guide lists flat plots that work for a dedicated raid site.
Hands, then head, then core — on a timer
Clear both hands first, then the head, then commit everything to the core. The warm-up bars are 39% of the fight, so glance at the countdown when the head drops: if you've used much more than two-fifths of it, you're behind pace and the core probably won't fall in time. That's the moment to decide whether to push or bail with your Pals intact.
Stay mounted for the Deathray
The Deathray ignores cover, so the only answer is distance. Fight from a fast mount — Jetragon is the obvious pick — and dismount only for committed damage windows after a Phantasmal Bolt. If you're on foot when the cast starts, you're gambling the run.
Kill the True Eyes on sight
On standard, the three True Eyes of Cthulhu are safe to ignore. On Master they deal ×7 like everything else, and three of them stacking on you is a run-ender by itself. Swap to a crowd tool such as Excalibur when they spawn, clear them, then go back to the boss.
 Heal early, not at low health
At ×7, the gap between "half health" and "dead" is one or two big hits. Heal whenever you drop below roughly two-thirds rather than waiting for the red bar, and keep a Pal-reviving plan ready so a downed carry doesn't cost you the rest of the countdown.
Moon Lord (Master) Drops and Rewards
The headline is the Moon Lord Statue Schematic at 100% — no other raid, chest or merchant has it, and the standard fight never drops it. Beyond that, Master pays out in bulk: 10–20 Ancient Civilization Parts and 5–10 Diamonds every clear, a guaranteed Carrying Lotus (L), and a chance at the top-tier collab weapon schematics. What it doesn't have is the Legendary Meowmere or the Moon Lord Mask — those stay on the standard table, so keep farming standard runs if you're after them.
| Drop | Rate | Amount |
|---|---|---|
| Moon Lord Statue Schematic | 100% | 1 |
| Celestial Sigil (Master) | 100% | 1 — funds the next attempt |
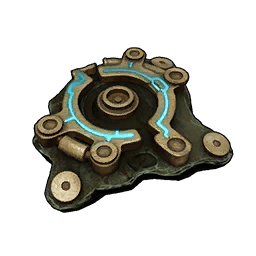 Ancient Civilization Parts Ancient Civilization Parts | 100% | 10–20 |
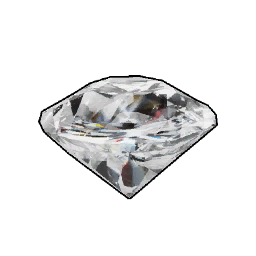 Diamond Diamond | 100% | 5–10 |
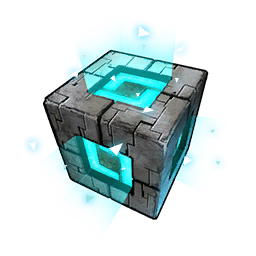 Ancient Civilization Core Ancient Civilization Core | 100% | 3 |
| Training Crystal | 100% | 2–3 |
 Carrying Lotus (L) Carrying Lotus (L) | 100% | 1 |
 Life Lotus (L) Life Lotus (L) | 20% | 1 |
 Stamina Lotus (L) Stamina Lotus (L) | 20% | 1 |
 Power Lotus (L) Power Lotus (L) | 20% | 1 |
 Speed Lotus (L) Speed Lotus (L) | 20% | 1 |
The top-tier weapon schematics are the other reason to repeat the fight. Master's pool holds the four collab weapon schematics one grade above the ones standard drops, so repeated clears are how you push a collab loadout toward max rarity. The lotuses permanently raise a Pal's stats, so a few extra runs also pay into the team that won them.
The statue itself costs another 100 Hallowed Bar to build and is purely decorative — the full build card is in how to get the Moon Lord Statue.
Summary
Beat standard Moon Lord for the Master sigil, then summon the Level 80 version far from your base. Wear Hallowed Plate Mail to take the ×7 down to about ×4.9, bring Astralym and your top-rarity Charge Rifle or Laser Sword, and clear hands, head, then core while staying mounted for the Deathray. Kill the True Eyes the moment they appear. The prize is a guaranteed Moon Lord Statue Schematic, a fresh Master sigil, and bulk Ancient Parts and Diamonds every clear.
Related Guides
Hubs: all Palworld guides · every raid boss and its battle multipliers · the interactive map
- How to beat the Moon Lord raid boss — the Level 50 fight that drops your Master sigil
- How to get the Moon Lord Statue — the trophy build the Master schematic unlocks
- Eye of Cthulhu location and drops — the Hallowed Bar source
- Hallowed Plate Mail schematic and stats — the 30% collab damage cut
- How to beat Xenolord (Ultra) — another hard-mode raid, with a real element to exploit
- How to beat Hartalis (Ultra) — the ×13 damage hard mode for comparison
- How to min-max Pals — getting a squad to raid-ready attack
- Tides of Terraria update — everything the crossover added