How to Get Pal Surgery Table: Cost, Uses, and Implants
How to unlock the Pal Surgery Table in Palworld: technology level 38 for 3 points, the 30 Refined Ingot, 20 High Quality Cloth and 10 Corrosive Solvent it costs, how to swap a Pal's passive skills or gender, and all 40 implants with their effects and sources.
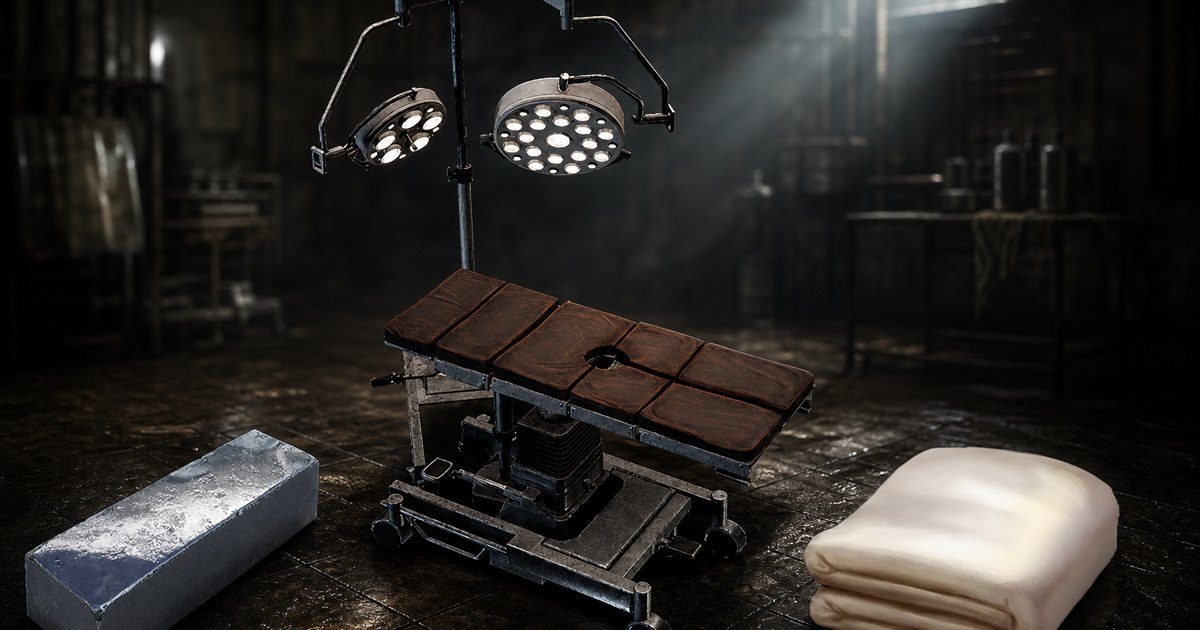
The Pal Surgery Table is the base structure that finally lets you rewrite a Pal instead of re-catching it — bad passive skills come off, good ones go on, and the wrong gender stops being a dead end. This guide covers the technology level it unlocks at, the full build cost down to the raw ore, what each of its two features actually does, and all 40 implants with their effects and where each one comes from.
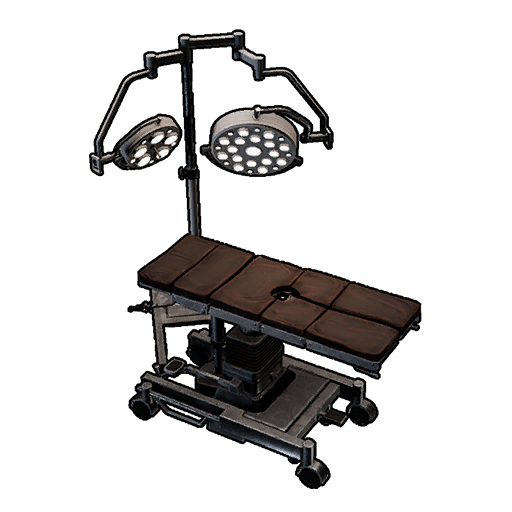 Pal Surgery Table at a Glance
It arrived with the Tides of Terraria update and sits in the Pal tab of the build menu, next to the Pal Dressing Facility and the Breeding Farm — not under Furniture or Production, which is where most people go hunting for it. At technology level 38 it is the sixth-latest of the 23 Pal-category structures, so it lands well after the Breeding Farm at level 19 and the Pal Essence Condenser at level 14. That ordering matters: by the time you can build this, you already have a breeding line running and a stack of Pals with junk passives waiting to be fixed.
| What | Detail |
|---|---|
| Type | Base structure, filed under the Pal tab in the build menu |
| Technology level | Lv. 38 |
| Technology points | 3 |
| Materials | 30 Refined Ingot, 20 High Quality Cloth, 10 Corrosive Solvent |
| Build workload | 10 |
| What it does | Adds or replaces a Pal's passive skills, or changes a Pal's gender |
| Surgery fee | One implant plus 50,000 Gold per passive-skill operation |
| Implants in the game | 40 reusable implants, plus 28 single-use Disposable Implants |
Three technology points is a real ask at level 38 — the same rung also holds the Meteor Launcher, the Refrigerator and the Quivern Saddle, and all of those compete for the same budget. The table wins the argument for one reason: every other upgrade path in the game caps out, while passive skills are the only stat multiplier you can keep re-rolling forever. Pair it with the condensing and IV work in the Palworld min-max guide and it is the last piece of a finished Pal.
How to Unlock the Pal Surgery Table
Two gates, and the second one is the slow half. You need character level 38 with 3 spare technology points, and you need three processed materials that all come off different production chains — a furnace line, a cloth line, and a chemical line. None of it is rare, but you will not have all three sitting in a chest by accident.
Reach Level 38 and Spend 3 Technology Points
Open the technology tree and grab Pal Surgery Table from the level 38 row. Of the 480 base structures in the game, 290 unlock at level 38 or earlier, so this is squarely mid-game furniture rather than an endgame flex — you will hit the level well before you can comfortably afford the materials. If your points are tight, the Refrigerator on the same row is the one worth taking first, since spoiled food costs you every day and a passive re-roll can wait a level. Full unlock order and point costs are on the Palworld technology tree.
 Gather the Three Crafting Materials
Refined Ingot is the bulk of the build and the easy part — 30 of them is a single furnace shift. High Quality Cloth is the annoying part if you are farming it by hand, because each one eats 10 Wool, and Corrosive Solvent is the part people forget, since it needs the Production Assembly Line at technology level 29 before you can make a single unit. Check that you have the assembly line standing before you start mining, or you will end up with two thirds of a table and nowhere to finish it.
| Material | Qty | Where to get it |
|---|---|---|
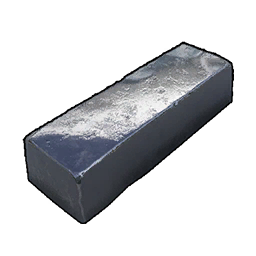
| Refined Ingot | 30 | Smelt 2 Ore + 2 Coal per ingot at a furnace. Also turns up in Forest treasure chests at 4.67% |
 High Quality Cloth High Quality Cloth | 20 | Craft from 10 Wool + 1 Leather at the High-Quality Workbench, or ranch it directly from Sibelyx. Caravan merchants sell it at 2,640 Gold each |
 Corrosive Solvent Corrosive Solvent | 10 | Craft from 1 Venom Gland + 1 Sulfur at the Production Assembly Line (Lv. 29) |
Buying the cloth is a trap unless you are swimming in money — 20 High Quality Cloth at caravan prices is 52,800 Gold, which is more than a passive-skill surgery costs. Ranch it or weave it. If you do want the Gold route anyway, the fastest income methods are in the Palworld Gold farming guide.
The Full Raw Material Cost
Nothing on the build list is a base resource, so the real shopping list is one layer deeper. Broken all the way down, the table costs 60 Ore, 60 Coal, 200 Wool, 20 Leather, 10 Venom Gland and 10 Sulfur. Wool is the single biggest line by a mile — 200 units — which is why a wool ranch pays for this build faster than any amount of mining does.
| Raw material | Total needed | Where it comes from |
|---|---|---|
 Wool Wool | 200 | Ranch Lamball, Cremis or Melpaca — no nodes, no drops needed |
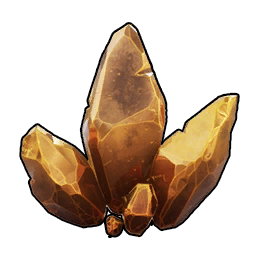 Ore Ore | 60 | 1,632 Ore nodes on the Palworld interactive map |
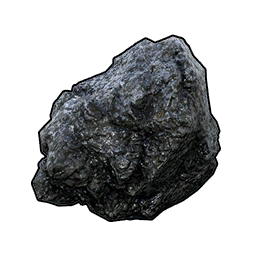 Coal Coal | 60 | 824 Coal nodes on the Coal map layer, mostly desert and volcano |
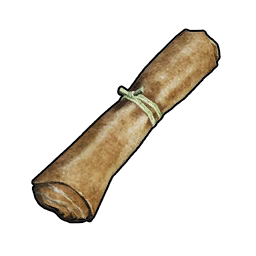 Leather Leather | 20 | Drops from most beast-type Pals; every village and caravan shop sells it at 200 Gold |
 Venom Gland Venom Gland | 10 | Ranch Depresso or Caprity Noct, or buy at 300 Gold. Ancient Feybreak Ruins expeditions return 10-20 |
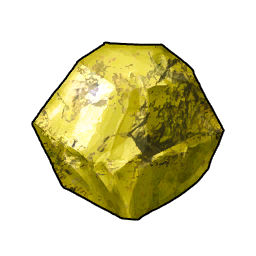 Sulfur Sulfur | 10 | 655 Sulfur nodes on the Sulfur map layer. Blazing Cavern expeditions return 20-40 |
 Ranch Pals That Cover Most of the Bill
Two of the six raw lines are pure ranch output, and one of them skips a crafting step entirely. Sibelyx drops finished High Quality Cloth straight onto the ranch floor, so a single Sibelyx removes the 200 Wool and 20 Leather from your list in one move — that is the highest-value ranch Pal you can own for this build. If you cannot catch one yet, three Wool producers cover the same ground more slowly, and Depresso handles the Venom Gland while being one of the easiest Pals on the island to find.
| Pal | Ranch output | Spawn points |
|---|---|---|
| Sibelyx | High Quality Cloth — skips the weaving step entirely | 48 |
 Sibelyx Primo Sibelyx Primo | High Quality Cloth, at the highest ranch output rank in the game | 82 |
 Lamball Lamball | Wool — the level-1 starter option, catch one in the first five minutes | 351 |
 Melpaca Melpaca | Wool, at a better rank than Lamball | 270 |
 Cremis Cremis | Wool, same rank as Melpaca | 200 |
 Depresso Depresso | Venom Gland — 406 spawn points, the most common source on the island | 406 |
 Caprity Noct Caprity Noct | Venom Gland, if you want it on a Pal that also fights | 51 |
Spawn point counts are how many places on Palpagos Islands each Pal can appear, so Depresso at 406 is genuinely hard to miss while Sibelyx at 48 is a trip you plan. Every one of those locations is pinned on the Palworld interactive map — filter by the Pal and the pins light up.
What the Pal Surgery Table Does
Two features, and they solve two completely different problems. One rewrites the passive skills a Pal was born with, and one flips its gender. Both operate on a Pal you already own, so nothing here replaces catching or breeding — it just stops a good Pal from being wasted by a bad roll.
Change a Pal's Passive Skills
This is the headline feature. Feed the table an implant and 50,000 Gold, and the passive it carries goes onto your Pal. That is a real bill — you are paying roughly the value of a legendary schematic every time you tune a Pal — so the sensible pattern is to fix your keepers only: the mount you actually ride, the four or five workers that run your main base, and whatever you are breeding from. Everything else can stay as it rolled. If you would rather chase perfect passives from eggs instead of buying them, the inheritance rules are in the Palworld breeding guide, and the full effect list for every skill in the game is on the Palworld passive skills list.
Change a Pal's Gender
The second feature looks minor until you try to breed something with a lopsided gender ratio. 244 of the 288 Pals in the game are a straight 50/50 coin flip, so for most of the roster this button is a convenience. For the other 44 it is the difference between one surgery and an hour of re-catching. Kingpaca is 90% male, so the female you need for a breeding pair shows up roughly once in ten catches; Bellanoir and Elizabee run the same problem in reverse at 10% male. Catch whatever the world gives you, then operate.
| Pal | Chance of male | Why it hurts |
|---|---|---|
 Kingpaca Kingpaca | 90% | Females are a 1-in-10 catch — the worst male skew in the game, shared with Kingpaca Cryst |
 Warsect Warsect | 85% | Same problem on a Pal you want breeding for its defensive line |
 Mimog Mimog | 80% | Rare enough that re-catching for gender is not a realistic plan |
 Knocklem Knocklem | 70% | Both forms skew male at the same rate |
 Bellanoir Bellanoir | 10% | Raid-boss line, so every catch is expensive |
 Elizabee Elizabee | 10% | Males are the rare half here — Beegarde shares the same 10% |
 Selyne Selyne | 20% | Skews female, and there is no farming around it |
 Mozzarina Mozzarina | 20% | Milk ranch staple, so you want a breeding pair early |
All Implants and How to Get Them
There are 40 reusable implants. Nineteen are available at the table from the moment you build it, seven come from the Bounty Shop, seven from the Arena Shop, and the seven strongest are locked behind Ancient Relic recycling. Heads up on the pictures: every implant in the game shares the exact same chip icon in your inventory, so the tables below list them by name and effect instead — the art tells you nothing, the numbers tell you everything.
Implants Unlocked by Default
These nineteen cost you nothing but the 50,000 Gold surgery fee, and a few of them are quietly excellent. Insomnia is the standout — a worker that never sleeps is a straight uptime gain on a base that otherwise goes quiet every night, and no percentage buff in this tier beats that. Philanthropist doubling breeding-farm speed is the other one worth paying for immediately. Work Slave is the trap: +30% Work Speed for -30% Attack is fine on a Pal that never leaves your base and terrible on anything you take out.
| Implant | Effect | Best on |
|---|---|---|
| Insomnia | Does not sleep, keeps working at night | Any base worker |
| Philanthropist | Breeding speed +100% when assigned to a Breeding Farm | Breeding pair |
| Work Slave | Work Speed +30%, Attack -30% | Base-only workers |
| Serious | Work Speed +20% | Base workers |
| Ferocious | Attack +20% | Combat Pals |
| Brave | Attack +10% | Combat Pals |
| Hard Skin | Defense +10% | Front-line Pals |
| Impatient | Active skill cooldown -15% | Combat Pals |
| Nimble | Movement Speed +10% | Mounts |
| Fit as a Fiddle | Max Stamina +25% (rideable Pals only) | Mounts |
| Sleek Stroke | Movement speed on water +30% | Swimming mounts |
| Workaholic | SAN drops 15% slower | Base workers |
| Positive Thinker | SAN drops 10% slower | Base workers |
| Diet Lover | Hunger drops 15% slower | Base workers |
| Dainty Eater | Hunger drops 10% slower | Base workers |
| Mine Foreman | Player Mining Efficiency +25% | Party Pal on ore runs |
| Logging Foreman | Player Logging Efficiency +25% | Party Pal on wood runs |
| Fine Furs | Items sell for +3% more | Your selling Pal |
| Mercy Hit | Pacifist — will not drop a target below 1 HP | Capture runs |
Implants from the Bounty Shop
Seven implants sit with the PIDF Bounty Officer at 15 Successful Bounty Tokens each. This is the best-value tier in the game: Artisan at +50% Work Speed is more than double what the free Serious gives you, and it costs a couple of bounties rather than a relic lottery. Motivational Leader, Vanguard, Stronghold Strategist and Wellness Watcher all buff you rather than the Pal, which means one Pal in your party carries the buff for your whole run. Where the tokens come from is covered in the Palworld bounty targets guide.
| Implant | Effect | Price |
|---|---|---|
| Artisan | Work Speed +50% | 15 Successful Bounty Tokens |
| Burly Body | Defense +20%, immune to flinch | 15 Successful Bounty Tokens |
| Musclehead | Attack +30%, Work Speed -50% | 15 Successful Bounty Tokens |
| Motivational Leader | Player Work Speed +25% | 15 Successful Bounty Tokens |
| Vanguard | Player Attack +10% | 15 Successful Bounty Tokens |
| Stronghold Strategist | Player Defense +10% | 15 Successful Bounty Tokens |
| Wellness Watcher | Player Stamina Consumption -5% | 15 Successful Bounty Tokens |
Implants from the Arena Shop
The Arena Merchant takes 50 Battle Tickets per implant, and this tier is where the mount upgrades live. Runner and Infinite Stamina together turn a decent mount into a long-haul one, and Serenity is the single best combat implant you can buy rather than gamble for — a flat 30% cooldown cut with +10% Attack attached beats anything in the free tier. Tickets come from Palworld arena runs, so this tier is gated by time rather than luck.
| Implant | Effect | Price |
|---|---|---|
| Serenity | Active skill cooldown -30%, Attack +10% | 50 Battle Tickets |
| Runner | Movement Speed +20% | 50 Battle Tickets |
| Infinite Stamina | Max Stamina +50% (rideable Pals only) | 50 Battle Tickets |
| Ace Swimmer | Movement speed on water +40% | 50 Battle Tickets |
| Noble | Items sell for +5% more | 50 Battle Tickets |
| Healing Coach | Player health regeneration rate +5% | 50 Battle Tickets |
| Reload Master | Player reload speed +4% | 50 Battle Tickets |
Implants from Ancient Relic Recycling
The seven best passives in the game are not sold anywhere. They come out of the Ancient Relic Recycler, and the odds are brutal — the highest grade of relic pays out a specific implant 0.812% of the time, and a Decayed relic drops to 0.051%. That is roughly one in 123 Glistening relics or one in 1,960 Decayed ones for any single implant you are chasing. Feed the recycler the best relics you own and treat everything that comes out as a bonus, because targeting one specific implant here is not a plan.
| Implant | Effect | Drop chance per relic |
|---|---|---|
| Remarkable Craftsmanship | Work Speed +75% | 0.812% Glistening, 0.406% Glowing, 0.203% Gorgeous, 0.102% Dormant, 0.051% Decayed |
| Demon God | Attack +30%, Defense +5% | Same tiered odds, 0.051%-0.812% |
| Diamond Body | Defense +30%, immune to flinch and knockback | Same tiered odds, 0.051%-0.812% |
| Swift | Movement Speed +30% | Same tiered odds, 0.051%-0.812% |
| Eternal Engine | Max Stamina +75% (rideable Pals only) | Same tiered odds, 0.051%-0.812% |
| Mastery of Fasting | Hunger drops 20% slower | Same tiered odds, 0.051%-0.812% |
| Heart of the Immovable King | SAN drops 20% slower | Same tiered odds, 0.051%-0.812% |
Disposable Implants You Can Only Pull from Relics
Alongside those, the recycler hands out 28 Disposable Implants, and the name is the whole story — one surgery, then it is gone. Twenty-one of the passives on this list have no reusable version at all, which makes them the rarest tuning in the game. The five below at 3.888% from Glistening Ancient Relics are the realistic targets: that is one in roughly 26 relics, a genuinely farmable number, and Immortality and Idiosyncratic are stronger than anything you can buy with tokens or tickets.
| Disposable Implant | Effect | Drop chance |
|---|---|---|
| Immortality | Life Steal +5%, Pal health regeneration +100%, Attack +15% | 3.888% from Glistening Ancient Relics |
| Idiosyncratic | Health regeneration +50%, Defense +25%, immune to Poison and Burn | 3.888% from Glistening Ancient Relics |
| Babysitter | Egg production +30% and incubation speed +30% at a base | 3.888% from Glistening Ancient Relics |
| Heavily Armored | Immune to explosion damage | 3.888% from Glistening Ancient Relics |
| Skymarcher | Mounted jump count +2 | 3.888% from Glistening Ancient Relics |
| God of Destruction | Attack +40%, Defense +20%, Max Health -50% | 0.051%-0.812% depending on relic grade |
| Vampiric | Absorbs damage dealt as health, and never sleeps | 0.051%-0.812% depending on relic grade |
| King of the Waves | Movement speed on water +50% | 0.051%-0.812% depending on relic grade |
| Dimensional Leap | Movement Speed +50%, Hunger drains 15% faster | 0.051%-0.812% depending on relic grade |
Best Implants to Install First
At 50,000 Gold a surgery you cannot fix everything, so spend on the operations that change what your save can do rather than the ones that shave a number. The order below is roughly what pays back fastest: base throughput first, because it compounds every hour you play, then breeding, then combat, then travel. Insomnia and Philanthropist being free at the table means the two biggest wins cost you nothing but the fee.
| Implant | Effect | Why it is worth 50,000 Gold |
|---|---|---|
| Insomnia | Never sleeps | Turns a base worker into a 24-hour worker — no percentage buff in the game adds that much raw output, and it is free at the table |
| Philanthropist | Breeding speed +100% | Halves the wait on every egg you make, so it pays for itself across one breeding project |
| Artisan | Work Speed +50% | Two and a half times what the free Serious gives, for 15 bounty tokens — the best value in the game |
| Remarkable Craftsmanship | Work Speed +75% | The ceiling for base output, but relic-locked at under 1% per pull — take it if you find it, do not farm for it |
| Serenity | Cooldown -30%, Attack +10% | The strongest combat implant you can buy on a fixed price instead of a lottery |
| Demon God | Attack +30%, Defense +5% | The biggest flat Attack boost among reusable implants, with no drawback attached |
| Diamond Body | Defense +30%, immune to flinch and knockback | The flinch and knockback immunity matters more than the 30% in boss fights |
| Swift | Movement Speed +30% | Best travel implant, and it stacks with a fast mount rather than replacing one |
One habit worth building: run the surgery after you finish condensing a Pal, not before. Condensing and passive skills are independent, but doing the cheap grind first means you never pay 50,000 Gold twice on a Pal you end up replacing. The full ordering for building a finished Pal is in the Palworld Pal ranking guide.
Related Guides
Everything else worth reading once the table is standing:
- Palworld base structures list — all 480 buildable structures with costs
- Palworld passive skills list — every passive skill and what it does
- How to Min-Max Pals: IVs, Passives, Souls, and Condensing
- How Breeding Works: Combi Ranks, Unique Combos, and Inheritance
- How to Get and Use the Ancient Relic Recycler
- All Bounty Targets: Token Payouts and Every Bounty Reward
- How to Farm Gold Fast: Best Money Making Methods
- Best Base Pals in Palworld: 7 Workers for Every Job
- All Palworld guides