Best Fishing Team: All 7 Fishing Pals, Ranks, and Saddles
The five-slot fishing party in Palworld: all 7 Pals whose partner skill only works with a rod out, the exact percentage each one pays from unranked to ☆4, which four are dead until their saddle is built, where to catch every one of them, and the bait that stacks on the same channel.
Exactly seven Pals in the Paldex carry a partner skill that does nothing at all unless you have a rod out, and between them they move five different parts of a cast — where the gauge starts, how fast it fills, what a miss costs you, what falls out alongside the Pal, and how good that Pal's stats are when it lands. This guide covers the five-slot party worth running, the exact figure every one of the seven pays from an unranked copy up to ☆4, which four of them are inert until you build a saddle, where to catch all seven, and which bait stacks on top instead of overlapping.
 The Best Fishing Team
None of these skills need the Pal summoned. They pay out from a party slot, which is the whole reason a fishing team is worth building at all — you fill four slots with anglers, keep the fifth for whatever you were already carrying, and every cast for the rest of the session is better. The four below were picked because no two of them touch the same number: Whalaska handles the gauge, Solmora Lux handles what you land, Gloopie handles what a miss costs, and Jelliette handles the haul. Stacking two Pals that both raise drops would waste a slot; this spread does not overlap anywhere.
| Slot | Pal | Partner Skill | What it changes | Live when |
|---|---|---|---|---|
| 1 |  Whalaska Whalaska | Chilled Whale Cruiser | Gauge opens partly filled and fills faster on the shadow | Saddle built (tech 42) |
| 2 | Solmora Lux | Shocking Fish | Better odds the Pal you land has high stat potential | Saddle built (tech 66) |
| 3 |  Gloopie Gloopie | Sticky Princess | Gauge drains slower while the bar is off the shadow | The moment you catch it |
| 4 |  Jelliette Jelliette | Jelliette Drop | More items on the line and more drops off the Pal you hook | The moment you catch it |
| 5 | Free | — | Your mount, your fighter, or Jellroy if you are salvaging | — |
Slot 5 is genuinely free and should stay that way for most of a playthrough, because the two saddle-gated slots take a long time to switch on and the other two are worth almost nothing while you are still on a Beginner rod. Early on the honest version of this team is Gloopie plus Jelliette and three empty slots — both are Beginner-pool catches, both are live from the moment they are yours, and together they cover the two things a new angler actually loses casts to. Swap Whalaska Ignis into slot 1 only after its saddle exists, and hand slot 5 to Jellroy on days you are running the magnet instead of hunting Pals. You can stack any five of these in the Palworld Team Builder to see the totals side by side.
All 7 Fishing Partner Skills and What They Pay
Every ladder below is the Pal's own rank ladder — five steps from an unranked copy up to ☆4, the same steps the Pal Essence Condenser climbs. The spread between the two ends is what decides whether a Pal is worth feeding duplicates into, and it is wildly uneven here: the two jellyfish gain 40 percentage points across the ladder while both sunfish gain 8 or 10, so one family is worth condensing and the other is close to finished the day you catch it. Read the "live when" column first, though, because a skill that has not switched on yet is worth zero regardless of what its top step says.
| Pal | Partner Skill | What it moves | Unranked | ☆4 | Live when |
|---|---|---|---|---|---|
| Jelliette | Jelliette Drop | Extra items on the line, and extra drops off the Pal you hook | +55% | +95% | On catch |
 Jellroy Jellroy | Jellroy Drop | Extra loot out of salvage pulls only | +55% | +95% | On catch |
| Gloopie | Sticky Princess | Cuts what the gauge loses while the bar is off the shadow | −12% | −35% | On catch |
| Whalaska | Chilled Whale Cruiser | Starting gauge, and gauge fill rate — both at once | +5% / +5% | +14% / +14% | Saddle at tech 42 |
 Whalaska Ignis Whalaska Ignis | Cozy Whale Cruiser | Starting gauge, and gauge fill rate — both at once | +7% / +7% | +17% / +17% | Saddle at tech 71 |
 Solmora Solmora | Charming Fish | Chance the Pal you land rolls high stat potential | 70% | 80% | Saddle at tech 65 |
| Solmora Lux | Shocking Fish | Chance the Pal you land rolls high stat potential | 74% | 82% | Saddle at tech 66 |
The ordering here is close to the reverse of how useful the Pals are, and that is the awkward part of the whole family. Jelliette, Jellroy and Gloopie are all Beginner-grade catches with no saddle, no tech unlock and no crafting in front of them — three of the seven are free and available on your first rod. The four that move the minigame itself are locked behind saddles at technology levels 42, 65, 66 and 71, so the Pals that make fishing easy are the ones you have to already be good at fishing to reach. Plan the team in two halves: the free pair now, the gauge and talent pair much later.
Gloopie: The Only Skill That Pays on a Miss
Six of the seven skills reward you for doing well. Sticky Princess is the only one that reduces the punishment for doing badly — while your bar has slipped off the shadow and the capture gauge is bleeding back down, Gloopie trims that loss by 12% on a fresh catch and 35% at ☆4. That makes it the single most forgiving pick in the family and the one that matters most on high-grade water, where the shadow fights the bar hardest and a run of failed casts costs you rod durability as well as bait. It is also completely free: Gloopie is a Paldeck #48 Water and Dark Pal, it is not rideable, there is no saddle or gear anywhere in front of it, and the bonus starts the instant it joins the party.
One trap worth flagging — the Gloopie Primo subspecies is not an upgrade here. It shares the Paldeck slot and the look, but its partner skill is a flat defense ladder of 15% climbing to 30%, with no fishing line on it at all. If you are building this team, the plain Water and Dark form is the one you want, and a Primo in the slot does nothing for your casts.
Whalaska and Whalaska Ignis: A Head Start on the Gauge
Whalaska's card understates it badly, because the skill pays the same figure twice on every single cast. One half sets where the capture gauge already sits the moment the minigame opens — you begin the fight partway home rather than from empty — and the other half raises how much each frame of overlap fills it. Both halves run 5% on an unranked copy through 7, 9, 11 and 14% at ☆4. Whalaska Ignis runs the identical pair at 7% through 17%, which is the strongest fishing bonus in the game, and it is also the last one you will ever get.
| Whalaska | Whalaska Ignis | |
|---|---|---|
| Elements | Ice / Water | Ice / Fire |
| Starting gauge, unranked → ☆4 | +5% → +14% | +7% → +17% |
| Gauge fill rate, unranked → ☆4 | +5% → +14% | +7% → +17% |
| Saddle technology level | 42 | 71 |
| Saddle materials | 20  Leather · 10 Leather · 10  Cloth · 20 Cloth · 20  Refined Ingot · 10 Refined Ingot · 10  Cryogenic Coolant · 25 Cryogenic Coolant · 25  Paldium Fragment Paldium Fragment | 24 Leather · 12 Cloth · 20  Soralite Ingot · 20 Soralite Ingot · 20  Flame Organ · 30 Paldium Fragment Flame Organ · 30 Paldium Fragment |
| Fished from | Advanced spots, Lv 50–69 | Grand Master spots, Lv 71–79 |
| Map spawn spots | 187 | 112 |
Twenty-nine technology levels separate the two saddles, and the real distance is wider than that, because the Ignis saddle wants 20 Soralite Ingot and Soralite Ingot comes out of nothing but an Ancient Furnace — another unlock at level 66 costing 5 technology points, needing Pals with high Kindling and high Cooling stationed at it, and taking roughly a hundred times as long per ingot as a Refined Ingot does. Plain Whalaska's saddle asks for Refined Ingot and Cryogenic Coolant, both of which you will have been stockpiling anyway by the time you hit level 42. Run the plain form. It is the one that actually carries you up the fishing tiers, and its twin arrives three points of gauge later, after the climb is already over. Whalaska also has an alpha at level 55 and Whalaska Ignis one at level 74 — check the Palworld interactive map for the exact pins on both.
Solmora and Solmora Lux: Better Pals Out of the Same Water
Charming Fish and Shocking Fish do not make the minigame easier by a single point. What they change is the quality of what you pull out of it — the chance that the Pal on the end of the line rolls high stat potential rather than average. That is the reason a fishing team exists for a lot of players in the first place, because hooking a Pal you were going to catch anyway is worth far more when its stats came out near the top of the range. If you are not sure what that ceiling looks like, the highest max IV stats by Pal breakdown shows exactly what a good roll is worth.
| Solmora | Solmora Lux | |
|---|---|---|
| Elements | Water | Water / Electric |
| High-potential chance, unranked | 70% | 74% |
| High-potential chance, ☆4 | 80% | 82% |
| Extra ladders on the same skill | Swim speed +10–25% | Swim speed +10–25%, ranged attack +5–20%, element switch to Electric |
| Saddle technology level | 65 | 66 |
| Saddle materials | 20 Leather · 10 Cloth · 10  Coralum Ingot · 25 Paldium Fragment Coralum Ingot · 25 Paldium Fragment | 24 Leather · 12 Cloth · 12 Coralum Ingot · 20  Electric Organ · 30 Paldium Fragment Electric Organ · 30 Paldium Fragment |
| Map spawn spots | 109 | 251 |
There is no argument between these two. Solmora Lux leads at every single rank — 74% against 70% unranked, 82% against 80% at the top — for the sake of one extra technology level, and it throws in a ranged attack ladder and an element switch that plain Solmora does not have. It is also more than twice as common in the wild, at 251 spawn spots against 109. The one thing the base form has going for it is a cheaper saddle with no Electric Organ line, and if you are 25 Coralum Ingot short that is a real consideration — where to find Coralum Ore covers the input. Otherwise take the Lux. Note that the top of this ladder is only 8 to 12 points above the bottom, which is the flattest climb in the family: a freshly caught Solmora Lux is already doing 90% of the job, so spare copies are better off condensed into something else.
Jelliette and Jellroy: Same Ladder, Different Payout
These two look identical on paper — both climb 55% to 95% across the ranks, both are Paldeck neighbours, both are free the moment you catch them. They are not the same skill. Jelliette pays on two channels at once, adding items to what comes up on the line and raising the drops off the Pal you hooked, so it is live on every cast you make. Jellroy pays on exactly one: salvage pulls, the junk-and-treasure hauls you get with a magnet. If you are fishing for Pals, Jellroy is dead weight in the slot, and if you are running salvage, it is the best thing you can put there.
| Pal | Skill | Pays on Pal catches | Pays on salvage | Unranked → ☆4 | Also carries |
|---|---|---|---|---|---|
| Jelliette | Jelliette Drop | Yes — items and Pal drops | No | +55% → +95% | Watering work speed +50→120% |
| Jellroy | Jellroy Drop | No | Yes | +55% → +95% | Watering work speed +50→120% |
Both also carry a watering work-speed ladder, and that is the one thing to be careful about: a base job and a party slot cannot run at the same time, so each copy does one thing or the other. Pick a use per Pal rather than trying to get both out of the same body. This family has the steepest condense ladder of the seven — 40 percentage points between an unranked copy and ☆4 — so if you are only going to feed duplicates into one member of the fishing team, feed them into Jelliette. It is also the easiest to farm for: Jellroy shows up across 1,193 spawn spots on the Palworld interactive map and is heavily nocturnal, and Jelliette sits at 868 spots and prefers daylight.
 What You Need Before Any of This Works
The gate on the whole activity is small and comes early. The Beginner Fishing Set unlocks at technology level 15 for 2 points and gives you both halves you need at once — the Beginner Fishing Rod (Chillet) and Simple Bait — and you cannot cast at all without bait in the bag. From there the ladder is a rod every fifteen-odd levels, with the Advanced Fishing Rod (Depresso) at the top as a Legendary-rarity schematic craft rather than a tree unlock. Everything else on this page is optional layers on top.
| Requirement | Where it comes from | Needed for |
|---|---|---|
| Beginner Fishing Set | Technology level 15, 2 points | Casting at all — rod plus  Simple Bait Simple Bait |
| Any Pal from the free three | Catching it | Gloopie, Jelliette or Jellroy pay from the party slot with nothing built |
| Whalaska Saddle | Technology level 42, 3 points | Switching on Whalaska's gauge bonus |
| Solmora Lux Saddle | Technology level 66, 4 points | Switching on the stat-potential bonus |
| Whalaska Ignis Saddle | Technology level 71, 4 points, plus an Ancient Furnace | The strongest gauge bonus in the game |
 Powerful Fishing Magnet Powerful Fishing Magnet | Technology level 62, 3 points | Salvage pulls — the only thing Jellroy pays on |
Note that being rideable is not what gates these skills. Three of the seven are not mounts and need nothing; the other four hold their fishing bonus behind a saddle even though the effect has nothing to do with sitting on the Pal. Building the saddle is the switch, not equipping it, and once it exists the bonus runs from a reserve slot with the Pal never summoned.
 Where to Catch All Seven
There are 367 fishing spots on the main map plus 55 more in the tree region, with 102 and 22 rare spots on top, and every one of them is pinned on the Palworld interactive map. Four of the seven are catchable by rod, which is the neat part of this family — you fish up the Pals that make you better at fishing — and all seven also spawn on land or in open water where a sphere works just as well. The Beginner-pool three are the ones to grab first; the rest can wait for the tech levels.
| Pal | Fishing tier | Fished level band | Spawn spots | Best time | Map |
|---|---|---|---|---|---|
| Jelliette | Beginner | Lv 1–32 | 868 | Day | View pins |
| Jellroy | Beginner | Lv 1–45 | 1,193 | Night | View pins |
| Gloopie | Beginner | Lv 10–49 | 743 | Night | View pins |
| Whalaska | Advanced | Lv 50–69 | 187 (alpha at Lv 55) | Day | View pins |
| Solmora | Expert | Lv 65–69 | 109 | Any time | View pins |
| Solmora Lux | Expert | Lv 65–79 | 251 | Any time | View pins |
| Whalaska Ignis | Grand Master | Lv 71–79 | 112 (alpha at Lv 74) | Any time | View pins |
Watch the rod-durability cost when you go hunting the late three. A cast at a Beginner spot strips 1 point of condition off your rod; from Advanced grade upward it costs 4, so the same rod gives you a quarter as many attempts against the water Whalaska and both Solmoras live in. Pack spares before the trip. Full pool odds, shadow sizes and grade difficulty are in the Palworld fishing database, and how to catch Pals covers the sphere route for anyone who would rather not fish for their anglers.
 Getting the Team to ☆4
Duplicates through the Pal Essence Condenser are the obvious route, and for Jelliette and Jellroy — the two with 40 points of headroom — it is worth the grind. For the rest it usually is not, and there is a shop route that skips the farming entirely. Starfruit each move a Pal one specific step of the ladder and are stocked at the Medal Shop; Ripe Starfruit adds a rank from wherever the Pal currently sits and is sold at the Bounty Shop. Recycling Ancient Relics turns up both kinds as well.
| Item | Moves | Price | Shop |
|---|---|---|---|
 Starfruit ☆1 Starfruit ☆1 | Unranked → ☆1 | 50 Dog Coin | Medal Shop |
 Starfruit ☆2 Starfruit ☆2 | ☆1 → ☆2 | 100 Dog Coin | Medal Shop |
 Starfruit ☆3 Starfruit ☆3 | ☆2 → ☆3 | 200 Dog Coin | Medal Shop |
| Starfruit ☆4 | ☆3 → ☆4 | 400 Dog Coin | Medal Shop |
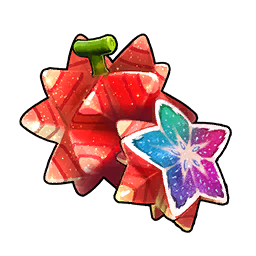 Ripe Starfruit Ripe Starfruit | One rank from anywhere | 50 Successful Bounty Token | Bounty Shop |
Priced out, the full climb from a fresh catch to ☆4 costs 750 Dog Coin in Starfruit, which is the right way to finish a Solmora Lux you are never going to see a spare of. The two sunfish gain only 8 and 10 points across the entire ladder, so they are the worst condense targets in the family and the best Starfruit targets — one purchase, done, no duplicate hunting. Do the opposite with the jellyfish: they spawn in the four figures, so duplicates cost you nothing but time and the payoff is four times larger.
 Bait to Pair With Each Slot
Nine baits exist and they move four different numbers between them, which means the useful question is not "which bait is best" but "which bait doubles down on what my party already does". The table below is the overlap map. Everything in it is a multiplier on the cast rather than a flavour difference, and the two 80% baits are the only ones that meaningfully change what a session is worth.
| Bait | What it does | Stacks with |
|---|---|---|
| Simple Bait | Baseline — required to cast at all | — |
| Beginner Bait | Gauge drains at 0.68× | Gloopie |
 High Quality Bait High Quality Bait | 1.5× chance a Pal bites | Nothing — no partner skill touches bite rate |
| Sweet Bait | 1.5× bite chance, cheaper tier | Nothing |
| Deluxe Bait | Minigame bar 1.15× wider | Nothing directly |
| Quick Bait | Bar 1.25× wider and 1.5× bite chance | Nothing directly |
| Lucky Bait | Bar 1.25×, +40% Pal drops, +40% item drops | Jelliette |
 Alluring Bait Alluring Bait | Bar 1.3×, +40% Pal drops, +40% item drops | Jelliette |
| Risky Bait | +80% Pal drops and item drops, harder bar | Jelliette and Whalaska |
Read that last row against slot 1 and the team starts to look deliberate. Risky Bait hands you the largest haul multiplier in the game and takes the minigame bar away in exchange — and a ☆4 Whalaska opening the gauge 14% full and filling it 14% faster is precisely the counterweight that makes the trade survivable. Nothing in the family stacks with bite chance, so High Quality and Sweet Bait are for sessions where you are waiting around rather than losing casts. Full bait multipliers, pond percentages and both salvage wreck tables live on the Palworld fishing database.
The Short Answer
Run Gloopie and Jelliette the whole game — both are free Beginner-pool catches whose bonuses are live from the party slot with nothing built, and between them they cut what a miss costs and raise what a hit pays. Add Whalaska at technology level 42 and Solmora Lux at 66, which are the only two saddles in this family genuinely worth the tech points, and leave the fifth slot for your mount. Feed duplicates into Jelliette because its ladder is worth 40 points; buy Starfruit for Solmora Lux because its ladder is worth 8. And skip Gloopie Primo, plain Solmora and — unless you are running the magnet — Jellroy.
Related Guides
Hubs: Palworld fishing database · all Palworld partner skills · Palworld Team Builder · Palworld interactive map · all Palworld guides
Fishing and catching: Palworld fishing guide: best catches, rods and bait · how to catch Pals · where to find Coralum Ore · all Water type Pals
Party building: best team comps · best Gobfin team · all Pals by max IV stats · how to farm IV fruits and training crystals