How to Min-Max Pals: IVs, Passives, Souls, and Condensing
The full min-max order for a Palworld 1.0 endgame Pal — the four-passive stack, +10 Potential fruits and what they cost, the 20-rank Statue of Power soul ladder (52 souls), star ranks, and the best skill fruits to overwrite with.

Building a maxed endgame Pal in 1.0 is a fixed pipeline of six steps, and running them out of order wastes consumables you can't refund. Here's the order, the exact cost of every stage, and which Pals actually deserve the 52 souls it takes to finish one.
 The Min-Max Order in Six Steps
The rule behind the order is simple: everything after step 2 is permanently bound to one specific Pal, and step 2 is the only stage that makes you throw Pals away. So you settle the species and the four passive slots first, then pour fruits, stars and souls into the body you decided to keep. Fixing a bad passive roll later means starting the whole spend again on a fresh hatch.
| Step | What it changes | Where you do it | Unlocked at |
|---|---|---|---|
| 1. Species | Base HP, Attack, Defense and element | Catching or the breeding calculator | Anytime |
| 2. Passives | Up to four percentage multipliers | 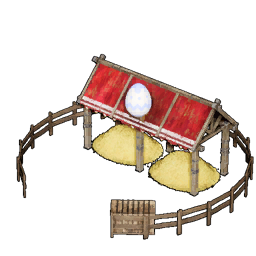 Breeding Farm Breeding Farm | Ancient Tech, Lv 19 |
| 3. Potential | The hidden 0-100 HP/Attack/Defense rolls | Potential fruits | Anytime |
| 4. Star rank | Overall stats and partner skill scaling |  Pal Essence Condenser Pal Essence Condenser | Ancient Tech, Lv 14 |
| 5. Soul ranks | A 20-rank stat ladder | 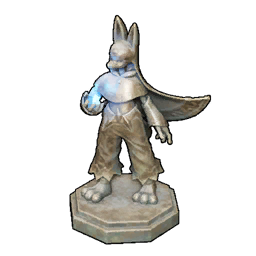 Statue of Power Statue of Power | Technology, Lv 9 |
| 6. Move set | Damage output in fights | Skill fruits | Anytime |
Steps 4 and 5 are interchangeable — condensing eats duplicates, not your keeper, so a Pal can climb both ladders in any order. Step 6 is the cheapest of the lot and the one most people skip, which is why a lot of "finished" Pals still fight with the level-1 move they hatched with.
Step 1: Pick a Species Worth 52 Souls
Passives and souls are multipliers on a base stat line, so the species you start with sets your ceiling before you spend a thing. These are the highest raw combat statlines in the game — Astralym is in a class of its own with 200 across attack, HP and defense, which is why it sits alone at the top of the combat tier list. Note that Jormuntide Ignis and Blazamut Ryu post their 150 as melee attack, so they only compare against other melee bruisers and they want close-range skills in step 6.
| Pal | Attack | HP | Defense | Why it's worth maxing |
|---|---|---|---|---|
| Astralym | 200 ranged | 200 | 200 | No weaknesses and no competition — the single best body to pour resources into |
 Panthalus Panthalus | 120 ranged | 180 | 200 | The tankiest option, and it drops a Giant Pal Soul itself |
 Frostallion Noct Frostallion Noct | 140 ranged | 140 | 135 | Carries Legend natively, so one passive slot is already filled |
 Necromus Necromus | 145 ranged | 130 | 120 | Legend carrier with the best attack of the legendary six |
 Bellanoir Libero Bellanoir Libero | 150 ranged | 120 | 100 | Highest ranged attack outside Astralym — glass, but it hits |
 Jormuntide Ignis Jormuntide Ignis | 150 melee | 130 | 100 | Top melee attack, and a Kindling Lv4 worker when it's off duty |
 Blazamut Ryu Blazamut Ryu | 150 melee | 105 | 125 | Melee damage with 125 defense instead of Jormuntide's 100 |
 Shaolong Shaolong | 135 ranged | 140 | 120 | Best all-rounder that also rides and waters at Lv8 |
If you only ever finish one Pal, make it Astralym — a 200/200/200 line means every percentage you add later is worth more than it would be on anything else. If you want the maxed Pal to also earn its keep at base or as a mount, Shaolong is the pick; the team comp guide covers who to pair it with.
Step 2: Lock In All Four Passive Slots
Four slots, and the game rolls them at hatch — that's the whole gate. Attack passives stack additively, so the slots you fill decide how much everything downstream is worth. These are the biggest damage passives in the game, with the drawbacks stated because most of the good ones have teeth:
| Passive | Effect | Rank |
|---|---|---|
| Twin-Edged Holy Blade | Attack +50%, Defense -30% | 5 |
| God of Destruction | Attack +40%, Defense +20%, Max HP -50% | 5 |
| Demon God | Attack +30%, Defense +5% | 4 |
| Musclehead | Attack +30%, Work Speed -50% | 2 |
| Legend | Attack +20%, Defense +20%, Move Speed +20% | 4 |
| Ferocious | Attack +20% | 3 |
| Lucky | Attack +15%, Defense +15%, Work Speed +20% | 4 |
| Immortality | Attack +15%, Life Steal +5%, HP regen +100% | 4 |
| Burly Body | Defense +20%, immune to flinch | 3 |
The theoretical ceiling is Twin-Edged Holy Blade + God of Destruction + Demon God + Musclehead: +150% attack, at the price of half your HP and a defense line that nets out to -5%. That Pal deletes bosses and dies to a stray AoE. The stack most people actually want is Twin-Edged Holy Blade + Demon God + Musclehead + Legend for +130% attack, +20% move speed and effectively no defense loss. The two rank-5 World Tree passives are the rarest rolls in the game, so treat them as the ceiling rather than the plan — swapping in Ferocious costs you 30 percentage points and nothing else.
Two things make the rolling bearable. Legend can't be rolled at all — it only exists on the six legendaries, and breeding is how you move it onto something else, which the exclusive passives guide walks through carrier by carrier. And the  Pal Surgery Table (Technology Lv 38, 3 points) flips a Pal's gender, so a perfect-passive offspring that hatched the wrong sex is still usable as a parent. Full mechanics live in the breeding guide, and the passive list has all 312 in the pool.
 Step 3: Read Potential with Ability Glasses
Potential is the hidden roll behind two identical Pals performing differently, and you can't min-max what you can't see. The Ability Glasses display HP, Attack and Defense on a 0 to 100 scale the moment you equip them — that's the number every fruit in the next step moves. They're Ancient Technology at level 34 for 4 points.
| Item | What it does | Materials |
|---|---|---|
| Ability Glasses | Shows HP, Attack and Defense Potential on a 0-100 scale | 30 Refined Ingot, 20 Paldium Fragment, 10 Ancient Civilization Parts, 5 Ancient Civilization Core |
 Pal Tamer's Glasses Pal Tamer's Glasses | Same reading, plus your attacks can't drop a target below 1 HP | 20 Refined Ingot, 30 Paldium Fragment, 10 Ancient Civilization Parts, 15 Ancient Bark |
Craft the Tamer's Glasses if you're still catching — the damage floor means you can hammer a legendary with a rocket launcher and never lose the capture. Once your box is set, the plain Ability Glasses are the lighter pick at 1.0 weight instead of 2.0. The core farming guide covers the one material that usually blocks the craft.
 Step 4: Top Up Potential with Fruits
Three consumables raise Potential directly, and each one is worth exactly +10 on that 0-100 scale. That makes the math clean: a Pal that reads 40 Attack needs six Power Fruits to top out, and filling a line from a zero roll takes ten. All three are sold at three different counters, so you buy with whichever currency you're drowning in:
| Fruit | Raises | Per use | Bounty Shop | Arena Shop | Medal Shop |
|---|---|---|---|---|---|
 Life Fruit Life Fruit | HP Potential | +10 | 25 Bounty Tokens | 100 Battle Tickets | 200 Dog Coins |
| Power Fruit | Attack Potential | +10 | 25 Bounty Tokens | 100 Battle Tickets | 200 Dog Coins |
 Stout Fruit Stout Fruit | Defense Potential | +10 | 25 Bounty Tokens | 100 Battle Tickets | 200 Dog Coins |
The Bounty Shop is the runaway best rate — 25 tokens against 100 Battle Tickets or 200 Dog Coins for the identical fruit. Taking all three lines from zero to 100 costs 30 fruits, which is 750 Successful Bounty Tokens at the bounty counter versus 6,000 Dog Coins at the Medal Shop. Work the bounty board before you touch the other two. Fruits also turn up in treasure map digs at every tier and out of the Ancient Relic Recycler.
 Crafting Fruits from Lotuses
If you'd rather not spend currency at all, each fruit has a recipe built entirely from stat lotuses. Those grow wild — there are 866 stat lotus pins on the interactive map's lotus layer — and they also drop out of oil rig crates and relic recycling.
| Fruit | Materials |
|---|---|
| Life Fruit | 3 Life Lotus (S), 3 Life Lotus (L), 3 Speed Lotus (S), 3 Carrying Lotus (S) |
| Power Fruit | 3 Power Lotus (S), 3 Power Lotus (L), 3 Speed Lotus (L) |
| Stout Fruit | 3 Stamina Lotus (S), 3 Stamina Lotus (L), 3 Carrying Lotus (L) |
Power Fruit is the cheapest of the three at nine lotuses instead of twelve, which is convenient given attack is the stat you'll want capped first. The recipes each carry a heavy work cost, so park your best Handiwork Pals on the bench — the worker rankings show who.
Step 5: Condense to Four Stars
The Pal Essence Condenser feeds same-species duplicates into your keeper and raises its star rank, which lifts its stats and scales its partner skill up the per-rank ladder. Your keeper's passives and Potential survive untouched — only the fodder is consumed. The full mechanic, build cost and duplicate strategy are in the rank-up guide.
If duplicates are painful to get — a legendary, a raid drop, a perfect-passive hatch you'd never feed to a machine — buy the stars instead. Starfruits skip the duplicate requirement entirely:
| Item | Raises | Price |
|---|---|---|
 Starfruit ☆1 Starfruit ☆1 | ☆0 to ☆1 | 50 Dog Coins |
 Starfruit ☆2 Starfruit ☆2 | ☆1 to ☆2 | 100 Dog Coins |
 Starfruit ☆3 Starfruit ☆3 | ☆2 to ☆3 | 200 Dog Coins |
 Starfruit ☆4 Starfruit ☆4 | ☆3 to ☆4 | 400 Dog Coins |
 Ripe Starfruit Ripe Starfruit | Any rank, +1 | 50 Successful Bounty Tokens |
Buying a Pal from zero stars to four costs 750 Dog Coins across the four graded Starfruits — cheap enough that duplicate-hunting a rare species is almost never worth the hours. The Ripe Starfruit is the flexible one: it works at any rank, so it's the right buy when you only need to close the last step. All five also drop from relic recycling.
Step 6: Climb the 20-Rank Soul Ladder
The Statue of Power is the cheapest structure on this page — Technology level 9 for 2 points, built from 20 Stone and 10 Paldium Fragment — and it hides the longest grind in the game. Offering Pal Souls at it runs a Pal up a 20-rank upgrade ladder, and the soul tier it demands escalates as you climb:
| Ranks | Soul required | Per rank | Total for the band |
|---|---|---|---|
| 1-4 |  Small Pal Soul Small Pal Soul | 1, 2, 3, 4 | 10 Small |
| 5-7 |  Medium Pal Soul Medium Pal Soul | 1, 2, 3 | 6 Medium |
| 8-10 |  Large Pal Soul Large Pal Soul | 1, 2, 3 | 6 Large |
| 11-20 |  Giant Pal Soul Giant Pal Soul | 1, 2, 2, 3, 3, 3, 4, 4, 4, 4 | 30 Giant |
That's 52 souls to take one Pal from rank 0 to rank 20, and 30 of them are Giant — the entire back half of the ladder is one bottleneck wearing a hat. The gold cost of resetting a rank also climbs from 100 up to 30,000, so pick the Pal before you start pouring. Pocketpair hasn't published the per-rank stat percentages, so judge progress by the rank counter rather than trying to do the arithmetic.
Where to Farm Each Soul
Every tier has three taps: Pals that drop it on death, dungeon chests, and expeditions. The first three tiers are trivially farmable from wild spawns — Wistella alone gives 3-5 Small Souls at a 100% rate, so the first four ranks are an afternoon.
| Soul | Best Pal drops | Expeditions | Dungeons |
|---|---|---|---|
| Small Pal Soul |  Wistella 3-5, Wistella 3-5,  Wispaw 2, Wispaw 2,  Hoodle 1-2 (all 100%) Hoodle 1-2 (all 100%) | Verdant Hollow (Easy, 30 min, 3-5), Secret Realm of the Forest (5-7) | Hillside Cavern, Isolated Island Cavern, Mountain Stream Grotto, Ravine Grotto |
| Medium Pal Soul |  Menasting Terra 2-3, Menasting Terra 2-3,  Wixen Noct 1-2 (100%) Wixen Noct 1-2 (100%) | Blazing Cavern and Hidden Sanctum of the Desert (Normal, 45 min, 5-7) | Cavern of the Dunes, Volcanic Cavern |
| Large Pal Soul |  Sekhmet 1-2, Sekhmet 1-2,  Ophydia 1-2, Ophydia 1-2,  Anubis 1 (100%) Anubis 1 (100%) | Astral Frost Cavern (Hard, 60 min, 5-7), Moonflower's Secret Hideout (7-11) | Astral Mountains Cavern, Cherry Blossom Cave, Feybreak Cavern |
| Giant Pal Soul |  Aegidron, Aegidron,  Silvance, Silvance,  Dandilord, Panthalus — 1 each at 100% Dandilord, Panthalus — 1 each at 100% | Sunreach Isle (Hard, 60 min, 4-8), Moonflower's Secret Hideout (Very Hard, 120 min, 5-10) | Sunreach Skies |
Only four Pals in the game drop a Giant Pal Soul and none of them spawn in the wild, so expeditions are the real answer: at 4-8 souls per Sunreach Isle run, the 30 you need is roughly four to eight dispatches. That expedition wants a 20-Pal Dragon squad hitting 589,000 strength, and Moonflower's Secret Hideout needs 1,600,000 Water — the expedition guide lists who clears each strength bar. Giant Souls also turn up in Sunreach Isle chests, rank-2 salvage wrecks and Sakurajima camp loot.
 Rewriting the Move Set with Skill Fruits
A Pal keeps whatever moves it leveled into, and most of those are terrible. Skill fruits overwrite a slot outright, and the two best in the game hit for 700 power on a 30-second cooldown — roughly 23 damage per second of cooldown, the highest sustained figure any teachable skill reaches. Everything below is bought from the Arena Shop:
| Skill Fruit | Element | Power | Cooldown | Arena price |
|---|---|---|---|---|
| Skill Fruit: Holy Burst | Neutral | 700 | 30s | 45 Battle Tickets |
 Ice Skill Fruit: Absolute Frost Ice Skill Fruit: Absolute Frost | Ice | 700 | 30s | 45 Battle Tickets |
 Electric Skill Fruit: Thunderstorm Electric Skill Fruit: Thunderstorm | Electric | 600 | 30s | 45 Battle Tickets |
 Fire Skill Fruit: Fire Ball Fire Skill Fruit: Fire Ball | Fire | 600 | 30s | 45 Battle Tickets |
 Dragon Skill Fruit: Dragon Meteor Dragon Skill Fruit: Dragon Meteor | Dragon | 600 | 30s | 45 Battle Tickets |
 Dark Skill Fruit: Dark Whisp Dark Skill Fruit: Dark Whisp | Dark | 600 | 30s | 45 Battle Tickets |
 Water Skill Fruit: Geyser Gush Water Skill Fruit: Geyser Gush | Water | 600 | 30s | 45 Battle Tickets |
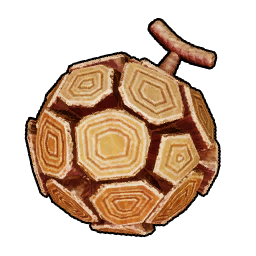 Ground Skill Fruit: Rocky Impact Ground Skill Fruit: Rocky Impact | Ground | 600 | 30s | 45 Battle Tickets |
| Ice Skill Fruit: Diamond Rain | Ice | 600 | 30s | Chest and fishing drops only |
Holy Burst is the flexible buy — Neutral means it never gets resisted, and its 5,000 range lets a Pal open from across an arena. Absolute Frost matches it on raw numbers but only reaches 3,000, and Geyser Gush and Rocky Impact are melee, so they belong on the bruisers from step 1 rather than a backline caster. Match element to the Pal where you can: the element-boost passives and the elemental talismans only multiply damage of their own type, so a Dragon Pal running Dragon Meteor gets paid twice. The full teachable list with every power and cooldown is on the skill fruits page.
Don't fill all four slots with 30-second nukes. One or two long-cooldown hitters plus a short-cooldown filler keeps damage flowing through a boss fight instead of leaving you standing around watching timers.
 Paying for All of It
Skill fruits, Potential fruits and Starfruits all run on shop currency, and the Pal Arena is the fastest printer for Battle Tickets. First clears pay a lump sum; after that each rank pays out every run:
| Rank | Opponent level | First clear | Per repeat |
|---|---|---|---|
| Bronze | 20 | 5 Battle Tickets | 1 |
| Silver | 30 | 10 | 2 |
| Gold | 40 | 15 | 4 |
| Platinum | 50 | 20 | 6 |
 Diamond Diamond | 60 | 25 | 8 |
| Master | 65 | 100 | 10-20 |
| Legend | 80 | 200 | 15-25 |
Legend rank is where the economy opens up: 200 tickets for the first clear and 15-25 per repeat means a 45-ticket skill fruit is about two runs, and you can kit out a full four-slot move set in an evening. Potential fruits are the exception — at 100 tickets each they're four to six Legend runs apiece, against 25 Successful Bounty Tokens for the same item, so keep buying those from the bounty counter. Dog Coins are the odd currency out here; spend them on Starfruits and handbooks, not fruits. If gold is your bottleneck instead, the gold farming guide has the fastest loops.
Related Guides
Where to go next:
- Palworld Tier List: every Pal ranked for combat, work and mounts
- Palworld Breeding Calculator
- How Breeding Works: Combi Ranks, Unique Combos, and Inheritance
- All Exclusive Passive Skills and How to Get Them
- How to Rank Up Pals: Condenser, Ripe Starfruit, and Handbooks
- Best Team Comps: Boss Killer, Explorer, and Farming Teams
- Best Partner Skills and Their Effects
- Best Pals for Expeditions, Strength, and Rewards
- Palworld 1.0 Endgame Checklist: What to Do at Level 60+