Attack Stat Explained: Damage Formula and How to Raise It
How the Attack stat works in Palworld — the base 100 multiplier, what 50 status points actually buy, and every source that raises it: accessories, food, armor upgrade ranks, partner skills and passives, plus why Pal Attack is a separate number.
Attack is the multiplier sitting on top of every weapon you fire and every punch you throw, and it's the stat players most often pour points into for the least return. This guide covers what the number actually does to your damage, the 200 ceiling levelling can reach, and every source that raises it — accessories, food, armor upgrade ranks, party Pals and passives — plus why none of it touches the completely separate Attack stat your Pals run.
 How the Attack Stat Works in Palworld
Every character starts at 100 Attack, and 100 is the neutral point — your weapon lands for exactly the damage on its card. From there Attack behaves as a straight multiplier: 150 is one and a half times the damage, 200 is double. The target's Defense works the other way and divides the result, which is why the same rifle shreds a level 30 Pal and tickles a level 60 Alpha. Pocketpair has never published the exact combat formula, so treat the multipliers below as very close estimates rather than frame-perfect maths, but the shape is not in doubt: attack multiplies, defense divides, and a weapon's listed damage is the number both act on.
| Your Attack | Damage multiplier | Where it comes from |
|---|---|---|
| 100 | ×1.0 | A fresh character with no points spent |
| 120 | ×1.2 | 10 status points |
| 150 | ×1.5 | 25 status points |
| 180 | ×1.8 | 40 status points |
| 200 | ×2.0 | All 50 ranks — the level-up ceiling |
| 200 +20% | ≈×2.4 | Rank 50 plus the Dogen Emblem |
| 200 +80% | ≈×3.6 | Rank 50 plus Solenne at ☆4 |
Two things fall out of that table. The first is that the percentage sources are worth more than the raw ranks — a single accessory hands you what ten status points do, and one party Pal hands you what forty would. The second is that none of this applies to your Pals. Player Attack raises your weapon damage and nothing else, so a build that maxes it while the team does the killing has spent 50 levels on nothing. Which stat a Pal's own skill runs off — melee or ranged — is decided by the skill's category, and the combat mechanics guide has that breakdown.
 Attack Is the Smallest Stat Per Point
Levelling hands you one status point per level and the cap is 80, so you finish a save with 79 points to place across five stats. Attack moves +2 per point against Health's +100 and Weight's +50, and it stops at rank 50 like everything else, which puts the ceiling at 200. Spending all 50 ranks there doubles your damage — genuinely good — but it costs you nearly two-thirds of your entire point budget to do it, and a single weapon-class upgrade moves your damage further than that. Attack is the pick for human-only runs, arena and PvP, and it is close to last for everyone else; the full ranking and the recommended spreads are in the best stats to level up guide.
| Stat | Base | Per point | Rank 50 | Points to max |
|---|---|---|---|---|
| Health | 500 | +100 | 5,500 | 50 of 79 |
| Weight | 500 | +50 | 3,000 | 50 of 79 |
| Work Speed | 100 | +50 | 2,600 | 50 of 79 |
| Stamina | 100 | +10 | 600 | 50 of 79 |
| Attack | 100 | +2 | 200 | 50 of 79 |
 Might Remedies and Elixirs Push Past the Point Wall
Two consumables add Attack ranks without costing you a level-up point: the Might Remedy is worth 1 point and the Might Elixir is worth 2. Both are player-only — a Pal that eats one gets nothing at all — and both respect the rank 50 ceiling, so the game refuses the item outright once Attack is full rather than letting you waste it. Farm the Elixir over the Remedy every time: double the points for one and a half times the lotuses. The fastest route by a mile is the Medal Shop, which sells the Elixir flat for 200 Dog Coin with no restock limit, and Dog Coins are farmable on a loop.
| Source | What you get | Cost |
|---|---|---|
| Medal Shop | Might Elixir | 200 Dog Coin, unlimited restock |
| Crafting | Might Elixir | 6 Power Lotus (L) + 2 Predator Core, 100,000 workload |
| Crafting | Might Remedy | 4 Power Lotus (S) + 1 Predator Core, 50,000 workload |
| Supply drops | Might Elixir | 20% per drop in six regions, 1-2 at a time |
| Sunreach Isle | Might Elixir | Dungeon elixir stands, 100% |
| Oil rig crates |  Power Lotus (S) / (L) Power Lotus (S) / (L) | 4% small crates, up to 20% for the large lotus |
Lotuses are the real gate on crafting your own. They come off the 866 stat lotus nodes scattered across the islands plus oil rig crates and Ancient Relic recycling, and Predator Cores drop from Predator Pals and nowhere else, so a hand-made Elixir is two separate farms stapled together. If you already have Dog Coins, skip all of it.
 Every Source That Raises Player Attack
Here is the whole ladder in one place, ordered by what each slot is worth at its best. The ordering surprises people: a party Pal beats every piece of gear you can wear, and the accessory slot beats a full 10 status points on its own. Note that food and party Pals are the two you can turn on right before a fight — everything else is a permanent build decision. Each row is a separate percentage applied to your Attack, so they stack rather than overwriting each other.
| Source | Best in slot | What it's worth |
|---|---|---|
| Partner skill |  Solenne Solenne | +80% at ☆4, if every party Pal is a different species |
| Weapon buff skill |  Bushi Noct Bushi Noct | +65% to your equipped weapon's damage at ☆4 |
| Status points | 50 ranks | +100 flat — a doubling, at 50 of your 79 points |
| Food | 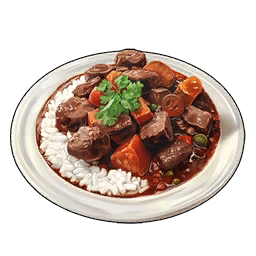 Mammorest Curry Mammorest Curry | +25% while the buff runs |
| Accessory | Dogen Emblem | +20% you, +16% your partner Pal |
| Pal passive | Vanguard | +10% per Pal in the party carrying it |
| Body armor | Any set at ☆4 | +12% from the upgrade rank alone |
What is *not* on that list matters as much as what is. There is no Attack bonus on head armor, no Attack roll on shields, and no way to spend gold on the stat directly. If you have already slotted the accessory and eaten the curry, the next real jump is a better weapon rather than a better number.
 Attack Accessories and Which One to Wear
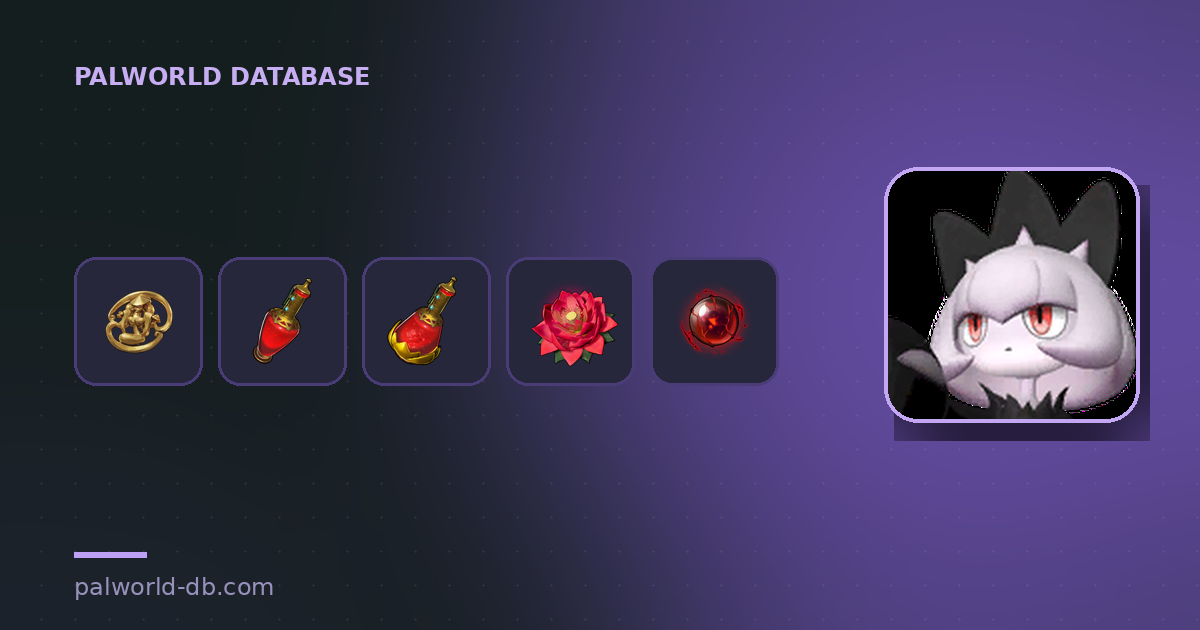
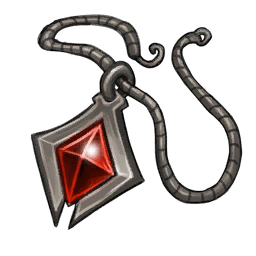
The accessory slot carries two Attack tiers and the gap between them is 5 percentage points, which is small enough that most players should wear whichever one they actually own. The Dogen Emblem is the best of them at +20% for you and +16% for the Pal fighting beside you — one slot buffing two damage sources, which is why it beats the pendants outright even though the raw player number is close. The pendants carry Attack Up Lv. 3 for up to +15%, and the plus versions do not change the passive tier at all; they change durability and roll quality. Check the passive on the accessory rather than the plus sign, and see the full accessories list for what else competes for the slot.
| Accessory | Passive carried | Effect | How to get it |
|---|---|---|---|
| Dogen Emblem | Attack Up Lv. 4 + Pal Attack Up Lv. 4 | +20% you, +16% partner Pal | Schematic from Sunreach Isle chests (2.4%) or large oil rig crates (1.0%) |
| Attack Pendant +2 | Attack Up Lv. 3 | +15% you | Upgraded Attack Pendant |
| Attack Pendant | Attack Up Lv. 3 | Up to +15% you | Schematic from Feybreak chests (3.4%) or oil rig crates (1.2%) |
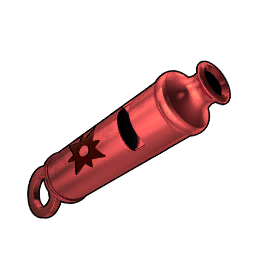 Attack Support Whistle +2 Attack Support Whistle +2 | Pal Attack Up Lv. 3 | +12% partner Pal only | Schematic, High-Quality Workbench |
 Flame Emperor's Baton Flame Emperor's Baton | Pal Attack Up Lv. 4 + Fire boost | +16% partner Pal, +20% its Fire damage | One baton exists per element |
Crafting the Emblem wants 20 Refined Ingot, 30 Bone, 35 Paldium Fragment and 30 Ancient Bone at a 400,000 workload on the Production Assembly Line, so it is a late build even after the schematic drops. The Attack Pendant is far cheaper — 25 Ingot, 20 Horn, 25 Paldium Fragment and 2 Ancient Civilization Parts at 50,000 workload on a High-Quality Workbench — and it is the one to wear for most of a playthrough. If your Pal is doing the killing rather than you, one of the ten element batons beats both: +16% Attack on your active Pal *plus* +20% to that element's damage is a bigger swing than anything the player-only pendants offer.
Food That Raises Attack
Fourteen dishes carry an Attack buff and the spread runs from +10% to +25%, which makes eating before a boss the cheapest damage in the game. Mammorest Curry is the outright best at +25% and it also refills 418 hunger, so it doubles as the meal you eat anyway. Three dishes tie behind it at +20%, and of those the Mozzarina Cheeseburger is the one worth building a line for — Milk and Flour both come off your own base rather than a hunt, while the Curry and Loco Moco each need a specific Pal butchered. Only one food effect runs at a time, so there is no stacking a curry on top of a burger; pick the biggest number you have and eat on the walk to the fight, because the buff runs on a timer rather than on hunger.
| Dish | Attack | Hunger | Made from |
|---|---|---|---|
| Mammorest Curry | +25% | 418 | 1 Mammorest Meat, 2 Onion, 2 Carrot, 2 Potato, 2 Red Berries |
 Broncherry Fried Noodles Broncherry Fried Noodles | +20% | 321 | 1 Broncherry Meat, 1 Onion, 1 Carrot, 1 Flour |
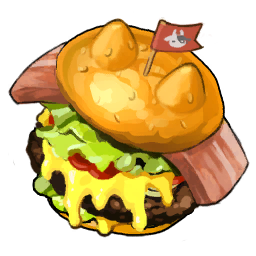 Mozzarina Cheeseburger Mozzarina Cheeseburger | +20% | 288 | 2 Mozzarina Meat, 1 Flour, 2 Tomato, 2 Milk |
 Eikthyrdeer Loco Moco Eikthyrdeer Loco Moco | +20% | 174 | 1 Eikthyrdeer Venison, 2 Red Berries, 2 Egg |
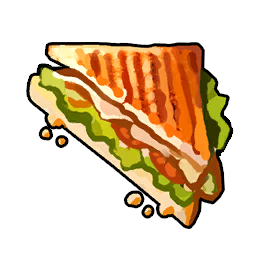 BLT BLT | +15% | 316 | Found rather than cooked |
 Hamburger Hamburger | +10% | 316 | Found rather than cooked |
 Mushroom Stew Mushroom Stew | +10% | 212 | Found rather than cooked |
 Bolognese Sauce Bolognese Sauce | +10% | 190 | Found rather than cooked |
 Rushoar Bacon 'n' Eggs Rushoar Bacon 'n' Eggs | +10% | 167 | 2 Rushoar Pork, 2 Egg |
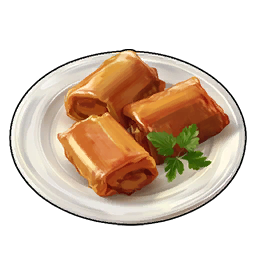 Spring Rolls Spring Rolls | +10% | 115 | 2 Onion, 2 Mushroom, 1 Flour |
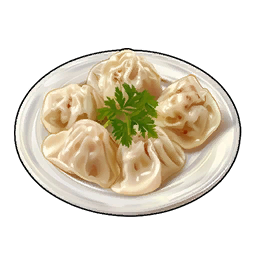 Rushoar Gyoza Rushoar Gyoza | +10% | 115 | 1 Rushoar Pork, 1 Mushroom, 1 Flour |
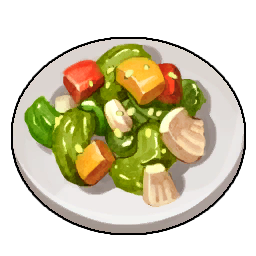 Stir-Fried Veggies Stir-Fried Veggies | +10% | 89 | Found rather than cooked |
 Omelet Omelet | +10% | 67 | 1 Tomato, 2 Egg — the earliest one you can make |
 Jelliette's Jiggly Jelly Jelliette's Jiggly Jelly | +10% | 58 | 2 Jelliette Bell Flesh, 2 Aquatic Pal Fluids |
The bottom half of that table is worth knowing about for one reason: the Omelet is a +10% Attack buff you can cook on day two from a Tomato and two Eggs off your own ranch. Ten percent for two farmable ingredients is the best deal on the page for a new save, and most players never notice it because the dish reads like starter filler.
 Your Body Armor's Upgrade Rank Is a Hidden Attack Bonus
This is the source almost nobody knows about. Every body armor in the game — all 114 of them, from the Cloth Outfit up — gains an Attack Up (S) passive as you upgrade it at the workbench, and the tier climbs with the upgrade rank rather than with the armor's tech level. A base chest piece gives nothing; the same piece at ☆4 hands you +12% Attack on top of its Defense. Head armor carries no Attack bonus at any rank, which means upgrading your chest is doing two jobs while upgrading your helmet is doing one. If you are already wearing the best set you can craft, pushing it up the upgrade ranks is free damage as well as free survivability.
| Upgrade rank | Passive | Attack | Ancient Armor defense at that rank |
|---|---|---|---|
| Base | None | — | 800 |
| ☆1 | Attack Up (S) Lv. 1 | +3% | 880 |
| ☆2 | Attack Up (S) Lv. 2 | +6% | 920 |
| ☆3 | Attack Up (S) Lv. 3 | +9% | 960 |
| ☆4 | Attack Up (S) Lv. 4 | +12% | 1,040 |
Read the last two columns together and the case for upgrading gets obvious: the jump from base to ☆4 on an Ancient chest is +240 Defense and +12% Attack from one piece of gear. The same ladder exists on every line below it, so a fully upgraded Plasteel chest is quietly out-damaging a freshly crafted Hexolite one. The whole armor progression sits in the best armor by tech level guide and the raw numbers are in the armor database.
Partner Skills That Raise Your Attack
The party slot is the biggest Attack source in the game and it costs nothing but a Pal you were probably carrying anyway. Solenne leads by a wide margin — Untainted Maiden is +30% player Attack on an uncondensed copy climbing to +80% at ☆4, with the single condition that every Pal in your party is a different species, which is trivially easy to satisfy. Behind it sits a group of seven Pals running the identical +30% to +50% ladder, and inside that group the pick is settled purely by which one you can catch: Finsider turns up in 671 spots against Anubis's 35. If you are early in a save, Gobfin gives you +10% immediately and is one of the first Pals most players walk past.
| Pal | Partner skill | Uncondensed | ☆4 | Where to find it |
|---|---|---|---|---|
| Solenne | Untainted Maiden | +30% | +80% | 47 spots — needs an all-different party |
 Anubis Anubis | Guardian of the Desert | +30% | +50% | 35 spots plus a level 55 Alpha |
 Elgrove Elgrove | Mother Nature's Menace | +30% | +50% | 75 spots |
 Finsider Finsider | Water Gun | +30% | +50% | 671 spots — by far the easiest to get |
 Wixen Noct Wixen Noct | Black Fox Lord | +30% | +50% | 184 spots, night only |
 Wixen Wixen | Lord Fox | +30% | +50% | 54 spots plus a level 28 Alpha |
 Icelyn Icelyn | Witch's Icy Veil | +30% | +50% | 38 spots |
 Prixter Lux Prixter Lux | Scorpion Longwave | +30% | +50% | 35 spots plus a level 70 Alpha |
 Nox Nox | Kuudere | +20% | +40% | 153 spots, night only |
 Gobfin Gobfin | Angry Shark | +10% | +20% | 66 spots — the early-game pick |
 Gobfin Ignis Gobfin Ignis | Angry Shark | +10% | +20% | 74 spots |
Two habits are worth building around this table. First, the bonus is live from a party slot — the Pal does not have to be the one you have summoned — so one of these can ride along permanently while your actual fighter does the work. Second, this family does not stack with itself: carrying Wixen and Icelyn together is a wasted slot, and the spare copies belong in the Condenser pushing one of them up the ladder instead.
Skills That Boost the Weapon Instead of the Stat
A second, smaller family raises the damage of the weapon you are holding rather than your Attack stat, which means the two apply on top of each other. Bushi Noct is the standout at +30% climbing to +65% — roughly double what the rest of the group manages — and it is also the most common Pal on this whole page at 1,990 spawn spots, so it is not a rare pull. The other four run an identical +10% to +35% ladder, and two of them are gated behind an unlock item, so check that before you build a party around one.
| Pal | Partner skill | Uncondensed | ☆4 | Notes |
|---|---|---|---|---|
| Bushi Noct | Void Blade | +30% | +65% | 1,990 spots — the most findable big buff in the game |
 Nyafia Nyafia | Shot-Nyan Mode | +10% | +35% | 259 spots; needs its unlock item |
 Robinquill Robinquill | Grounded Archer | +10% | +35% | 52 spots |
 Pupperai Pupperai | Best Boy | +10% | +35% | 23 spots — the rarest on this table |
 Xenogard Xenogard | Unknown Intruder | +10% | +35% | Needs its unlock item |
 Mounts That Buff You While You Ride
Seventeen mounts rewrite what element your own attacks count as while you are in the saddle, and fifteen of them carry a flat +5% to +20% player Attack bonus alongside the switch. The two Frostallions double that ladder to +10% through +40% and add a status rider — freeze on Frostallion, darkness on Frostallion Noct — which makes them the best mounted damage in the game by some distance. The catch is that all of it is saddle-gated and none of it applies on foot, so this is a bonus for players who fight from the back of something. Which element to be carrying is a matchup question rather than a numbers one — the attack-element guide lists every switch and the type chart settles the rest.
Vanguard: the Only Passive That Buffs Your Attack
Passive skills split by who they point at, and the split is easy to miss because the tooltips read almost identically. Exactly one passive in the game points its Attack bonus at *you*: Vanguard, worth +10% player Attack per Pal in the party carrying it. Five combat Pals all rolling Vanguard is a flat +50% on the player, which beats every status point you could realistically spare. It is a random roll rather than an innate skill on any species, so it comes out of breeding and lucky catches — the passives database has the full list and how they pass down. Only nine passives in the whole game buff the trainer instead of the Pal, and these are all of them.
| Passive | What it gives you | Worth |
|---|---|---|
| Vanguard | +10% player Attack | Five points of the Attack stat, per Pal carrying it |
| Motivational Leader | +25% player Work Speed | The biggest percentage on the list |
| Max Carrying Capacity Lv. 3 | +200 carry limit | Four Weight status points |
| Stronghold Strategist | +10% player Defense | A stat you cannot buy with points at all |
| Mine Foreman / Logging Foreman | +25% mining / logging efficiency | Faster nodes without touching Work Speed |
| Reload Master | +4% reload speed | Small, but it is uptime on every gun |
| Wellness Watcher | −5% player stamina drain | Stretches every Stamina point you own |
| Healing Coach | +5% player HP regeneration | Between-fight uptime rather than a bigger pool |
Read that table as a shopping list for party slots rather than a ranking. Vanguard is the only row that touches damage, it stacks once per Pal carrying it, and it is the single reason the Attack stat sits near the bottom of the status point rankings — one lucky passive roll is worth five ranks you would otherwise have paid levels for. Everything else in the Attack column buffs the Pal that owns the passive, and those are in the next section.
 Pal Attack Is a Completely Separate Stat
None of the gear, food or points above does anything for your Pals. A Pal's Attack comes from species, level and a hidden potential roll, growing as 100 + base × 0.075 × level, with a perfect 100 potential roll multiplying the growth by 1.3 — so two identical species can finish 27% apart at the same level. Astralym is alone at the top with a base 200 ranged, a third clear of the next tier and with no element for anything to be super-effective against. Below it the roster splits: Jormuntide Ignis and Blazamut Ryu lead on melee, Bellanoir Libero leads the ranged pack. These numbers only compare against other Pals — they are not on the same scale as your armored player total.
| Pal | Melee | Ranged | Lv 60, 0 potential | Lv 60, 100 potential | Why it's the pick |
|---|---|---|---|---|---|
| Astralym | 100 | 200 | 1,000 | 1,270 | No weaknesses, and 200 HP and 200 Defense to go with it |
 Jormuntide Ignis Jormuntide Ignis | 150 | 130 | 775 | 977 | Top melee attack, and a Kindling worker off duty |
 Blazamut Ryu Blazamut Ryu | 150 | 130 | 775 | 977 | Same melee with 125 Defense instead of 100 |
 Incineram Incineram | 150 | 100 | 775 | 977 | Ties the melee lead but learns weak melee skills |
 Bellanoir Libero Bellanoir Libero | 100 | 150 | 775 | 977 | Highest ranged attack outside Astralym — glass, but it hits |
 Necromus Necromus | 100 | 145 | 752 | 948 | Carries Legend natively for another +20% |
 Neptilius Neptilius | 100 | 145 | 752 | 948 | Adds its own water strikes to your attacks from a party slot |
 Jetragon Jetragon | 100 | 140 | 730 | 919 | The fastest mount in the game, and it hits hard |
 Cryolinx Cryolinx | 140 | 100 | 730 | 919 | Melee statline plus a weak-point damage partner skill |
One trap worth flagging: a Pal's melee and ranged Attack are separate numbers, and which one a skill uses is decided by the skill's category, not by how far away the target is. Incineram is the clean example — it ties for the highest melee attack in the game and the best close-range skill it naturally learns is far weaker than its fireball, so it spends most fights firing a big number off its worse stat. Pick moves from the strongest attack skills list with the category in mind.
 How to Raise a Pal's Attack
Five levers move a Pal's Attack once the species is settled, and this is the order to pull them in. Potential first: Ability Glasses reveal the hidden 0-100 Attack roll, and each Power Fruit adds +10 to it for 25 Bounty Tokens, 100 Battle Tickets or 200 Dog Coins. Passives next, because a four-slot roll of Musclehead and Legend beats most of the grind that follows. Then condensing at  the Pal Essence Condenser and the 20-rank soul ladder at
  the Statue of Power, which together want 52 Pal Souls and a pile of duplicates. Finally, wear a Attack Support Whistle +2 or an element baton yourself and hand your active Pal another 12-16% for free. Full costs are in the min-max guide.
| Passive | Attack | Trade-off |
|---|---|---|
| Twin-Edged Holy Blade | +50% | Defense −30% |
| God of Destruction | +40% | Max Health −50%, but Defense +20% |
| Musclehead | +30% | Work Speed −50% — a fighter-only pick |
| Demon God | +30% | None — also +5% Defense |
| Ferocious | +20% | None |
| Legend | +20% | None — also +20% Defense and move speed |
| Lucky | +15% | None — also +15% Defense and +20% Work Speed |
| Hooligan | +15% | Work Speed −10% |
| Sadist | +15% | Defense −15% |
| Brave | +10% | None |
| Aggressive | +10% | Defense −10% |
| Serenity | +10% | None — also 30% cooldown reduction |
| Work Slave | −30% | Work Speed +30% — reroll it on a fighter |
| Pacifist | −20% | Reroll it |
Musclehead and Demon God tie at +30% and the difference is what they cost you: Musclehead guts Work Speed, which is irrelevant on a Pal that never sees a workbench, while Demon God is clean and rarer. The two World Tree passives at the top are the highest numbers in the game and both are genuine trades — Twin-Edged Holy Blade turns a tank into a glass cannon, God of Destruction halves the health bar outright. On a Pal that dies to one hit either way, take them. The full list including where each one drops is in the exclusive passives guide.
 Why the Same Attack Number Deals Different Damage
Attack is one term in a longer chain, and three other things move your damage far more than the stat does. Weapon class is the biggest: the numbers on weapon cards are only comparable inside a class, because a bow fires one slow charged arrow while a gatling gun empties a belt in the same window. Element matchup is next — hitting something weak to your element is worth roughly half again as much damage, for free. And the level gap matters in both directions: an underlevelled player chips at a boss, an overlevelled one deletes it, and Alpha bosses carry extra resistance to player damage on top. Doubling your Attack stat is real, but it will not out-earn switching to the right weapon and the right element.
| Weapon class | Best in class | Attack | What the number means |
|---|---|---|---|
| Bow | Mechanical Bow | 24,000 | One slow, silent, fully-charged arrow |
| Rocket launcher |  Beam Launcher Beam Launcher | 16,800 | Splash damage, long reload |
| Assault rifle | 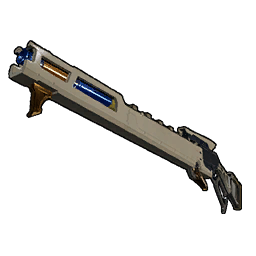 Charge Rifle Charge Rifle | 15,000 | Per charged shot, not per bullet |
| Melee |  Laser Sword Laser Sword | 2,400 | Per swing, and swings chain |
| Handgun |  Old Revolver Old Revolver | 1,500 | Per shot, small magazine |
| Shotgun | 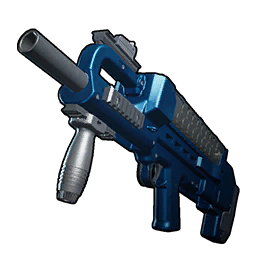 Prototype Shotgun Prototype Shotgun | 1,400 | Per pellet spread at close range |
| Gatling gun | 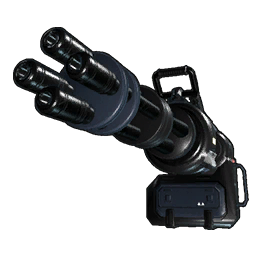 Laser Gatling Gun Laser Gatling Gun | 689 | Per bullet at an extreme fire rate |
The gatling gun row is the reason the raw figure lies — the lowest number on the list belongs to one of the highest-damage weapons in the game. Every figure here is the fully upgraded ☆4 version, so a freshly crafted one sits well below it, and the gun rankings compare them the way they should be compared.
The Short Version
Attack starts at 100 and acts as a straight multiplier on your weapon damage while the target's Defense divides it. Status points move it +2 at a time to a ceiling of 200, which doubles your damage but eats 50 of your 79 points — so it is a specialist pick for human-only, arena and PvP builds. Everything else is percentages: +80% from Solenne at ☆4, +65% to your weapon from Bushi Noct, +25% from Mammorest Curry, +20% from the Dogen Emblem, +12% from a fully upgraded chest piece and +10% per party Pal carrying Vanguard. Your Pals run a completely separate Attack stat that none of that touches — raise theirs with Power Fruits, passives, condensing and souls instead.
Related Guides
Start here:
- All Palworld guides and the interactive Palworld map
- Combat Mechanics Explained: Damage, Weak Points, Dodging
- Defense Stat Explained: Damage Reduction and How to Raise It The rest of the damage chain:
- Best Stats to Level Up: Priority Order and Stat Caps
- Strongest Attack Skills and How to Get Them
- STAB Explained: Same Type Attack Bonus and Best Moves
- Super Effective and Resistance Explained: Type Chart
- All Guns Ranked: Damage, Ammo, and Tech Level Build the team and the gear:
- Best Partner Skills and Their Effects
- How to Min-Max Pals: IVs, Passives, Souls, and Condensing
- Best Armor at Every Tech Level: Full Upgrade Path
- List of All Accessories: Effects, Slots, and How to Get
- All Pals That Change Your Attack Element
- Palworld Passive Skills Database and the partner skills database