Best Passives for Base Pals: Work Speed, SAN, and Implants
Every Work Speed passive for base Pals in Palworld with exact percentages, the four-slot stack worth +235%, the SAN skills that keep workers going, and how to get each one.

Work Speed passives are the biggest lever you have on base output — four good ones on the same Pal more than triple the rate it clears a crafting queue. This guide lists every Work Speed and SAN passive with its exact percentage, the four-slot stacks worth +235% and +175%, the skills that quietly ruin a rank 8 worker, and exactly where each one comes from.
Best Base Pal Passives at a Glance
Nine passives are worth deliberately hunting for a base Pal. Six of them are pure Work Speed, two cut SAN drain, and one keeps the Pal on shift after dark. Everything else you roll on a wild catch is either neutral filler or a downgrade you want to overwrite at the Pal Surgery Table.
| Passive | Effect | Rank | Why it belongs on a worker |
|---|---|---|---|
| Demon's Hand | Work Speed +90%, SAN drain +15% | 5 | The largest single Work Speed number in the game. The SAN cost is real but a hot spring pays it back. |
| Remarkable Craftsmanship | Work Speed +75% | 4 | The best no-strings passive. Nothing negative attached, so it fits any Pal in any job. |
| Artisan | Work Speed +50% | 3 | The one big Work Speed passive you can buy outright instead of rolling for it. |
| Work Slave | Work Speed +30%, Shot Attack -30% | 1 | The Shot Attack loss costs you nothing on a Pal that never leaves the base. |
| Lucky | Work Speed +20%, Shot Attack +15%, Defense +15% | 4 | The only Work Speed passive that also makes the Pal better in a fight. |
| Serious | Work Speed +20% | 1 | Cheap filler for a fourth slot when nothing better has rolled yet. |
| Insomnia | Does not sleep, keeps working at night | 1 | Adds hours rather than percent — the whole night shift instead of a faster day. |
| Heart of the Immovable King | SAN drain -20% | 4 | The strongest SAN reduction that doesn't cost Work Speed. |
| Hermit Sage | SAN drain -50%, Work Speed -20% | 5 | A deliberate trade for a base with no hot spring yet, not a dud roll. |
If you only chase one, make it Remarkable Craftsmanship — +75% with no drawback is the cleanest value on the list, and it never becomes wrong later. Demon's Hand beats it on raw numbers but drags SAN down 15% faster, so it wants a base that already has a hot spring running. Work Slave looks like a trap at -30% Shot Attack and isn't: a Pal you assigned to a workbench is never going to fire a shot.
Work Speed vs. Work Suitability: What Actually Changes Output
Every one of the 288 Pals in the game has the same base Work Speed stat of 100 — there is no such thing as a naturally faster crafter. Only two things move base output: the Pal's work suitability rank for that job, and its passives. That is why passives matter more than which Pal you picked, and why a rank 8 specialist with Slacker will feel slower than a rank 5 body with a stacked passive line.
| Job | Rank ceiling | Pals that reach it | Top Pal |
|---|---|---|---|
| Handiwork | 8 | 109 Pals have the job |  Solenne Solenne |
| Planting | 8 | 45 Pals have the job |  Dandilord Dandilord |
| Kindling | 8 | 44 Pals have the job |  Renjishi Renjishi |
| Watering | 8 | 46 Pals have the job |  Shaolong Shaolong |
| Cooling | 8 | 38 Pals have the job |  Bastigor Bastigor |
| Generating Electricity | 8 | 25 Pals have the job |  Orserk Orserk |
| Transporting | 7 | 140 Pals have the job |  Knocklem Knocklem |
| Farming | 4 | 29 Pals have the job |  Dumud Gild Dumud Gild |
Transporting and Farming are the two jobs where the ceiling is lower than everywhere else — 7 and 4 respectively — so passives carry proportionally more of the load there. Farming in particular is worth noting: with a rank ceiling of only 4, the two passives that raise Farming suitability outright — Ranch Master at +2 and Farmhand at +1 — are worth more on a ranch Pal than a flat Work Speed roll. The full ranking for every job sits on our best base Pals rankings, and the work optimizer will tell you which of your caught Pals to assign where.
Every Work Speed Passive and Its Exact Percentage
There are thirteen passives in the game that touch a Pal's Work Speed, and six of them make it worse. The list below is the complete set, sorted from best to worst, with whatever else each one does bolted on. Note the shape of it: the positives cluster at rare ranks and the traps are common, which is why a freshly caught Pal is more likely to arrive with a penalty than a bonus.
| Passive | Work Speed | Also does | Rank |
|---|---|---|---|
| Demon's Hand | +90% | SAN drain +15%; World Tree harvestables don't vanish on approach | 5 |
| Remarkable Craftsmanship | +75% | Nothing | 4 |
| Artisan | +50% | Nothing | 3 |
| Work Slave | +30% | Shot Attack -30% | 1 |
| Lucky | +20% | Shot Attack +15%, Defense +15% | 4 |
| Serious | +20% | Nothing | 1 |
| Conceited | +10% | Defense -10% | 1 |
| Clumsy | -10% | Nothing | -1 |
| Hooligan | -10% | Shot Attack +15% | 1 |
| Mentally Unstable | -10% | Defense -10% | -1 |
| Hermit Sage | -20% | SAN drain -50%; World Tree resources don't vanish on approach | 5 |
| Slacker | -30% | Nothing | -3 |
| Musclehead | -50% | Shot Attack +30% | 2 |
Musclehead is the one that catches people out. It reads as a good passive because it's a positive rank and +30% Shot Attack is genuinely strong, but on a worker it halves your output — it belongs on a combat Pal and nowhere near a workbench. Hooligan is the same mistake in miniature. Hermit Sage is the only negative Work Speed number on the list that you might keep on purpose, and the SAN section below explains when. If you search Work Speed elsewhere you'll also run into Speedy Worker Lv. 1 to Lv. 4 and Motivational Leader — those affect your work speed, not the Pal's, so they do nothing for base production; Speedy Worker rolls on accessories rather than on Pals at all.
The +235% Stack: What Four Slots Can Do
A Pal holds four passives, and the Work Speed ones stack. Nothing stops Demon's Hand, Remarkable Craftsmanship and Artisan sitting on the same Pal at once, and adding Lucky to fill the last slot brings the listed total to +235%. Pocketpair hasn't published how the game combines these internally, so treat the totals below as the sum of the listed values rather than a guaranteed multiplier on the tooltip — but the ordering between the builds holds either way.
| Build | The four passives | Listed Work Speed | When to run it |
|---|---|---|---|
| Ceiling | Demon's Hand + Remarkable Craftsmanship + Artisan + Lucky | +235% | Endgame, base already has a hot spring to absorb the extra SAN drain |
| No-relic | Remarkable Craftsmanship + Artisan + Work Slave + Lucky | +175% | Everything here is obtainable without Ancient Relic farming |
| SAN-safe | Remarkable Craftsmanship + Artisan + Lucky + Heart of the Immovable King | +145% | A Pal you never want to see depressed — SAN drain also drops 20% |
| Early | Artisan + Work Slave + Serious + Lucky | +120% | Mid-game, before rank 4 and 5 passives are realistic |
| Night shift | Remarkable Craftsmanship + Artisan + Work Slave + Insomnia | +155% | Turns a fast day worker into an around-the-clock one |
The No-relic build is the one most players should actually target. It gives up 60 percentage points against the ceiling but every piece of it is reachable through breeding or the Bounty Shop, whereas Demon's Hand realistically means grinding Ancient Relics. The Night shift build is the sleeper pick for a production base: +155% for however many hours the Pal works is worth more total output than +235% for a normal day, and it costs you a rank 1 passive to set up. Our Pal build guide covers the combat-side equivalents if you want the same Pal to fight.
SAN Passives: the Half Your Base Actually Runs On
Work Speed decides how fast a Pal works; SAN decides whether it works at all. A worker whose SAN bottoms out stops doing its job, wanders, and in bad cases starts breaking things — so on a big base the SAN passives are quietly worth more than another +20% of speed. Seven passives touch the SAN drain rate, and the split is three helpful, two harmful, one hybrid trade.
| Passive | SAN drain | Also does | Rank |
|---|---|---|---|
| Hermit Sage | -50% | Work Speed -20% | 5 |
| Heart of the Immovable King | -20% | Nothing | 4 |
| Workaholic | -15% | Nothing | 3 |
| Positive Thinker | -10% | Nothing | 1 |
| Unstable | +10% | Nothing | -1 |
| Destructive | +15% | Nothing | -2 |
| Demon's Hand | +15% | Work Speed +90% | 5 |
Heart of the Immovable King is the pick — -20% drain for no Work Speed cost, and it's the only free reduction at rank 4. Hermit Sage cuts drain by half but hands back 20% Work Speed, which makes it a situational tool rather than a default: run it on a base that has no hot spring yet, or on a Pal you keep working while you're away from the base for long stretches. Once a hot spring is up, swap it out. Demon's Hand appearing on this list is the honest cost of that +90% — it accelerates drain by the same 15% that Destructive does, and pairing the two on one Pal is how you end up with a rank 8 specialist sulking in a corner.
 Hot Springs Beat Passives for SAN
Before you spend a surgery on a SAN passive, build the recovery facility — it's cheaper and it covers every Pal in the base instead of one. The Hot Spring unlocks at Technology 9, the High Quality Hot Spring at 31, the Japanese-Style Hot Spring at 64, and the Ancient Hot Spring at 76 with the highest recovery rate in the game. Each tier restores more SAN per Pal per visit, so the upgrade path effectively raises the Work Speed ceiling your Pals can sustain without burning out.
| Facility | Technology level | What it's for |
|---|---|---|
| Hot Spring | 9 | The first one you build — get it up before you stack Demon's Hand on anything |
| High Quality Hot Spring | 31 | Restores more SAN and holds more Pals comfortably |
 Japanese-Style Hot Spring Japanese-Style Hot Spring | 64 | An extra boost to SAN recovery over the High Quality tier |
 Ancient Hot Spring Ancient Hot Spring | 76 | Paldium-infused water, the highest SAN recovery in the game |
The other half of SAN management is food. A well-fed base drains slower in practice than a badly fed one, and our best food for SAN and hunger guide ranks the meals worth cooking. The Japanese-Style Hot Spring guide has the full material cost for the tier most players stop at.
Hunger Passives and Where They Rank
Hunger passives are the third tier of base-Pal priority, below Work Speed and SAN. They don't make a Pal faster; they make it eat less, which matters when your feed box is being drained by fifteen workers and a cooking line you haven't automated yet. Six passives move the hunger rate, plus one World Tree skill that halves it at a heavy HP cost.
| Passive | Hunger drain | Also does | Rank |
|---|---|---|---|
| World Tree Seedbed | -50% | Max HP -20% | 5 |
| Mastery of Fasting | -20% | Nothing | 4 |
| Diet Lover | -15% | Nothing | 3 |
| Dainty Eater | -10% | Nothing | 1 |
| Glutton | +10% | Nothing | -1 |
| Bottomless Stomach | +15% | Nothing | -2 |
| Dimensional Leap | +15% | Movement Speed +50% | 5 |
Mastery of Fasting is the only one worth a surgery slot, and even then only on a base that's genuinely food-limited — a fourth slot is almost always better spent on +20% Work Speed than on -20% hunger. World Tree Seedbed's -20% Max HP is irrelevant on a Pal that never fights, so if one rolls it on a dedicated worker you can happily leave it. Glutton and Bottomless Stomach are the ones to strip; they're common rolls and they add feed-line pressure for nothing in return.
Insomnia and the Night Shift
Insomnia is the odd one out on this list because it has no percentage at all — the Pal simply doesn't sleep and keeps working after dark. In throughput terms that's the biggest single upgrade available to a rank 1 passive, since it adds hours to the working day rather than a fraction to the working rate. On a base that produces overnight while you're out exploring, one Insomnia worker outproduces a faster daytime one.
The catch is that a Pal working all night isn't in a bed recovering, so pair Insomnia with a hot spring and, ideally, a SAN reduction in the same passive line. It's also worth having a Monitoring Stand configured before you run night shifts — an unrestricted Pal will wander off the job you actually wanted it doing, and you won't be there to notice. Insomnia is a rank 1 skill, which makes it one of the cheapest surgeries you'll ever do.
Passives to Strip Off a Worker Immediately
Negative passives roll on wild catches just as often as good ones, and because a bad passive occupies a slot it costs you twice: the penalty itself plus the bonus that isn't there. These are the ones to overwrite the moment you have a surgery table. Musclehead is the priority — at -50% it is the single most destructive thing you can leave on a worker, and its positive rank makes players hesitate.
| Passive | What it costs a worker | Rank | Verdict |
|---|---|---|---|
| Musclehead | Work Speed -50% (for Shot Attack +30%) | 2 | Move it to a combat Pal, never leave it on a worker |
| Slacker | Work Speed -30% | -3 | Pure downgrade, overwrite first |
| Clumsy | Work Speed -10% | -1 | Pure downgrade |
| Mentally Unstable | Work Speed -10%, Defense -10% | -1 | Pure downgrade |
| Hooligan | Work Speed -10% (for Shot Attack +15%) | 1 | A combat passive sitting in a worker's slot |
| Destructive | SAN drain +15% | -2 | Worse than it looks on a night-shift or Demon's Hand Pal |
| Unstable | SAN drain +10% | -1 | Overwrite when convenient |
| Bottomless Stomach | Hunger drain +15% | -2 | Low priority unless food is tight |
| Glutton | Hunger drain +10% | -1 | Low priority unless food is tight |
The order to fix them in is Work Speed first, SAN second, hunger last. A Pal carrying both Slacker and Musclehead is down 80 percentage points before you've stacked anything positive on it — that's the difference between a worker that clears a queue and one you'll assume is bugged. If a caught Pal has two negatives and no good passives, it's usually faster to breed a replacement than to buy two surgeries.
How to Get the Passives You Want
There are three routes to a specific passive: breed for it, implant it, or buy it. Breeding is free but slow and random, implanting is precise but gated behind a mid-game unlock and a supply of implants, and buying only covers a handful of skills. Most finished base Pals end up as a mix — bred for two or three good rolls, then surgically topped up.
Breeding for Passives
Offspring can inherit passives from either parent, so the standard technique is to breed two Pals that already carry the skills you want and keep re-rolling the egg until they land together. It's the only method that costs nothing but time, and it's how most players assemble their first fully stacked worker. The mechanics — combi ranks, which pairs produce what, and how inheritance actually resolves — are covered in our breeding guide, and the breeding calculator will find the parent pair for any target Pal.
Two things make this faster: breed the passive onto a cheap, common Pal first to build a carrier, and remember that the passives don't have to arrive on the Pal you'll actually use — once you have a surgery table you can lift a skill off a throwaway carrier and put it where you want it.
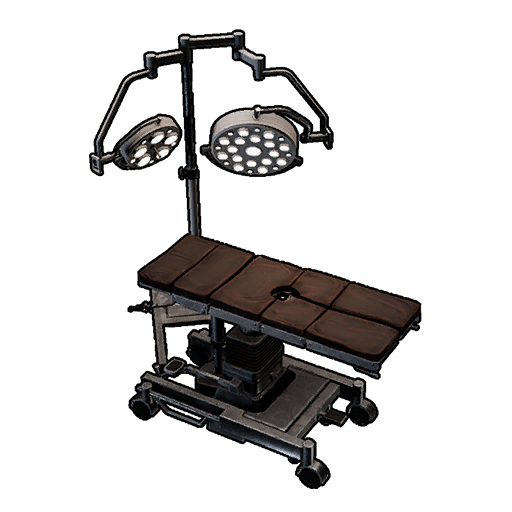 The Pal Surgery Table
The Pal Surgery Table is the precision tool: it changes a Pal's passive skills (and its gender) directly instead of leaving it to breeding luck. It unlocks at Technology level 38 for 3 technology points, which puts it comfortably in the mid-game — well before you'd realistically be farming rank 5 passives. Total build cost is 30 Refined Ingots, 20 High Quality Cloth and 10 Corrosive Solvent.
| Material | Qty | Note |
|---|---|---|
 Refined Ingot Refined Ingot | 30 | Smelted from Ore at an Improved Furnace |
 High Quality Cloth High Quality Cloth | 20 | The upgraded cloth tier, not basic Cloth |
 Corrosive Solvent Corrosive Solvent | 10 | The gating material — plan around this one |
Using it consumes an Implant item for the passive you want, so the table is only half the cost — the implants are the part you have to go and find. Our Pal Surgery Table guide walks through the unlock, the full implant catalogue and the gold cost per operation, which scales up sharply for the rarest skills.
Implants Worth Hunting
Implants come in two forms: permanent Implants, which are the reusable Essential-tier items, and Disposable Implants, which are single-use consumables. Every implant in the game shares the same two icons — a permanent one and a consumable one — so the art below won't tell them apart; read the names. The table lists the ones that matter for a base Pal and where each comes from.
| Implant | Grants | Rarity | Where it comes from |
|---|---|---|---|
 Disposable Implant: Demonic Grasp Disposable Implant: Demonic Grasp | Demon's Hand (+90% Work Speed) | 4 | Recycling Ancient Relics |
| Disposable Implant: Remarkable Craftsmanship | Remarkable Craftsmanship (+75%) | 4 | Recycling Ancient Relics |
 Implant: Remarkable Craftsmanship Implant: Remarkable Craftsmanship | Remarkable Craftsmanship (+75%) | 4 | Extracted from a Pal that already carries it |
| Implant: Artisan | Artisan (+50%) | 3 | Bounty Shop, 15 Successful Bounty Tokens |
| Implant: Work Slave | Work Slave (+30%) | 1 | Extracted from a Pal that already carries it |
| Disposable Implant: Lucky | Lucky (+20% and combat stats) | 4 | Recycling Ancient Relics |
| Implant: Serious | Serious (+20%) | 1 | Extracted from a Pal that already carries it |
| Implant: Insomnia | Insomnia (works at night) | 1 | Extracted from a Pal that already carries it |
| Implant: Heart of the Immovable King | SAN drain -20% | 4 | Extracted from a Pal that already carries it |
| Implant: Workaholic | SAN drain -15% | 3 | Extracted from a Pal that already carries it |
| Disposable Implant: Hermit | Hermit Sage (SAN -50%, Work Speed -20%) | 4 | Recycling Ancient Relics |
| Implant: Mastery of Fasting | Hunger drain -20% | 4 | Extracted from a Pal that already carries it |
Note the pattern: the rank 5 World Tree passives — Demon's Hand and Hermit Sage — only exist as disposable implants, so each one you use is gone. That's the practical reason the No-relic build is the sensible target for most bases, and why you should put Demon's Hand on the one Pal you're certain about rather than spreading it around.
 The Ancient Relic Recycler
The Ancient Relic Recycler is where the rank 4 and 5 disposable implants actually come from. It unlocks at Technology level 74 for 3 technology points and costs 50 Paloxite Ingots, 50 Mythical Wood, 30 Ancient Civilization Parts and 20 Ancient Civilization Cores — a genuine endgame build. Feed it Ancient Relics and it converts them into a random reward from a shared pool; the better the relic tier, the better your odds on any given implant.
| Relic fed in | Rarity | Odds per implant in the pool |
|---|---|---|
 Decayed Ancient Relic Decayed Ancient Relic | 0 | 0.051% |
 Dormant Ancient Relic Dormant Ancient Relic | 1 | 0.102% |
 Gorgeous Ancient Relic Gorgeous Ancient Relic | 2 | 0.203% |
 Glowing Ancient Relic Glowing Ancient Relic | 3 | 0.406% |
 Glistening Ancient Relic Glistening Ancient Relic | 4 | 0.812% |
Those odds are per individual implant, and they double with every relic tier — a Glistening relic is sixteen times more likely to produce a given implant than a Decayed one. That ratio is the whole strategy: hoarding low-tier relics is a bad trade compared to spending your time on sources that drop the high tiers. The Demonic Grasp, Remarkable Craftsmanship, Lucky and Hermit implants all sit in the same pool at the same rate, so any relic run is a roll at all of them at once. Our Ancient Relic Recycler guide covers the full output list and what else the machine produces.
The Bounty Shop
One genuinely good Work Speed passive can be bought outright rather than farmed: Implant: Artisan sells at the Bounty Shop for 15 Successful Bounty Tokens, and grants the +50% skill permanently. That makes Artisan the fastest big Work Speed number to guarantee on a specific Pal, and it's why the Early and No-relic builds above both lean on it.
Tokens come from turning in wanted Pals, so the passive is effectively a side reward from bounty hunting you were doing anyway. Our bounty targets guide lists every target and its payout, and the merchant catalogue shows the rest of the Bounty Shop stock. The Bounty Shop also carries Implant: Musclehead at the same price — a fine buy for a combat Pal and an expensive mistake on a worker.
What You Need Unlocked First
Passive optimisation has a clear progression gate, and trying to skip ahead wastes materials. The four unlocks below are the checkpoints — the first two are early-game and cheap, the third is when precision passive work genuinely begins, and the fourth is endgame.
| Unlock | Technology level | Why you need it |
|---|---|---|
 Monitoring Stand Monitoring Stand | 7 | Assigns and restricts jobs so passives apply to the work you meant |
| Hot Spring | 9 | SAN recovery — the prerequisite for running Demon's Hand at all |
| Pal Surgery Table | 38 | Changes passives directly instead of re-breeding |
| Ancient Relic Recycler | 74 | The only source of the rank 4 and 5 disposable implants |
Between the surgery table at 38 and the recycler at 74 there's a long stretch where breeding is your main tool, which is exactly the window in which the No-relic build is the right goal. If you're planning a base around this, our best base locations guide covers the sites with the node coverage to keep a stacked crew busy.
The Short Answer
Stack Remarkable Craftsmanship, Artisan, Work Slave and Lucky on any base Pal for +175% Work Speed using only breeding and the Bounty Shop. Swap Work Slave for Demon's Hand once you have a hot spring and Ancient Relics to recycle, and you're at +235%. Strip Musclehead and Slacker on sight, add Heart of the Immovable King if the base runs unattended, and remember that work suitability rank decides *which* jobs a Pal can do while passives decide how fast it does them — every Pal in the game starts from the same base Work Speed.
Related Guides
Passives and workers:
- All Palworld Passive Skills — the searchable list of every passive and its effects
- Best Base Pals in Palworld — the seven workers that staff an entire base
- Best Pal Builds: Top Passives, Skills, and Loadouts — the combat-side equivalent of this page
- How to Min-Max Pals: IVs, Passives, Souls, and Condensing — everything beyond passives
- Best Pals for Handiwork — the job most base passives end up serving
Getting the passives:
- How to Get Pal Surgery Table — unlock, cost and the full implant list
- How Breeding Works — combi ranks, unique combos and passive inheritance
- How to Get and Use the Ancient Relic Recycler — the rank 5 implant source
- All Bounty Targets and Token Payouts — how to afford Implant: Artisan
- All Exclusive Passive Skills — the ones tied to specific Pals
Keeping them working:
- Best Food for SAN and Hunger — the meals that keep a stacked crew standing
- How to Use the Monitoring Stand — job restrictions and both upgrade tiers
- Best Base Locations in Palworld 1.0 — coordinates and node counts
- Palworld Work Optimizer — assign your caught Pals to the right jobs
- Best Pals Rankings — every Pal ranked by work suitability