How to Beat Hard Mode Zoe and Grizzbolt: Team and Drops
Hard Mode Zoe and Grizzbolt is a level 72 rematch with 464,000 HP that only takes 10% of your damage — the longest fight on the whole ladder. Here's the Ground teams that beat the clock, the passives and gear to bring, every attack in the kit, and the Legendary Beam Scatter Schematic it drops.
Zoe and Grizzbolt on Hard Mode is the rematch at the very first tower you ever cleared, rebuilt as a level 72 fight with 464,000 HP that soaks 90% of everything you throw at it — the single longest health bar on the rematch ladder. This guide covers the boss card, why Ground is the answer and Grass is the catch, the three teams that finish it inside the five-minute clock, the passives, gear and food worth packing, every attack in the hard-mode rotation, and the Legendary Beam Scatter Schematic sitting on the reward table.
 Zoe and Grizzbolt (Hard) at a Glance
Two things separate this from the tower fight you remember. Grizzbolt is no longer alone — a Syndicate Gunner and a Syndicate Crusher drop into the arena with it — and its kit is no longer purely Electric, which is the detail that wrecks most first attempts. Everything else is the standard rematch package: same door, same five-minute timer, and the unlock is the ladder-wide one, so Auri and Shaolong has to fall before this rematch appears.
| Hard Mode | |
|---|---|
| Boss | Zoe & Grizzbolt |
| Element | Electric |
| Weak to | Ground |
| Level | 72 |
| HP | 464,000 |
| Time limit | 5 minutes |
| Unlock | Defeat Auri and Shaolong |
| Other enemies | Syndicate Gunner ×1, Syndicate Crusher ×1 |
| First-clear reward |  Zoe Hat Zoe Hat |
| Paldeck | #185 |
The Longest Fight on the Whole Ladder
Every tower boss is an ordinary Pal wearing multipliers, and the rematch rewrites all four of Grizzbolt's. Health goes from ×12 to ×100, which already sounds heavy, but the number that actually decides the run is the damage-taken column: it falls from full to a tenth. Its own output climbs from ×1 to ×13, the hardest hit on the board — softened only by the cooldown multiplier going to ×3, the slowest rotation of any rematch. Big, infrequent hits are survivable with the right armour; the health bar is what kills attempts.
| Multiplier | First battle | Hard Mode |
|---|---|---|
| HP | ×12 | ×100 |
| Damage dealt | ×1.0 | ×13 |
| Damage taken | ×1.0 | ×0.1 |
| Cooldown | ×2.0 | ×3.0 |
| Effective health | ×12 | ×1,000 |
Multiply health by the reciprocal of damage taken and you get the real size of the bar. At ×1,000 effective health this is the biggest one in the game's tower class, well clear of Lily and Lyleen at ×833 and more than double Victor and Shadowbeak at ×400. That inversion is the joke of the rematch ladder: the tower everyone clears first on Normal is the last one you should book on Hard. Do not walk in here off the back of a Shadowbeak clear and assume the same team scales — it needs roughly two and a half times the damage output. The full ladder with every multiplier lives on the tower boss list.
| Rematch | HP × | Takes × | Effective health |
|---|---|---|---|
| Zoe & Grizzbolt | ×100 | ×0.1 | ×1,000 |
 Lily & Lyleen Lily & Lyleen | ×100 | ×0.12 | ×833 |
 Axel & Orserk Axel & Orserk | ×110 | ×0.15 | ×733 |
 Marcus & Faleris Marcus & Faleris | ×110 | ×0.15 | ×733 |
 Saya & Selyne Saya & Selyne | ×93 | ×0.2 | ×465 |
 Auri & Shaolong Auri & Shaolong | ×88 | ×0.2 | ×440 |
 Bjorn & Bastigor Bjorn & Bastigor | ×75 | ×0.18 | ×417 |
 Victor & Shadowbeak Victor & Shadowbeak | ×100 | ×0.25 | ×400 |
 Ground Is the Answer, Grass Is the Catch
Grizzbolt is pure Electric, and Ground is the one element that beats Electric — no second typing, no alternative line, no debate. That makes team building simple and the counter-play brutal, because Ground has exactly one weakness of its own and the hard-mode kit was built around it. Four of the nine attacks in the rematch rotation are Grass, and Grass is super effective into Ground, so the fight is a straight trade: your damage is doubled while you are out, and the boss's damage is doubled the moment those casts land on your attacker. Check any pairing yourself on the element matchup chart and counter finder.
| Element | Into Grizzbolt | Heaviest move you can bring | What answers it |
|---|---|---|---|
| Ground | Super effective | Rocky Impact — 600 power, 30s | Grass casts hit your Pal for double |
| Neutral, Fire, Water, Ice, Dark, Dragon, Grass | Normal damage | — | Nothing to exploit, and no reason to bring it |
There is a second, quieter reason Ground is the pick beyond the damage bonus: Ground attacks apply Muddy, and a Muddied target deals less Electric damage. Since almost everything dangerous Grizzbolt does is Electric, your offence and your defence come out of the same move. The trade-off is that enemies build resistance to Muddy the more often you reapply it, so it is a tool to time rather than spam — the status effects guide covers how the stacking works.
Best Pals for the Fight
Knocklem is the standout and it is not close. Its partner skill, Steel Guardian Mode, scales to +200% ranged attack and +200% defense at max rank — the largest single-Pal buff you can bring to a Ground fight, and it fixes the survivability problem and the damage problem in one slot. Pierdon is the specialist pick: its partner skill multiplies its damage against Muddied targets, and since you want Muddy up anyway, the two mechanics compound. Anubis is the play if you would rather be the damage dealer yourself, and it comes with Earth Emperor already baked in as an innate passive. Gildane is the budget version of that plan with a weaker attack boost, but its partner skill is always on rather than something you have to trigger.
| Pal | Element | Heaviest Ground move | Why it works here |
|---|---|---|---|
| Knocklem | Ground | Rocky Impact — 600, 30s | Steel Guardian Mode scales to +200% ranged attack and +200% defense; Ground Cutter lands 450 on a 20s cycle |
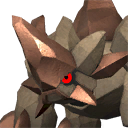 Pierdon Pierdon | Ground | Horn Burst / Rocky Impact — 600, 30s | Power Stone spikes its damage against Muddied targets, and it is a pure attacker by build role |
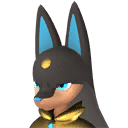 Anubis Anubis | Ground | Rocky Impact — 600, 30s | Guardian of the Desert adds up to +50% ranged attack and converts your shots to Ground; innate Earth Emperor for +30% Ground damage |
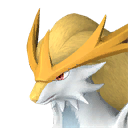 Gildane Gildane | Ground | Rocky Impact — 600, 30s | Sandstorm's Blessing turns your attacks Ground with no activation needed, and it rides at 1,260 sprint speed |
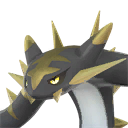 Cryolinx Terra Cryolinx Terra | Ground | Rocky Impact — 600, 30s | Explosive Strength is the flat attack support slot for a player-damage build |
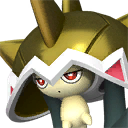 Turtacle Terra Turtacle Terra | Water / Ground | Rocky Impact — 600, 30s | Bench support that adds a second layer of Ground damage on top of whatever is out |
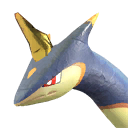 Surfent Terra Surfent Terra | Ground | Rocky Impact — 600, 30s | Sand Swimmer turns your own shots Ground, which is how you apply Muddy by hand |
Double Knocklem Swap Team
The strongest comp on paper is two Knocklem rather than one. Steel Guardian Mode runs on a cooldown, so a single Knocklem spends part of every cycle without its buff; carrying a second and swapping the instant the first one's skill goes down gives you effectively unbroken uptime on that +200%/+200%. Around them, Orserk handles the universal bullet-hit buff, Turtacle Terra stacks extra Ground damage into Grizzbolt's weakness, and Silvegis adds a shield layer on you specifically — which matters when the escorts decide you are the target.
| Slot | Pal | Job |
|---|---|---|
| Active | Knocklem | Main damage — Serenity, Earth Emperor, Immortality, God of Destruction |
| Active (swap) | Knocklem | Identical build; swap in the moment the first partner skill drops |
| Support | Turtacle Terra | Extra Ground damage from the bench |
| Support | Orserk | Attack and defense stacks on every bullet that connects |
| Support | 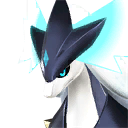 Silvegis Silvegis | Buffs your shield — the safety net against the two escorts |
Muddy Pierdon Team
This one frees a party slot by running a single active Pal, and it puts everything into one damage window. Pierdon hits far above its rating against a Muddied target, and it has two 600-power Ground moves — Horn Burst and Rocky Impact — to spend that bonus on. Surfent Terra is the enabler: with Sand Swimmer up your own shots turn Ground, so you can apply Muddy on demand instead of waiting for Pierdon's cooldowns. If manually applying it sounds like too much to juggle, Dumud slots in there instead. Time the application to just before a big Ground cast rather than keeping it permanently on — resistance builds with every reapply.
| Slot | Pal | Job |
|---|---|---|
| Active | Pierdon | Main damage — Serenity, Earth Emperor, Immortality, God of Destruction |
| Support | Turtacle Terra | Extra Ground damage |
| Support | Orserk | Bullet-hit attack and defense stacks |
| Support | 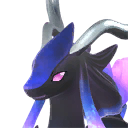 Celesdir Noct Celesdir Noct | Blessing of Chaos, up to +80% ranged attack |
| Support | Surfent Terra | Turns your shots Ground so you can apply Muddy yourself |
Player-Damage Anubis Team
If your gun is better than your Pals, flip the plan. Anubis converts your attacks to Ground and adds up to +50% ranged attack, which turns every shot you land into weakness damage — and Anubis has a dodge of its own, so it survives the Grass casts better than most Ground Pals left standing in the open. Behind it, Solenne and Cryolinx Terra cover flat attack and weak-point damage, while Turtacle Terra and Pierdon sit on the bench purely for their Ground and Muddy bonuses. Swap God of Destruction for Legend on the active Pal here — the −50% max health is a bad trade on a Pal you are not relying on for damage. The attack-element guide lists every Pal that can do this conversion.
| Slot | Pal | Job |
|---|---|---|
| Active | Anubis | Converts your attacks to Ground — Serenity, Earth Emperor, Immortality, Legend |
| Support | Turtacle Terra | Extra Ground damage |
| Support |  Solenne Solenne | Flat attack support |
| Support | Pierdon | Muddy damage bonus from the bench |
| Support | Cryolinx Terra | Weak-point and attack bonuses for headshots on Zoe |
Passives Worth Rerolling For
Four passives carry every one of the teams above, and the reason is arithmetic rather than taste. Serenity is the best offensive passive in the game for a five-minute fight — 30% off active-skill cooldowns means roughly one extra 600-power cast per minute, and it adds 10% attack on top. Earth Emperor is a flat +30% to exactly the element you are using. God of Destruction is the highest raw attack line at +40%, but read the third row before you commit: −50% max health against a boss hitting for ×13 is a real risk, and Legend is the safer +20%/+20% version. On the player side, Idiosyncratic is the sleeper — +50% health regeneration and +25% defense on both you and your Pal.
| Passive | Goes on | Effect |
|---|---|---|
| Serenity | Active Pal | Active skill cooldown −30%, attack +10% |
| Earth Emperor | Active Pal | Ground attack damage +30% |
| Immortality | Active Pal | Life steal +5%, health regeneration +100%, attack +15% |
| God of Destruction | Active Pal | Attack +40%, defense +20%, max health −50% |
| Legend | Active Pal | Attack +20%, defense +20%, movement speed +20% — the safe alternative |
| Vanguard | Player | Player attack +10% |
| Stronghold Strategist | Player | Player defense +10% |
| Reload Master | Player | Player reload speed +4% |
| Idiosyncratic | Player | Health regeneration +50% and defense +25% for you and your Pal, immune to poison and burn |
 Minimum Requirements Before You Walk In
This is the checklist that decides whether the attempt is worth starting, and it matters more here than at any other tower. Hard Mode does not punish an under-built party with a wipe — it punishes it with a timeout, and with a ×1,000 effective health bar this is the fight most likely to hand you one. Every row below is fixable before you walk through the door. If a Pal falls short, the answer is not a different Pal — it is condensing and ranking up the one you already own and raising its trust, both cheaper than levelling a replacement from zero.
| Requirement | Target | Why |
|---|---|---|
| Pal level | 80 | Eight levels above the boss — the gap is free damage on top of the weakness bonus |
| Condensed | 4 star | The largest stat swing available to a Pal you already have |
| Pal Souls | +20 HP, +20 Attack, +20 Defense | Fed by  Large Pal Souls the towers themselves drop Large Pal Souls the towers themselves drop |
| Trust level | 7 or higher | Knocklem's +200% buff only exists at the top of the partner-skill scale |
| Awakened | Yes | 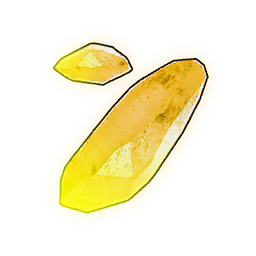 Radiant gems by element — farm them before the run, not during Radiant gems by element — farm them before the run, not during |
| Weapon | Legendary tier for your level | See the best weapon by tech level |
| Armor | Full Ancient set at minimum | See the best armor by tech level |
 Weapons to Bring
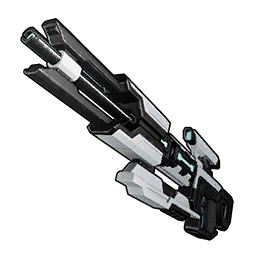
The Drone Launcher is the most important item in your bag here and it has almost nothing to do with its own damage — it is the fastest way to max out Orserk's buff, because the drones fire on their own and land hits far quicker than you can by hand. The Plasma Rifle is the best gun in the game for sustained output, the Megaboost Gun exists purely to throw an extra attack and defense buff onto your active Pal, and the Mechanical Bow is the utility pick for sticking status effects on the pair. Compare attack figures down the column only against weapons of the same class — a bow's 20,000 and a rifle's 1,860 are measured on completely different scales, which the gun tier list explains in full.
| Weapon | Class | Unlocks at | Attack | Durability | Why bring it |
|---|---|---|---|---|---|
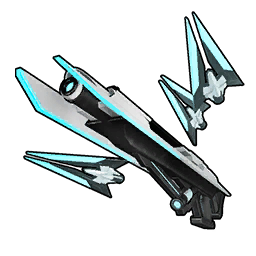 Drone Launcher Drone Launcher | Melee class | Tech Lv 77 | 200 | 6,500 | Autonomous drones cap Orserk's stacks in seconds |
| Plasma Rifle | Assault Rifle | Tech Lv 78 | 1,860 | 25,000 | 38-round magazine and the highest sustained damage available |
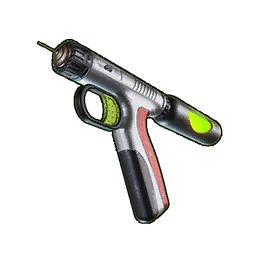 Megaboost Gun Megaboost Gun | Handgun | Tech Lv 63 | 250 | 400 | Shoot your own Pal for a stronger, longer attack and defense buff |
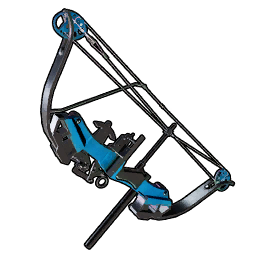 Mechanical Bow Mechanical Bow | Bow | Tech Lv 67 | 20,000 | 2,000 | Best tool for applying status effects; weak without a dedicated bow build |
 The Ring That Was Made for This Fight
The Menasting Terra Ring does both halves of this fight in one slot: it greatly reduces the Electric damage your Pal takes *and* significantly raises its Ground damage. Against a boss whose entire dangerous kit is Electric and whose only weakness is Ground, nothing else in the pool is close. Past that, the Earth Emperor's Baton and Anubis's Talisman split the same Ground bonus across attack and defense, and the Ground Support Whistle is the cheap starter version. If you are running the player-damage comp instead, drop the Ground-specific pieces for the Dogen Emblem and the Silvegis Emblem, which buff you and your Pal together. The full pool is on the accessories list, with every Pal ring and every baton broken out separately.
| Accessory | Best on | What it does |
|---|---|---|
| Menasting Terra Ring | Any Ground team | Greatly cuts Electric damage taken by your Pal, significantly raises its Ground damage |
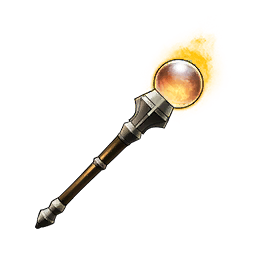 Earth Emperor's Baton Earth Emperor's Baton | Ground team | Raises your Pal's attack and significantly increases its Ground damage |
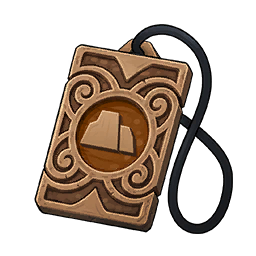 Anubis's Talisman Anubis's Talisman | Ground team | Raises your Pal's defense and significantly increases its Ground damage |
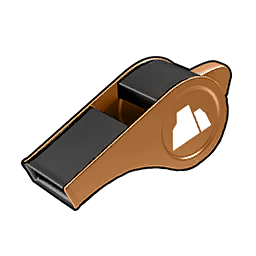 Ground Support Whistle Ground Support Whistle | Budget slot | Slightly raises your Pal's Ground damage |
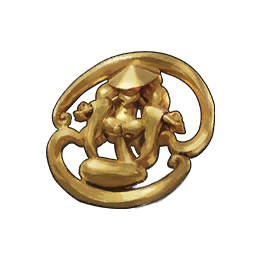 Dogen Emblem Dogen Emblem | Player-damage team | Greatly raises your attack and your Pal's |
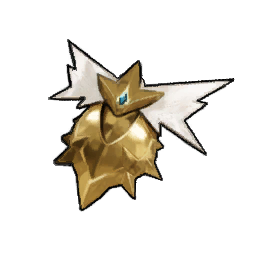 Silvegis Emblem Silvegis Emblem | Player-damage team | Greatly raises your defense and your Pal's |
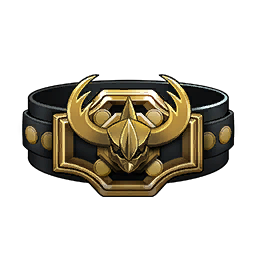 Warsect Terra's Belt Warsect Terra's Belt | Survival slot | Greatly raises defense and health |
For armour the Ancient set is the floor, not the goal. Lightweight Ancient Armor is the body piece to beat at 840 defense and 2,400 HP, the Ancient Helm adds 500 defense and 1,200 HP, and the Ancient Shield carries a 2,200 shield that repairs itself between casts. Wear a higher-tier craft if you have one unlocked — incoming damage here is multiplied by thirteen, so every point of defense is doing thirteen times its usual work.
| Gear | Unlocks at | HP | Defense | Added effect |
|---|---|---|---|---|
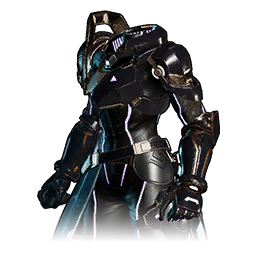 Lightweight Ancient Armor Lightweight Ancient Armor | Tech Lv 79 | 2,400 | 840 | Cold Resistance Lv2, Heat Resistance Lv2, carry weight Lv4 |
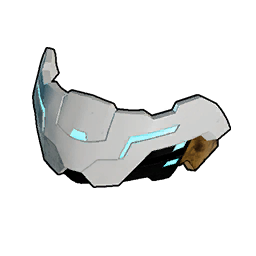 Ancient Helm Ancient Helm | Tech Lv 68 | 1,200 | 500 | Neutral and Dragon damage reduction Lv1 |
 Ancient Shield Ancient Shield | Tech Lv 71 | — | 2,200 shield | Self-repairs after a spell without taking damage |
 Food and Healing to Pack
The tower runs on a clock, so damage food beats defence food every single time — a defensive buff that keeps you alive through a run you time out on has achieved nothing at all. Mammorest Curry is the strongest at +25% attack, with Broncherry Fried Noodles one step behind at +20%. Eat before you walk through the door; the buff ticking down during the fight is fine, the seconds spent in your inventory inside the arena are not. Bring revives too — with the boss hitting at ×13, a Pal going down mid-run is a normal outcome rather than a mistake.
| Consumable | Effect | Notes |
|---|---|---|
| Mammorest Curry | Attack +25% | The strongest attack food — eat it at the door |
 Broncherry Fried Noodles Broncherry Fried Noodles | Attack +20% | The fallback if you are short on curry ingredients |
 Advanced Recovery Meds Advanced Recovery Meds | Rapid health restore | The one to use when a Grass cast catches you |
 High Quality Recovery Meds High Quality Recovery Meds | Large health restore over time | Cheaper topping-up between casts |
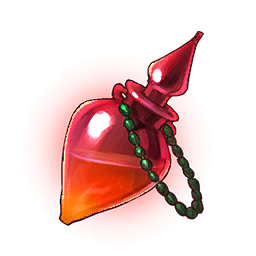 Revival Potion Revival Potion | Revives a downed Pal | Carry several — a swap comp needs both Knocklem standing |
Every Attack in the Hard Mode Kit
Nine attacks, and the split is the whole story: five Electric and four Grass. The Electric half is what Muddy blunts and what the Menasting Terra Ring cuts, so most of the rotation can be planned for. The Grass half exists only in Hard Mode and it is aimed squarely at the Ground team you were told to bring — Reflect Leaf at 400 power ricochets up to four times, which means one cast can hit the same Pal repeatedly. Lethal Laser is the biggest single hit at 600 power, but its 30-second cooldown is the longest in the kit, so it is the most telegraphed thing the boss does. Full move data for anything here is on the active skills list.
| Attack | Element | Power | Cooldown | What it does |
|---|---|---|---|---|
| Lethal Laser | Electric | 600 | 30s | Aims, then fires several ultra-fast lightning lasers |
| Heavy Thunder Tank | Electric | 550 | 24s | Grizzbolt's signature — sustained minigun fire ending in one charged shot |
| Thunder Rain | Electric | 400 | 20s | Marks a spot and drops lightning on it after a delay — move |
| Lightning Strike | Electric | 300 | 16s | Turns itself into a lightning rod and electrifies the surrounding area |
| TriSpark | Electric | 250 | 12s | One fast ball in a straight line plus slow tracking balls |
| Reflect Leaf | Grass | 400 | 20s | Wind blade that rebounds off enemies and trees up to four times |
| Spine Vine | Grass | 250 | 12s | Thorns chase along the ground and pierce from below |
| Wind Edge | Grass | 200 | 12s | Fans out sharp blades of air |
| Seed Mine | Grass | 120 | 8s | Lobs a seed that detonates on contact — cheapest cast, comes out most often |
Strategy That Changes the Fight
Delete the Two Syndicate Escorts First
A Syndicate Gunner and a Syndicate Crusher spawn in with the boss, and they have a habit of picking you rather than your Pal. On a five-minute clock, spending the opening twenty seconds clearing both is not lost damage — it is the difference between dodging one attack pattern and dodging three. Burst them down with the Plasma Rifle while your active Pal is already chewing on Grizzbolt, then commit to the boss and never look behind you again.
Keep Muddy Up, But Do Not Spam It
Muddy is the reason this fight is survivable. Every Ground attack applies it, and while it is up the target's Electric damage drops — which is nearly all of Grizzbolt's dangerous output. The catch is resistance: the more often you reapply it, the shorter it sticks. Save your manual applications for the moment before a heavy Ground cast lands, especially on the Pierdon comp where the whole plan is landing 600-power moves into a Muddied target. Running Surfent Terra on the bench is what lets you control the timing yourself instead of hoping the cooldowns line up.
Recall Your Pal Before the Grass Casts
This is the skill check that separates a clear from a wipe. Four attacks in the rotation are Grass, and Grass is super effective into the Ground Pal you have invested everything in. When one starts — Reflect Leaf and Spine Vine are the readable ones — pull your Pal back rather than trying to out-heal it. Recalling costs you a few seconds of damage; eating a doubled 400-power ricochet on a Pal running God of Destruction at half max health costs you the run.
Aim at Zoe, Not Just Grizzbolt
Zoe is a person standing next to a very large Pal, and headshots on the rider carry the weak-point multiplier. On the Anubis player-damage comp that is where most of your total output comes from, so treat every cooldown gap as a window to line up on her rather than as downtime. Even on a Pal-damage build it is free damage while your active Pal's skills recharge, and it is the main argument for keeping Cryolinx Terra on the bench for its weak-point bonus.
Stack Orserk's Buff With Drones
Orserk's partner skill adds attack and defense to your active Pal for every bullet that connects, stacking up to 30 times. Reaching that cap by hand burns your opening minute; the Drone Launcher deploys drones that fire on their own and get there in seconds. The catch is range — drift too far from the boss and the drones stop shooting, the stacks decay, and your damage quietly halves with no warning on screen. Stay inside the fight while you dodge instead of kiting to the far wall.
What Zoe and Grizzbolt Drop
The Zoe Hat is guaranteed the first time you clear the rematch, so the opening run is never wasted — though at 20 defense, 60 HP and 5,000 durability it belongs in your wardrobe rather than on your head during a fight. The reason to keep queueing is the schematic at 10%, plus the Speed Lotus (L) and Training Crystals on repeat. The lotus feeds the permanent Speed Elixir and the crystal skips a level of grinding outright, which makes the longest fight on the ladder also one of the better repeat farms once you can actually clear it.
| Drop | Chance | What it's for |
|---|---|---|
| Zoe Hat | Guaranteed on 1st clear | 20 defense, 60 HP — a collection piece, not an upgrade |
 Beam Scatter Schematic Beam Scatter Schematic | 10% | Unlocks the Legendary Beam Scatter at the Ancient Workbench |
 Speed Lotus (L) Speed Lotus (L) | Repeat drop | Speed Elixir — permanent work speed |
| Training Crystal | Repeat drop | Raises a Pal's level by one, no grinding |
The Legendary Beam Scatter Schematic
The Beam Scatter is the last shotgun on the tech tree at level 75, and its numbers only make sense read against other shotguns. 508 attack across a 30-round magazine is 15,240 damage before a reload — the most of any shotgun in the game, ahead of the Prototype Shotgun's 14,004 despite the Prototype's much bigger per-shot figure. That is the whole pitch: it trades punch per pellet for a magazine nothing else in the class comes near. Attack and durability both scale with the rarity of the schematic you build from, so a Legendary copy crafts a straight upgrade over the tech-tree version — and at 10% off this boss, this tower is by far the most reliable place to pull one.
| Beam Scatter | |
|---|---|
| Weapon class | Shotgun |
| Base attack | 508 |
| Magazine | 30 rounds |
| Damage per magazine | 15,240 — highest in the class |
| Durability | 950 |
| Technology level | Lv 75 |
| Crafting station | Ancient Workbench |
| Crafting work | 3,500,000 |
| Recipe | 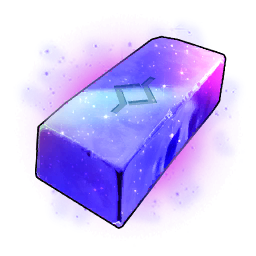 Paloxite Ingot ×50, Paloxite Ingot ×50, 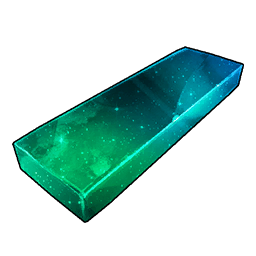 Soralite Ingot ×50, Soralite Ingot ×50,  AI Core ×5, AI Core ×5,  Ancient Civilization Core ×5 Ancient Civilization Core ×5 |
| Ammo |  Beam Scatter Ammo Beam Scatter Ammo |
If you keep pulling lower-rarity copies instead of the Legendary, they are not wasted — five of the same tier combine into one of the next at the Drafting Table, which the schematic upgrade guide walks through. The legendary schematics guide ranks the whole pool by what it actually crafts, and the legendary weapon schematic locations page covers every other pool these turn up in.
Where the Tower Is
Zoe's tower is the Rayne Syndicate tower in the starting grasslands — the same door you walked through in your first few hours, which is exactly why the rematch catches people out. All eight tower pins are already marked on the tower boss layer of our interactive map, with three more in the World Tree region on the World Tree view. Turn the layer on, take the nearest fast travel statue and you are at the entrance. If you also want to catch a wild Grizzbolt of your own while you are in the area, its habitat is on the Grizzbolt spawn layer — 40 daytime areas and 40 at night.
Summary
Bring Ground and nothing else, run Knocklem twice so its +200% buff never lapses, clear the two Syndicate escorts in the opening seconds, keep Muddy up to blunt the Electric half of the kit, and recall your Pal every time a Grass cast starts. Pack the Drone Launcher for Orserk's stacks, wear the Menasting Terra Ring, eat Mammorest Curry at the door, and aim at Zoe whenever your cooldowns are down. Do that and the biggest health bar in the tower class comes apart inside the clock — and hands over a 10% shot at the Legendary Beam Scatter Schematic every time.
Related Guides
The rest of the rematch ladder:
- How to Unlock Hard Mode Towers
- How to Beat Hard Mode Lily and Lyleen
- How to Beat Hard Mode Axel and Orserk
- How to Beat Hard Mode Marcus and Faleris
- How to Beat Hard Mode Victor and Shadowbeak
- How to Beat Hard Mode Saya and Selyne
- How to Beat Hard Mode Bjorn and Bastigor
- How to Beat Hard Mode Auri and Shaolong
Getting the team and gear ready: