Game Mechanics Explained: Combat, Base, and Survival
Every Palworld system explained with the numbers behind it — sphere capture power, the nine-element chart, the three skill types, all 588 technologies, 12 work suitabilities, hunger and temperature, and what each boss tier actually is.
Palworld runs a survival crafting game, a creature collector, a base-automation sim and a boss-rush shooter at the same time, and the systems feed each other in ways the tutorial never spells out. This page walks every mechanic in 1.0 with the actual numbers attached — how much a sphere tier is really worth, what the element chart does, how the 588 technologies gate your progress, and which survival meters can kill you.
Every Palworld System at a Glance
Ten systems carry the whole game. The table below is the map — each row is a mechanic, the number that defines it, and where to read the full breakdown. If you are brand new, work down it in order: catching feeds your base, your base feeds your tech tree, and your tech tree is what makes the bosses survivable.
| System | What it governs | The number that matters | Go deeper |
|---|---|---|---|
| Capturing | Adding Pals to your party, base and Paldeck | 288 Pals, 7 craftable sphere tiers | Capture Rate Calculator |
| Elements | Damage taken and dealt in every fight | 9 elements, ~1.5× on a weakness | Palworld Type Chart |
| Skills | Attacks, ride abilities and stat modifiers | 300 active skills, 312 passives | List of All Active Skills |
| Bosses | Story gates and the best drops in the game | 9 towers, 90 Alphas, 6 raids | Alpha Pal Locations |
| Dungeons | Repeatable loot runs that respawn | 170 entrances, Lv. 5 – 69 | Palworld Dungeon Locations |
| Technology | What you are allowed to craft | 588 technologies, level cap 80 | Palworld Technology Tree |
| Base building | Automation, storage and production | 485 structures | List of All Base Structures |
| Work suitability | Which Pal does which job for you | 12 job types, Lv. 1 – 8 | Best Base Pals for Every Work Type |
| Breeding | Passing down passives and unlocking Pals | 41,616 parent combinations | Palworld Breeding Calculator |
| Exploration | Loot, resources and collectibles on the island | 40,818 map pins | Palworld Interactive Map |
Player level runs to 100, but the technology tree stops handing out new unlocks at Lv. 80 — every level past that is stat points and nothing else. Plan your route through the game around 80, not 100.
 Capturing Pals and What Sphere Tier Is Worth
You throw a sphere, the Pal gets pulled in, and a hidden roll decides whether it sticks. Each sphere tier carries a capture power value, and the jump between tiers is bigger than the names suggest — an Ultimate Sphere is worth just over six ordinary Pal Spheres on the same throw. The tiers also unlock on a slow drip through the tech tree, which is why your capture rate feels stuck for long stretches: you are not doing anything wrong, you just have not hit the next unlock level yet.
| Sphere | Capture power | vs a Pal Sphere | Unlocks at | Tech points |
|---|---|---|---|---|
| Pal Sphere | 7 | — | Lv. 2 | 1 |
 Mega Sphere Mega Sphere | 14 | ×2.0 | Lv. 14 | 2 |
 Giga Sphere Giga Sphere | 20 | ×2.9 | Lv. 20 | 3 |
 Hyper Sphere Hyper Sphere | 26 | ×3.7 | Lv. 27 | 3 |
 Ultra Sphere Ultra Sphere | 32 | ×4.6 | Lv. 35 | 4 |
 Legendary Sphere Legendary Sphere | 37 | ×5.3 | Lv. 44 | 5 |
 Ultimate Sphere Ultimate Sphere | 43 | ×6.1 | Lv. 51 | 5 |
Those seven are the craftable ladder. A handful of other spheres exist as pickups and event rewards — the Exotic Sphere, the Sol Sphere and the Ancient Sphere — and they sit above the Ultimate, but you cannot manufacture them, so they are not something to plan a farming trip around.
What Actually Moves Your Capture Odds
Sphere tier is only one of five multipliers. Weakening the target is by far the strongest lever you control: a Pal at full health is a coin-flip even with good spheres, while one dropped to a sliver can be caught with gear two tiers cheaper. Hitting a Pal in the back with the throw adds another 50% on top, and every Lifmunk Effigy rank you buy at the Statue of Power adds a flat bonus to every throw for the rest of the save.
The five things that change the roll:
- Remaining HP — the single biggest factor. Get the target as low as you dare before throwing.
- Back throws — landing the sphere on a Pal's back is worth roughly ×1.5.
- Statue of Power rank — Lifmunk Effigy upgrades run to rank 10 and stack with everything else. There are 407 effigy pickups scattered across the island, so open the effigy layer on the map and grab them as you pass.
- Alpha status — a boss version of a Pal is markedly harder to hold than the field version.
- The Pal's own capture rating — a fixed per-species value. Lamball sits at 1.5; Mimog sits at 0.8.
Combat: Elements, STAB, and the Three Skill Types
Combat is third-person and real-time — you shoot, roll and reposition while a Pal fights beside you. Two hidden systems decide whether that fight is short or miserable: the element chart, and which of the three skill types you are actually leaning on. Get the element right and a tower boss folds in a couple of minutes; get it wrong and the same fight runs the clock out.
The Nine-Element Chart
Nine elements, and every one except Neutral beats something. Hitting a weakness lands roughly 1.5× damage, and taking one costs you the same — which is why bringing the wrong element to a boss feels less like a slow fight and more like a losing one. Fire and Grass are the two elements that cover a second matchup each, which makes them the most flexible things to keep in your party, and Neutral is the only element with no offensive advantage at all.
| Element | Strong against | Weak to |
|---|---|---|
| Neutral | — | Dark |
| Dark | Neutral | Dragon |
| Dragon | Dark | Ice |
| Ice | Dragon | Fire |
| Fire | Ice, Grass | Water |
| Water | Fire | Electric, Grass |
| Electric | Water | Ground |
| Ground | Electric | Grass |
| Grass | Ground, Water | Fire |
One trap worth knowing: a Pal's element is not its damage element. The move decides the damage type, so a Pal can carry an attack outside its own typing and still hit a weakness. When a Pal does use a move matching its own element it gets a same-type attack bonus on top, which is why a Fire Pal throwing Fire moves out-damages the same Pal running an off-type move of identical power. Check the full active skills list before you write off a matchup, or hand the target to the counter finder and let it name the answer.
Active, Partner, and Passive Skills
Every Pal has active skills and one partner skill; passives are the wildcard that may or may not be there when you catch it. There are 300 active skills in the game and 312 passives, and the gap between a good Pal and a great one is almost always the passive line rather than the moveset. The table sorts out which is which.
| Skill type | How many | What it does | How you change it |
|---|---|---|---|
| Active skills | 300 total | The attacks a Pal uses in combat. Only three can be equipped, and the Pal picks between them at random unless you are riding it and firing manually. | Feed a Skill Fruit or overwrite a slot in the Pal menu |
| Partner skills | One per Pal, 288 total | A unique effect tied to the species — a ride, a passive buff, or a triggered ability. 140 Pals use theirs to become mounts. | Fixed. Many need a Pal Gear item built first |
| Passive skills | 312 total | Stat and behaviour modifiers. A Pal holds up to four, and they apply to combat and base work alike. | Breed for them, or overwrite one at a Pal Surgery Table with the matching Implant |
Partner skills are where the mounts live. 140 of the 288 Pals can be ridden, and every one of them needs its saddle or harness built first — Foxparks' Harness turns Foxparks into a handheld flamethrower, and the equivalent saddle is what lets Faleris carry you into the air. See every partner skill effect for the full list, or the mount speed rankings if you only care about getting somewhere fast.
Passives are permanent once you get them right, and that makes breeding the real endgame. A Pal carries up to four, and they pass down through eggs — see how breeding works and the best passives for base Pals for the lines actually worth chasing. The other route is the Pal Surgery Table at Lv. 38, which overwrites a passive directly if you own the Implant for it.
 Bosses, Dungeons, and Base Raids
Palworld has five separate kinds of boss and they behave nothing alike. Tower bosses are story gates on a 10-minute timer. Alphas are overworld field bosses you can catch and keep, size and stats intact. Raids are summoned at an altar you build yourself. Dungeon bosses sit at the end of a timed cave. Base raids come to you whether you want them or not.
| Boss type | How many | Level range | Where you fight it | Repeatable |
|---|---|---|---|---|
| Tower bosses | 9 | 10 – 80 | Faction towers and the Sealed Sanctum | Yes — plus a Hard Mode rematch |
| Raid bosses | 6 | 35 – 80 | A Summoning Altar you build at Lv. 33 | Yes, as long as you have a slab |
| Alpha Pals | 90 | 11 – 79 | Fixed spots in the overworld | Yes — they respawn |
| Dungeon bosses | 147 Pals | 10 – 69 | End room of any of the 170 dungeons | Yes — rosters reshuffle |
| Bounty targets | 33 | 10 – 59 | Fixed human camps | Yes |
Tower fights do not just raise the boss's level — they multiply its stats. Grizzbolt opens the run at ×12 health, and by the Feybreak tower Bastigor is sitting on ×62. That scaling is the entire reason gear checks matter more than your own level. The full boss list has every multiplier, weakness and coordinate, and the tower layer on the map shows where each one stands.
Dungeons Are Timed, Not Permanent
There are 170 dungeon entrances on the island, and each one runs on a timer — clear it or leave, and it eventually respawns with a reshuffled roster. Difficulty follows the region rather than your level: the Grasslands caverns start around Lv. 5, while the Feybreak and Sunreach caves top out near Lv. 69. Inside you get treasure chests, Pal eggs, Skill Fruits, Mimics and a boss at the end, which makes dungeons the most reliable repeatable loot in the game. Every dungeon location lists the level band and loot table per cave.
Raid Bosses Are Summoned, Not Found
Raids do not exist in the world — you build a Summoning Altar (Lv. 33, and it costs Ancient Technology Points) and burn a slab to call one down. Six raid bosses exist, from Bellanoir at Lv. 35 up to the Lv. 80 Ultra rematches, and their health multipliers are absurd by design: Xenolord runs ×280 HP at Lv. 65 and ×420 in its Ultra version. They also carry the best drops in the game, including the Skill Fruits you cannot get anywhere else. Start with the Bellanoir raid guide and work up.
Base Raids Come To You
Every so often a wave of hostile Pals or human raiders attacks a base you own. The fight uses your base Pals and whatever defences you have built, so a base with no walls, no Alarm Bell and a roster of Lv. 15 workers gets flattened. Keep at least a couple of combat-capable Pals assigned, build defences early, and check the base building guide for the layout that survives them.
 Crafting, Technology, and Base Building
Everything you can build is gated behind the technology tree, and the tree is gated behind your level. There are 588 technologies in 1.0 split across two currencies, and you will not unlock all of them in one run without spending carefully — the ordinary tree alone costs 1,413 Technology Points, which is more than levelling to 80 hands you if you unlock things you never use.
| Track | Entries | Total cost | Currency | Where the points come from |
|---|---|---|---|---|
| Standard technology | 537 | 1,413 points | Technology Points | One or more per player level |
| Ancient technology | 51 | 185 points | Ancient Technology Points | Defeating tower bosses and Alphas |
The split matters because the ancient track holds things you genuinely cannot skip — the Summoning Altar, the ancient furnaces and workstations, and all three Lockpicking Tools. Ancient points only come from bosses, so a player who avoids the towers ends up locked out of a chunk of the crafting game entirely. See the best ancient technology to unlock for the priority order.
Once a recipe is unlocked you still need the right station. Crafting is split across specialised benches — spheres at one, food at another, weapons at a third — and there are 485 buildable structures in total. The crafting guide covers which bench makes what, and the full structure list has the material cost of every single one.
Work Suitability: The 12 Base Jobs
Every Pal carries work suitability levels between 1 and 8, and those levels decide who does what once you drop them in a base. The distribution is lopsided in ways worth planning around: 140 Pals can haul, but only 25 can generate electricity and only 29 can work a ranch — so the specialist jobs are the ones to breed for, not the common ones. Farming is the only job that caps at Lv. 4 rather than 8.
| Work type | Pals with it | Max level | Ranking |
|---|---|---|---|
| Transporting | 140 | 7 | Best Transporting Pals |
| Handiwork | 109 | 8 | Best Handiwork Pals |
| Gathering | 109 | 8 | Best Gathering Pals |
| Lumbering | 63 | 8 | Best Lumbering Pals |
| Mining | 57 | 8 | Best Mining Pals |
| Watering | 46 | 8 | Best Watering Pals |
| Planting | 45 | 8 | Best Planting Pals |
| Kindling | 44 | 8 | Best Kindling Pals |
| Medicine Production | 43 | 8 | Best Medicine Pals |
| Cooling | 38 | 8 | Best Cooling Pals |
| Farming | 29 | 4 | Best Farming Pals |
| Generating Electricity | 25 | 8 | Best Electricity Pals |
Work Speed is the multiplier layered on top of suitability — it decides how fast a task finishes, not whether a Pal can do it at all. A Lv. 3 worker with strong Work Speed passives frequently out-produces a Lv. 4 worker without them, which is why the passive lines matter more than the suitability number on its own. Feed the whole roster to the work suitability optimizer and it will assign your base for you.
Survival: Hunger, Stamina, Temperature, and Time
The survival layer is quiet until it kills you. Four meters run in the background — hunger, stamina, temperature and sanity — and each one has a cheap fix you should have built before you needed it. None of them are difficult; they are just easy to ignore until you are standing in the desert at night with no cold gear on.
 Hunger: Cook It, Do Not Eat It Raw
You and your Pals both eat. Let the meter empty and health drains steadily down to 1 HP, and a starving base Pal simply stops working. 151 items restore hunger, but the gap between raw and cooked is enormous: the best raw meat in the game — Broncherry Meat or Mammorest Meat — restores 180, while Special Cake restores 738 and tops up 92 sanity at the same time. That is roughly four raw steaks per slice of cake, plus a far longer spoilage timer.
Build a cooking station early and keep a food box stocked for the base rather than hand-feeding Pals. Cake in particular does double duty, since it is also what the Breeding Farm consumes — see the breeding guide for the production loop.
Stamina Gates Every Fast Thing You Do
Sprinting, climbing, dodging, gliding and attacking all draw from stamina, and running it dry leaves you crawling. Your mount has its own separate bar, which is the practical workaround — hop on a Pal and your own stamina refills while you keep moving. Stat points, armour and consumables all raise the ceiling; the stat priority guide covers how much stamina is actually worth versus health and weight.
Movement tech is the other answer. A glider turns any cliff into a shortcut and costs almost nothing to keep equipped — the Normal Parachute arrives in the tutorial and the line runs up to the Hyper Glider. Compare the glider tiers before you spend points on one.
 Temperature Kills Faster Than Anything Else
Regions have climates, and standing in the wrong one without protection drains health continuously. The fix is layered: wear the resistance version of your current armour tier, keep a campfire handy in the field, and build a Heater (Lv. 17) or Cooler (Lv. 18) at the base. Every armour tier has heat- and cold-resistant variants, right up to the Cold-Resistant Ancient Armor at 1,092 defence, so you are never trading protection for warmth.
Temperature also controls incubation. Eggs hatch fastest when the incubator sits at the temperature that egg likes, and building the right heater or cooler beside it is the single largest hatching speed modifier available early — the egg hatching guide has the full stack.
 Day and Night Change What Spawns
Time passes on its own, and 13 Pals only appear after dark — if you have been hunting one of these in daylight, that is why you cannot find it. The Desiccated Desert flips the other way: scorching in the day, freezing at night, so a desert trip needs both armour sets in the bag rather than one. The night-exclusive roster is short enough to memorise.
| Night-only Pal | Element | Night-only Pal | Element |
|---|---|---|---|
 Loupmoon Loupmoon | Dark | Splatterina | Dark |
 Lovander Lovander | Neutral |  Pengullet Lux Pengullet Lux | Electric |
 Depresso Depresso | Dark |  Maraith Maraith | Dark |
 Hangyu Cryst Hangyu Cryst | Ice |  Needoll Noct Needoll Noct | Dark |
 Hoocrates Hoocrates | Dark |  Wixen Noct Wixen Noct | Dark |
 Daedream Daedream | Dark |  Tombat Tombat | Dark |
 Nox Nox | Dark | — | — |
It skews heavily Dark, which is convenient — one Dragon-element team handles almost the entire night roster. Only one Pal runs the opposite way and appears exclusively in daylight, and that is the Alpha version of Jelliette.
 Sanity, Sickness, and Injuries
Overworked, hungry or injured Pals lose sanity, and a low-sanity Pal works slowly, refuses to work, or eventually turns on you. Treat it as a base-design problem rather than an emergency: build a Hot Spring (Lv. 9) so Pals rest between shifts, keep a Medicine Rack stocked, and do not stack a Pal onto a job it has no suitability for. A Kinship Peach restores 100 sanity outright if you need a quick fix, and 84 items in the game restore sanity to some degree.
 Loot: Chests, Keys, and Lockpicks
There are 1,559 treasure chests placed around the island, plus another 8,371 supply caches and 1,816 egg nests. Most chests open on contact. The ones with a red glow are locked, and there are exactly three ways past a lock — carry the matching key, craft the lockpicking tool, or bring the Pal that does it for free. Keys are single-use consumables; lockpicks come off the ancient tech track, so they cost boss points rather than ordinary ones.
| Method | Tier | How you get it | Reusable |
|---|---|---|---|
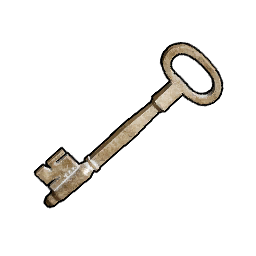 Copper Key Copper Key | Common locks | Loot and merchants | No — consumed |
 Silver Key Silver Key | Mid locks | Loot and merchants | No — consumed |
| Gold Key | High locks | Loot and merchants | No — consumed |
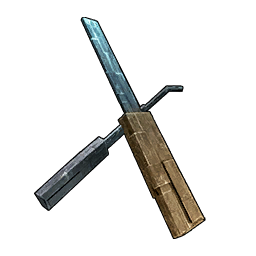 Lockpicking Tool v1 Lockpicking Tool v1 | Common locks | Ancient tech, Lv. 16 — 1 ancient point | Yes |
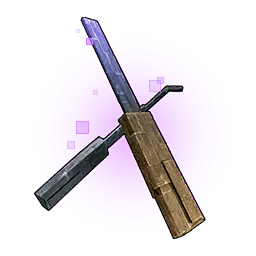 Lockpicking Tool v2 Lockpicking Tool v2 | Mid locks | Ancient tech, Lv. 25 — 2 ancient points | Yes |
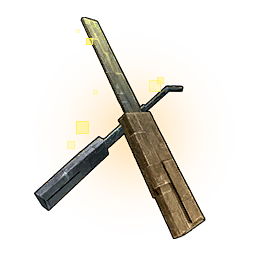 Lockpicking Tool v3 Lockpicking Tool v3 | High locks | Ancient tech, Lv. 53 — 3 ancient points | Yes |
 Mimog Mimog | Any chest | Catch it — its partner skill opens chests | Yes, on an 80s to 10s cooldown |
Mimog is the standout here. Its Master of Unlocking partner skill pops chests while it fights alongside you, with the cooldown dropping from 80 seconds to 10 as the skill ranks up — which turns a chest run from a key-budgeting exercise into a walk. Everything else in the world is loot too: shiny pickups on the ground, 407 Lifmunk Effigies, 47 Skill Fruit spots and 422 fishing points. The interactive map carries all 40,818 pins with a layer per category.
Multiplayer and Guilds
Guilds let players pool bases, share access to storage and Palboxes, and work toward the same objectives. They only mean anything on a shared server — in a solo world you are technically in a guild of one and nothing about it changes how you play. Worth knowing before you go looking for a guild mechanic that does not exist in single-player.
The Short Version
Catch Pals with the highest sphere tier you have unlocked, after weakening them and ideally from behind. Bring the right element to every fight, because ~1.5× on a weakness is the difference between a two-minute boss and a failed timer. Spend Technology Points deliberately — there are more unlocks than points. Put the right Pals on the right base jobs and let automation carry your resource income. Eat cooked food, dress for the climate, and build a Hot Spring before your workers snap. Everything else is detail.
Related Guides
Start here:
Base and crafting:
Combat and progression: