List of All Missions in Palworld: Rewards and Objectives
Every main and sub mission in Palworld 1.0 in order, what each one asks you to do, the exact EXP it pays, and which sub-mission chains hand over Applied Handbooks, Starfruit and free schematics.

Missions are Palworld's quest system: a main story chain that walks you from the beach to the World Tree, plus a pile of optional sub missions handed out by named islanders scattered across Palpagos. This is every mission in the game with the objective, the EXP payout and the reward attached to each one, so you can see at a glance which detours are worth the trip.
 All Missions at a Glance
There are 31 main missions and 45 one-off sub missions, plus four repeatable request lines that keep paying out as you play. Clearing everything once is worth just under 1.63 million EXP, and the split is almost dead even between the story and the optional stuff — the sub missions are not filler, they are half the total.
| Detail | Value |
|---|---|
| Main missions | 31, from The First Islander to Awakening |
| Sub missions | 45 one-off missions, in 11 chains and one-shots |
| Repeatable requests | 4 request lines (captures, bosses, Paldeck, cooking) |
| EXP from all main missions | 816,018 |
| EXP from all sub missions | 813,977 |
| Biggest single payout | Awakening — 143,736 EXP |
| Biggest sub mission payout | Surviving the World Tree — 106,470 EXP |
| Longest chain | Harold's five missions, 180,315 EXP total |
The payout curve is brutal at both ends. The first twelve main missions hand out 348 EXP between them, which is a rounding error, while the last nine are worth 698,145 on their own. Sub missions follow the same shape: the farmers pay a few hundred EXP each, and the World Tree delivery pays six figures. Save the optional chains for when you actually need the levels.
 All Main Missions in Order
The main chain runs in a fixed order and gates the whole game — fast travel, the Palbox, the towers and the World Tree all come out of it. Missions unlock one after the other, so you cannot skip ahead, but the tower fights in the middle can be delayed as long as you like while you build up. Below is every step with what triggers completion.
 Opening Missions: The First Islander to Crafting Pal Gear
The first twelve missions are the tutorial, and they are worth 348 EXP in total — you will out-earn all of them with a single alpha kill later. Do them anyway, because they unlock the Pal Sphere tech, the Palbox and the base system in the right order. The only one that can slow you down is The Weakest Pal, which wants three Lamball rather than one, and Crafting Pal Gear, which needs you to actually catch a Foxparks before you can craft its harness.
| # | Mission | What you have to do | EXP |
|---|---|---|---|
| 1 | The First Islander | Wake up on Palpagos and get moving | 6 |
| 2 | How to Stay Alive | Open the survival guide | 6 |
| 3 | Set Up a Workbench | Pick up Wood and build a workbench | 6 |
| 4 | Crafting an Axe and a Pickaxe | Gather Stone, craft a Stone Axe and a Stone Pickaxe | 15 |
| 5 | Enhance Stats | Level up and spend a stat point | 15 |
| 6 | Catching a Pal | Unlock the sphere tech, mine Paldium Fragment, craft a Pal Sphere and catch a Pal | 15 |
| 7 | Putting Pals to Work | Unlock the Palbox, build a base and assign one worker | 15 |
| 8 | Filling Your Belly | Eat a meal | 15 |
| 9 | The Weakest Pal | Catch 3 Lamball | 45 |
| 10 | Gearing Up | Kit yourself out with basic gear | 45 |
| 11 | Small Settlement | Reach the Small Settlement | 66 |
| 12 | Crafting Pal Gear | Catch a Foxparks and craft Foxparks' Harness | 99 |
 Tower Missions: The Rayne Syndicate to Hope Springs Eternal
This is the spine of the game — eight tower bosses, one mission each, worth 117,525 EXP across the block. Three of them bolt an extra objective onto the fight: Ruler of the Sands makes you talk to two desert villagers first, Interspecies Experiments wants five Syndicate scientists taken out, A Fine Night for a Drink wants five ninjas, and Hope Springs Eternal locks the Sunreach fight behind six area barriers. Full fight breakdowns live in the Palworld tower boss guide, and the rematches are covered in How to Unlock Hard Mode Towers.
| # | Mission | What you have to do | EXP |
|---|---|---|---|
| 13 | The Rayne Syndicate | Beat Zoe and Grizzbolt at the first tower | 198 |
| 14 | The Key Sphere | Return to the Small Settlement | 288 |
| 15 | Zoe Rayne | Talk to Zoe | 288 |
| 16 | Thou Shalt Not Harm Pals | Beat Lily and Lyleen | 1,155 |
| 17 | Flawless Victory Fixation | Beat Axel and Orserk | 3,345 |
| 18 | Ruler of the Sands | Talk to two desert inhabitants, then beat Marcus and Faleris | 7,302 |
| 19 | Interspecies Experiments | Take out 5 Syndicate scientists, then beat Victor and Shadowbeak | 15,210 |
| 20 | A Fine Night for a Drink | Take out 5 ninjas, then beat Saya and Selyne | 21,294 |
| 21 | Bearer of All Burdens | Beat Bjorn and Bastigor | 28,899 |
| 22 | Hope Springs Eternal | Clear 6 area barriers, then beat Auri and Shaolong | 39,546 |
 Endgame Missions: The Sunreacher to Awakening
The last nine missions carry 698,145 EXP, which is 86% of everything the main story pays. Gathering the Key Spheres is the big collection job — all eight spheres, from the Key Sphere of Envy through to the Key Sphere of Original Sin. Panthalus is the other multi-stage one: four Marine Echobone fragments, craft the Echoing Flute, then fight the whale, and it is the only main mission that hands over an item — the Applied Watering Handbook I.
| # | Mission | What you have to do | EXP |
|---|---|---|---|
| 23 | The Sunreacher | Speak to the Sunreach leader | 39,546 |
| 24 | The Calamity | Hear out the rest of the story | 39,546 |
| 25 | Gathering the Key Spheres | Collect all 8 Key Spheres | 39,546 |
| 26 | Panthalus | Gather 4 Marine Echobone, craft the Echoing Flute, beat Panthalus | 63,882 |
| 27 | To the World Tree | Reach the World Tree | 63,882 |
| 28 | Sin | Talk to the World Tree guardian | 102,669 |
| 29 | The Sealed Calamity | Defeat the three World Tree mid-bosses | 102,669 |
| 30 | Path to the Abyss | Open the way down into the abyss | 102,669 |
| 31 | Awakening | Beat the World Tree boss | 143,736 |
 All Sub Missions and Their Rewards
Sub missions come from named islanders, and most of them run as four or five mission chains with one giver each. They are optional, they never expire, and between them they hold every free schematic, every Applied Handbook outside the Panthalus fight, and all of the Ripe Starfruit you can get without grinding. Each chain is listed below with its giver, its objective and exactly what it pays.
 Farmer Missions
The four farmers are the cheapest chain in the game — 1,380 EXP total — but they are also the earliest, and the payouts are stat fruit you would otherwise be hunting in the wild. Pal's Blessing only needs any Pal with the Watering work suitability, so a starter Pengullet clears it. Medical Bills asks for 5,000 Gold Coin flat, which stings early — do it after your first merchant run.
| Mission | Given by | What it asks | EXP | Rewards |
|---|---|---|---|---|
| Pal's Blessing | Desperate Farmer | Hand over a Pal that can do Watering | 240 |  Stout Fruit Stout Fruit  Mega Sphere x5 Mega Sphere x5  2,000 Gold 2,000 Gold |
| Hungry for Recruits | Foodie Farmer | Show a Pal with Glutton or Bottomless Stomach | 330 |  Cake x3 Cake x3  Power Fruit Power Fruit |
| A Special Dish | Worrywart Farmer | Deliver the Farmer's Special Dish | 280 | Cheeseburger x5 2,500 Gold |
| Medical Bills | Pal-Loving Farmer | Hand over 5,000 Gold | 530 |  Life Fruit Mega Sphere x5 Life Fruit Mega Sphere x5 |
 Researcher Missions
The best-value chain in the game. Four missions, 63,810 EXP, and every single one pays an Applied Handbook — the items that add a work suitability to a Pal that was never born with it. Prove the Legend! wants a Pal carrying the Legend passive, which usually means a captured tower boss or a lucky breed, and Lock In is the fussiest: a Cryolinx that specifically has Motivational Leader on it.
| Mission | Given by | What it asks | EXP | Rewards |
|---|---|---|---|---|
| Prove the Legend! | Legend-Loving Researcher | Show a Pal with the Legend passive | 25,350 |  Applied Handiwork Handbook I Applied Handiwork Handbook I |
| Lock In | Archaeological Society Researcher | Hand over a Cryolinx with Motivational Leader | 12,170 |  Applied Cooling Handbook I Applied Cooling Handbook I |
| Give a Fuack | Fuack Fanatic Researcher | Hand over a Fuack | 940 |  Applied Gathering Handbook I Applied Gathering Handbook I  Homeward x3 3,500 Gold Homeward x3 3,500 Gold |
| Metal on Your Mind | Rock-Obsessed Researcher | Deliver 5 Chromite | 25,350 | Applied Mining Handbook I |
 Breeder Missions
The breeders pay in Starfruit, which is the shortcut past the Pal Condenser — one fruit is worth a pile of duplicate Pals. The chain is worth 74,935 EXP and hands you a ☆1, a ☆2 and a ☆3 fruit across three of its four missions. Operation: Splatterina Spree is the grind of the set at ten Splatterina handed over, so start collecting them the moment the mission appears.
| Mission | Given by | What it asks | EXP | Rewards |
|---|---|---|---|---|
| Breeding Basics | Rookie Pal Breeder | Deliver 5 Cake | 1,925 |  Starfruit ☆1 Starfruit ☆1  Medical Supplies x5 Medical Supplies x5 |
| Farewell Under the Sakura Tree | Loyal-Hearted Breeder | Deliver 1 Advanced Recovery Meds | 25,350 | Starfruit ☆3 |
| No Mercy for Pal Thieves | Vertigo-Stricken Breeder | Recover the Breeder's Precious Pal from a Syndicate thug | 12,170 |  Starfruit ☆2 Starfruit ☆2  Recovery Meds x10 Recovery Meds x10 |
| Operation: Splatterina Spree | Passionate Pal Breeder | Hand over 10 Splatterina | 35,490 |  Vegetable Cake x10 Vegetable Cake x10  Special Cake x5 Special Cake x5 |
 Hunter Missions
The hunters pay in elixirs and high-tier spheres, so this is the chain to run right before a legendary capture attempt — Formidable Faleris Aqua alone hands over five Ultimate Sphere. Two of the four are straight fights, and the two hand-over missions want specific passives: Serenity on a Surfent Terra for Hunting Essentials, which usually means breeding for it.
| Mission | Given by | What it asks | EXP | Rewards |
|---|---|---|---|---|
| Hunting Essentials | Ever-Eager Hunter | Hand over a Surfent Terra with Serenity | 17,745 |  Speed Elixir Speed Elixir  Legendary Sphere x5 Legendary Sphere x5 |
| The Fugitive | Righteous Hunter | Take down a flamethrower-wielding Syndicate Cleaner | 12,170 |  Vital Elixir Legendary Sphere x5 Vital Elixir Legendary Sphere x5 |
| Formidable Faleris Aqua | Big Game Hunter | Defeat the Faleris Aqua alpha | 35,490 |  Might Elixir Ultimate Sphere x5 Might Elixir Ultimate Sphere x5 |
| A Sweet Deal | Sweet-Smelling Hunter | Hand over 3 Elizabee or Beegarde | 3,550 |  Stamina Elixir Stamina Elixir  Giga Sphere x5 Giga Sphere x5 |
 Wanderer Missions
Four missions, eight free schematics — this is the only chain that hands over gear blueprints, and every one of them is a rank 2 version rather than the base recipe. Dungeon Hunt is almost free at one Tombat, and Sparkly and Smooth only wants ten Nightstar Sand, so both are worth doing the moment they show up. Push the schematics further at the drafting table with How to Upgrade Schematics to Legendary.
| Mission | Given by | What it asks | EXP | Rewards |
|---|---|---|---|---|
| A True Ascent Ends in Descent | One-Way Wanderer | Hand over a Wumpo | 17,745 | Grenade Launcher 2 Plasteel Helmet 2 |
| Sparkly and Smooth | Sparkle-Seeking Wanderer | Deliver 10 Nightstar Sand | 25,350 | Flamethrower 2 Pal Metal Helm 2 |
| Dungeon Hunt | Journey-Junkie Wanderer | Hand over a Tombat | 940 | Mega Sphere x5 Pelt Armor 2 |
| Easygoing Adventures | Restless Wanderer | Hand over a Yakumo with Easygoing | 25,350 | Semi-Auto Shotgun 2 Rocket Launcher 2 |
Harold's Missions
Harold's five-mission chain is the longest in the game and the richest — 180,315 EXP and 110,000 Gold Coin across it, which is more cash than any other quest line. The back half is a predator hunt: The Proxy puts you against a predator Flopie and The Knight's Last Stand against a predator Silvegis, so bring endgame gear. The finale pays a Ripe Starfruit and a Kinship Peach.
| Mission | Given by | What it asks | EXP | Rewards |
|---|---|---|---|---|
| Captured Adventurer | Harold | Take out 5 Syndicate hunters | 330 | Starfruit ☆1 Medical Supplies x5 |
| Taking Down a Bounty | Harold | Take down a Syndicate Crusher boss | 17,745 | 80,000 Gold |
| The Proxy | Harold | Defeat a predator Flopie | 48,165 | 30,000 Gold Might Elixir |
| The Past | Harold | Hear Harold out | 48,165 | — |
| The Knight's Last Stand | Harold | Defeat a predator Silvegis | 65,910 |  Kinship Peach Power Fruit x3 Ripe Starfruit Kinship Peach Power Fruit x3 Ripe Starfruit |
Rookie Expedition Team Missions
Fia, Cara and Gadel run a four-mission story chain worth 53,565 EXP that turns into a predator hunt halfway through — a predator Direhowl first, then a predator Lovander. Growth is a breather that only wants one Might Remedy handed in. A Sterile Flower closes it out and pays the same three-item bundle the other chain finales do.
| Mission | Given by | What it asks | EXP | Rewards |
|---|---|---|---|---|
| The Rookie Expedition Team | Fia, Cara and Gadel | Defeat a predator Direhowl | 330 | — |
| Budding | Fia, Cara and Gadel | Defeat a predator Lovander | 5,575 | — |
| Growth | Fia, Cara and Gadel | Deliver 1 Might Remedy | 12,170 | — |
| A Sterile Flower | Fia | Settle things with Fia | 35,490 | Kinship Peach Life Fruit x3 Ripe Starfruit |
Lone Wolf Missions
A three-mission chain worth 96,330 EXP, which is the best EXP-per-mission rate of any sub line outside the World Tree. Both fights are late-game: a predator Jormuntide Ignis and then a Kitsun Noct. The Unsheathed Katana is the third of the three chain finales that pays a Ripe Starfruit, so it is worth clearing all three back to back once you can handle predators.
| Mission | Given by | What it asks | EXP | Rewards |
|---|---|---|---|---|
| The Sable Loner | Lone wolf | Start the chain | 25,350 | — |
| Reminiscent Wandering | Lone wolf | Defeat a predator Jormuntide Ignis | 35,490 | — |
| The Unsheathed Katana | Lone wolf | Defeat a Kitsun Noct | 35,490 | Kinship Peach Stout Fruit x3 Ripe Starfruit |
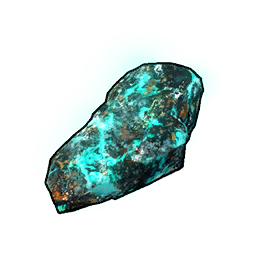 Stockpiling Missions
Five material deliveries, ten units each, paid in cash. They scale with how late the material appears: sulfur and hardwood are worth 3,000 Gold, Soralite is worth 20,000 plus 48,165 EXP. If your Pals are already mining these on a schedule, this is 92,785 EXP and 41,000 Gold for materials you were stockpiling anyway — pair it with How to Farm Gold Fast for the rest of your income.
| Mission | What it asks | EXP | Reward |
|---|---|---|---|
| Stockpiling Sulfur | Deliver 10 Sulfur | 3,550 | 3,000 Gold |
| Stockpiling Hardwood | Deliver 10 Hardwood | 3,550 | 3,000 Gold |
| Stockpiling Pure Quartz | Deliver 10 Pure Quartz | 12,170 | 5,000 Gold |
| Stockpiling Hexolite Quartz | Deliver 10 Hexolite Quartz | 25,350 | 10,000 Gold |
| Stockpiling Soralite | Deliver 10 Soralite | 48,165 | 20,000 Gold |
 Zoe's Missions and One-Offs
Zoe hands out three story missions after her tower plus a repeatable Free Pal Alliance hunt, and there is a handful of standalone missions on top. Surviving the World Tree is the outlier of the whole game: it only asks for one Mythical Wood and one Paloxite, and pays 106,470 EXP — more than any main mission except the finale. That's the World Tree's own material, so you cannot cheese it early, but it is free levels the first time you set foot in there.
| Mission | Given by | What it asks | EXP | Rewards |
|---|---|---|---|---|
| Don't Get Cocky | Zoe | Show her a Grizzbolt | 940 | — |
| I Still Don't Trust You | Zoe | Defeat 5 Free Pal Alliance members | 1,015 | — |
| A Warm Memory | Zoe | Recover Zoe's Tattered Memento | 1,090 | — |
| Zoe's Sphere | Zoe | Defeat 30 Free Pal Alliance members | — | — |
| Happy Halloween! | Zoe | Seasonal delivery | 1,031 | — |
| A Fine Day for Fishing | Laid-Back Angler | Deliver 3 Jelliette Bell Flesh | 940 |  Simple Bait x15 Simple Bait x15 |
| That's That Me, Depresso! | Wannabe Depresso Islander | Deliver 20 High Quality Cloth and 100 Venom Gland | 1,031 |  Depresso Helmet Depresso Armor Depresso Helmet Depresso Armor |
| Surviving the World Tree | — | Deliver Mythical Wood and Paloxite | 106,470 | — |
 Repeatable Requests
Four islanders run request lines that never close. The Wise Hunter pays out as your capture count climbs, the Veteran Hunter tracks bosses you have beaten, the Pal Ecological Researcher rewards Paldeck progress, and the Arrogant Gourmet wants cooked dishes handed over one at a time. None of them show a fixed EXP value because the payout scales with the milestone you hit.
| Request line | Given by | What it tracks |
|---|---|---|
| Request from a Wise Hunter | Wise Hunter | How many Pals you have captured |
| Request from a Veteran Hunter | Veteran Hunter | How many bosses you have defeated |
| Request from a Pal Ecological Researcher | Pal Ecological Researcher | Paldeck completion |
| Request from an Arrogant Foodie | Arrogant Gourmet | Cooked dishes handed over |
 Every Dish the Arrogant Gourmet Asks For
The gourmet asks for one dish at a time and pays a fixed item for each. Ten dishes are on his list, and the standout is the Mammorest Steak — it is the only source of an Applied Kindling Handbook I outside of loot, which means a free Kindling slot on a Pal that cannot normally light a furnace. The Pancake request is the sleeper: eighteen Giga Sphere for one plate of pancakes.














 Best Missions for EXP
If you are missing a level before a raid or a tower rematch, these are the twelve biggest single payouts in the game. Five of them are sub missions, which is why the optional content matters so much at the top end — Surviving the World Tree beats every main mission except the final boss, and it is a two-item delivery. Stack a Training Manual (XL) before you turn any of these in.
| Mission | Type | EXP | Why it pays so much |
|---|---|---|---|
| Awakening | Main | 143,736 | The final boss fight — nothing else comes close |
| Surviving the World Tree | Sub | 106,470 | Two World Tree materials handed in, no fight at all |
| Sin | Main | 102,669 | Pure story step, just a conversation |
| The Sealed Calamity | Main | 102,669 | Three World Tree mid-bosses back to back |
| Path to the Abyss | Main | 102,669 | Opens the descent into the abyss |
| The Knight's Last Stand | Sub | 65,910 | Predator Silvegis kill, plus a Ripe Starfruit |
| Panthalus | Main | 63,882 | Four-fragment hunt and the whale fight |
| To the World Tree | Main | 63,882 | Travel step, no combat required |
| The Proxy | Sub | 48,165 | Predator Flopie kill and 30,000 Gold |
| The Past | Sub | 48,165 | Free — it is a story beat in Harold's chain |
| Stockpiling Soralite | Sub | 48,165 | Ten Soralite delivered, best EXP-per-effort in the game |
| Gathering the Key Spheres | Main | 39,546 | All eight Key Spheres collected |
Mission Rewards Worth Detouring For
Most missions pay EXP and consumables, but a handful hand over items you cannot craft. Applied Handbooks add a work suitability to a Pal that was never born with it, and Starfruit skips condenser grinding entirely. Between them, the missions below are the reason to clear the optional chains even after you have finished the story.
 Every Mission That Gives an Applied Handbook
Six handbooks come out of missions, and five of those are sub missions. The researchers cover Handiwork, Cooling, Gathering and Mining, the Panthalus story fight covers Watering, and the gourmet's Mammorest Steak request covers Kindling. Which Pal to burn each one on is covered in All Handbooks and the Best Pals to Use Them On.
| Handbook | Mission | Type |
|---|---|---|
| Applied Handiwork Handbook I | Prove the Legend! | Sub |
| Applied Cooling Handbook I | Lock In | Sub |
| Applied Gathering Handbook I | Give a Fuack | Sub |
| Applied Mining Handbook I | Metal on Your Mind | Sub |
| Applied Watering Handbook I | Panthalus | Main |
 Applied Kindling Handbook I Applied Kindling Handbook I | Arrogant Gourmet's Mammorest Steak request | Request |
Every Mission That Gives Starfruit
Seven missions pay Starfruit, and the three chain finales all pay the Ripe Starfruit — the one that ranks up any Pal regardless of species. Clear Harold's chain, the expedition team's chain and the lone wolf's chain and you walk away with three free rank-ups plus three Kinship Peach. The rest of the ranking system is in How to Rank Up Pals.
| Starfruit | Mission | Chain |
|---|---|---|
| Starfruit ☆1 | Breeding Basics | Breeders |
| Starfruit ☆1 | Captured Adventurer | Harold |
| Starfruit ☆2 | No Mercy for Pal Thieves | Breeders |
| Starfruit ☆3 | Farewell Under the Sakura Tree | Breeders |
| Ripe Starfruit | The Knight's Last Stand | Harold |
| Ripe Starfruit | A Sterile Flower | Rookie Expedition Team |
| Ripe Starfruit | The Unsheathed Katana | Lone Wolf |
Related Guides
Start here if you are new or wrapping up:
Mission rewards, bosses and materials:
- All Handbooks and the Best Pals to Use Them On
- How to Rank Up Pals: Condenser, Ripe Starfruit, and Handbooks
- How to Upgrade Schematics to Legendary
- How to Unlock Hard Mode Towers
- How to Get Nightstar Sand: Locations and Uses
- How to Make Cake: All Recipes and Effects
- How to Farm Gold Fast
- All Journal Locations