Pump-Action Shotgun Schematic Location and Stats
Where the Legendary Pump-Action Shotgun schematic drops in Palworld — the 3% roll off Alpha Suzaku at level 45, all four Desert supply drop percentages down to 0.1%, the full 220 to 385 rarity ladder with exact magazine and durability numbers, and the 584-unit Legendary craft.
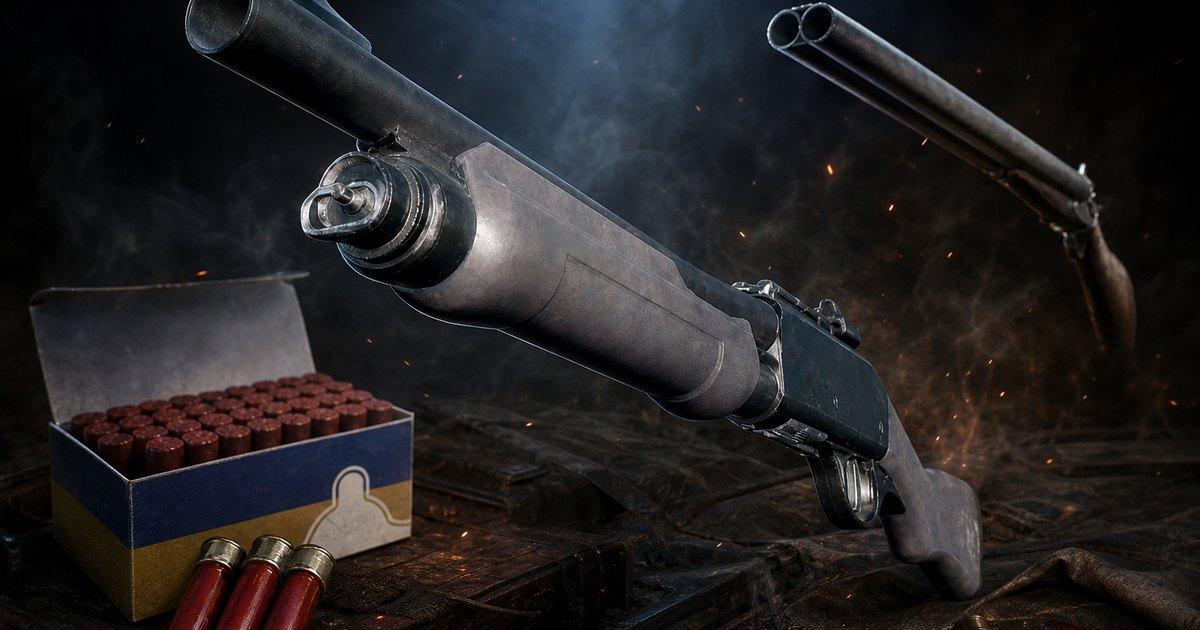
The Pump-Action Shotgun unlocks at Technology Lv 43 and is the first shotgun in Palworld that holds a real magazine — eight rounds of 220 instead of the one or two you've been living on. This guide covers the exact stat line at every rarity, the single Alpha boss that drops the Legendary schematic at 3%, every other pool the four tiers sit in, and what the top-tier craft actually costs once you trace it to raw materials.
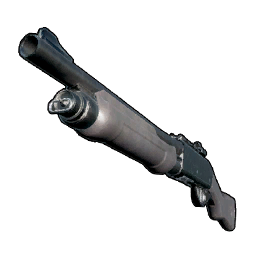 Pump-Action Shotgun Stats
The base card is a straightforward upgrade over everything before it: 220 attack across an 8-round magazine is 1,760 damage before you reload, which is more than four times what the Double-Barreled Shotgun manages four tech levels earlier. The one genuinely weak number is durability — 150, the lowest of any shotgun in the game, tied with the Core Eject Shotgun. That's the number the rarity tiers fix hardest, and it's the main reason a Legendary version feels like a different weapon rather than a slightly better one.
| Stat | Pump-Action Shotgun (Common) |
|---|---|
| Weapon class | Shotgun |
| Base Attack | 220 |
| Magazine | 8 rounds |
| Damage per magazine | 1,760 |
| Durability | 150 — lowest in the class |
| Weight | 20 |
| Technology level | Lv 43, 4 Technology Points |
| Crafting station | Weapon Assembly Line (unlocks at Lv 32) |
| Crafting work | 120,000 |
| Ammo |  Shotgun Shell — Lv 39, 2 points Shotgun Shell — Lv 39, 2 points |
| Legendary schematic |  Pump-Action Shotgun Schematic 4 Pump-Action Shotgun Schematic 4 |
| Item value | 61,920 Gold |
Shotgun attack numbers only mean anything against other shotguns — a shotgun round and a rifle round are fired at completely different rates, so 220 here says nothing about where this sits in the wider gun tier list. Inside its own class the Pump-Action is the point where the family stops being a stopgap. It also sits in a long gap: the only other shotgun before Tech 56 is the Semi-Auto Shotgun at Lv 47, and that one costs more materials for less attack per shot — so barring a lucky drop, this is your shotgun for a very long stretch.
Every Rarity Tier Compared
This is the one shotgun whose five rarity tiers are all laid out end to end, so there's no guesswork here — every number below is the real crafted stat, not an estimate. Attack climbs 220 → 275 → 308 → 352 → 385, the magazine gains a round per tier, and durability jumps from 150 straight to 500 at the very first upgrade before finishing at 800. Damage per magazine is where it lands: a Legendary puts out 4,620 before a reload, 2.6 times the Common's 1,760.
| Rarity | Schematic needed | Attack | Magazine | Damage per magazine | Durability | Crafting work | Item value |
|---|---|---|---|---|---|---|---|
| Common | None — the tech node | 220 | 8 | 1,760 | 150 | 120,000 | 61,920 |
| Uncommon | Schematic 1 | 275 | 9 | 2,475 | 500 | 480,000 | 77,660 |
| Rare | Schematic 2 | 308 | 10 | 3,080 | 600 | 960,000 | 95,280 |
| Epic | Schematic 3 | 352 | 11 | 3,872 | 700 | 1,920,000 | 111,020 |
| Legendary | Schematic 4 | 385 | 12 | 4,620 | 800 | 3,840,000 | 128,640 |
Two things stand out. The Uncommon tier is the single best value in the ladder — it more than triples durability for a 25% attack bump and four times the crafting work, so the very first schematic you find is the one that changes the gun most. And the work column doubles at every step, ending at 3,840,000 for the Legendary: 32 times the Common's job. On a fresh Weapon Assembly Line with a couple of Handiwork Pals that is a genuinely long build, so start it and go do something else. Every schematic in the game uses the same rolled-scroll model in your bag, which is why the four icons above are each tier's own art — that's the only way to tell them apart at a glance.
| Rarity |  Refined Ingot Refined Ingot |  Polymer Polymer |  Carbon Fiber Carbon Fiber |  Ancient Civilization Parts Ancient Civilization Parts |
|---|---|---|---|---|
| Common | 30 | 20 | 10 | — |
| Uncommon | 37 | 25 | 12 | 1 |
| Rare | 45 | 30 | 15 | 2 |
| Epic | 52 | 35 | 17 | 3 |
| Legendary | 60 | 40 | 20 | 4 |
The materials scale gently — a Legendary needs exactly double the Common's ingots, Polymer and Carbon Fiber — but note the fourth column. Every tier above Common wants Ancient Civilization Parts, which the Common version doesn't touch at all. That's the real gate on a Legendary build, and it happens to be the thing the boss you're farming hands over five to seven of per kill.
Where the Legendary Schematic Drops
All four tiers share one background pool of chests, camps, fishing spots and oil rig crates, and the Desert region's supply drops carry every tier with a real percentage attached. Then one row breaks the pattern: Alpha Suzaku drops the Legendary schematic at a flat 3%, and no other tier drops from it at all. That is 30 times the odds of the same schematic falling out of a Desert supply drop, off a fixed boss you can walk back to and kill again.
| Schematic | Crafts | Alpha Suzaku | Desert supply drop | Treasure map digs (tier 2) | Chests, camps, fishing, oil rigs |
|---|---|---|---|---|---|
| Schematic 1 | Uncommon | — | 12.65% | — | Yes |
| Schematic 2 | Rare | — | 2.53% | Yes | Yes |
| Schematic 3 | Epic | — | 0.51% | Yes | Yes |
| Schematic 4 | Legendary | 3.0% | 0.1% | Yes | Yes |
12.65% is an enormous number for a supply drop, and it's the highest rate any single Pump-Action schematic has anywhere. It makes Desert drops the feeder for your Drafting Table rather than a Legendary source — you will drown in Schematic 1s long before the 0.1% ever pays out. Schematic 1 is also the only tier locked out of treasure maps, so digging tier 2 maps never wastes a roll on the tier you already have stacks of.
 Alpha Suzaku — the 3% Boss Drop
This is the farm. Alpha Suzaku is a level 45 Fire field boss in the far north-east, out in the desert stretch of the Palpagos Islands, and it is the only Pal in the game whose loot table contains a Pump-Action Shotgun Schematic 4. It's a fixed spawn that respawns, so the 3% is a roll you take over and over rather than a one-shot chest. The timing is almost too neat: the weapon unlocks at Tech 43, the Alpha is level 45, and the Drafting Table opens at 45 too — clear this boss the first time and every piece of the puzzle is available at once.
| Fight | Alpha Suzaku |
|---|---|
| Level | 45 |
| Element | Fire — bring Water |
| Damage taken | ×0.24 (a 76% cut, and the only thing making this fight long) |
| HP multiplier | ×1.0 — no bonus health |
| Damage dealt | ×1.0 — no bonus damage |
| Move cooldowns | ×1.0 — no faster attacks |
| Base Pal stats | 120 HP · 100 melee · 105 ranged · 105 defence |
| Wild spawn spots | 13, day and night |
| Map | Show Alpha Suzaku's pin and all 13 spawn spots |
The stat block is the friendly kind of Alpha: no HP buff, no damage buff, no cooldown buff — just the flat 76% damage reduction. Suzaku cannot burst you down, it just quarters your DPS, so an under-geared run turns a three-minute fight into twelve and you run dry on shells. Beat that with Water damage rather than patience. The loot is worth the trip even when the schematic doesn't drop:
| Drop | Chance | Amount |
|---|---|---|
| Ancient Civilization Parts | 100% | 5-7 |
 Precious Plume Precious Plume | 100% | 5-7 |
| Pump-Action Shotgun Schematic 4 | 3% | 1 |
Look at that first row against the crafting table above: a Legendary Pump-Action needs 4 Ancient Civilization Parts, and one Alpha Suzaku kill pays 5 to 7. The boss that drops the schematic also funds the build, which is not true of most legendary weapons. The Precious Plumes are pure profit on top — at a 10,000 Gold item value each, five to seven of them is 50,000 to 70,000 Gold a run, so even a completely unlucky farming session pays for your ammo many times over. The wild version of Suzaku is a different table entirely, and it matters for a different reason — see the crafting section below.
How Long the 3% Actually Takes
A 3% drop sounds worse than it plays. The average is 34 kills, but averages hide the shape of it: you're a coin flip to have the schematic inside 23 kills, and nine times out of ten it's yours within 76. Compare that to the Desert supply drop route in the right-hand column and the argument ends itself — the boss is roughly thirty times faster at every confidence level.
| Odds you have it by | Alpha Suzaku kills (3%) | Desert supply drops (0.1%) |
|---|---|---|
| Average | 34 | 1,000 |
| 50% | 23 | 693 |
| 90% | 76 | 2,302 |
| 99% | 152 | 4,603 |
Treat 76 kills as the number to plan around rather than 23 — that's the honest "I want this today" figure. With a fast Water mount the round trip is short enough that a session of thirty or forty runs is an evening, and every one of them is banking Ancient Civilization Parts you need anyway. Nothing about the roll is streak-protected, so a dry run of sixty means nothing; the odds reset every kill.
What Suzaku Throws At You at Level 45
Six moves are online at level 45, and here is the thing that makes this the best possible boss to fight with a shotgun: every single one of them has a minimum range of at least 500 units. Get inside that and Suzaku has literally nothing it can use. Its two genuinely frightening attacks — Fire Ball at 600 power and Holy Burst at 700 — unlock at levels 50 and 70, so the Alpha never gets them. Point-blank is a dead zone, and point-blank is exactly where a Pump-Action wants to be.
| Move | Element | Power | Cooldown | Range | What to do |
|---|---|---|---|---|---|
| Flare Storm | Fire | 200 | 12s | 700-3000 | Its heaviest hit — inside 700 it's off the table |
| Ignis Breath | Fire | 160 | 8s | 500-1500 | The close-range punish; the one attack that covers your approach |
| Flare Arrow | Fire | 120 | 8s | 500-5000 | Long-range poke while you're closing |
| Spirit Fire | Fire | 80 | 4s | 1000-3000 | Mid-range chip — you pass through this band fast |
| Ignis Blast | Fire | 40 | 2s | 500-5000 | Constant filler; ignore it and keep firing |
| Air Cannon | Neutral | 40 | 2s | 500-4000 | Same filler, and its only non-Fire move |
So the fight has exactly one dangerous phase: the walk in. Ignis Breath is the only heavy attack that reaches down to 500, which makes the 500-1500 band the stretch to cross without stopping. Once you're under its nose the whole moveset is dead and the 76% damage cut is the only thing left between you and the drop. Every move except Air Cannon is Fire, so Water Pals resist essentially the entire kit — worth remembering when you're picking who rides along.
 The Team to Bring
Fire takes extra damage from Water, and with a 76% damage cut in play that multiplier isn't a nicety — it's the difference between a fight and a chore. The practical pick at this stage is Shaolong: it's S-tier in combat, it has 63 wild spawn spots and no Alpha you have to beat first, and it doubles as the second-fastest mount in the game, which matters more than damage when you're doing a boss run thirty times. If you're coming back later with a better roster, Neptilius has the highest ranged attack of any Water Pal.
| Pal | Elements | Melee / Ranged | HP | Why bring it |
|---|---|---|---|---|
 Neptilius Neptilius | Water | 100 / 145 | 105 | S-tier, and the best ranged attack of any Water Pal; its Alpha is level 60, so it's the return trip |
| Shaolong | Dragon/Water | 100 / 135 | 140 | S-tier with no Alpha gate — 63 wild spawn spots, and the game's #2 mount at 2,800 sprint |
 Jormuntide Jormuntide | Dragon/Water | 150 / 120 | 130 | S-tier bruiser, top melee attack of the group; Alpha at level 55 |
 Panthalus Panthalus | Water | 100 / 120 | 180 | S-tier wall with 200 defence — the one that survives a sloppy approach |
 Faleris Aqua Faleris Aqua | Water | 100 / 110 | 110 | 197 wild spawn spots and its own mount saddle — ride to the pin, fight, ride out |
 Azurobe Azurobe | Water/Dragon | 70 / 100 | 110 | The early answer — its own Alpha is level 40, so you can own one before this fight |
There's a nice bit of symmetry available too: Suzaku's own Water variant counters it, and you breed it from the boss's species. Pairing Suzaku with Jormuntide gives Suzaku Aqua, a pure Water Pal with 125 HP and 50 wild spawn spots of its own. Full stats and spawn points for all of these are on their Pal pages, the combat tier list ranks the rest, and the Alpha Pals database lists every field boss with its own multipliers.
Desert Supply Drops — All Four Tiers
Supply drops are the only source that gives you a real percentage for every tier, and this weapon's schematics appear in the Desert region's table alone — the other regions don't carry them at all. The curve is a clean fifth-per-step: each tier is roughly one fifth as likely as the one below it, bottoming out at 0.1%, or one in a thousand drops.
| Schematic | Crafts | Desert supply drop chance | Drops needed on average |
|---|---|---|---|
| Schematic 1 | Uncommon | 12.65% | 8 |
| Schematic 2 | Rare | 2.53% | 40 |
| Schematic 3 | Epic | 0.51% | 196 |
| Schematic 4 | Legendary | 0.1% | 1,000 |
Chase the top row, not the bottom one. At 12.65% roughly one Desert drop in eight hands you a Schematic 1, which is the fastest legitimate way to feed the Drafting Table for any weapon in the game. Run a Desert drop circuit while you're out there, bank everything, and let Alpha Suzaku handle the Legendary at 3%. Every region's full pool is on the supply drops page.
Chests, Camps and Fishing Spots
All four tiers, Legendary included, sit in the same wide background pool — this is the loot you pick up without going out of your way. Three regions carry it in their chests, three in their enemy camps, and, unusually for a weapon schematic, three in their fishing spots. It's the same three regions throughout: Desert, Snowfields and Sakurajima, with the oil rigs bolted on. Note the camp distinction — in the Desert and Snowfields the Legendary sits behind the camp leader in the boss stash, while in the Snowfields and Sakurajima it's also in the ordinary camp loot.
| Source | Regions | Tiers | Map |
|---|---|---|---|
| Treasure chests | Desert, Snowfields, Sakurajima | All four | 263 · 178 · 68 pins |
| Enemy camp boss stashes | Desert, Snowfields | All four | 58 enemy camps |
| Enemy camp loot | Snowfields, Sakurajima | All four | 58 enemy camps |
| Fishing spots | Desert, Snowfields, Sakurajima | All four | 367 spots · 102 rare |
| Crates on the oil rigs | Oil rigs | All four | — |
| Treasure map digs (tier 2) | Anywhere | Schematics 2, 3, 4 | — |
The fishing row is the one people miss. A weapon schematic turning up on a fishing line is rare enough that most players never try for it, and two of the three regions here are places you're already crossing on a Suzaku run — so leaving a rod at a Desert spot between boss kills is free rolls at no cost. The fishing database has the full catch tables and the fishing guide covers rod tiers and which spots are worth the walk.
 Build It Instead: The Drafting Table Route
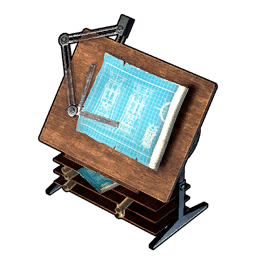
The Drafting Table unlocks at Technology Lv 45 for 4 Technology Points — just two levels after the gun — and it combines five identical schematics into one of the next rarity up. This weapon supports the whole ladder with no gaps, which isn't true of every line in the game. On paper a Legendary costs 125 Schematic 1s, but nobody should actually pay that, and the reason is in the second table.
| Target | Combine cost | Equivalent in Schematic 1s |
|---|---|---|
| Schematic 2 | 5× Schematic 1 | 5 |
| Schematic 3 | 5× Schematic 2 | 25 |
| Schematic 4 (Legendary) | 5× Schematic 3 | 125 |
Here's the trick worth knowing. The Desert pool is tuned so each tier contributes almost exactly the same value: 12.65% × 1, 2.53% × 5, 0.51% × 25 and 0.1% × 125 all land near 0.126 Schematic-1-equivalents per drop. Bank all four tiers instead of only counting Schematic 1s and 125 becomes reachable in about 247 Desert drops rather than 988 — a four-fold saving for doing nothing except not throwing away the rare ones early.
| Approach | Desert drops needed | Why |
|---|---|---|
| Schematic 1s only | 988 | 125 Schematic 1s at 12.65% a drop |
| Bank every tier and combine upward | 247 | Each drop averages 0.51 Schematic-1-equivalents once all four tiers count |
| Kill Alpha Suzaku instead | 0 | 34 kills on average at 3%, no combining at all |
So the Drafting Table is the backup, not the plan. Combine only at the top of the ladder, banking Schematic 3s until you hold five; the classic trap is spending five Schematic 1s the instant you can, because those are exactly the rolls you'll wish you still had when a Schematic 3 lands and you're one short. Build cost for the table is 20 Refined Ingot, 10 High Quality Wooden Board and 30 Charcoal; the schematic upgrade guide has the full rules.
 How to Craft the Pump-Action Shotgun
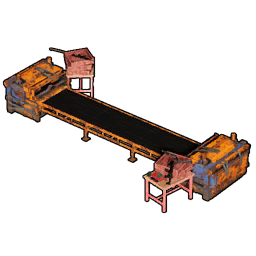
Whatever schematic tier you're holding, the shape of the recipe never changes: three materials on the Weapon Assembly Line, plus Ancient Civilization Parts on anything above Common. Nothing in it is regional or endgame — no Sakurajima ore, no Sunreach Isle ingots, no Computers. If your base can already make Refined Ingots and Polymer, you can make this gun today.
| Material | Common | Legendary | Unlocks at | Made from |
|---|---|---|---|---|
| Refined Ingot | 30 | 60 | Improved Furnace, Tech Lv 34 | 2 Ore + 2 Coal each |
| Polymer | 20 | 40 | Tech Lv 33, 2 points | 2 High Quality Pal Oil + 1 Sulfur each |
| Carbon Fiber | 10 | 20 | Tech Lv 35, 2 points | 5 Charcoal + 1 Flame Organ each |
| Ancient Civilization Parts | — | 4 | Not craftable at all | Alpha and tower bosses — Alpha Suzaku pays 5-7 |
Trace all of it down to things you pick off the ground and a Common Pump-Action is 290 raw units, while a Legendary is 584 — almost exactly double the materials for 2.6 times the damage per magazine, which is a better deal than most of the ladder in this game. The Legendary column is what you should be stockpiling toward while you farm:
| Raw material | Common | Legendary | Where to get it |
|---|---|---|---|
 Ore Ore | 60 | 120 | 1,632 nodes |
 Coal Coal | 60 | 120 | 824 nodes |
 Wood Wood | 100 | 200 | 4,654 lumber nodes — burned into Charcoal 2:1 |
 High Quality Pal Oil High Quality Pal Oil | 40 | 80 | Mammorest at 5-10 per kill, 100% |
 Sulfur Sulfur | 20 | 40 | 655 nodes |
 Flame Organ Flame Organ | 10 | 20 | Fire Pals — table below |
| Ancient Civilization Parts | — | 4 | One Alpha Suzaku kill covers it |
Coal is the line worth planning around: 120 of it is a real dent, and coal nodes are barely half as common as ore. High Quality Pal Oil is the other one — 80 for a Legendary is eight to sixteen Mammorest kills, so start that before you need it. Everything else is a base with mining and logging Pals doing what it already does.
 Fastest Flame Organ Farm
Twenty Flame Organ for a Legendary sounds fiddly until you notice who tops the list: wild Suzaku is the single best Flame Organ source in the game at 5-10 a kill, 100%. The species you're already farming for the schematic drops the material for the craft — the Alpha for the blueprint and the Ancient Parts, the wild ones on the way in for the Carbon Fiber. If you want volume rather than a side benefit, Ragnahawk has 150 wild spawn spots against Suzaku's 13.
| Pal | Flame Organ per kill | Drop rate | Wild spawn spots |
|---|---|---|---|
 Blazamut Blazamut | 10 | 100% | 16 |
| Suzaku | 5-10 | 100% | 13 |
| Ragnahawk | 5-7 | 100% | 150 |
 Reptyro Reptyro | 5-7 | 100% | 22 |
 Pyrin Pyrin | 4-5 | 100% | 93 |
 Blazehowl Blazehowl | 3-5 | 100% | 56 |
Blazamut is the flat-10 pick if you can find one, but with 16 spawn spots it's a hunt rather than a farm. Ragnahawk is the sensible answer for bulk — 150 spots means you trip over them, and 5-7 a kill clears 20 Flame Organ in three or four fights. Pyrin at 93 spots is the easy backup. All of them drop at 100%, so there's no luck involved anywhere in this row.
Can You Even Build It Yet?
Technology Lv 43 is the headline, but it's the supporting nodes that actually stop people — Polymer, Refined Ingot and Carbon Fiber each need their own unlock and their own station, and all three sit below the gun in the tree. Work down this list before you go schematic hunting, because a Legendary schematic in your bag does nothing until the bench exists to use it.
| Requirement | Unlocks at | Why you need it |
|---|---|---|
| Weapon Workbench | Tech Lv 20, 3 points | Where Shotgun Shells get made — 15 Ingot + 10 Wooden Board + 10 Nail |
| Gunpowder | Tech Lv 21, 2 points | Every Shotgun Shell you'll ever fire |
| Weapon Assembly Line | Tech Lv 32, 3 points | The gun itself — 200 power, 100 Ingot + 20 Wooden Board + 20 Nail + 10 High Quality Pal Oil to build |
| Polymer | Tech Lv 33, 2 points | 20 per Common, 40 per Legendary |
| Improved Furnace | Tech Lv 34, 4 points | The bench that turns Ore and Coal into Refined Ingot |
| Carbon Fiber | Tech Lv 35, 2 points | 10 per Common, 20 per Legendary |
| Shotgun Shell | Tech Lv 39, 2 points | Something to fire |
| Pump-Action Shotgun | Tech Lv 43, 4 points | The weapon recipe |
| Drafting Table | Tech Lv 45, 4 points | Combining schematics upward — two levels after the gun |
Six Technology Points at Lv 39-43 covers the gun and its ammo together, and every point here is an ordinary Technology Point rather than the Ancient kind you pry out of tower bosses. The sequencing is far kinder than most weapons in this band: the Drafting Table lands at 45, only two levels after the gun and the same level as the Alpha you're farming, so there's no dead stretch where you can collect schematics but not use them. The full tree is on the technology page.
 How It Compares to Every Other Shotgun
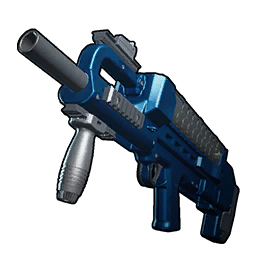
Ranked on raw attack a Common Pump-Action sits mid-pack, but damage per magazine is the column that decides how a shotgun actually feels, and there it beats everything below Tech 47 outright. The row that matters most is the bolded one: a Legendary Pump-Action's 4,620 per magazine out-damages a Common Energy Shotgun, a gun that unlocks twenty tech levels later and costs 155 Coralum Ingot and 15 Computers to build.
| Shotgun | Tech | Base Attack | Magazine | Durability | Damage per magazine |
|---|---|---|---|---|---|
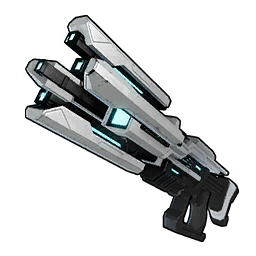 Beam Scatter Beam Scatter | 75 | 508 | 30 | 950 | 15,240 |
| Prototype Shotgun | 69 | 1,167 | 12 | 6,000 | 14,004 |
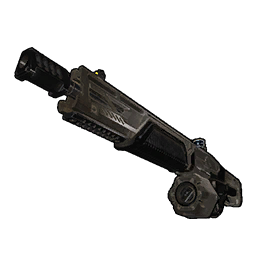 Energy Shotgun Energy Shotgun | 63 | 402 | 10 | 300 | 4,020 |
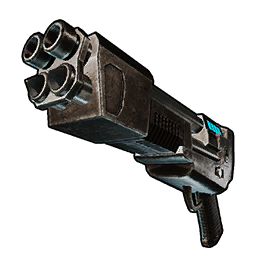 Core Eject Shotgun Core Eject Shotgun | 56 | 230 | — | 150 | — |
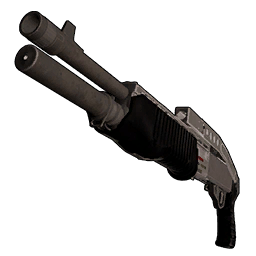 Semi-Auto Shotgun Semi-Auto Shotgun | 47 | 195 | 10 | 300 | 1,950 |
| Pump-Action (Legendary) | 43 | 385 | 12 | 800 | 4,620 |
| Pump-Action Shotgun | 43 | 220 | 8 | 150 | 1,760 |
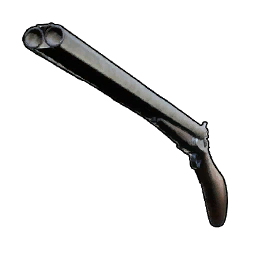 Double-Barreled Shotgun Double-Barreled Shotgun | 39 | 190 | 2 | 200 | 380 |
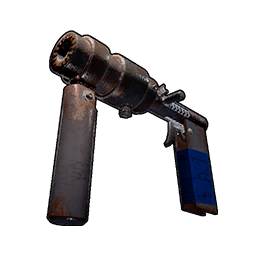 Makeshift Shotgun Makeshift Shotgun | 30 | 215 | 1 | 200 | 215 |
The Semi-Auto Shotgun four levels later is the awkward one: it costs more — 50 Refined Ingot against the Pump-Action's 30 — for less attack per shot and only 190 more damage per magazine. Skip it and stay on this gun. That's the real case for chasing the Legendary here: it isn't a marginal upgrade to a weapon you'd replace next week, it's the thing that carries you from Tech 43 to the Prototype Shotgun at Tech 69 without ever feeling underpowered. Where each gun sits in the ladder is laid out in the tech-level upgrade path, and the weapons database has the rest.
Shotgun Shells and Running Costs
The ammo is the easy part. Shotgun Shells unlock at Tech 39 for two points, four levels before the gun, they're made on the basic Weapon Workbench rather than an electrified bench, and one craft gives you ten. The same shells feed the Double-Barreled Shotgun and the Semi-Auto, so nothing you stockpiled earlier goes to waste.
| Ammo | Recipe | Per craft | Station | Unlock |
|---|---|---|---|---|
| Shotgun Shell | 2 Refined Ingot + 3 Gunpowder | 10 | Weapon Workbench | Tech Lv 39, 2 points |
Traced to raw materials, ten shells cost 4 Ore, 4 Coal, 12 Wood and 3 Sulfur — genuinely nothing, and the Wood half is free forever once a Charcoal loop runs in your base. A full Legendary magazine is 12 shells, so one craft doesn't quite fill the gun; make them in batches of a hundred and stop thinking about it. Every other weapon's ammo cost is on the ammo database.
The Short Answer
Kill Alpha Suzaku, the level 45 Fire field boss in the far north-east desert: it's the only Pal that drops the Legendary schematic, it drops it at a flat 3%, and it respawns. Bring Water — the fight has no HP or damage buff, only a 76% damage cut, and every move Suzaku has at level 45 has a minimum range of 500, so point-blank is completely safe. Expect the schematic inside 23 kills half the time and 76 kills nine times out of ten, and every kill banks the 4 Ancient Civilization Parts the Legendary craft needs anyway. Back it up with Desert supply drops (12.65% for Schematic 1, 0.1% for the Legendary) plus chests, camps and fishing spots in the Desert, Snowfields and Sakurajima. Build the Common version at Tech Lv 43 immediately, and treat the Drafting Table at Lv 45 as the backup route — banking all four tiers gets you there in about 247 Desert drops instead of 988.
Related Guides
More on shotguns, schematics and Alpha farming:
- How to Upgrade Schematics to Legendary at the Drafting Table
- All Legendary Weapon Schematic Locations in Palworld
- Best Legendary Schematics and How to Get Them
- Double-Barreled Shotgun Schematic Location and Stats
- Heavy Assault Rifle Schematic Location and Stats
- Alpha Pal Hunting Route: Every Field Boss by Level
- Best Guns Tier List: All Guns Ranked
- Best Weapons at Every Tech Level: Full Upgrade Path
- Palworld Fishing Guide: Every Spot and Catch
- All Alpha Pals: levels and boss multipliers
- Every schematic in Palworld and where it drops
- Palworld weapons database: every weapon compared
- Palworld supply drops: full loot pool by region
- Palworld tier list: every Pal ranked for combat
- Palworld interactive map: every node, chest and camp
- All Palworld guides