What to Do in Palworld: All Goals and Objectives
Palworld never tells you what the point is. Here are the four goals the game actually keeps score of — the 288-Pal Paldeck, a base that runs itself, all 10 tower bosses, and the endgame sweep — with the real counts, unlock levels and map links for each.
Palworld drops you on a beach with no briefing, so it is fair to wonder what you are actually supposed to be doing. Underneath the sandbox the game keeps score of four things — your Paldeck, your base, the tower bosses, and the pile of endgame content behind them — and this guide walks all four with the real counts, the levels they unlock at, and where each one lives on the map.
All Palworld Goals at a Glance
There is no single win screen. The story chain ends after 31 main missions with a level 80 dragon at the bottom of the World Tree, but finishing it leaves most of the game untouched — the Paldeck is the longest grind, the base is the one that pays for everything else, and the tower bosses are the gate on the good technology. If you only pick one target to chase, make it the tower bosses: they are the only source of Ancient Technology Points, and those points gate the crafting benches everything late-game runs through.
| Goal | How much of it there is | Where to start |
|---|---|---|
| Fill the Paldeck | 288 Pals — 204 numbered entries plus 84 variants | Best Combat Pals Tier List |
| Beat the tower bosses | 10, plus 9 hard-mode rematches | All Tower Bosses and Battle Multipliers |
| Hunt Alpha Pals | 90, level 11 to 79 | All Alpha Pal Locations |
| Clear raid bosses | 5, four of them with Ultra versions | All Raid Bosses and Battle Multipliers |
| Raise your base | Base Lv. 35 is the cap | All Base Level Rewards and Requirements |
| Unlock technology | 588 entries, 51 of them Ancient | Full Technology Tree |
| Finish the story | 31 main missions | Main Missions Walkthrough |
| Level your character | Lv. 100 cap | Best Stats to Level Up |
| Climb the Arena | 7 ranks, Bronze to Legend | Palworld Arena Ranks and Rewards |
| Sweep the map | 170 dungeon entrances, 152 fast travel points | Palworld 1.0 Interactive Map |
 Goal 1: Complete the Paldeck
The Paldeck is the closest thing Palworld has to a completion percentage. It runs to 288 entries — 204 numbered Pals plus 84 variants like Lyleen Noct and Knocklem Ignis that occupy their own slots. Catching fills it, but so does beating a Pal, so you get partial credit either way; you only get the full stat and drop readout once one is in a sphere. Catching also pays real experience on top of the fight, and catching the same species repeatedly stacks an escalating bonus that tapers off after the tenth, which is why parking on a dense spawn cluster levels you faster than wandering.
Some Pals only exist at night — Katress and Felbat are the obvious ones — so a region you swept in daylight is not a region you have finished. Check the Palworld interactive map with a Pal filter on before you write a species off as missing.
 Catch, Buy, and Free Pals
Catching is the main route, and the sphere you throw matters more than anything except the target's remaining health. The ladder runs ten tiers from the basic Pal Sphere at technology level 2 all the way to the Ancient Sphere at Lv. 74, and each tier is a flat upgrade — there is never a reason to hold the older ones back once you can craft the next. Beyond throwing spheres you can free caged Pals in Syndicate camps, buy them outright from a Pal merchant, or trade with other players on a server. Run the numbers for a specific target in the Palworld capture rate calculator before you burn your good spheres; Pocketpair has never published the exact formula, so those odds are close estimates rather than gospel, but the ordering of the factors is solid.
| Sphere | Tech level | Points to unlock |
|---|---|---|
| Pal Sphere | Lv. 2 | 1 |
 Mega Sphere Mega Sphere | Lv. 14 | 2 |
 Giga Sphere Giga Sphere | Lv. 20 | 3 |
 Hyper Sphere Hyper Sphere | Lv. 27 | 3 |
 Ultra Sphere Ultra Sphere | Lv. 35 | 4 |
 Legendary Sphere Legendary Sphere | Lv. 44 | 5 |
 Ultimate Sphere Ultimate Sphere | Lv. 51 | 5 |
 Exotic Sphere Exotic Sphere | Lv. 58 | 5 |
 Sol Sphere Sol Sphere | Lv. 67 | 5 |
 Ancient Sphere Ancient Sphere | Lv. 74 | 5 |
Clear Dungeons for the Pals You Cannot Find Outside
There are 170 dungeon entrances scattered across the regions, and they open and close on their own schedule, so an entrance that was live yesterday can be sealed today. Each one shows a level when you walk up to it, which is your difficulty warning. The Grasslands hold 48 of them — nearly a third of the total — which makes them the sensible place to learn the format before you take a level 50 cavern seriously. Inside you get caged Pals to free, treasure chests, skill fruit, Pal eggs, mimics, and the schematics that are hard to find anywhere else. The named caverns and the 18 Sealed Realms are listed separately on the list of all dungeons.
| Region | Dungeon entrances | Open the map |
|---|---|---|
| Grasslands | 48 | 48 Grasslands entrances |
| Forest | 30 | 30 Forest entrances |
| Viking ruins | 30 | 30 Viking ruins entrances |
| Desert | 15 | 15 Desert entrances |
| Snowfields | 15 | 15 Snowfields entrances |
| Mount Obsidian | 15 | 15 Mount Obsidian entrances |
| Sakurajima | 15 | 15 Sakurajima entrances |
| Sunreach Isle | 1 | The Sunreach Isle entrance |
| Yakushima | 1 | The Yakushima entrance |
 Hunt All 90 Alpha Pals
Alphas are oversized, named versions of ordinary Pals that sit at fixed spots, and there are 90 of them running from level 11 up to level 79. They are worth doing for two separate reasons: they are far stronger than anything the same species rolls in the wild, so they fill Paldeck entries you would otherwise be scraping for, and every single one drops Ancient Civilization Parts on a guaranteed roll — anywhere from 1 to 9 depending on which Alpha you kill. Those parts are the material half of the Ancient technology line, with tower boss points as the other half. Work up the level ladder rather than jumping to the top: the two hardest, Celesdir Noct and Aegidron, are both level 79 and will delete an underlevelled team.
| Alpha | Level | Element | What makes it awkward |
|---|---|---|---|
| Celesdir Noct | 79 | Dark | Joint highest-level Alpha in the game |
 Aegidron Aegidron | 79 | Dragon / Ground | Joint highest level, and the dual typing resists most single-element teams |
 Mycora Mycora | 78 | Grass | Straight stat check at level 78 |
 Moldron Cryst Moldron Cryst | 78 | Ice / Ground | Ice and Ground together leaves very few clean counters |
 Renjishi Renjishi | 78 | Fire | The highest-level Fire Alpha |
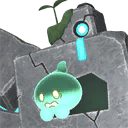 Dualith Dualith | 75 | Ground / Grass | Spawns at two separate levels, 55 and 75 |
 Neptilius Neptilius | 60 | Water | Legendary — ×3.74 HP, the biggest Alpha health multiplier in the game |
 Frostallion Frostallion | 60 | Ice | Legendary — ×2.73 HP, and only 18% of your damage lands |
 Catch the 8 Legendary Pals
Eight Pals sit at the top rarity band, and they are the ones worth building a whole trip around. Jetragon is the fastest mount in the game and turns every later objective on this page into a shorter journey, so it is the one to prioritise if you are choosing. Paladius and Necromus only appear at night in the desert, Bellanoir and Bellanoir Libero are raid summons rather than field spawns, and the rest hold fixed Alpha spots. Bring your best spheres and knock the health down hard first — these are the fights where the difference between a Legendary Sphere and an Ultra Sphere is the difference between catching it and watching it break out.




 Goal 2: Build a Base That Runs Itself
Everything else on this page is paid for by the base. It is the only thing in Palworld that produces while you are not there, and a base that mines, smelts and cooks on its own is what turns a two-hour gear grind into a fifteen-minute pickup. Pick your first plot on a wide flat area just past the Plateau of Beginnings — flat ground matters more than scenery, because uneven terrain is what breaks Pal pathing — then move or add bases once you know which ore nodes you care about. There are 485 buildable structures in total, so you will not be short of options; the trick is unlocking the right forty in the right order.
 Unlock the Technology Your Base Needs
Every character level hands you Technology Points, and the 588-entry technology tree spends them. The early production chain is cheap and matters immediately — a Berry Plantation and Ranch at Lv. 5, a Primitive Furnace at Lv. 10 — while a handful of the best structures cost Ancient Technology Points instead, which only tower bosses hand out. The Breeding Farm at Lv. 19 is the one that catches people out: it is an Ancient unlock, so you cannot buy it with the points you have been banking. Get it anyway. Breeding is how you turn a mediocre catch into a Pal with the passives you actually want, and it feeds straight back into the Paldeck goal above.
| Structure | Tech level | Cost | What it changes |
|---|---|---|---|
| Palbox | Lv. 2 | 1 point | Defines the base and hosts every base mission |
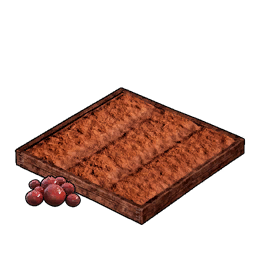 Berry Plantation Berry Plantation | Lv. 5 | 2 points | Food without hunting — the first thing that stops babysitting |
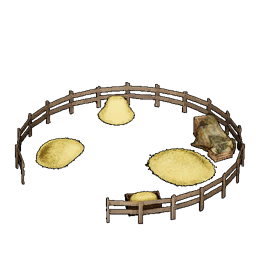 Ranch Ranch | Lv. 5 | 2 points | Passive Wool, eggs and milk from work Pals |
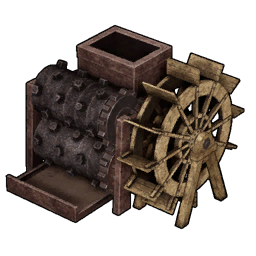 Crusher Crusher | Lv. 8 | 2 points | Turns rubble into Paldium Fragment for spheres |
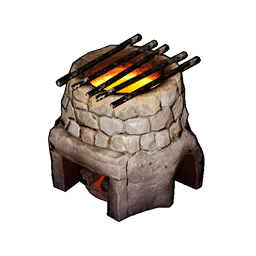 Primitive Furnace Primitive Furnace | Lv. 10 | 3 points | First ingots, which gate every metal weapon and armour tier |
| Breeding Farm | Lv. 19 | 2 Ancient points | Passive inheritance — needs a tower boss clear first |
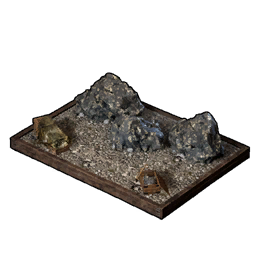 Ore Mining Site Ore Mining Site | Lv. 24 | 2 Ancient points | Ore without leaving base |
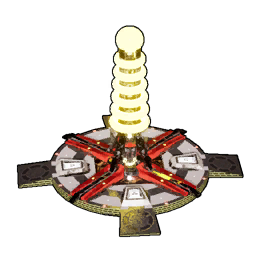 Power Generator Power Generator | Lv. 26 | 3 points | Unlocks the electric production tier |
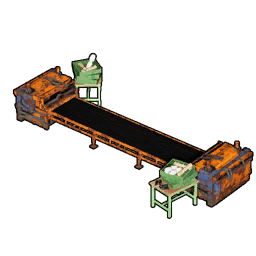 Production Assembly Line Production Assembly Line | Lv. 29 | 3 points | Bulk crafting throughput for the late game |
Staff Every Work Suitability
A base is only as good as the Pals working it. There are 12 work suitabilities, and a Pal's rating in each runs from 1 up to 8 — except Farming, which caps at 4 across every Pal in the game, so nobody is farming faster than anybody else. The scarce ones are what should shape your catching list: only 25 Pals can generate electricity at all and only 38 can cool, so those two jobs decide whether your refrigerator and your electric furnace ever run. Handiwork and Transporting are the opposite problem — over a hundred Pals do each, so you can afford to pick on passives instead of raw rating. Check the work optimizer once you have a roster, and read up on the best passives for base Pals before you commit breeding time.
| Work | Max rating | Pals that can do it | Top of the class |
|---|---|---|---|
| Transporting | 7 | 140 |  Knocklem — rating 7 Knocklem — rating 7 |
| Handiwork | 8 | 109 |  Solenne — rating 8 Solenne — rating 8 |
| Gathering | 8 | 109 | Jetragon — rating 8 |
| Lumbering | 8 | 63 | Celesdir Noct — rating 8 |
| Mining | 8 | 57 | Aegidron — rating 8 |
| Watering | 8 | 46 |  Shaolong — rating 8 Shaolong — rating 8 |
| Planting | 8 | 45 |  Dandilord — rating 8 Dandilord — rating 8 |
| Kindling | 8 | 44 | Renjishi — rating 8 |
| Medicine Production | 8 | 43 |  Silvance — rating 8 Silvance — rating 8 |
| Cooling | 8 | 38 |  Bastigor — rating 8 Bastigor — rating 8 |
| Farming | 4 | 29 |  Dumud Gild — rating 4 Dumud Gild — rating 4 |
| Generating Electricity | 8 | 25 |  Orserk — rating 8 Orserk — rating 8 |
Push the Palbox to Base Level 35
The Palbox hands out base missions, and clearing them is the objective list the game is most explicit about. Base level caps at Lv. 35, and the boards ask for 60 distinct technologies along the way, costing 172 Technology Points plus 12 Ancient Technology Points in total. The rewards are the reason to care: your work Pal cap rises by one per level for the first 15 levels, and you unlock extra base slots at base Lv. 8, 15 and 24 for a maximum of four. The level is shared across your whole guild, so on a server everybody's building counts toward the same board. If four bases and fifteen workers is not enough, the caps can be pushed to 50 workers and 10 bases in world settings.
| Base progression | Value |
|---|---|
| Maximum base level | Lv. 35 |
| Work Pal cap from levelling | 15 — one per level to Lv. 15 |
| Extra bases | 4 total, unlocked at base Lv. 8, 15 and 24 |
| Technologies the missions ask for | 60 |
| Total research cost | 172 Technology Points + 12 Ancient Technology Points |
| Player level for the final board | Lv. 78 |
| Raisable in world settings | Up to 50 work Pals and 10 bases |
 Goal 3: Beat All 10 Tower Bosses
Tower bosses are the spine of the game's difficulty curve and the only source of Ancient Technology Points, which is why they are the objective to chase if you chase one. Each tower is a human trainer plus one Pal with an inflated health pool — the multiplier column below is what that inflation looks like — and the fights are timed, so a team that cannot burst simply runs out the clock. Eight of the ten sit in the main mission chain; Bastigor and Shaolong fill out the rest. Note that the first-fight multiplier is not a clean difficulty ranking on its own: Grizzbolt has the smallest pool at ×12 but only 10% of your damage lands, the harshest damage cut of any tower fight. Death is cheap here — anything you drop, including Pals, is returned to the tower entrance.
| Tower boss | Element | First-fight HP | Rematch HP | Your damage that lands |
|---|---|---|---|---|
| Zoe & Grizzbolt | Electric | ×12 | ×100 | 10% |
 Lily & Lyleen Lily & Lyleen | Grass | ×25 | ×100 | 12% |
| Axel & Orserk | Dragon / Electric | ×25 | ×110 | 15% |
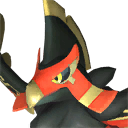 Marcus & Faleris Marcus & Faleris | Fire | ×27 | ×110 | 15% |
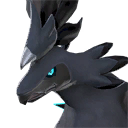 Victor & Shadowbeak Victor & Shadowbeak | Dark | ×28 | ×100 | 25% |
 Panthalus Panthalus | Water | ×42 | No rematch | — |
| Auri & Shaolong | Dragon / Water | ×50 | ×88 | 20% |
 Saya & Selyne Saya & Selyne | Dark / Neutral | ×54 | ×93 | 20% |
| Bastigor | Ice | ×62 | ×75 | 18% |
 Zenara & Astralym Zenara & Astralym | — | ×40 | ×405 | 45% |
Element matchups do most of the work in these fights, so read the Palworld type chart and bring the counter rather than your favourite. Once a tower is down on Normal it opens as a rematch, and 9 of the 10 have a hard mode on top of that — see how to unlock hard mode towers for the order they become available in.
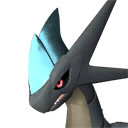 Goal 4: The Endgame Sweep
Finishing the story does not empty the map. The 31 main missions pay 816,018 EXP in total, which by itself only carries you to around Lv. 43 out of a Lv. 100 cap — so most of your levelling was always going to come from somewhere else, and the list below is where. Raids are the hardest content in the game and need summoning altars, of which there are 16 on the map. The collectible sweeps are the least glamorous entry here and probably the highest value per hour: 866 stat lotuses are 866 permanent stat increases, and there is no fight in the game that a bigger health bar does not help with.
| What is left | How much | Why it is worth doing | Jump in |
|---|---|---|---|
| Raid bosses | 5, four with Ultra versions | The hardest fights in the game and the best gear behind them | All Raid Bosses and Battle Multipliers |
| Raid Summoning Altars | 16 on the map | You cannot start a raid without one | Every Summoning Altar location |
| Hard-mode tower rematches | 9 of the 10 towers | The top difficulty tier outside raids | How to Unlock Hard Mode Towers |
 Stat Lotuses Stat Lotuses | 866 | Permanent player stat increases — the biggest collectible pile in the game | All 866 stat lotuses |
 Pal Effigies Pal Effigies | 407 including the World Tree | Feed the Statue of Power to raise capture power | All Effigies and Upgrades |
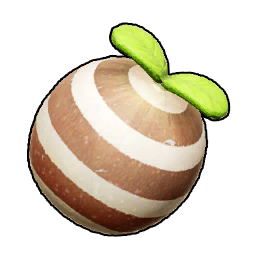 Skill Fruit trees Skill Fruit trees | 47 | Teach skills your Pals will never learn on their own | Every skill fruit |
| Arena ranks | 7, Bronze to Legend | Structured PvP-style ladder with rank rewards | Palworld Arena Ranks and Rewards |
| Pal Expeditions | 18 destinations | Passive rewards from Pals you are not using | Pal Expeditions and Rewards |
| Enemy camps | 58 | Chest loot plus a Gold payout per clear | All 58 enemy camps |
| Breeding combinations | 41,616 | The only reliable way to get the passives you want | Palworld Breeding Calculator |
Where to Start Right Now
Short version: build a base on flat ground, catch enough Pals to staff all 12 work suitabilities, follow the main mission chain until the first tower drops, then alternate between Alpha hunting and tower clears while your base pays for the gear. The Paldeck and the collectible sweeps fill in around that loop rather than replacing it — you will be catching Pals and picking up lotuses the whole time anyway. If you have just landed on the beach, the Palworld day one checklist covers your first few hours in unlock order; if you are already past the story, the endgame checklist has everything on this page in remaining-content form.
Related Guides
Start with the two hubs — the full Palworld guides index and the Palworld 1.0 interactive map — then dig into whichever goal you are working on.
Getting started: Palworld Day One Checklist · How to Catch Pals · Palworld Base Building Guide · Best Base Locations
Progression: Main Missions Walkthrough · List of All Missions · All Base Level Rewards and Requirements · How to Get Technology Points
Combat and bosses: All Tower Bosses · All Alpha Pal Locations · All Raid Bosses · Alpha Hunting by Level · Palworld Type Chart
Endgame: Palworld Endgame Checklist · Best Ancient Technology · How Breeding Works · All Effigies and Upgrades