Messenger of Love Locations, Rewards, and Emotes
The Messenger of Love pays out three guaranteed item stacks for copying one emote. Here is every region one spawns in, all nine emotes they can ask for, the exact reward pool and drop rates for each region, and the level 60 Arena opponent who shares the name.

The Messenger of Love is the wandering villager who stops you mid-run, pulls an emote, and waits for you to copy it — play along and you walk away with three item stacks, every single time. This guide has every region one spawns in, all nine emotes they can ask for, the full reward pool per region with exact drop rates, why Feybreak is the only one worth a detour, and the level 60 Arena opponent who carries the same name.
 Messenger of Love at a Glance
There is no fight here and nothing to hand over. A Messenger of Love is a harmless civilian who performs one of the game's nine emotes, names it out loud, and drops loot the moment you perform the same one back. What you get is decided entirely by which region you are standing in, not by the Messenger's level, which is why a two-minute detour on Feybreak pays better than ten Messengers in the starting grasslands.
| Detail | What it means |
|---|---|
| What they are | A neutral civilian NPC — they never attack and never block progress |
| Regions they appear in | 7 — grasslands, forest, desert, volcano, snowfields, Sakurajima and Feybreak |
| NPC entries in the game | 27 — 18 tied to fixed spots (nine pairs) and 9 that turn up as roaming encounters |
| Levels | The roaming set is locked to 12, 26, 28, 34, 40, 44, 45, 52 and 55 |
| What you get | 3 item stacks, all guaranteed — there is no partial payout |
| What it costs you | Nothing. No combat, no materials, no Gold |
| Emotes involved | All 9 in the game, one per Messenger group |
| Capture rate | One tenth of an ordinary human NPC's — see the capture section below |
| Best region | Feybreak — Ultimate Spheres, Gold Keys and 400-500 Gold guaranteed |
 Where to Find the Messenger of Love
There is no coordinate list for these, and that is not an oversight — most Messengers are placed as random encounters, so the same spot is empty on one save and occupied on the next. What is fixed is the set: 27 Messenger entries exist across the Palpagos Islands, 18 of them tied to specific spots and 9 of them roaming. They also barely move. Each one idles inside a radius of a few metres around wherever it spawned, so once you spot the emote animation you have time to walk over — nothing chases you off and nothing despawns while you fiddle with the menu. They are listed as ordinary settlement civilians on the Palworld NPC list, which is why they turn up near roads, bridges and ruins rather than out in monster territory.
| Where they come from | How many | What that means for you |
|---|---|---|
| Fixed placements | 18 | Nine pairs scattered across the islands, each pair tied to one emote — these are the ones friends can tell you about |
| Roaming encounters | 9 | Spawned into open terrain at set levels; they rotate, so a spot that was empty yesterday can hold one today |
| Arena opponent | 1 | A level 60 fighter sharing the name — hostile, and covered further down |
The nine roaming Messengers spawn at fixed levels — 12, 26, 28, 34, 40, 44, 45, 52 and 55 — and those levels never scale to you. That ladder is worth knowing for one reason only: it tells you roughly how deep into the map a given Messenger sits, but it tells you nothing about the loot. A level 12 Messenger in the grasslands and a level 55 one on Feybreak both hand over three stacks; the region decides whether those stacks are Bread and Arrows or Ultimate Spheres and Gold Keys.
 Every Region With a Messenger of Love
Seven regions have a Messenger reward pool behind them, and each pool is built to the gear tier of that region. The sphere it hands out is the fastest way to tell which pool you just hit — Mega Spheres mean grasslands, Ultimate Spheres mean Feybreak. Worth knowing before you waste a flight: the sky islands have no Messenger pool at all, so Sunreach Isle and the World Tree are dead ground for this.
| Region | Sphere it hands out | Key it can drop | Pal Soul it can drop |
|---|---|---|---|
| Grasslands |  Mega Sphere Mega Sphere |  Copper Key Copper Key |  Small Pal Soul Small Pal Soul |
| Forest |  Giga Sphere Giga Sphere |  Silver Key Silver Key | Small Pal Soul |
| Desert | Hyper Sphere | Silver Key |  Medium Pal Soul Medium Pal Soul |
| Volcano | Hyper Sphere | Silver Key | Medium Pal Soul |
| Snowfields | Hyper Sphere | Gold Key |  Large Pal Soul Large Pal Soul |
| Sakurajima | Legendary Sphere | Gold Key | Large Pal Soul |
| Feybreak |  Ultimate Sphere Ultimate Sphere | Gold Key |  Giant Pal Soul Giant Pal Soul |
 How the Emote Reward Works
The whole interaction is four steps and takes about fifteen seconds. Walk up, the Messenger greets you and names the emote in the dialogue box, you open the emote wheel and pick that exact one, and the loot drops with a "You received a reward from the Messenger of Love!" line in your log. The name in the dialogue is the important part — the animation can be ambiguous at a distance, but the text spells it out, so read it before you start scrolling the wheel.
| Step | What to do |
|---|---|
| 1. Approach | Get close enough to trigger dialogue. The Messenger names the emote they want in the greeting line |
| 2. Open the wheel | Bring up the Pal command menu and switch to the Emotes page |
| 3. Match it exactly | Pick the emote by name, not by guessing from the animation — a near miss pays nothing |
| 4. Collect | 3 stacks drop at once. Each Messenger pays out for the copy, then has nothing more for you |
There are exactly nine emotes in the game and exactly nine Messenger groups, one per emote, so across a full playthrough you will be asked for every single one:
- Beckon
- Dance
- Wave
- Sit in Chair
- Sit on Ground
- Surprised
- Hand Over
- Sleep
- Kick
Two of those are worth checking before you need them. Sit in Chair only plays properly with a chair nearby, and Hand Over is easy to confuse with Wave in the wheel. If you have rebound anything, the emote page lives inside the Pal command menu rather than on its own key — the full Palworld controls and keybinds list has the menu bindings for both PC and controller.
All Messenger of Love Rewards by Region
Every Messenger rolls three separate slots, and all three fire at 100%. That is unusual — most loot in Palworld has a bait slot that quietly skips most of the time, but here you always leave with three stacks. Slot 1 is the interesting one and holds everything from schematics to Gold Keys, slot 2 is a flat Gold payment, and slot 3 is the bulk stack of ammo, spheres, food and Training Manuals. The three tables below cover all seven regional pools.
Slot 1: The Rare Roll
This is where the payout actually lives. The sphere is the single most likely result in every region, and its chance climbs as the regions get harder — 25.6% in the grasslands against 34.3% on Sakurajima and Feybreak. Keys are the second-best outcome and follow the same curve. Note how the schematic share peaks in the forest and desert at roughly 40%: those two pools are stuffed with early gun and armour schematics, which is great if you are still building your first firearm and worthless once you are past it.
| Region | Sphere | Key | Pal Soul | Any schematic | Medical supplies |
|---|---|---|---|---|---|
| Grasslands | Mega Sphere ×2-3 · 25.6% | Copper Key ×2-3 · 12.8% | Small Pal Soul ×1-2 · 2.6% | 20.7% |  Low Grade Medical Supplies · 12.8% Low Grade Medical Supplies · 12.8% |
| Forest | Giga Sphere ×2-4 · 27.5% | Silver Key ×1-2 · 13.8% | Small Pal Soul ×1-3 · 2.8% | 39.5% |  Medical Supplies ×2-3 · 8.3% Medical Supplies ×2-3 · 8.3% |
| Desert | Hyper Sphere ×2-5 · 27.4% | Silver Key ×1-2 · 13.7% | Medium Pal Soul ×1-2 · 2.7% | 39.7% | Medical Supplies ×2-3 · 8.2% |
| Volcano | Hyper Sphere ×2-5 · 28.5% | Silver Key ×1-2 · 14.2% | Medium Pal Soul ×1-2 · 2.8% | 37.3% | Medical Supplies ×2-3 · 8.5% |
| Snowfields | Hyper Sphere ×2-5 · 30.4% | Gold Key ×1-2 · 15.2% | Large Pal Soul ×1 · 3.0% | 33.2% | Medical Supplies ×2-3 · 9.1% |
| Sakurajima | Legendary Sphere ×2-3 · 34.3% | Gold Key ×1-2 · 17.1% | Large Pal Soul ×1 · 3.4% | 24.6% | Medical Supplies ×1-2 · 10.3% |
| Feybreak | Ultimate Sphere ×2-3 · 34.3% | Gold Key ×1-2 · 17.1% | Giant Pal Soul ×1 · 3.4% | 24.6% |  High Grade Medical Supplies ×1-2 · 10.3% High Grade Medical Supplies ×1-2 · 10.3% |
The Pal Soul line is the quiet winner. A 3.4% shot at a Giant Pal Soul sounds tiny, but Giant Souls are the slowest currency in the game to accumulate and a Messenger hands one over for an emote. Everything else in slot 1 is a stack you can farm elsewhere; that one is not.
Slot 2: Guaranteed Gold
Slot 2 has exactly one entry per region, so the Gold is not a roll — you get it every time. The scale is steep: a grasslands Messenger pays under 100 Gold while a Feybreak one pays 400-500, so the same interaction is worth five to eight times more late-game. It is pocket change next to real Gold farming methods, but it is free and it arrives without a fight.
| Region | Gold paid, every time |
|---|---|
| Grasslands | 50-99 |
| Forest | 75-150 |
| Desert | 100-200 |
| Volcano | 100-200 |
| Snowfields | 100-200 |
| Sakurajima | 200-300 |
| Feybreak | 400-500 |
Slot 1 can also roll a much bigger Gold pile as its rare result — 300-500 in the grasslands rising to 1,200-1,700 on Feybreak — but that only lands about 3% of the time, so treat it as a bonus rather than a plan.
 Slot 3: The Bulk Stack
Slot 3 is the consolation slot and it is more useful than it looks, because it is where the Training Manuals live. Feybreak is the standout: 20% for a Training Manual (XL) ×1-2 plus another 16% for Training Manual (L) ×2-3 means over a third of Feybreak Messengers hand you raw player XP. Snowfields and Sakurajima both sit at 17% for the Large manual, which is the best rate outside Feybreak.
| Region | Ammo or throwable | Sphere | Food | Training Manuals |
|---|---|---|---|---|
| Grasslands |  Arrow ×10-20 · 23% Arrow ×10-20 · 23% |  Pal Sphere ×2-5 · 28% Pal Sphere ×2-5 · 28% |  Bread ×5-8 · 23% Bread ×5-8 · 23% |  Manual (S) 10% · Manual (S) 10% ·  Manual (M) 6% Manual (M) 6% |
| Forest | Arrow ×5-8 · 28% | Mega Sphere ×2-5 · 28% |  Grilled Galeclaw ×2-3 · 28% Grilled Galeclaw ×2-3 · 28% | Manual (M) 10% · Manual (L) 6% |
| Desert |  Coarse Ammo ×5-8 · 28% Coarse Ammo ×5-8 · 28% | Giga Sphere ×2-5 · 28% |  Dumud Chowder ×2-3 · 28% Dumud Chowder ×2-3 · 28% | Manual (L) 10% ·  Manual (XL) 6% Manual (XL) 6% |
| Volcano | Coarse Ammo ×5-8 · 26% | Giga Sphere ×2-5 · 26% |  Rushoar Bacon 'n' Eggs ×2-3 · 26% Rushoar Bacon 'n' Eggs ×2-3 · 26% | Manual (L) 14% · Manual (XL) 9% |
| Snowfields |  Handgun Ammo ×5-8 · 25% Handgun Ammo ×5-8 · 25% | Giga Sphere ×2-5 · 25% |  Reindrix Stew ×2-3 · 25% Reindrix Stew ×2-3 · 25% | Manual (L) 17% · Manual (XL) 9% |
| Sakurajima |  Assault Rifle Ammo ×5-8 · 25% Assault Rifle Ammo ×5-8 · 25% | 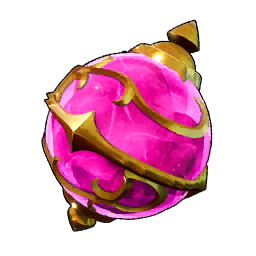 Ultra Sphere ×2-5 · 25% Ultra Sphere ×2-5 · 25% |  Galeclaw Nikujaga ×2-3 · 25% Galeclaw Nikujaga ×2-3 · 25% | Manual (L) 17% · Manual (XL) 9% |
| Feybreak | 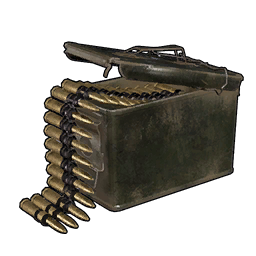 Gatling Gun Ammo ×5-8 · 21% Gatling Gun Ammo ×5-8 · 21% | Ultra Sphere ×2-5 · 21% | 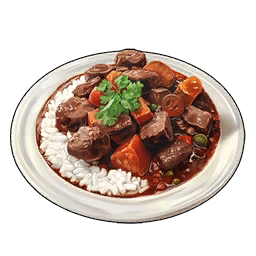 Mammorest Curry ×2-3 · 21% Mammorest Curry ×2-3 · 21% | Manual (XL) 20% · Manual (L) 16% |
The one genuinely rare entry hiding in slot 3 is the grasslands Frag Grenade ×2-3 at 10%. Grenades are awkward to craft that early and a Messenger simply gives you a pair, which makes a grasslands Messenger surprisingly relevant for a first tower run even though everything else in that pool is filler.
Best Regions to Farm
Because the pool is region-locked and every Messenger pays out only once, "farming" here really means not wasting the ones you find. If you know you are about to move to a harder region, skipping a Messenger in the lower one costs you nothing — the same emote pays out far better one island over. The ranking below is by what a single interaction is actually worth.
| Rank | Region | Why it ranks here |
|---|---|---|
| 1 | Feybreak | The only pool with Ultimate Spheres (34.3%), Giant Pal Souls and High Grade Medical Supplies, plus 400-500 guaranteed Gold and a 36% combined shot at Training Manuals. Nothing else is close |
| 2 | Sakurajima | Same 34.3% sphere rate and the same Gold Key odds, one sphere tier lower. Worth it if you are still working through Sakurajima content |
| 3 | Snowfields | The best of the mid-game pools — it is the earliest region where the key upgrades to a Gold Key, and the sphere rate (30.4%) beats desert and volcano |
| 4 | Desert / Volcano | Roughly 40% and 37% schematic rates make these the best pools for filling out early gun and armour blueprints, but the spheres and keys are mid-tier |
| 5 | Forest | The widest schematic pool in the game at 44 different blueprints, so it is the one to hit while you are still short on weapon options |
| 6 | Grasslands | Lowest payout across every slot. Take it for the free Frag Grenades and Copper Keys, then never think about it again |
Schematic Odds From a Messenger
Schematics are the reason to bother with a mid-game Messenger, and the odds are far better than people assume — roughly two in five desert or forest Messengers hand over a blueprint of some kind. What is not realistic is the top tier. Every regional pool includes Schematic 4 versions of its weapons and armour, but they sit at a fraction of a percent, so a Messenger is a nice surprise rather than a route to endgame gear. For that, the best legendary schematics and where they drop is the guide you want.
| Region | Any schematic | Schematic 4 (top tier) | Different schematics in the pool |
|---|---|---|---|
| Grasslands | 20.7% | 0.13% | 20 |
| Forest | 39.5% | 0.25% | 44 |
| Desert | 39.7% | 0.24% | 33 |
| Volcano | 37.3% | 0.22% | 29 |
| Snowfields | 33.2% | 0.18% | 32 |
| Sakurajima | 24.6% | 0.12% | 24 |
| Feybreak | 24.6% | 0.16% | 24 |
The pools are tiered the same way everywhere: Schematic 1 versions are common, and each step up is roughly five times rarer than the one below it. The forest pool being the widest at 44 distinct blueprints also means it is the most diluted — a high chance of *a* schematic, a low chance of the specific one you were hoping for. If you have Schematic 1 copies piling up, upgrading schematics at the Drafting Table turns them into something usable rather than leaving them to rot in a chest.
Can You Catch a Messenger of Love?
You can, but the game clearly does not want you to. Human NPCs almost all share a capture modifier of 0.1, and only 37 of the game's 433 human entries are set ten times lower at 0.01 — 27 of those 37 are Messengers of Love. In practice that means burning a stack of high-tier spheres on something that gives you a civilian with 100 base HP and no work suitability worth having. The only real payoff is the sale price: a Messenger is valued at 8,000 Gold, above the 5,000 that most civilians fetch, but well short of what a good Pal sells for.
| Stat | Messenger of Love | Typical human NPC |
|---|---|---|
| Capture modifier | 0.01 | 0.1 |
| Base HP | 100 | 100 is standard for civilians |
| Sale value | 8,000 Gold | 5,000 Gold for the most common civilian tier |
| EXP multiplier | 1.5× | 1.5× is the shared civilian rate |
| Work suitability | Handiwork 2, Planting / Logging / Mining 1 | Same generic civilian spread |
Catch one before you copy the emote and you lose the reward entirely, which is the actual reason not to do it. Copy first, collect the three stacks, then decide whether you want to spend twenty Ultimate Spheres on a novelty. If you are hunting people rather than Pals, the captured Pals and prisoner camp locations guide covers the NPCs that are actually worth the trip.
 The Arena Messenger of Love
There is one more Messenger of Love, and this one fights back. A Diamond rank Arena opponent carries the same name, sits at 3,350 rank points, and comes in at level 60 with a five-Pal team built entirely around the theme. Every Pal on it is level 60 with 75 talent and four stars of enhancement, so this is a genuine endgame Palworld Arena wall rather than a joke fight — and unlike the field version, there is no emote that gets you out of it.
| Pal | Element | Level | Talent | What it does to you |
|---|---|---|---|---|
| Lovander ×2 | Dark | 60 | 75 | The signature pick — two of them, and Dark damage cuts through anything Neutral you bring |
 Palumba ×2 Palumba ×2 | Grass | 60 | 75 | Fast, aggressive Grass bruisers used to pressure you while the Lovanders work |
 Lyleen ×1 Lyleen ×1 | Grass | 60 | 75 | The anchor. Lyleen is one of the strongest Grass Pals in the game and closes out the fight |
Three of the five are Grass, which makes this one of the easier Diamond teams to counter — a Fire team melts the Palumbas and Lyleen, and the two Lovanders are the only thing that punishes you for it. Bring a Dragon or Fire attacker with high talent and the whole squad folds faster than the rank point value suggests. Checking your Pal's IVs first is worth the minute, since the opposing team is fixed at 75 talent and anything below that on your side is a straight stat deficit.
Related Guides
More on the loot a Messenger hands you and where else to find it:
- All Palworld guides and the Palworld interactive map
- How to Get Keys: Copper, Silver, and Gold Key Locations
- All Chest Locations and Best Chest Farming Routes
- Junkyard Locations, All Items, and Best Regions to Farm
- How to Farm Gold Fast: Best Money Making Methods
- List of All New Schematics: Drop Rates and Locations
- How to Upgrade Schematics to Legendary at the Drafting Table
- What to Buy from Merchants: Best Items Worth Your Gold
- All Controls and Keybinds: PC, Controller, and Rebinds