All Controls and Keybinds: PC, Controller, and Rebinds
Every Palworld control on keyboard and controller, including the menu hotkeys and build-mode inputs the pause screen never shows you, plus the exact steps to rebind a key and the conflict rule that stops the change from saving.
Palworld runs a bigger control set than the pause menu ever admits to — on top of the movement and combat keys, there is a whole second layer of menu hotkeys and build-mode inputs that never appear on any prompt. This guide lists every default on keyboard and controller, breaks out the interface and building keys the game keeps quiet about, and walks the exact steps to rebind an action in 1.0, including the conflict rule that silently blocks the save.
PC Controls
These are the defaults on a fresh install. The four that new players miss most are V to pick a Pal up and carry it, Ctrl to roll (it has invulnerability frames, so it beats sprinting away from a boss slam), 2 to cycle which sphere you are about to throw, and B to open the build menu without touching the pause screen. Note that several keys are context-sensitive rather than duplicated: left click attacks on foot but fires the mount weapon while riding, and C crouches on foot but triggers a mount's third skill in the saddle.
| Key | Action | Notes |
|---|---|---|
| W / A / S / D | Move (Front / Left / Back / Right) | Auto-Run has its own entry in the key list, but you have to give it a key yourself |
| Space | Jump | Press it again on the way down to open an equipped glider |
| Shift | Sprint | Can be flipped to a toggle in the control options |
| Ctrl | Roll | Dodge roll — the only i-frame move you have on foot |
| C | Crouch / Slide / Ride Skill 3 | Slides if you are already sprinting |
| Left Click | Attack / Ride Skill 1 | Mounted, this fires the saddle weapon instead |
| Right Click | Aim / Cancel Pal Sphere | Also cancels a sphere throw you have already wound up |
| R | Reload | Doubles as Quick Stack at a chest and Unequip on the gear screen |
| Mouse Wheel | Switch Weapons | Scrolls through your equipped weapon slots |
| Q | Throw Pal Sphere | Throws whichever sphere is currently selected |
| E | Summon Pal / Ride Skill 2 | Sends out your active Pal, or fires the mount's second skill |
| F | Partner Skill | Only does something if the Pal out with you has an activated partner skill |
| V | Pick Up Pal | Carry a Pal, then throw it with the attack button |
| 1 / 3 | Change Pal (Left / Right) | Cycles through your six-slot Pal party |
| 2 | Change Sphere | Cycles sphere tiers without opening the inventory |
| 4 | Command Pal | Opens the Pal command wheel |
| B | Build Menu | Opens the construction radial straight from the field |
| Middle Click | Direct attack order | Points your Pal at whatever is under the crosshair |
Menu and Interface Hotkeys
This is the layer that saves the most real time, and almost none of it is advertised in-game. Every major screen has a direct key, so you never need to open the pause menu and click across to it — Tab for your inventory and character screen (I works as a second key for the same screen), M for the map, T for technology, P for Pal stats. Inside those screens, Q and E page between tabs, which is the same pair that flips between Palbox pages. The two that pay for themselves fastest are X for Take All and R for Quick Stack at a chest — together they turn an inventory dump into two keypresses instead of a minute of dragging.
| Key | Where it works | Action |
|---|---|---|
| Tab / I | Field | Open the character and inventory menu |
| M | Field | Open the world map |
| T | Field | Open the technology menu |
| P | Field | Open Pal stats |
| Enter | Field | Open chat (Tab switches chat mode) |
| Escape | Anywhere | Close the current screen or open the pause menu |
| Backspace | Menus | Back / cancel |
| Q / E | Menus | Previous / next tab — also previous and next Palbox page |
| 1 / 3 | Inventory | Previous / next inventory tab |
| X | Storage | Take All |
| R | Storage | Quick Stack into the container |
| Space | Storage | Manage Storage |
| R | Equipment screen | Unequip the highlighted gear |
| Right Click | Pal status | Remove the selected active skill |
| F | Palbox | Open the highlighted Pal's detail screen |
| Right Click | Palbox | Send the Pal to a party slot |
| F / E / V | World map | Filter pins / place a marker / dismantle a base camp |
| P / R | World map | Jump the view to your position / to your base camp |
| T | World map | Switch between maps |
| T | Quest list | Track or untrack the selected quest |
| Space (hold) | Cutscene | Skip — a 1.5-second hold for cutscenes, 0.5 seconds for dialogue |
Controller Controls (PS5 and Xbox)
The pad layout doubles up more than the keyboard does, because there are fewer buttons than actions. Square / X covers Partner Skill *and* Reload, Triangle / Y covers Switch Weapons *and* Pick Up Pal, and Circle / B merges Roll, Crouch and the mount's third skill into one button — the game picks based on whether you are moving, standing or riding. Sprint sits on L3, which is the single most common rebind request on pad, and the Pal command wheel is on R3. The two system buttons matter too: Options / Menu opens your character screen and Share / View opens the map, so you can reach both without going through the pause menu.
| PS5 | Xbox | Action |
|---|---|---|
| Left Stick | Left Stick | Move |
| Right Stick | Right Stick | Camera |
| Cross | A | Jump |
| Circle | B | Roll / Crouch / Slide / Ride Skill 3 |
| Square | X | Partner Skill / Reload |
| Triangle | Y | Switch Weapons / Pick Up Pal |
| R2 | RT | Attack / Ride Skill 1 |
| L2 | LT | Aim / Cancel Pal Sphere |
| R1 | RB | Throw Pal Sphere |
| L1 | LB | Summon Pal / Ride Skill 2 |
| L3 | LS | Sprint |
| R3 | RS | Command Pal |
| D-Pad Left / Right | D-Pad Left / Right | Change Pal — also cycles ammo type on weapons that take more than one |
| D-Pad Down | D-Pad Down | Change Sphere |
| D-Pad Up | D-Pad Up | Open the build radial |
| Options | Menu | Character menu |
| Share | View | World map |
 Pal Controls: Throwing, Riding, and Commands
Half of Palworld's control scheme only exists because you have a Pal out, and those inputs change meaning depending on whether the Pal is beside you, in your hands, or under you. This section covers what each of them actually does.
 Throwing Spheres and Summoning
Q throws whatever sphere is currently selected and 2 cycles the selection, so you can drop from a Mega Sphere to a basic Pal Sphere on a weakened target without opening a menu. Holding right click while a sphere is wound up cancels the throw instead of wasting it — worth knowing, because spheres are the one consumable you will always feel short of. Fitting a sphere module such as the Homing Module changes how the throw behaves in the air but not which button throws it. E is a separate action entirely: it sends your active Pal out to fight, and while you are riding it becomes the mount's second skill.
Riding and Ride Skills
140 Pals in the Paldeck can be mounted once you have built their saddle, and every one of them maps its abilities to the same three inputs: left click for Ride Skill 1, E for Ride Skill 2, and C for Ride Skill 3. What those skills *are* depends entirely on the Pal, which is why the same button that fires Grizzbolt's minigun launches missiles on Jetragon. The table below shows the spread across the saddles worth building, from the level 9 harness you can have in your first evening to the level 79 launcher that ends the progression — see the full Palworld mount speed rankings for how they compare on the ground and in the air.
| Pal | Saddle | Tech Level | Why the ride inputs matter |
|---|---|---|---|
 Direhowl Direhowl | Direhowl's Saddled Harness | 9 | First real mount most players get — 1,050 sprint speed for a level 9 unlock |
 Lifmunk Lifmunk | Lifmunk's Submachine Gun | 11 | Earliest saddle that turns Ride Skill 1 into a real weapon |
 Nitewing Nitewing | Nitewing Saddle | 15 | The standard early flyer, and its partner skill also boosts your move speed |
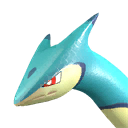 Surfent Surfent | Surfent Saddle | 16 | Water mount — the only way to cross open ocean before flight is comfortable |
 Mossanda Mossanda | Mossanda's Grenade Launcher | 32 | Ride Skill 1 becomes splash damage, which trivialises grouped mobs |
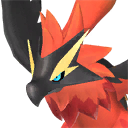 Ragnahawk Ragnahawk | Ragnahawk Saddle | 33 | 1,300 sprint speed flyer that also adds up to 20% ranged attack as a partner skill |
 Grizzbolt Grizzbolt | Grizzbolt's Minigun | 40 | Sustained-fire mount weapon on the attack button |
| Jetragon | Jetragon's Missile Launcher | 79 | 3,300 sprint speed, the fastest mount in the game, with missiles on Ride Skill 1 |
Commanding Your Pal
4 opens the command wheel, where you set your Pal's stance and tell it to hold position or come back. The faster option most players never find is middle click, which issues a direct attack order at whatever is under your crosshair — on a controller that is R3. Use it when your Pal is chasing the wrong target in a group fight, because it retargets instantly instead of making you open a wheel mid-combat. F is the partner skill trigger and does nothing at all unless the Pal beside you has an activated one, so check the full list of Palworld partner skills before assuming a key is broken.
Build Mode Controls
Build mode swaps almost every key out from under you, and it is the part of the control scheme that goes least documented in-game. The two that transform base building are Left Alt, which changes the placement mode, and Left Ctrl, which changes the alignment mode so pieces stop snapping to the grid you do not want. 4 flips you into replace mode, which swaps an existing piece for the one you have selected instead of forcing you to dismantle first. Holding the place button keeps laying pieces down in a line, which is how you build a fence or a wall run without clicking a hundred times. If you are laying out a camp from scratch, the Palworld base building guide covers what to place where once you know how to place it.
| Input | Action |
|---|---|
| B | Open the build radial (D-Pad Up on a pad) |
| Left Click | Place the selected object — hold to place continuously |
| Mouse Wheel Up / Down | Rotate the piece left / right |
| Left Alt | Change build mode |
| Left Ctrl | Change building alignment mode |
| 4 | Toggle replace mode |
| F | Favourite the highlighted build object |
| C | Switch to dismantle mode |
| Left Click (dismantle mode) | Dismantle — hold right click to dismantle continuously |
| P | Switch to painting mode |
| Left Click (painting mode) | Paint the object |
| F (painting mode) | Pick up an existing colour |
| R (painting mode) | Strip the colour back off |
| Right Click / B / Tab / Escape | Leave build, dismantle or painting mode |
How to Change Controls
Rebinding happens entirely inside the Controls screen, and the whole flow takes about ten seconds per key once you know where the confirmation prompts hide. The one thing that catches people out is that Palworld refuses to overwrite a key that is already doing something else, so a rebind can look like it worked and then quietly not save.
Step 1: Open the Controls Screen
Press Escape to open the pause menu and go to Settings, then choose Controls. The screen is split into three tabs — Common, Keyboard and Controller Pad — and you page between them with Q and E, or the shoulder buttons on a pad. Common holds the settings that apply to both input types, Keyboard holds the key list, and Controller Pad holds the button list and the stick options. Inside the Keyboard tab the list is grouped under two headings, Player Action for everything you do in the world and UI Action for the menu keys.
Step 2: Assign a New Key
Select the action you want to change and the game throws up an *Assign key for <action>* prompt asking you to press the key you would like to use. Press it and the binding updates in the list. If the key is already assigned somewhere else, you get "Cannot save. Key already in use." and nothing changes — you have to go and move the other binding out of the way first, because Palworld will not clear it for you. A handful of keys are reserved by the game and come back with "Key cannot be used" instead, so if a key refuses twice with that message, it is not a conflict and no amount of shuffling will free it up.
Step 3: Apply or Reset
Press Escape to leave and the game asks *Apply changed settings?* — choose Yes or the whole session of rebinding is thrown away. If you have made a mess of it, the Restore to Default option resets the tab you are on, bound to F on keyboard and the Share / View button on a pad, and it confirms with an *Initialize settings?* prompt before it wipes anything. Reset works per screen, so restoring your keyboard layout does not touch your controller layout.
What You Can and Can't Rebind
The rebindable list is shorter than the full control scheme. Everything in the Player Action group is fair game — movement, jump, sprint, roll, crouch, reload, attack, aim, weapon switch, sphere throw, summon, partner skill, Pal cycling, sphere cycling, the command wheel, the build menu key, Auto-Run and Push-to-Talk all have their own entries. The UI Action group is much narrower: you can move the four interaction keys, the world map, technology menu, Pal stats, character menu, chat, skip cutscene, and the building alignment toggle. Everything else in the menu table above — Take All, Quick Stack, Palbox paging, map filters, quest tracking — is hard-wired and will stay where it is no matter what you do to the rest of your layout. Plan around that: if you move F or V for comfort, the fixed menu keys still expect their originals.
Control Settings Worth Changing
Several options change how the controls *feel* without touching a single binding, and three of them fix complaints people usually try to solve by rebinding. Toggle Sprint stops you holding Shift or L3 across an entire continent. Single button press for hold interactions converts every hold prompt in the game into a tap, which is the first thing to turn on if holding buttons is uncomfortable. Change build mode switching from Hold to Toggle does the same job for base building, where the holds stack up fastest. The Wing Pack gets its own separate invert-Y option, which is there because plenty of players want inverted flight and normal ground aiming — if you are still on an early glider, the Palworld glider list shows what upgrading gets you.
| Setting | Tab | What it does |
|---|---|---|
| Toggle Sprint | Common | Sprint stays on after one press instead of needing a held key |
| Single button press for hold interactions | Common | Turns every hold prompt into a single tap |
| Change build mode switching from Hold to Toggle | Common | Same thing, applied to build mode |
| Change Over the Shoulder Camera when Aiming | Common | Swaps which shoulder the camera sits over while aiming |
| Mouse Sensitivity / Aim Sensitivity | Keyboard | Separate sliders, so you can aim slower than you look around |
| Invert X / Y Axis | Keyboard | Standard camera inversion |
| Invert Y Axis When Using Wing Pack | Keyboard | Inverts gliding only, independent of your ground camera |
| Right Stick Sensitivity | Controller Pad | Camera speed on pad |
| Left / Right Stick Deadzone | Controller Pad | Raise it if a worn stick drifts, lower it for finer aim |
| Aim Assist | Controller Pad | Pad only — turn it off if it drags your crosshair onto the wrong target |
| Vibration | Controller Pad | Rumble on or off |
Related Guides
Once your inputs feel right, these cover the systems they drive:
- All Palworld Guides and the Palworld interactive map
- How to Change World Settings: All Options and Defaults
- Combat Mechanics Explained: Damage, Weak Points, Dodging
- Best Flying Mounts and the Full Saddle Upgrade Path
- Best Partner Skills and Their Effects
- Best Glider in Palworld: Full Upgrade Ladder and Glider Pals
- Palworld Base Building Guide: All 7 Structure Sets and Costs
- Palworld Multiplayer Guide: Co-op, Crossplay, and Servers
- Palworld PC System Requirements: Minimum and Recommended