How to Unlock Hard Mode Towers: Requirements and Boss List
Hard Mode towers unlock once you've cleared all eight normal tower bosses. Here's the exact unlock condition, every rematch's level and multipliers, which fight is secretly the longest, the Pal checklist to pass the gate, and the hats and legendary schematics it pays out.
Hard Mode towers are the endgame rematch ladder — the same eight tower bosses you already put down, rebuilt in the level 70s and 80s with multipliers that turn a comfortable win into a five-minute race against a health bar. This guide covers the single unlock condition, every rematch's level and multipliers, which fight is secretly the longest one on the board, the Pal checklist that decides whether an attempt is worth starting, and the hats and legendary schematics waiting at the end.
 Hard Mode Tower Unlock Requirements
There is only one gate, and it is a completion check rather than a level check: beat all eight tower bosses on Normal Mode, one clear each. Zenara and Astralym sit outside that count and are not required, which is the part most people get wrong — you can unlock the whole rematch ladder without ever touching the World Tree fight. The difficulty your world was set to when you cleared those eight doesn't matter either, and an unfinished story objective won't hold the rematches back.
Nothing new opens up on the map when the gate clears. The rematches run at the same eight towers you already have fast travel points next to, so the only travelling involved is going back to a door you've already used.
| Requirement | Detail |
|---|---|
| Bosses to clear | All 8 normal tower bosses, once each |
| Zenara and Astralym | Not required — optional either way |
| World difficulty | Doesn't matter which setting you cleared them on |
| Story progress | Not a blocker — unfinished objectives are fine |
| Where to fight | The same eight towers, no new location |
| Time limit | Still 5 minutes, same as the first battle |
 Every Hard Mode Tower in Order
The rematch levels don't scale evenly with the original ladder — they compress. Grizzbolt jumps from level 10 to 72, a 62-level leap, while the back half of the ladder all lands flat at 80. That means the four late towers (Shadowbeak, Selyne, Bastigor and Shaolong) share a level, and the only thing separating them is their multipliers and their element. Pick your first rematch by weakness coverage, not by where it sits in the list — check any pairing on the element matchup chart and counter finder before you commit a team.
| Boss | Element | Weak to | Normal Lv | Hard Lv |
|---|---|---|---|---|
 Zoe & Grizzbolt Zoe & Grizzbolt | Electric | Ground | 10 | 72 |
 Lily & Lyleen Lily & Lyleen | Grass | Fire | 20 | 74 |
 Axel & Orserk Axel & Orserk | Dragon / Electric | Ground, Ice | 30 | 76 |
 Marcus & Faleris Marcus & Faleris | Fire | Water | 40 | 78 |
| Victor & Shadowbeak | Dark | Dragon | 50 | 80 |
 Saya & Selyne Saya & Selyne | Dark / Neutral | Dragon, Dark | 55 | 80 |
 Bjorn & Bastigor Bjorn & Bastigor | Ice | Fire | 60 | 80 |
 Auri & Shaolong Auri & Shaolong | Dragon / Water | Ice, Electric | 68 | 80 |
Two elements cover four of the eight on their own. Dragon damage answers both Shadowbeak and Selyne, and Ground answers both Grizzbolt and Orserk — so a party built around one Dragon attacker and one Ground attacker clears half the ladder without a rebuild. Fire handles Lyleen and Bastigor, leaving only Water for Faleris and Ice or Electric for Shaolong as one-offs.
How Much the Rematch Multiplies Each Boss
Every tower boss is an ordinary Pal wearing multipliers, and the rematch rewrites all four of them. In the first battle each boss deals ×1 damage and takes ×1 damage; in the rematch they hit for 8 to 13 times as much and absorb 75% to 90% of what you deal. That damage-taken column is the one people underestimate — dropping from ×1 to ×0.1 doesn't make the fight 10% harder, it makes it ten times longer, and the clock does not move. The full multiplier set for both phases lives on the tower boss list.
| Boss | HP × | Damage × | Damage taken × | Cooldown × |
|---|---|---|---|---|
| Zoe & Grizzbolt | ×100 | ×13 | ×0.1 | ×3 |
| Lily & Lyleen | ×100 | ×10 | ×0.12 | ×3 |
| Axel & Orserk | ×110 | ×10 | ×0.15 | ×2.5 |
| Marcus & Faleris | ×110 | ×8 | ×0.15 | ×2.5 |
| Victor & Shadowbeak | ×100 | ×12 | ×0.25 | ×2 |
| Saya & Selyne | ×93 | ×9 | ×0.2 | ×2 |
| Bjorn & Bastigor | ×75 | ×10 | ×0.18 | ×2 |
| Auri & Shaolong | ×88 | ×12 | ×0.2 | ×2.5 |
Grizzbolt is the hardest hitter on the board at ×13, and Faleris the softest at ×8 — but read the cooldown column alongside it, because Grizzbolt also has the slowest rotation at ×3. Bigger hits landing less often is a fight you can armour through; Shadowbeak at ×12 damage on a ×2 cooldown is the one that actually threatens to kill you. Bastigor carries the smallest health multiplier at ×75, which is why it's the usual first rematch people clear.
The Longest Fight Is the One You Beat First
Combine the health multiplier with the damage-taken multiplier and you get the number that actually predicts how long you'll be in the room. A boss with ×100 health that only takes 10% of your damage is effectively a ×1,000 health bar. Run that for all eight and the rematch ladder comes out almost perfectly inverted: Zoe's tower, the very first one in the game, is the longest grind in Hard Mode, and Victor's — halfway up the original ladder — is the shortest.
| Boss | HP × | Damage taken × | Effective health |
|---|---|---|---|
| Zoe & Grizzbolt | ×100 | ×0.1 | ×1,000 |
| Lily & Lyleen | ×100 | ×0.12 | ×833 |
| Axel & Orserk | ×110 | ×0.15 | ×733 |
| Marcus & Faleris | ×110 | ×0.15 | ×733 |
| Saya & Selyne | ×93 | ×0.2 | ×465 |
| Auri & Shaolong | ×88 | ×0.2 | ×440 |
| Bjorn & Bastigor | ×75 | ×0.18 | ×417 |
| Victor & Shadowbeak | ×100 | ×0.25 | ×400 |
The practical read: start at the bottom of this table, not the top. Shadowbeak and Bastigor are the two rematches a freshly-geared level 60 party can realistically time out, and clearing them funds the Large Pal Souls and radiant gems you need before Grizzbolt is even worth booking. Going after Zoe first because it was the easy tower in the early game is how most first attempts end in a timeout rather than a wipe.
Where the Towers Are
All eight towers are already pinned on the tower boss layer of our interactive map — one pin each, spread across the main landmass from the Rayne Syndicate tower in the starting grasslands out to the Sakurajima and Feybreak towers. Three more tower pins sit in the World Tree region, which you can switch to on the World Tree view of the map. Turn the layer on, take the nearest fast travel point, and you're at the door.
 Minimum Requirements Before You Try
This is the gate that matters more than the unlock condition. Hard Mode does not punish a bad team with a wipe — it punishes it with a timeout, which costs you five minutes and teaches you nothing. Every entry below is something you can fix before you walk in, and a party that ticks all of them will out-damage the clock on the bottom half of the ladder even without a perfect element match.
| Requirement | Target | Why it matters |
|---|---|---|
| Pal level | 80 | Under-levelled attackers lose damage to the level gap on top of the ×0.1–0.25 reduction |
| Condensed | 4 star | The single biggest stat swing available to a Pal you already own |
| Pal Souls | +20 HP, +20 Attack, +20 Defense | Fed by  Large Pal Souls the towers themselves drop Large Pal Souls the towers themselves drop |
| Trust level | 7 or higher | Unlocks the top of the partner-skill payoff |
| Awakened | Yes | Radiant gems by element — farm them before the run, not during |
| Weapon | Legendary tier for your level | See the best weapon by tech level |
| Armor | Best available tier | See the best armor by tech level |
If a Pal falls short, the fix is not a different Pal — it's condensing and ranking up the one you already have, and raising its trust. Both are cheaper than levelling a replacement from scratch. Bring backup as well: the boss fights alongside allies around level 70 — Pals or humans depending on the tower — and none of them can be caught, so every sphere you packed is dead weight in there. Co-op is the honest answer for the top four rematches; two players roughly halve every effective-health number in the table above.
 What Hard Mode Towers Drop
The guaranteed payout is cosmetic: each boss hands over its owner's hat the first time you clear its rematch, so the opening run at every tower is never wasted. They're all identical statistically — 20 defense, 60 HP, 5,000 durability apiece — which puts them below anything in the late-game helmet tiers, so wear them for the look and the collection rather than the numbers. The Zenara Hat is the odd one out, flagged in-game as something only the luckiest survivors walk away with.
| Hat | From | Defense | HP |
|---|---|---|---|
| Zoe Hat | Zoe & Grizzbolt | 20 | 60 |
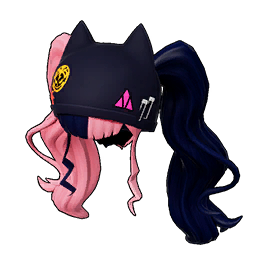
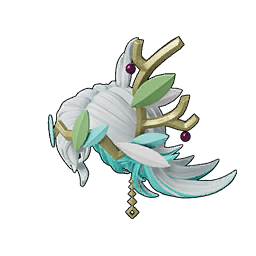 Lily Hat Lily Hat | Lily & Lyleen | 20 | 60 |
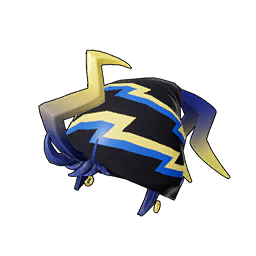 Axel Hat Axel Hat | Axel & Orserk | 20 | 60 |
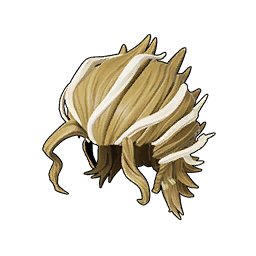 Marcus Hat Marcus Hat | Marcus & Faleris | 20 | 60 |
 Victor Hat Victor Hat | Victor & Shadowbeak | 20 | 60 |
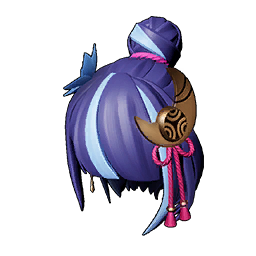 Saya Hat Saya Hat | Saya & Selyne | 20 | 60 |
| Bjorn Hat | Bjorn & Bastigor | 20 | 60 |
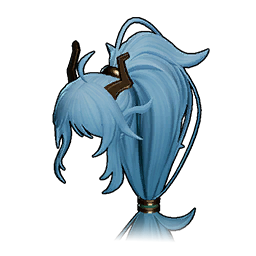 Auri Hat Auri Hat | Auri & Shaolong | 20 | 60 |
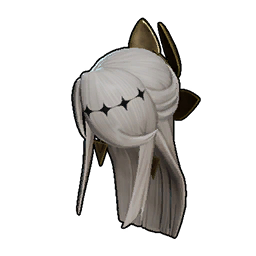 Zenara Hat Zenara Hat | Zenara & Astralym | 20 | 60 |
The reason to keep running a tower after the hat is the legendary schematic on each boss's table, which lands at roughly one clear in ten and is different per tower — Heat-Resistant Ancient Armor off Axel, the Plasma Rifle off Saya, Cold-Resistant Ancient Armor off Victor and Bjorn. The legendary schematics guide ranks the whole pool by what it actually crafts, and the schematic upgrade guide explains why the duplicates you'll pile up are still worth keeping. The rest of each table is material: Large Pal Souls, element-matched radiant gems, Training Crystals and stat lotuses.
 Zenara and Astralym Sit Outside the Ladder
Astralym is the World Tree tower and it plays by different rules. It's the only tower boss with no element at all, so there is no weakness to exploit and no counter team to build — raw damage is the entire plan. Its rematch multipliers are in another bracket too: ×405 health against ×0.45 damage taken works out to roughly ×900 effective health, second only to Grizzbolt, and it's the only rematch on the board that lets more than a quarter of your damage through.
The trade is that Astralym hits softest of anything in the tower class, at ×5 damage where the rest of the ladder runs ×8 to ×13. Beating it is a damage-per-second problem, not a survival one — which makes it the clean measuring stick for whether your endgame build is actually finished. It also has the highest HP, Shot Attack and Defense of any Pal in the game once you catch it, so the fight is worth repeating for reasons beyond the hat.
Related Guides
Every hard rematch we've written up in full:
Getting your team and gear ready: