HP Stat Explained: Max Health and How to Raise It
How the HP stat works in Palworld, what each status point is worth, and every source that raises your maximum Health — armor, shields, accessories, elixirs — plus how Pal HP scales on its own separate number.

HP is the one stat in Palworld where a single level-up point is worth a hundred of something, and it's also the stat most players stop feeding right before the game starts one-shotting them. This guide covers what your Health bar actually is, every source that makes it bigger, the shield pool that sits in front of it, how to get it back when it drops, and why your Pals run a completely different HP number that none of your gear touches.
 How the HP Stat Works in Palworld
Health is a flat pool, not a percentage or a divider — unlike the Defense stat, which quietly multiplies how far that pool stretches. Every character starts at exactly 500 Health and every level-up hands you one status point that can go into it for +100 each, which is the biggest single-point jump of the five player stats by a factor of two. The ceiling isn't your level, though: each individual stat stops accepting points at rank 50, so levelling alone tops Health out at 5,500 and everything past that has to come from gear, accessories or permanent-boost consumables.
| Detail | Value |
|---|---|
| Health at level 1 | 500 — identical for every character |
| Gain per status point | +100 |
| Rank cap on Health | 50 ranks |
| Health from levelling alone | 5,500 at rank 50 |
| Status points you ever earn | 79 by the level 80 cap, split across five stats |
| Biggest flat gear bonus | +3,120 from a legendary  Ancient Armor Ancient Armor |
| Biggest percentage bonus | +25% from Health Up Lv. 4 |
| Largest separate damage pool | 2,200 from the  Ancient Shield Ancient Shield |
| At 0 HP | You go down and respawn at a fast travel point of your choice |
The important line in that table is the third one. Fifty ranks of Health costs 50 of the 79 points you will ever own, which means committing to a maxed Health bar spends roughly two-thirds of your entire status budget — the stat priority guide ranks Health third for exactly that reason, behind Weight and Stamina. The good news is that gear carries more raw Health than levelling does once you're deep in the technology tree, so the endgame answer is almost never "more points".
Every Way to Raise Your Max HP
Five things move the number and they don't move it the same way. Armor adds flat Health, accessories multiply it, elixirs buy you extra status ranks outright, and a shield doesn't touch your HP at all — it sits in front of it as a separate bar. Read the table by slot rather than by size: the armor rows and the accessory row stack with each other, so the correct play is always "best armor you can craft plus a Health accessory", never one or the other.
| Source | Best in slot | What it's worth |
|---|---|---|
| Status points | 50 ranks of Health | +5,000 — takes you from 500 to 5,500 |
| Body armor | Ancient Armor | +2,400 HP, or +3,120 on a legendary roll |
| Headgear |  Ancient Helm Ancient Helm | +1,200 HP, or +1,560 on a legendary roll |
| Accessory |  Vanguard Charm Vanguard Charm | Health Up Lv. 4 — +25% Max HP |
| Cheap accessory |  Life Pendant Life Pendant | Health Up Lv. 3 — +20% Max HP for 16,500 gold |
| Permanent consumable | Vital Elixir | +2 Health ranks, so +200 Max HP per bottle |
| Shield | Ancient Shield | 2,200 damage soaked before your Health bar moves |
If you only change one thing today, change the accessory. A Life Pendant costs 25 Ingot, 20 Bone, 25 Paldium Fragment and 2 Ancient Civilization Parts — nothing rarer than a mid-game dungeon run — and +20% of a 6,000-point pool is 1,200 Health, which is twelve status points you didn't have to spend. Armor is the bigger number in absolute terms, but it's gated behind technology levels you can't rush.
Level-Up Points: +100 Per Point, 50 Ranks
Health is the cleanest stat in the game to plan around because the maths never bends — it's 500 plus 100 per rank, all the way to the wall at rank 50. What that flat line hides is how conditional the stat is. While your team is doing the fighting, a bigger bar does nothing at all; the moment you're soloing an Alpha, clearing a tower or standing in a raid, a level 70 enemy can take a third of an unfed bar with one swing. The rows below are the checkpoints worth aiming at rather than a schedule — most players are comfortable somewhere around rank 20 and let gear carry the rest.
| Health ranks spent | Max HP | Where you'll want to be |
|---|---|---|
| 0 | 500 | Starting bar — a wild Alpha two-shots you |
| 10 | 1,500 | Comfortable through the first two towers |
| 20 | 2,500 | The practical sweet spot for most builds |
| 30 | 3,500 | Worth it if you fight without a Pal out |
| 40 | 4,500 | Raid and hard-mode tower territory |
| 50 (cap) | 5,500 | Costs 50 of your 79 lifetime points |
One thing worth knowing before you start pouring: Memory Wiping Medicine refunds every point you've spent, including the ones that came out of elixirs, so a bad spread is fixable. It's just brutally expensive — 99 Beautiful Flower is the gate, and there are only 27 of those nodes on the whole map — so it's a fix, not a plan.
Head and Body Armor: The Biggest Flat Source
Head and body are the only two equipment slots that carry a Health number, and they climb together up the technology tree. The jump most people underrate is technology 51: Plasteel Armor and its helmet nearly double what the Pal Metal set gave you, and that single tier is worth more Health than nineteen status points. The endgame Ancient Armor set at technology 68 pushes past your entire levelling budget — 3,600 Health from two pieces against 5,500 from fifty points.
| Tech | Head | Body | HP from gear |
|---|---|---|---|
| 23 | 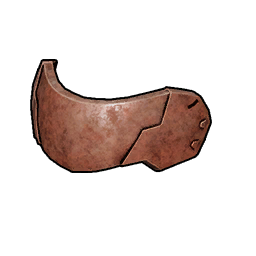 Metal Helm (100) Metal Helm (100) | 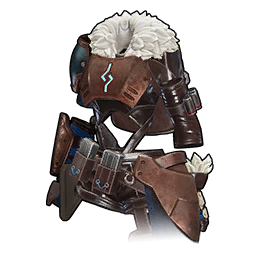 Metal Armor (250) Metal Armor (250) | +350 |
| 37 | 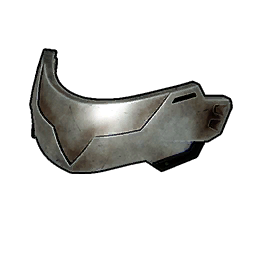 Refined Metal Helm (250) Refined Metal Helm (250) |  Refined Metal Armor (500) Refined Metal Armor (500) | +750 |
| 46 |  Pal Metal Helm (350) Pal Metal Helm (350) |  Pal Metal Armor (750) Pal Metal Armor (750) | +1,100 |
| 51 |  Plasteel Helmet (600) Plasteel Helmet (600) |  Plasteel Armor (1,300) Plasteel Armor (1,300) | +1,900 |
| 59-60 | 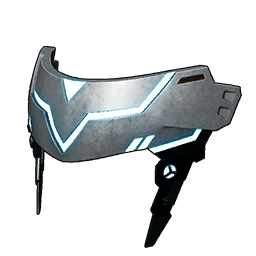 Hexolite Helmet (800) Hexolite Helmet (800) |  Hexolite Armor (1,750) Hexolite Armor (1,750) | +2,550 |
| 68 | Ancient Helm (1,200) | Ancient Armor (2,400) | +3,600 |
Those are the base craft numbers. Every armor piece also comes in rarity-upgraded versions, and each grade adds a clean slice on top — a legendary Ancient Armor reads 3,120 Health instead of 2,400 and a legendary Ancient Helm reads 1,560 instead of 1,200, a flat 30% over the standard craft. Chasing those is what the legendary Ancient Armor schematics are for. Worth flagging one oddity: the Hallowed Plate Mail carries 650 Health at a tier where Refined Metal only gives 500, which makes its schematic a genuine mid-game upgrade rather than a cosmetic. The heat and cold variants of every set carry the identical Health value as the plain version, so climate coverage never costs you a point of it — the full ladder is in the armor upgrade path.
Accessories: Health Up Lv. 3 vs Lv. 4
In-game text says a pendant "slightly raises Health" and a charm "significantly increases" it, which tells you nothing. The rungs behind those words are fixed: Health Up Lv. 3 is +20% Max HP and Lv. 4 is +25% — a five-point gap for something like six times the crafting cost. That makes the humble Life Pendant the value pick by a mile, and the two epic pieces worth it only for their second effect. Warsect Terra's Belt is the standout of the pair because Defense Up Lv. 4 is +25% on a stat you cannot buy with status points at all.
| Accessory | Health effect | Second effect | Materials | Gold value |
|---|---|---|---|---|
| Life Pendant | Health Up Lv. 3 — +20% | — | 25 Ingot, 20 Bone, 25 Paldium Fragment, 2 Ancient Civilization Parts | 16,500 |
 Warsect Terra's Belt Warsect Terra's Belt | Health Up Lv. 4 — +25% | Defense Up Lv. 4 (+25% Defense) | 40 Refined Ingot, 20 Honey, 35 Paldium Fragment, 30 Ancient Lava | 80,700 |
| Vanguard Charm | Health Up Lv. 4 — +25% | Heat and Cold Resistance Lv. 3 | 30 Polymer, 30 Bone, 20 Flame Organ, 20 Ice Organ, 30 Ancient Bone | 103,680 |
 Claws Pendant Claws Pendant | +10 flat HP | +5 Defense | Not craftable | — |
Accessory slots are the one equipment slot you buy rather than research — the Mysterious Accessory Box is 50 Dog Coins and the Mystic Accessory Box is 300, both permanent Medal Shop stock, and both simply need to sit in your bag. Buy the cheap one early: it's the difference between choosing a Health accessory and wearing one alongside everything else you already had on. The full accessory list covers what the other 80-odd pieces compete for.
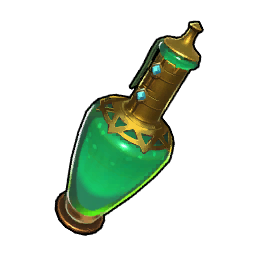 Vital Remedies, Vital Elixirs and Life Crystals
These are the only items in the game that permanently add Health, and they work by handing you status ranks rather than raw points — a Remedy is worth one rank and an Elixir is worth two, so +100 and +200 Max HP respectively. They only work on the player; a Pal that drinks one gets nothing at all. They also respect the rank 50 ceiling, and the game refuses the item outright once Health is full, so there's no way to waste one by accident.
| Item | What it gives | How to get it |
|---|---|---|
| Vital Remedy | +1 Health rank (+100 Max HP) | 4 Life Lotus (S) + 1 Predator Core at 50,000 workload; 20% of Grasslands and Forest supply drops, 2 at a time; Grassland dungeon elixir stands at 100% |
| Vital Elixir | +2 Health ranks (+200 Max HP) | 200 Dog Coin at the Medal Shop, or 6 Life Lotus (L) + 2 Predator Cores at 100,000 workload; 20% of Desert, Mount Obsidian, Snowfields, Sakurajima, Feybreak and Sunreach Isle supply drops |
 Life Crystal Life Crystal | A permanent Health boost per crystal | The Tides of Terraria version of a Vital Remedy — no effect on a Pal or at the rank cap |
Farm the Elixir, not the Remedy. Double the ranks for one and a half times the lotuses, and the Medal Shop sells it outright at a flat 200 Dog Coin with unlimited restock, which skips both farms entirely. If you'd rather grow them, the lotuses are wild pickups — there are 866 stat lotus nodes on the map — while Predator Cores drop from Predator Pals and nowhere else, which is the actual bottleneck on the crafting route.
Shields Are a Second Health Bar
A shield is not a Health bonus and it doesn't show up in your stat screen — it's a separate pool that eats incoming damage first and refills on its own once you've gone a few seconds without being hit. That regeneration is what makes it worth more than its raw number suggests: an Ancient Shield doesn't add 2,200 Health once, it adds 2,200 every time you break line of sight for a moment, which is why shield uptime matters more than shield size in a long boss fight.
| Shield | Absorbs | Tech | Materials |
|---|---|---|---|
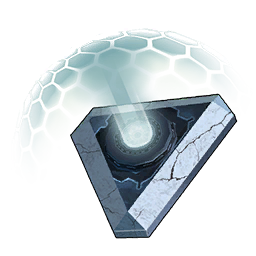 Common Shield Common Shield | 100 | Lv. 4, 2 points | 10 Paldium Fragment, 20 Wood, 20 Stone, 10 Fiber |
 Mega Shield Mega Shield | 260 | Lv. 16, 2 points | 5 Ancient Civilization Parts, 30 Paldium Fragment, 10 Ingot |
 Giga Shield Giga Shield | 540 | Lv. 29, 2 points | 10 Ancient Civilization Parts, 50 Paldium Fragment, 20 Ingot |
 Hyper Shield Hyper Shield | 1,045 | Lv. 43, 3 points | 20 Ancient Civilization Parts, 100 Paldium Fragment, 30 Ingot |
 Ultra Shield Ultra Shield | 1,520 | Lv. 55, 4 points | 30 Ancient Civilization Parts, 150 Paldium Fragment, 50 Plasteel, 10 Bio Battery, 30 Ancient Civilization Core |
 Advanced Shield Advanced Shield | 1,800 | Lv. 60, 5 points | 50 Ancient Civilization Parts, 200 Paldium Fragment, 50 Hexolite, 5 Thermal Core, 30 Ancient Civilization Core |
| Ancient Shield | 2,200 | Lv. 71, 5 points | 50 Ancient Civilization Parts, 250 Paldium Fragment, 30 Soralite Ingot, 5 AI Core, 30 Ancient Civilization Core |
The Hyper Shield at technology 43 is the one to actually plan around. It absorbs 1,045 for 20 Ancient Civilization Parts and 30 Ingot at 150,000 workload, while the very next tier wants Plasteel, Bio Batteries and Ancient Civilization Cores at four times the work for less than 500 more absorption. Craft the Hyper, wear it through the whole mid game, and skip straight to the Ancient Shield when the workbench can handle a 10,000,000 workload job. Every tier auto-repairs the same way, so a cheap shield you actually have beats an expensive one you're still farming for.
The Highest Max HP You Can Reach
Stack every layer and the number gets genuinely silly. This is the theoretical ceiling for a level 80 character who spent every available rank on Health and rolled legendary on both armor pieces — not a build to aim at, since 50 Health ranks means going without Weight and Stamina entirely, but a useful sense of how the sources compare. Note where the percentage sits: Health Up Lv. 4 applies to the whole pool, so it's worth 2,545 Health at the bottom of this table and would be worth 125 at the top.
| Layer | Adds | Running total |
|---|---|---|
| Base at level 1 | — | 500 |
| 50 Health ranks | +5,000 | 5,500 |
| Legendary Ancient Armor | +3,120 | 8,620 |
| Legendary Ancient Helm | +1,560 | 10,180 |
| Health Up Lv. 4 accessory | +25% | 12,725 |
| Ancient Shield on top | 2,200 absorbed | 14,925 effective |
Pocketpair hasn't published the exact order the game applies these in, so treat the last two rows as very close estimates rather than frame-perfect numbers. What isn't an estimate is the shape of the list: gear out-earns levelling roughly two to one at the top end, and the shield row is free real estate that costs you no slots at all. If you're dying in a hard-mode tower, the honest fix is almost always a technology tier, not a respec.
 How to Restore HP
Restoring Health is a much shorter list than raising it, and the thing that catches out everyone coming from other survival games is that food does nothing for your Health bar. Eating fills the hunger meter only. Your actual options are the four-tier Recovery Meds line, a handful of Pals whose partner skills heal you, and passive regeneration between fights — and that last one switches off entirely while you're Hungry, which is the real reason to keep eating.
| Method | What it does | Where it comes from |
|---|---|---|
| Advanced Recovery Meds | The strongest heal-over-time in the game | Technology Lv. 61 — not sold anywhere; large oil rig crates and tier 4 treasure maps |
 High Quality Recovery Meds High Quality Recovery Meds | The practical daily driver | Free with the Medicine Workbench, or 12,600 gold from any Caravan Shop |
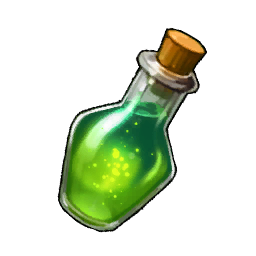 Recovery Meds / Recovery Meds /  Low Quality Recovery Meds Low Quality Recovery Meds | Early-game heals over time | Medicine Workbench at technology Lv. 12 |
| Healer partner skills | Up to 95% of your bar on a button press | Lyleen Noct is the ceiling; Teafant is catchable in your first hour |
| Passive regeneration | Ticks up out of combat, for free | Stops completely while your character is Hungry |
| Sleeping in a bed | Tops you up between expeditions | 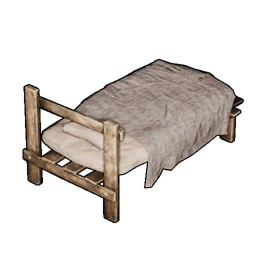 Shoddy Bed at technology Lv. 3, Shoddy Bed at technology Lv. 3,  Fine Bed at Lv. 28 Fine Bed at Lv. 28 |
 Medical Supplies (3 grades) Medical Supplies (3 grades) | Nothing — these cure conditions only | See the sickness and injury list |
Two things are worth internalising here. First, Recovery Meds heal over time, not instantly, so cracking one in the middle of a melee usually just gets you killed with a buff running — drink behind cover. Second, a healer in your party is strictly better than a pocket full of meds at the top end: a button press for 95% of your bar on a 300-second cooldown beats anything you can craft. The full healing guide covers all ten healer Pals, their per-rank numbers and how to patch up your Pals, which is a completely separate system.
 Pal HP Is a Completely Separate Number
None of the above touches your team. Raising your own Health does nothing for a Pal, and a Pal's Health does nothing for you — they're two independent pools that happen to share a name. A Pal's bar is built from three things: the same 500 floor everyone starts on, 5 more per level, and then half of its species HP stat for every level it has gained. That third term is the whole story, because species HP ranges from 60 on Chikipi to 200 on Astralym across all 288 Pals, with the median sitting at 95. A maxed hidden HP roll adds another 30% on top of that species term.
| Pal | Species HP | Lv. 30 | Lv. 50 | Lv. 60 | Lv. 60 at 100 Potential |
|---|---|---|---|---|---|
| Astralym | 200 | 3,650 | 5,750 | 6,800 | 8,600 |
 Panthalus Panthalus | 180 | 3,350 | 5,250 | 6,200 | 7,820 |
 Mammorest Mammorest | 150 | 2,900 | 4,500 | 5,300 | 6,650 |
 Frostallion Frostallion | 140 | 2,750 | 4,250 | 5,000 | 6,260 |
 Jormuntide Ignis Jormuntide Ignis | 130 | 2,600 | 4,000 | 4,700 | 5,870 |
 Lamball Lamball | 70 | 1,700 | 2,500 | 2,900 | 3,530 |
 Chikipi Chikipi | 60 | 1,550 | 2,250 | 2,600 | 3,140 |
Read down the Lv. 60 column and the gap between the best and worst Pal in the game is barely 2.6x, which is much flatter than the 3.3x gap in their species stats — that shared 500-plus-5-per-level floor compresses everything. The practical read is that levels matter more than species for survivability, so a level 60 Lamball genuinely outlasts a level 30 Astralym. It also means the Potential column is where the real separation lives: a maxed HP roll is worth 1,800 Health on Astralym and 540 on Chikipi. You can line any two up side by side on the Pal comparison tool.
Highest HP Pals in the Game
Two Pals sit clear of the field and one of them is not a fair fight. Astralym posts 200 across HP, Defense and ranged Attack with no elemental weakness at all, which is why it tops the combat tier list on its own. Panthalus is the tank pick underneath it — 180 HP behind the same 200 Defense — and it has the rare distinction of dropping a Giant Pal Soul itself, so the thing you'd feed souls into helps pay for its own upgrades. Below those two it's a tie at 140 between six Pals, and the tiebreaker is Defense: Frostallion Noct takes it at 135, and it carries the Legend passive natively so one of its four passive slots is filled the moment you catch it.
| Pal | HP | Defense | Element | Size | Why it's worth the slot |
|---|---|---|---|---|---|
| Astralym | 200 | 200 | None | XL | No weaknesses and 200 ranged Attack alongside — nothing else is close |
| Panthalus | 180 | 200 | Water | XL | The tankiest catchable Pal, and one of only four that drop a Giant Pal Soul |
| Mammorest | 150 | 90 | Grass / Ground | XL | Huge bar on a 90 Defense frame — a wall you can catch early |
 Mammorest Cryst Mammorest Cryst | 150 | 90 | Ice / Ground | XL | The same statline with Ice coverage instead of Grass |
 Frostallion Noct Frostallion Noct | 140 | 135 | Dark | L | Best Defense of the 140-HP tier, and it carries Legend natively |
| Frostallion | 140 | 120 | Ice | L | Same bar, Ice element, and a mount with 140 ranged Attack |
 Shaolong Shaolong | 140 | 120 | Dragon / Water | XL | The best all-rounder here — rides, waters at base, and hits for 135 |
 Bastigor Bastigor | 140 | 120 | Ice | M | The only medium-size Pal in the tier, so it fits where the XLs can't |
 Silvance Silvance | 140 | 110 | Grass | L | A 140-HP Grass body, and it drops a Giant Pal Soul |
 Wumpo Botan Wumpo Botan | 140 | 110 | Grass | L | Cheapest entry into the 140 tier — far easier to find than the legendaries |
 Raising a Pal's HP
Once you've picked the body, four levers move its Health and one of them moves it backwards. Potential is the hidden 0-100 roll behind two identical Pals performing differently, and Life Fruit is the only thing that raises it — +10 per fruit, so ten fruits take a zero roll to the cap. Buy them from the Bounty Shop rather than anywhere else: 25 Successful Bounty Tokens against 200 Dog Coins for the identical item is not a close call.
| Lever | What it does to Health | What it costs |
|---|---|---|
| Life Fruit | +10 HP Potential on the 0-100 scale; a full line is worth +30% of the species term | 25 Bounty Tokens / 100 Battle Tickets / 200 Dog Coins, or 3 Life Lotus (S) + 3 Life Lotus (L) + 3 Speed Lotus (S) + 3 Carrying Lotus (S) |
 Ability Glasses Ability Glasses | Shows the hidden HP roll so you know how many fruits you need | Ancient Technology Lv. 34, 4 points |
| Condensing to ☆4 | Lifts every stat including Health, and scales the partner skill | Same-species duplicates, or 750 Dog Coins in graded Starfruits — see the rank-up guide |
 Statue of Power Statue of Power | A 20-rank stat ladder on top of everything else | 52 Pal Souls, 30 of them Giant — the longest grind attached to any single Pal |
| Passives to avoid | God of Destruction is −50% Max HP; World Tree Seedbed is −20% | Rolled at hatch — re-roll at the Breeding Farm if the body is meant to tank |
| Passives to want | Immortality is +100% HP regeneration; Idiosyncratic is +50% and it also buffs you | Rolled at hatch, four slots per Pal |
That penalty row is the one people get burned by. God of Destruction reads like the best damage passive in the game at +40% Attack and +20% Defense, and it quietly halves the Health bar it's sitting on — fine on a glass-cannon shooter, catastrophic on the Pal you built to soak hits. The full ordering of species, passives, fruits, stars and souls is in the min-max guide, and the order genuinely matters: everything after the passive roll is bound permanently to one body.
What Happens When Your HP Hits 0
At zero Health your character goes down and a short countdown starts, after which you pick a fast travel point to respawn at rather than being sent to a fixed spot. What you lose on the way out is a world setting rather than a rule, and it's worth checking before your first long expedition:
- Nothing dropped — the default on casual settings; you respawn with your inventory intact
- Drop all items — everything except equipment goes on the ground where you fell
- Drop all items and equipment — including what you were wearing
- Drop everything including Pals — the harshest option, and the reason a corpse run in a raid arena can end a save Pals work differently. A Pal at zero Health doesn't die — it's incapacitated and picks up an injury, then needs a bed, a Palbox slot or a Revival Potion before it fights again. That's covered alongside every other condition in the sickness and injury list.
Related Guides
Start with the stat priority guide if you're deciding where your next points go, then work down the gear list:
- Best Stats to Level Up — all five stats ranked, with the spreads worth copying
- Defense Stat Explained — the multiplier that decides how far your Health actually stretches
- Attack Stat Explained — the damage side of the same equation
- Stamina Explained — the other bar you spend points on
- Work Speed Explained — every boost and how to stack it
- How to Heal Pals and Player HP — all four Recovery Meds tiers and the ten healer Pals
- Best Armor at Every Tech Level — the full upgrade path for your biggest Health source
- List of All Accessories — what the other slots are competing for
- How to Min-Max Pals — IVs, passives, souls and condensing in the right order
- Combat Mechanics Explained — weak points, dodging and how damage is actually calculated
- All Pals and every Palworld guide — the full database