Palworld 1.0 Endgame Checklist: What to Do at Level 60+
Everything Palworld 1.0 still has waiting past the story — all 10 tower bosses with their hard-mode multipliers, the 5 raid bosses and their Ultra versions, 90 Alpha Pals, 170 dungeon entrances, and every collectible sweep worth finishing, with a map link for each.
The "dead game" verdict people handed Palworld during early access did not survive 1.0, and the reason is simple: the release version has more boss fights, more islands and more collectibles than almost anyone actually clears. This is the endgame board — every tower boss and its hard-mode rematch, all five raids, the 90 Alpha Pals, the dungeon and collectible sweeps, and which farms are worth your time once you are past level 60.
 The Endgame Board at a Glance
Here is the whole board in one place. If you have finished the story and are wondering what is left, the honest answer is most of it — the fights that carry the real reward tables are all gated behind the point where the campaign stops pushing you. The three lines that matter most are the tower rematches, the four summonable raids and their Ultra versions, and the Alpha sweep, because those three feed each other: raid slabs come out of expeditions, tower clears pay Ancient Technology Points, and Alphas are where your best fighters come from.
| Content | How much of it | Where to start |
|---|---|---|
| Tower bosses | 10 | All Tower Bosses and Battle Multipliers |
| Hard-mode tower rematches | 9 of the 10 | How to Beat Hard Mode Victor and Shadowbeak |
| Raid bosses | 5 | All Raid Bosses and Battle Multipliers |
| Raid Summoning Altars | 16 on the map | Every Summoning Altar location |
| Alpha Pals | 90, level 11 to 79 | All Alpha Pal Locations |
| Named caverns | 10 | List of All Dungeons: Caverns and Sealed Realms |
| Sealed Realms | 18 | Every Sealed Realm and its boss |
| Dungeon entrances | 170 across the regions | All 170 dungeon entrances |
| Arena ranks | 7, Bronze to Legend | Palworld Arena Ranks and Rewards |
| Pals to catch | 288 | Best Combat Pals Tier List |
| Breeding combinations | 41,616 | Palworld Breeding Calculator |
| Technologies to unlock | 588 | Full Technology Tree |
Two rows on that table are bigger than they look. The 170 dungeon entrances are not 170 dungeons — entrances rotate, so the same handful of cavern layouts keep reappearing at fresh mouths, which is what makes cavern farming repeatable instead of finite. And the 41,616 breeding combinations are the reason a completed Paldeck is a genuine project rather than a checklist: plenty of Pals are far easier to hatch than to hunt.
 Every Tower Boss and Its Hard Mode
Tower bosses are the spine of the endgame. Each one is a normal Pal wearing enormous multipliers, and beating a tower is the main faucet for the Ancient Technology Points that unlock the Ancient technologies. Nine of the ten offer a hard rematch, and the rematch is not a modest bump — it is a different fight with its own reward table. Panthalus is the exception, a one-and-done encounter with no harder version.
Read the multipliers as multiples of that specific Pal's own stats, not as a cross-boss ranking — Astralym's 405× is applied to Astralym's base HP, so it is not directly comparable to Grizzbolt's 100×. What does compare cleanly is the damage-taken column, and that is where the rematches get nasty: Grizzbolt on hard absorbs 90% of everything you throw at it.
| Tower boss | Element | First fight HP | Rematch HP | Rematch damage | Your damage that lands |
|---|---|---|---|---|---|
| Astralym | — | ×40 | ×405 | ×5 | 45% |
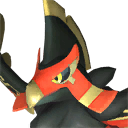 Faleris Faleris | Fire | ×27 | ×110 | ×8 | 15% |
 Orserk Orserk | Dragon / Electric | ×25 | ×110 | ×10 | 15% |
 Grizzbolt Grizzbolt | Electric | ×12 | ×100 | ×13 | 10% |
 Lyleen Lyleen | Grass | ×25 | ×100 | ×10 | 12% |
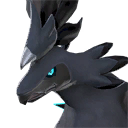 Shadowbeak Shadowbeak | Dark | ×28 | ×100 | ×12 | 25% |
 Selyne Selyne | Dark / Neutral | ×54 | ×93 | ×9 | 20% |
 Shaolong Shaolong | Dragon / Water | ×50 | ×88 | ×12 | 20% |
 Bastigor Bastigor | Ice | ×62 | ×75 | ×10 | 18% |
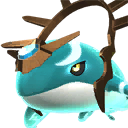 Panthalus Panthalus | Water | ×42 | No rematch | — | — |
The pattern to take from that table: the first fights are HP checks and the rematches are damage checks. Bastigor has the toughest opening fight at ×62 HP but one of the softer rematches, while Grizzbolt is a pushover on the first pass at ×12 and then turns into the hardest damage race in the tower set. If a rematch is stonewalling you, more attack rarely fixes it — the 10-25% damage-taken figures mean the fix is a properly condensed Pal, not a bigger gun. Every tower is pinned on the interactive map if you are still working out where they are.
The Three Hard Fights With Real Numbers
Three of the hard rematches are the ones players actually get stuck on, and all three are level 80 fights sitting between half a million and 570,000 HP. Auri and Shaolong is the gatekeeper — two of the three only open up once it falls — and Victor and Shadowbeak instead asks you to clear its normal version first. There is no shortcut past the requirement list: turn up with an uncondensed Pal and the fight times out rather than kills you.
| Hard-mode fight | Level | HP | Unlock | Full guide |
|---|---|---|---|---|
| Victor & Shadowbeak | 80 | 570,000 | Clear it on Normal first | Victor and Shadowbeak guide |
| Saya & Selyne | 80 | 567,300 | Defeat Auri and Shaolong | Saya and Selyne guide |
| Axel & Orserk | 80 | 514,800 | Defeat Auri and Shaolong | Axel and Orserk guide |
Do Axel and Orserk first. It is the lowest HP pool of the three and its escorts share the boss's Electric weakness, so a single Ground attacker clears the whole arena — the other two make you cover more than one element. All three want the same shopping list before you start: a level 80 Pal, +20 Pal Soul upgrades across HP, attack and defense, trust 7 or higher, four-star condensed and awakened. Ranking up and condensing is the step that actually unblocks these, not a weapon upgrade.
 All Five Raid Bosses
Raids are the heaviest encounters in the game and the only ones you summon yourself, at one of the 16 Summoning Altars scattered around the map. Each is built from a Slab — four fragments crafted into a summoning item — and four of the five have an Ultra version at level 80 that turns the same fight into an endurance test. The multipliers below are the highest numbers anywhere in Palworld, and again they scale each Pal's own stats rather than a shared baseline.
| Raid boss | Element | Summon level | HP | Damage | Ultra HP | Ultra damage | Ultra damage you land |
|---|---|---|---|---|---|---|---|
| Xenolord | Dark / Dragon | 65 | ×280 | ×5 | ×420 | ×13 | 9% |
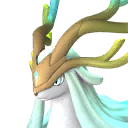 Hartalis Hartalis | Neutral | 70 | ×180 | ×4 | ×320 | ×13 | 20% |
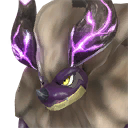 Blazamut Ryu Blazamut Ryu | Dragon / Fire | 55 | ×140 | ×2 | ×500 | ×8 | 9% |
| Bellanoir Libero | Dark | 45 | ×120 | ×2 | ×420 | ×10 | 9% |
 Bellanoir Bellanoir | Dark | — | ×120 | ×1.5 | No Ultra | — | — |
Start at Bellanoir Libero and work down the list — level 45 with only ×2 damage is the gentlest introduction to raid mechanics, and the slab economy works the same way for every one of them. Blazamut Ryu Ultra carries the single biggest HP multiplier in the game at ×500, but Xenolord Ultra is the harder fight: ×13 damage combined with armor that lets through only about 9% of yours. The fastest route to any slab is the hard Pal Expeditions, where the right two regions each pay a guaranteed fragment per run — two rotations and you have a slab without swinging at anything.
There is one more raid-adjacent target worth knowing about: beating the Highly Modified Pals yields the Modified Pal's Contaminated Core, one of the keys to the sealed chamber under the World Tree. That is the thread most players never pull.
 The 90 Alpha Pals
Alphas are the open-world field bosses, 90 of them, and they run from level 11 all the way to 79. They are also the most misread fight in the game: a standard Alpha does not get bonus HP. It fights at its normal health pool and instead takes only 24% of your damage — roughly four times tougher than the same Pal in the wild, without a single extra hit point. A handful of the early ones are softer at 48%, which is why the low-level Alphas feel like a different category of fight entirely.
| Alpha | Level | Element | What makes it hard |
|---|---|---|---|
| Celesdir Noct | 79 | Dark | Joint highest-level Alpha in the game |
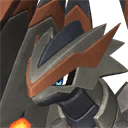 Aegidron Aegidron | 79 | Dragon / Ground | Joint highest level, and a dual typing that resists most single-element teams |
 Mycora Mycora | 78 | Grass | Level 78 with the standard 24% damage-taken wall |
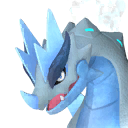 Moldron Cryst Moldron Cryst | 78 | Ice / Ground | Ice/Ground pairing leaves few clean counters |
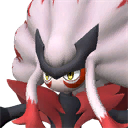 Renjishi Renjishi | 78 | Fire | Highest-level Fire Alpha |
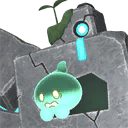 Dualith Dualith | 75 | Ground / Grass | Appears at two separate levels, 55 and 75 |
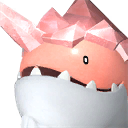 Whalaska Ignis Whalaska Ignis | 74 | Ice / Fire | Ice and Fire on the same Pal at level 74 |
 Neptilius Neptilius | 60 | Water | Legendary: ×3.74 HP, the biggest Alpha HP multiplier in the game |
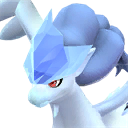 Frostallion Frostallion | 60 | Ice | Legendary: ×2.73 HP, and only 18% of your damage lands |
 Jetragon Jetragon | 70 | Dragon | Legendary: ×2.67 HP, and the fastest mount in the game once caught |
Work the list bottom-up by level rather than by name. The five legendary Alphas — Neptilius, Frostallion, Frostallion Noct, Jetragon and Paladius — are the ones worth catching rather than killing, because they double as your best mounts and raid attackers. Four of them also cut the damage you land to 18% on top of their HP multiplier; Neptilius stays at 24% but carries the heaviest health pool of the group. Everything else on the 90 is a hunt with a reward table, and the Alpha hunting route orders them so you are never fighting something ten levels above you by accident. Locations for all of them are on the interactive map.
 170 Dungeon Entrances and 18 Sealed Realms
Palworld's underground splits in two. Caverns are repeatable dungeons whose entrances rotate around each region, every one ending in a boss room with a shot at Technology Books — including the Ancient ones. Sealed Realms are 18 fixed shrines, each sealing a single powerful Pal, and they pay out Ancient Civilization Parts. There are 10 named caverns in total — the full dungeon list has each one's spawn pool, boss lineup and chest loot side by side.
| Region | Dungeon entrances | Jump to the map |
|---|---|---|
| Grasslands | 48 | 48 Grasslands entrances |
| Forest | 30 | 30 Forest entrances |
| Viking ruins | 30 | 30 Viking ruins entrances |
| Desert | 15 | 15 Desert entrances |
| Snowfields | 15 | 15 Snowfields entrances |
| Mount Obsidian | 15 | 15 Mount Obsidian entrances |
| Sakurajima | 15 | 15 Sakurajima entrances |
| Sunreach Isle | 1 | The Sunreach Isle entrance |
| Yakushima | 1 | The Yakushima entrance |
The Grasslands concentration is the useful bit: 48 entrances in the starter region means the cheapest cavern loop in the game is also the one nearest your first base, and it never runs dry because the mouths rotate. Late-game runs are a different calculation — Sunreach Isle and Yakushima have a single entrance each, so you go there for what is inside rather than for volume. Every named cavern has its own breakdown of spawns, boss pool and chest loot, starting with the Feybreak Cavern guide and Sunreach Skies.
 The Collectible Sweeps Almost Nobody Finishes
This is the quiet half of the endgame, and it is where the permanent power actually lives. Effigies and lotuses upgrade you rather than a Pal, which means they carry across every fight on this page and never get replaced by a better drop. The counts below are what is actually out there on the map — the Lifmunk ladder alone runs 15 ranks and costs 100 effigies to max, and there are 13 separate upgrade tracks feeding off the effigy pile.
| Sweep | On the map | Why bother | Map view |
|---|---|---|---|
 Stat Lotuses Stat Lotuses | 866 | Permanent player stat increases — the biggest single pile of anything collectible | All 866 stat lotuses |
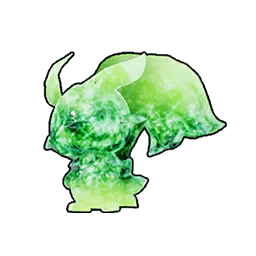 Pal Effigies Pal Effigies | 360 + 47 in the World Tree | 13 upgrade tracks, including the 15-rank capture power ladder | All 360 effigies |
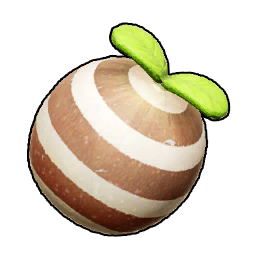 Skill Fruit Skill Fruit | 47 trees — 35 plus 12 in the World Tree | Teach skills your Pals will never learn on their own — see every skill fruit | All 35 skill fruit trees |
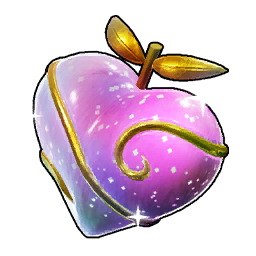 Kinship Fruit Kinship Fruit | 22 | Raises trust, which several late fights quietly require | All 22 Kinship Fruit |
| Oil Fields | 185 | The rigs behind bulk Coralum Ore and Dog Coins | All 185 oil field points |
| Elemental-Sealed Chests | 109 | Locked until you turn up with the matching element | All 109 sealed chests |
| Enemy Camps | 58 | Faction camps with chest loot and a Gold payout per clear | All 58 enemy camps |
| Grade 4 Pal Egg Nests | 26 | The rarest egg tier out in the world | Open the interactive map |
If you only sweep one of these, sweep the lotuses. At 866 pins they are everywhere, they need no fight to collect, and the stat gains are permanent in a way that a better weapon is not. Effigies are the second call because the capture power ladder makes every subsequent Alpha and legendary catch cheaper — the full effigy track breakdown has the exact costs per rank. Kinship Fruit is the sleeper at only 22 pins: trust level 7 is a hard requirement on the hard-mode tower fights, and raising trust is slow without them.
 Farms Worth Running at Level 60+
Past level 60 your bottleneck stops being levels and becomes materials, schematics and Pal Souls. These are the farms that actually move those needles, and the useful thing about them is how little overlap there is — each one owns a resource nothing else drops in quantity, so you pick by what you are short of rather than by what pays best overall.
| What you need | Best source | The number | Guide |
|---|---|---|---|
| Coralum Ore | Crates on the large oil rig | 15-20 per crate | How to Get Coralum Ore: Locations and Uses |
| Legendary weapon & armor schematics | Rank 2 salvage wrecks | 6 schematic lines running to Legendary | Palworld Salvaging Guide |
 Dog Coins Dog Coins | Junk hauls while fishing the Feybreak and Sunreach Isle | 18-22 per haul | Palworld Fishing Guide |
| Applied Handbooks | Rank 2 wrecks, or 300 Dog Coins each at the Medal Shop | All 12 in the wreck pool | All Handbooks and the Best Pals to Use Them On |
| Ancient Technology Points | Tower boss clears, plus Ancient Technical Manuals from rank 1 wrecks | 1-3 manuals per pull | Full Technology Tree |
 Giant Pal Souls Giant Pal Souls | Rank 2 salvage wrecks | 1 per pull | How to Rank Up Pals |
| Raid Slab fragments | Hard Pal Expeditions in the right two regions | Guaranteed one per run | Pal Expeditions and Rewards |
| Radiant Gems | Element-specific sources across all 9 elements | 9 element variants | How to Farm Radiant Gems |
| Gold | Hunting  Mimog Mimog | 8,500-11,000 coins per drop | How to Farm Gold Fast: Best Money Making Methods |
The single highest-leverage entry there is the expedition line. Slab fragments are guaranteed from the two hard expeditions of the right region, which means the entire raid tier — the biggest fights in the game — is unlocked by sending Pals away and doing something else. Set those running before you go do anything on this page. The second-best habit is carrying salvage magnets everywhere: rank 2 wrecks are the only source that pays Legendary schematics, Applied Handbooks and Giant Pal Souls from the same pull.
The Arena, and What to Do When You Run Out
The Arena is the endgame's structured ladder: seven ranks from Bronze through Silver, Gold, Platinum, Diamond and Master up to Legend, each with a first-clear reward table and a smaller repeat table. It is the cleanest test of whether your team actually works, because you cannot out-gear it with a better rifle — the Pals do the fighting. If your roster clears Legend, your roster will clear anything else on this page.
When the fights genuinely run out, the game still has three long tails left:
- The Paldeck. 288 Pals, and 41,616 breeding combinations means a lot of them are faster to hatch than to hunt — the breeding calculator finds the parents.
- Condensing. Four-star condensing and Pal Souls turn a good Pal into a hard-mode-capable one, which is the actual wall on the level 80 rematches.
- The tech tree. 588 technologies, and the Ancient ones only open as tower clears pay out — see the full technology tree for what is still locked.
The Short Answer
If you have just finished the story: sweep the 866 stat lotuses and the effigy tracks first, then clear the ten towers on normal for Ancient Technology Points. Send hard Pal Expeditions out on a loop for Slab fragments and work the four summonable raids from Bellanoir Libero up to Xenolord. Condense and soul-max one attacker to four stars with trust 7, then take the hard-mode rematches in order — Axel and Orserk at 514,800 HP first, Victor and Shadowbeak at 570,000 last. The 90 Alphas and the 170 dungeon entrances fill every gap in between.
Related Guides
Where to go next, by what you are chasing:
- How to Beat Hard Mode Axel and Orserk
- How to Beat Hard Mode Saya and Selyne
- How to Beat Hard Mode Victor and Shadowbeak
- How to Get Xenolord: Slab Locations and Raid Fight
- How to Get Bellanoir Libero: Slab Locations and Raid Fight
- Alpha Pal Hunting Route: Every Field Boss by Level
- How to Rank Up Pals: Condenser, Ripe Starfruit, and Handbooks
- Best Team Comps: Boss Killer, Explorer, and Farming Teams
- Best Legendary Schematics and How to Get Them
- Palworld Salvaging Guide: How to Salvage and Best Loot
- All Tower Bosses and Battle Multipliers
- All Raid Bosses and Battle Multipliers
- List of All Dungeons: Caverns and Sealed Realms
- Palworld interactive map: every node, chest and spawn
- All Palworld guides