How to Beat Hard Mode Victor and Shadowbeak
Hard Mode Victor and Shadowbeak is a level 80 Dark tower boss with 570,000 HP. Here's the Dragon team that melts it, the gear and food to bring, every attack in its rotation, and the drops it pays out.

Victor and Shadowbeak is the last tower fight in Palworld, and Hard Mode turns it into a genuine endurance test — a level 80 Dark-element boss sitting on 570,000 HP with a clone mechanic that wastes your damage if you fall for it. This guide covers the boss card, the team that beats it, the gear and food worth bringing, every attack in its rotation and what it drops.
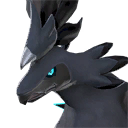 Victor and Shadowbeak (Hard) at a Glance
Everything that decides your loadout, in one place. The important line is the weakness: Shadowbeak is Dark, and Dark takes extra damage from Dragon, so the entire fight is built around fielding Dragon attackers and surviving long enough to use them.
| Hard Mode | |
|---|---|
| Boss | Victor & Shadowbeak |
| Element | Dark |
| Weak to | Dragon |
| Level | 80 |
| HP | 570,000 |
| Unlock | Clear the fight on Normal Mode first |
| Paldeck | #189 |
 What It Drops
Shadowbeak is one of the better endgame payouts in the game, and every one of these lands at 100% except the manual — you are not gambling on the reward, only on whether you can finish the fight. The Large Pal Souls and Dark Radiant Gems are the pull for most players, since both gate progression you cannot buy your way past.
| Drop | Chance | What it's for |
|---|---|---|
| Large Pal Soul | 100% | Condensing and ranking up your best Pals |
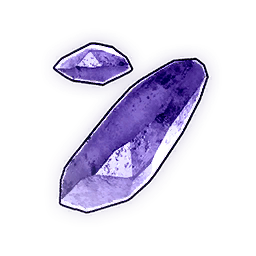 Dark Radiant Gem Dark Radiant Gem | 100% | Awakening Dark Pals |
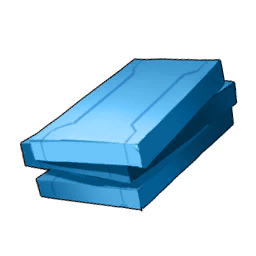 Plasteel Plasteel | 100% | Late-game crafting material |
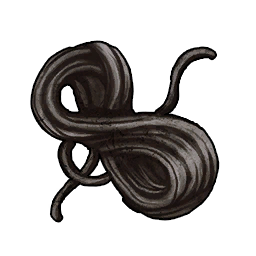 Carbon Fiber Carbon Fiber | 100% | Late-game crafting material |
 Innovative Technical Manual Innovative Technical Manual | 10% | Technology points without levelling |
 The Team That Beats It
Dragon is the whole answer. Dark takes roughly one and a half times damage from Dragon moves, and against a 570,000 HP pool that multiplier is the difference between a clean kill and running out of time. Field your highest-attack Dragon Pals and make sure the moves are Dragon too — the element on the Pal does not matter if it is swinging a Neutral attack, so check the moveset on each Pal's page before you commit.
Fire is the sensible backup if your Dragon roster is thin, and a mount you can reposition on matters more than a marginal attack stat here, because most of the damage you take is avoidable. Pick your attackers from the combat tier list and check each one's best moveset — every Pal page lists its highest-DPS set with the maths already done.
| Bring | Why |
|---|---|
| A Dragon attacker with Dragon moves | The weakness multiplier is the only reason this fight is finishable |
| A second Dragon or Fire attacker | Cover for cooldowns — burst windows are short |
| A fast flying mount | Repositioning out of the AoE is most of your survivability |
| A healer or shield partner skill | The clone phase punishes standing still |
| Spare spheres | Not for the boss — for anything you meet on the way in |
Every Attack in the Rotation
Shadowbeak's kit is a mix of ranged Dark projectiles and heavy area attacks. The pattern worth learning is that the big hits telegraph — the damage that kills you is almost always the AoE you stood in, not the chip damage. Full details for each move, including power and cooldown, are on the active skills list.
| Attack | What it does |
|---|---|
| Divine Disaster / Divine Disaster II | Its heaviest hit — leave the marked ground immediately |
| Dark Laser | Sustained beam; break line of sight or strafe wide |
| Nightmare Ball | Tracking projectile — keep moving rather than blocking |
| Shadow Burst | Close-range burst; do not melee through it |
| Spirit Flame | Lingering ground damage — reposition, do not tank it |
| Dark Ball / Air Cannon | Chip damage between the big casts |
Strategy That Actually Changes the Fight
Ignore the clone. The fight spawns a duplicate, and damage poured into it is damage that never touches the boss's health bar. Identify the real target early and commit to it — this single mistake is why most attempts run out of time rather than dying. Never stand in the marked ground. Almost every death here is avoidable AoE damage. Treat repositioning as a damage cooldown, not an interruption to it. Stack your buffs before you enter, not during. Food buffs and partner-skill boosts applied inside the arena cost you burst window. Walk in already buffed. Bring the resistance you need, not the highest defense number. Late-game body armour tops out at 840 defense on the Cold-Resistant Ancient Armor line, and the equip effect matters as much as the number — see the armour-by-tech-level guide for what is craftable at your point.