How to Beat Hard Mode Auri and Shaolong: Team and Drops
Hard Mode Auri and Shaolong is a level 80 Dragon/Water rematch with 501,600 HP that only takes 20% of your damage. Here's the Ice and Electric teams that answer it, the gear and food to bring, every attack in Shaolong's kit, and the Legendary Beam Launcher Schematic it drops.
Auri and Shaolong on Hard Mode is the last rematch on the tower ladder, a level 80 Dragon/Water fight with 501,600 HP that soaks 80% of everything you throw at it and floods the arena partway through. This guide covers the boss card, the three elements that actually hurt it, the Ice and Electric teams that finish it inside the clock, the gear and food worth packing, every attack in its rotation, and the Legendary Beam Launcher Schematic on the reward table.
 Auri and Shaolong (Hard) at a Glance
This one is a clean duel — no escorts, no adds, no clone tricks. Just you, a boss with a five-minute timer, and the only real complication being the flooding phase in the back half. The unlock is the standard one for the ladder: put Auri and Shaolong down on Normal Mode first, and the rematch door opens at the same tower.
| Hard Mode | |
|---|---|
| Boss | Auri & Shaolong |
| Element | Dragon / Water |
| Weak to | Ice, Electric, Grass |
| Level | 80 |
| HP | 501,600 |
| Time limit | 5 minutes |
| Unlock | Beat Auri and Shaolong on Normal Mode |
| Other enemies | None — the boss fights alone |
| First-clear reward |  Auri Hat Auri Hat |
| Paldeck | #192 |
How Much Harder the Rematch Really Is
Tower bosses are ordinary Pals wearing multipliers, and the rematch rewrites all four of them. The health bar grows by less than a factor of two, which sounds mild — but the damage-taken column drops from full to a fifth, and that is the number that decides whether you beat the clock. Multiply the two together and the rematch is roughly nine times the health bar of the first battle, on the same five-minute timer. Its own hits go from harmless to lethal in the same step: ×0.9 damage becomes ×12, which is more than thirteen times the punch, and the cooldown multiplier barely slows it down.
| Multiplier | First battle | Hard Mode |
|---|---|---|
| HP | ×50 | ×88 |
| Damage dealt | ×0.9 | ×12 |
| Damage taken | ×1.0 | ×0.2 |
| Cooldown | ×2.0 | ×2.5 |
| Effective health | ×50 | ×440 |
That ×440 puts Auri and Shaolong sixth out of eight on the rematch ladder for how long the fight drags — easier going than Zoe and Grizzbolt at ×1,000 or Axel and Orserk at ×733, and only a little longer than Victor and Shadowbeak at ×400. If you have already cleared a couple of the late towers, your existing team is close enough; the full ladder with every multiplier sits on the tower boss list.
What Auri and Shaolong Drop
The Auri Hat is guaranteed the first time you clear the rematch, so the opening run is never a waste — though at 20 defense and 60 HP it is a cosmetic, not an upgrade, and belongs in your wardrobe rather than on your head during a fight. The reason to keep queueing is the schematic at 10%, and the lotuses: all five large ones drop here, and they are the gate on the permanent stat elixirs, which makes this tower one of the better repeat farms in the endgame.
| Drop | Chance | What it's for |
|---|---|---|
| Auri Hat | Guaranteed on 1st clear | 20 defense, 60 HP — a collection piece |
 Beam Launcher Schematic Beam Launcher Schematic | 10% | Unlocks the Legendary Beam Launcher at the Ancient Workbench |
 Life Lotus (L) Life Lotus (L) | Repeat drop | Vital Elixir — permanent max HP |
 Power Lotus (L) Power Lotus (L) | Repeat drop | Might Elixir — permanent attack |
 Stamina Lotus (L) Stamina Lotus (L) | Repeat drop | Stamina Elixir — permanent stamina |
 Carrying Lotus (L) Carrying Lotus (L) | Repeat drop | Burden Elixir — permanent carry weight |
 Speed Lotus (L) Speed Lotus (L) | Repeat drop | Speed Elixir — permanent work speed |
 Training Crystal Training Crystal | Repeat drop | Raises a Pal's level by one, no grinding |
The Legendary Beam Launcher Schematic
The Beam Launcher unlocks in the tech tree at level 80 for 5 points, and the legendary schematic pushes the craftable version from 14,000 attack to 16,800 — a 20% jump — while quadrupling durability from 3,500 to 14,000. That durability line matters more than it looks: the base version wears out fast enough that you feel it inside a single tower run. Read the attack figure against other launchers only; it is not on the same scale as a rifle's, which is why the Plasma Rifle looks small at 1,860 next to it.
| Version | Rarity | Attack | Durability |
|---|---|---|---|
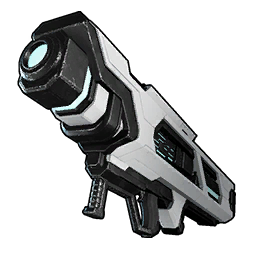 Beam Launcher Beam Launcher | Common | 14,000 | 3,500 |
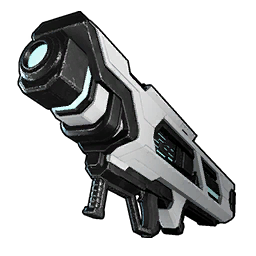 Beam Launcher Beam Launcher | Rare | 15,400 | 7,000 |
| Beam Launcher | Legendary | 16,800 | 14,000 |
This tower is not the only place the legendary schematic turns up — it also appears in Treasure Map chests, World Tree chests and World Tree fishing spots, all of which are covered on the legendary weapon schematic locations page. If you keep pulling lower-rarity copies instead, five of the same tier combine into the next one up at the Drafting Table; the legendary schematics guide ranks what is actually worth chasing first.
 Which Elements Actually Hurt It
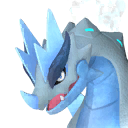
Shaolong is Dragon and Water, and that dual typing opens three doors rather than the usual one. Ice punishes the Dragon half, while Electric and Grass both punish the Water half — so three different rosters can clear this fight. Ice is the safest of the three, because nothing in Shaolong's kit is Fire and therefore nothing it casts is super effective back into your attackers. Electric is the highest-value pick if you own Orserk, with one caveat covered below. You can check any pairing yourself on the element matchup chart and counter finder.
| Element | Hits which half | Heaviest move available | Risk from Shaolong's kit |
|---|---|---|---|
| Ice | Dragon | 700 power (Ice Laser, Absolute Frost) | None — it casts no Fire |
| Electric | Water | 600 power (Polykeraunos, Thunderstorm) | Two Ground moves hit Electric Pals hard |
| Grass | Water | 800 power (Spore Burst) | None — it casts no Fire |
That last column is the thing most teams walk into blind. Shaolong's rotation includes Rocky Impact and Sand Twister, both Ground, and Ground is the element that beats Electric — so an Orserk-led party is taking bonus damage on two of the boss's casts. It is survivable with a shield partner and healing, but if you keep dying rather than timing out, that is why, and swapping to the Ice team removes the problem outright. Grass is the forgotten option: Silvance's Spore Burst is the single highest-power Grass move in the game at 800, and Grass eats no return damage here either.
 Best Pals for the Fight
Shaolong flies and it is fast — its own ride sprint of 2,800 makes it the second-quickest mount in the game behind Jetragon, and that is exactly why melee attackers and slow projectiles whiff so often here. Prioritise ranged damage. Moldron Cryst is the standout because both of its heavy hitters, Ice Spit and Ice Laser, are exclusive ranged Ice skills no other Pal learns, so it needs no help landing damage on a flying target.
| Pal | Element | Why it works here |
|---|---|---|
| Moldron Cryst | Ice / Ground | Two exclusive ranged Ice skills at 600 and 700 power — best hit rate against a flying boss |
| Orserk | Dragon / Electric | Exclusive 600-power Polykeraunos plus a partner skill that buffs you as you shoot |
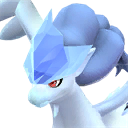 Frostallion Frostallion | Ice | 140 Shot Attack, four 700-power moves, and a flying mount to escape the whirlpool |
 Icelyn Icelyn | Ice | Partner skill adds up to +50% Ranged Attack for a player-damage build |
 Grizzbolt Grizzbolt | Electric | The recruited Zoe-and-Grizzbolt pairing brings a minigun, but can't be bred for passives |
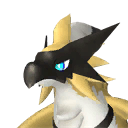 Beakon Beakon | Electric | Electric damage on a flyer — the mobility slot on an Electric team |
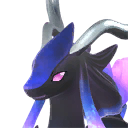 Celesdir Noct Celesdir Noct | Dark | Partner skill scales to +80% Ranged Attack, the biggest flat boost in the party |
 Silvegis Silvegis | Dragon | Aegis Shield buffs your shield — the reason Electric teams survive the Ground casts |
Electric Team
Orserk carries this build twice over: its own Electric damage hits the Water half of the boss, and its partner skill stacks attack and defense on your active Pal every time one of your bullets lands. Beakon rides second as the flyer you switch to when the floor disappears, and the three support Pals never leave the party slots — Univolt for extra Electric output, Celesdir Noct for the +80% ranged boost, and Silvegis to keep a shield on you through the Ground attacks.
| Slot | Pal | Job |
|---|---|---|
| Active | Orserk | Main damage and the stacking attack/defense buff |
| Active swap | Beakon | Electric flyer for the flooding phase |
| Support | 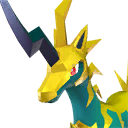 Univolt Univolt | More Electric damage into the Water half |
| Support | Celesdir Noct | Up to +80% Ranged Attack |
| Support | Silvegis | Shield buff — the answer to Rocky Impact and Sand Twister |
Ice Team
Same shape, safer element. Moldron Cryst leads on its two exclusive Ice skills, and Frostallion takes the swap slot — at 1,800 ride sprint it is the seventh-fastest mount in the game and a full 50% quicker than Beakon, which is the difference between clearing the whirlpool and getting dragged into it. Keep Orserk in a support slot even here, because its bullet-stacking buff works from the bench. Azurobe Cryst and Beakon Cryst are the fallbacks if you have no Frostallion, though neither buff comes close.
| Slot | Pal | Job |
|---|---|---|
| Active | Moldron Cryst | Exclusive Ice Spit and Ice Laser, both ranged |
| Active swap | Frostallion | Fastest flyer of the Ice options, plus an Ice and Freeze buff |
| Support | Orserk | Stacking attack and defense buff from the party |
| Support | Celesdir Noct | Up to +80% Ranged Attack |
| Support | Silvegis | Shield buff for the heavy casts |
Player-Damage Team
If your Pals keep missing a boss that never stands still, stop relying on them and do the damage yourself. Frostallion leads because its partner skill infuses your own shots with Ice without needing an active skill to fire first, and the rest of the party exists purely to inflate your numbers: Solenne, Cryolinx Terra, Vanwyrm Cryst and Moldron Cryst stack Ice damage and weak-point bonuses on top of each other. This is the build where headshots on Auri decide the run.
| Slot | Pal | Job |
|---|---|---|
| Active | Frostallion | Ice infusion on your weapon plus attack, and a flying escape |
| Support |  Solenne Solenne | Player-side damage buff |
| Support | 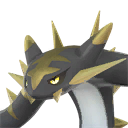 Cryolinx Terra Cryolinx Terra | Explosive Strength — more player damage |
| Support | 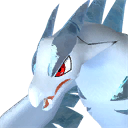 Vanwyrm Cryst Vanwyrm Cryst | Ice support from the party slot |
| Support | Moldron Cryst | Ice Overload stacks with the rest |
Minimum Requirements Before You Walk In
Hard Mode rarely kills a decent party — it runs the clock out on them, which costs five minutes and teaches you nothing. Every line below is fixable before you enter, and a team that ticks all of them out-damages the timer here even without a perfect element match. If a Pal falls short, condensing the one you already own is faster than levelling a replacement, and raising its trust costs a few peaches rather than a few hours.
| Requirement | Target | Why |
|---|---|---|
| Pal level | 80 | The level gap eats damage on top of the ×0.2 reduction |
| Condensed | 4 star | The biggest single stat swing on a Pal you already have |
| Pal Souls | HP +20, Attack +20, Defense +20 | Fed by  Large Pal Souls from the towers themselves Large Pal Souls from the towers themselves |
| Trust level | 7 or higher | Unlocks the top of the partner-skill payoff |
| Awakened | Yes | Farm the radiant gems before the run, not during |
| Weapon | Legendary for your level | See the best weapons by tech level |
| Armor | Full Ancient set or better | See the best armor by tech level |
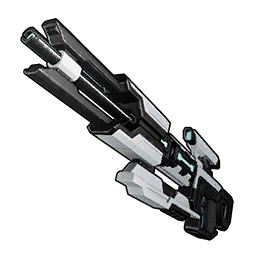 Weapons to Bring
The Drone Launcher is the one people leave at home, and it is arguably the most important gun in the bag: its drones attack on their own, so it maxes out Orserk's stacking buff without you doing anything except staying in range. The Plasma Rifle is the best all-round gun in the game and carries the raw damage, the Megaboost Gun exists to pump your active Pal's attack and defense between casts, and the Mechanical Bow is for applying status effects rather than damage — remember its 20,000 is a bow number, not comparable to a rifle's.
| Weapon | Unlocks at | Attack | Durability | Why bring it |
|---|---|---|---|---|
| Plasma Rifle | Lv 78 | 1,860 | 25,000 | Highest sustained damage of any rifle |
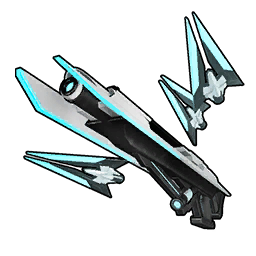 Drone Launcher Drone Launcher | Lv 77 | 200 | 6,500 | Autonomous drones stack Orserk's buff to the cap |
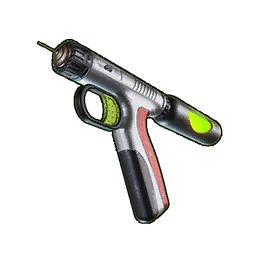 Megaboost Gun Megaboost Gun | Lv 63 | 250 | 400 | Shoot your own Pal to raise its attack and defense |
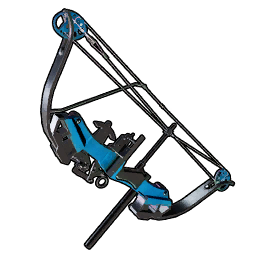 Mechanical Bow Mechanical Bow | Lv 67 | 20,000 | 2,000 | Status application — bow attack is a separate scale |
 Accessories and Armor
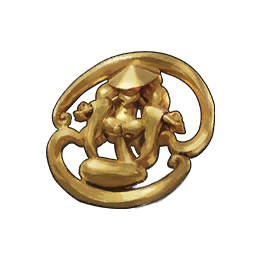
The rule is simple: wear accessories that boost whichever element you built the team around. The Dogen Emblem is the default pick because it raises your attack *and* your Pal's, so it never sits idle regardless of comp. The two rings are the situational stars here — the Fenglope Lux Ring cuts incoming Water damage while boosting Electric, and the Cryolinx Ring cuts incoming Dragon damage while boosting Ice. Shaolong deals both of those elements, so either ring is offense and defense in one slot. The full pool is on the accessories list.
| Accessory | Best on | What it does |
|---|---|---|
| Dogen Emblem | Any team | Greatly raises your Attack and your Pal's |
 Cryolinx Ring Cryolinx Ring | Ice team | Cuts Dragon damage taken, boosts your Pal's Ice damage |
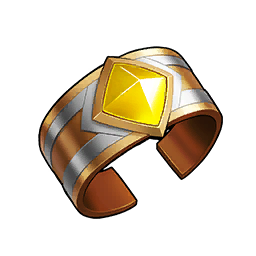 Fenglope Lux Ring Fenglope Lux Ring | Electric team | Cuts Water damage taken, boosts your Pal's Electric damage |
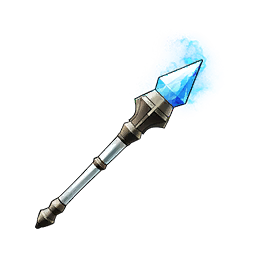 Ice Emperor's Baton Ice Emperor's Baton | Ice team | Raises your Pal's Attack and its Ice damage |
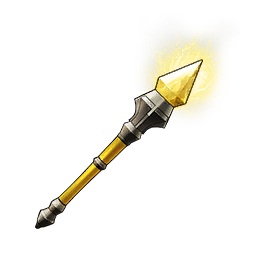 Lord of Lightning's Baton Lord of Lightning's Baton | Electric team | Raises your Pal's Attack and its Electric damage |
 Frostallion's Talisman Frostallion's Talisman | Ice team | Raises your Pal's Defense and its Ice damage |
 Orserk's Talisman Orserk's Talisman | Electric team | Raises your Pal's Defense and its Electric damage |
For armor, the Ancient set is the floor rather than the goal. Lightweight Ancient Armor is the body piece to beat at 840 defense and 2,400 HP, the Ancient Helm adds 500 defense and 1,200 HP with a Dragon damage reduction that is directly relevant to this boss, and the Ancient Shield carries 2,200 shield that repairs itself between casts. If you have a higher-tier craft unlocked, wear that instead — this is a fight where the incoming damage is measured in multiples of twelve.
| Gear | HP | Defense | Added effect |
|---|---|---|---|
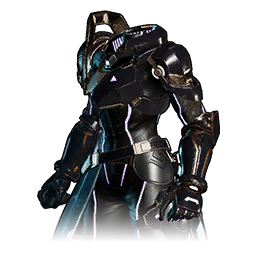 Lightweight Ancient Armor Lightweight Ancient Armor | 2,400 | 840 | Cold Resistance Lv2, Heat Resistance Lv2, carry weight Lv4 |
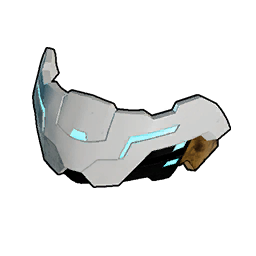 Ancient Helm Ancient Helm | 1,200 | 500 | Neutral and Dragon damage reduction Lv1 |
 Ancient Shield Ancient Shield | — | 2,200 shield | Self-repairs after a spell without damage |
 Food and Healing to Pack
Because the tower runs on a timer, damage food beats defense food every time — a defensive buff that keeps you alive for a run you time out on has achieved nothing. Mammorest Curry is the strongest of the two at +25% attack, with Broncherry Fried Noodles a step behind at +20%, and both also refill a big chunk of hunger and sanity so you are not eating mid-fight. Eat before you walk through the door — the buff timer running while you fight is fine, the arena seconds spent opening your inventory are not.
| Consumable | Effect | Notes |
|---|---|---|
| Mammorest Curry | +25% Attack | Best damage buff available — also restores 418 hunger |
 Broncherry Fried Noodles Broncherry Fried Noodles | +20% Attack | The cheaper stand-in, restores 321 hunger |
 Advanced Recovery Meds Advanced Recovery Meds | Rapid HP restore | The heal to carry when a cast connects |
 High Quality Recovery Meds High Quality Recovery Meds | Strong HP restore | Cheaper backup — bring several |
 Revival Potion Revival Potion | Revives a downed Pal | Losing your attacker mid-run is what ends attempts |
Every Attack in Shaolong's Hard Mode Kit
Ten moves, three elements, and every one of the heavy hitters sits on a 24 or 30 second cooldown — which the ×2.5 cooldown multiplier stretches further, giving you real gaps to attack in. Hydra Charge, Azure Dracoflare and Celestial Vortex are Shaolong's exclusives, learned by no other Pal in the game. The two Ground entries are the ones to note if you brought Electric attackers, and Celestial Vortex is the cast that ends most runs. Power and cooldown for anything else it throws are on the active skills list.
| Attack | Element | Power | Cooldown | What it does |
|---|---|---|---|---|
| Celestial Vortex | Water | 700 | 30s | The whirlpool that closes the flooding phase — it pulls you in |
| Meteorain | Dragon | 700 | 30s | Rains meteorites and shockwaves across the arena |
| Azure Dracoflare | Dragon | 600 | 30s | Sweeping Dragon flame breath, scorches a wide arc |
| Geyser Gush | Water | 600 | 30s | Water pillars erupt under and around you |
| Dragon Meteor | Dragon | 600 | 30s | Volley of small tracking meteors |
| Rocky Impact | Ground | 600 | 30s | Ground slam — extra damage on Electric Pals |
| Hydra Charge | Water | 500 | 24s | Water-cloaked charge in a straight line — step aside |
| Aqua Surge | Water | 500 | 24s | Waves converge on you and explode upward |
| Sand Twister | Ground | 500 | 24s | Roaming sand tornadoes — extra damage on Electric Pals |
| Hydro Slicer | Water | 350 | 16s | Frontal water blast that erupts again after a delay |
Strategy That Changes the Fight
Four things decide this rematch, and none of them are gear. Read them in order — the whirlpool is what kills, the freeze is what makes your damage land, and the last two are where the extra damage comes from.
Get Clear of the Whirlpool
Celestial Vortex closes the flooding phase with a huge whirlpool that drags everything toward the centre, and at 700 power on a ×12 multiplier it is the single most dangerous thing in the fight. Two outs work: mount a flying Pal and get to a corner, or put a pillar between you and the pull. Recall your active Pal while it happens, or resummon it behind a pillar — a Pal sucked into the middle goes down, and reviving mid-fight costs you the burst window you were saving.
Freeze It to Stop the Chase
Shaolong spends the fight airborne and moving at mount-tier speed, which is why so many attempts end on the clock with the boss at a third health. Freeze fixes that. Any Ice attacker, or a Freeze-applying partner skill like Frostallion's, can lock it in place long enough for a full burst — and a stationary boss is also a boss whose weak point you can actually hit. The status effects guide covers which elements apply what.
Aim at Auri's Head
Auri rides on top, and headshots on the rider carry the weak-point multiplier. On a player-damage build that is where the majority of your total output comes from, so the freeze window and the headshot window are the same window — freeze first, then aim high. If you are running a Pal-damage comp it matters less, but it is still free damage while your active Pal's skills are on cooldown.
Stack Orserk's Buff With Drones
Orserk's partner skill grows the attack and defense of your active Pal every time one of your bullets connects, and it stacks up to 30 times. Firing a rifle by hand gets you there slowly; the Drone Launcher deploys up to nine drones that attack on their own and get you to the cap in seconds. The catch is range — drift too far from Auri and Shaolong and the drones stop firing, the stacks expire, and your damage quietly halves. Stay in the fight, even while dodging.
Where the Tower Is
The rematch happens at the same door as the first battle, so if you have already beaten Auri and Shaolong on Normal you have the fast travel point. Every tower on the main landmass is pinned on the tower boss layer of our interactive map — eight pins — with three more in the World Tree region on the World Tree view. Shaolong itself is catchable in the wild too: 63 spawn spots, all in the World Tree region, plotted on Shaolong's spawn map.
Summary
Bring Ice or Electric, keep everything ranged, freeze the boss so your damage lands, and treat the flooding phase as a movement puzzle rather than a damage race. The health bar is big but not the biggest on the ladder — at ×440 effective health this is a mid-pack rematch, and a level 80, 4-star, awakened team with a legendary weapon clears it inside the five minutes. The payoff is a 10% roll at a schematic that makes the Beam Launcher hit for 16,800, plus a steady supply of large lotuses for your permanent stat elixirs.
Related Guides
The rest of the hard rematch ladder:
Getting your team and loot in order: