List of All 104 Large Egg Pals and Where to Farm Them
Every Pal that hatches from a Large Egg in Palworld: all 104 across nine egg colours, the nest pool with the best odds for each one, and the 13 that no nest will ever drop.

A Large egg is the middle shell in Palworld, and the band it covers is the biggest one in the game — 104 Pals sit in it, more than the standard size and the Huge size hold on their own. This guide lists every Large Egg Pal by colour, the nest pool with the best per-nest odds for each one, the 13 that no nest will ever hand you, and the routes that fill a bag with 25-weight shells fastest.
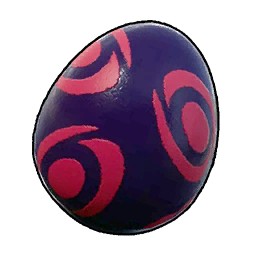 Large Eggs: Quick Facts
Two things decide what shell a Pal turns up in: the colour follows its primary element, and the size follows its rarity. Large is the rarity 5 to 7 slice, which is where the game keeps most of its element variants and most of its genuinely useful base workers. All fourteen wild Pal Egg nest pools can roll one, which is not true of the Huge shell.
| Detail | Value |
|---|---|
| Egg colours | 9 — Dark, Scorching, Frozen, Verdant, Damp, Rocky, Electric, Common, Dragon |
| Pals in the band | 104 — 91 from wild nests, 13 from breeding or a boss fight |
| Rarity needed | 5 to 7 — rarity 4 and below comes in a standard shell, rarity 8 and above in a Huge one |
| Element variants | 33 of the 104 are the B-form of another Pal |
| Item type | Material — Pal Egg |
| Weight | 25 each — 2.5× a standard egg, half a Huge one |
| Stack size | 1 — every egg eats a full inventory slot |
| Gold value | 10 |
| Nests on the map | 1,816 across 14 pools; all 14 can roll a Large egg |
| Best pool | Mount Obsidian Grade 2 — 65.36% per nest |
| Biggest haul | Feybreak Grade 1 — 496 nests at 51.20% |
| Nest respawn | 180 minutes (3 hours) |
| Hatching | Any incubator; the basic  Egg Incubator unlocks at Technology level 10 Egg Incubator unlocks at Technology level 10 |
Strip every nest on the map in one impossible sweep and roughly 689 of the 1,816 eggs come back Large — better than one in three, and four times what the Huge shell returns. That makes Large the size you actually plan routes around, because a good pool hands you one on most nests instead of making you pray.
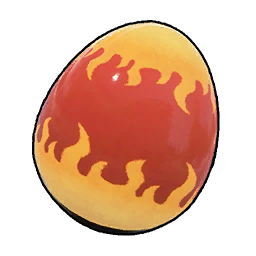 All 9 Large Egg Colours at a Glance
Dark runs away with this one. Nearly a quarter of the whole band is Dark, mostly because the World Tree and Feybreak pools are stuffed with gothic Pals, while Dragon has three occupants and two of them barely register in any nest. The Best Nest Pool column is the chance a single nest in that pool holds a Large egg of that colour, alpha rolls included.
| Large Egg | Pals | From Nests | Breeding or Boss Only | Best Nest Pool |
|---|---|---|---|---|
| Large Dark Egg | 24 | 22 | 2 | Feybreak G1 · 21.31% |
| Large Scorching Egg | 17 | 15 | 2 | Mount Obsidian G2 · 53.33% |
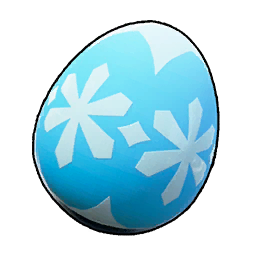 Large Frozen Egg Large Frozen Egg | 14 | 13 | 1 | Grasslands G4 · 32.98% |
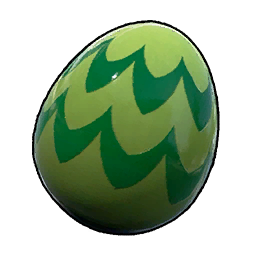 Large Verdant Egg Large Verdant Egg | 13 | 11 | 2 | Sunreach Isle · 12.50% |
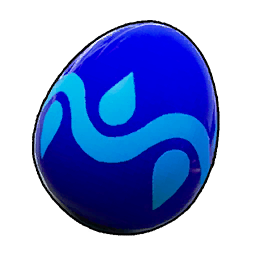 Large Damp Egg Large Damp Egg | 9 | 7 | 2 | Feybreak G2 · 16.05% |
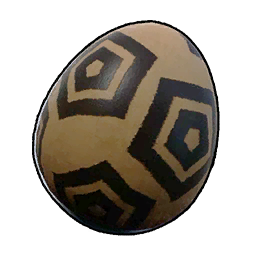 Large Rocky Egg Large Rocky Egg | 9 | 7 | 2 | Desert · 16.00% |
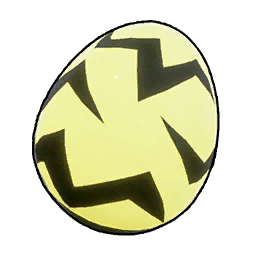 Large Electric Egg Large Electric Egg | 8 | 7 | 1 | Snowfields G1 · 6.30% |
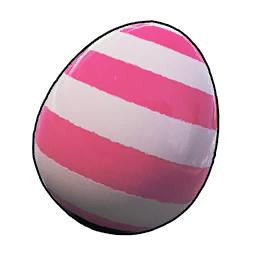 Large Common Egg Large Common Egg | 7 | 7 | 0 | Sakurajima · 6.45% |
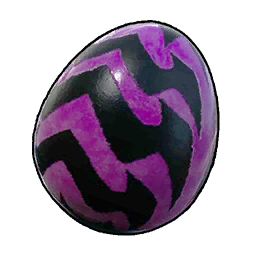 Large Dragon Egg Large Dragon Egg | 3 | 2 | 1 | Grasslands G2 · 0.95% |
Mount Obsidian's grade 2 nests are the standout number on the page — more than half of them hold a Large Scorching Egg, which is the highest single-colour rate anywhere in the game. The Large Common Egg is the friendliest set instead of the fastest: all seven of its Pals roll out of wild nests, so it is the only colour you can finish without touching the Palworld Breeding Calculator or a boss fight.
There is a tenth shell the table does not cover. World Tree nests run a second roll after picking the Pal, and on 10% of them the egg comes out as an Ominous shell instead of the Pal's element colour — so 18 of these 104 can also arrive as a Large Ominous Egg. Solenne, Renjishi and Mimog are all in that group; the full pool is in the Ominous Egg locations guide.
 All 104 Large Egg Pals
Here is the full roster, split by shell colour and sorted in Paldex order. The Best Nest Source column gives the pool with the highest chance that a single nest is holding that specific Pal, so a 3.44% row means roughly one nest in thirty. Rarity is the value that put the Pal in the Large band in the first place — 7 is one step from a Huge shell, 5 is one step from a standard one.
Large Dark Egg (24 Pals)
Twenty-four Pals, the largest colour in the band and the one with the widest spread of sources. Seven of them come out of the World Tree pool at 2.31% each, including Solenne, whose Handiwork 8 is tied for the best work rank in the entire Large band. Another seven sit in Feybreak grade 1, and with 496 nests out there that is the pool to farm if you want volume rather than a specific name.
| Pal | No. | Element | Rarity | Best Nest Source |
|---|---|---|---|---|
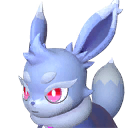 Nox Nox | #24 | Dark | 6 | Grasslands G1 · 2.14% |
 Wispaw Wispaw | #50 | Dark | 5 | World Tree G1 · 2.31% |
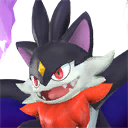 Tombat Tombat | #52 | Dark | 5 | Grasslands G1 · 2.14% |
 Felbat Felbat | #65 | Dark | 6 | Feybreak G1 · 3.44% |
 Lovander Lovander | #69 | Dark | 5 | Grasslands G2 · 1.44% |
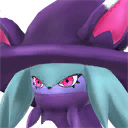 Katress Katress | #79 | Dark | 6 | Snowfields G1 · 3.06% |
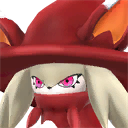 Katress Ignis Katress Ignis | #79B | Dark / Fire | 6 | Grasslands G3 · 3.43% |
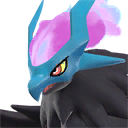 Helzephyr Helzephyr | #80 | Dark | 7 | Feybreak G1 · 2.75% |
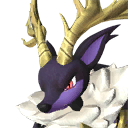 Incineram Noct Incineram Noct | #91B | Dark | 5 | Breeding or boss only |
 Ghangler Ghangler | #97 | Dark / Water | 5 | Feybreak G1 · 3.44% |
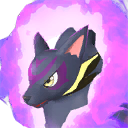 Kitsun Noct Kitsun Noct | #111B | Dark | 6 | Feybreak G1 · 2.75% |
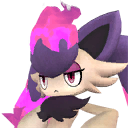 Majex Majex | #115 | Dark / Fire | 5 | World Tree G1 · 2.31% |
 Maraith Maraith | #117 | Dark | 6 | Snowfields G1 · 6.11% |
 Gildra Gildra | #120 | Dark / Ground | 5 | Desert G1 · 1.16% |
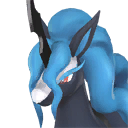 Starryon Starryon | #130 | Dark | 7 | Feybreak G1 · 2.75% |
 Sootseer Sootseer | #135 | Dark / Fire | 7 | Feybreak G1 · 3.44% |
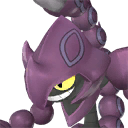 Prixter Prixter | #141 | Dark / Ground | 5 | Snowfields G2 · 2.30% |
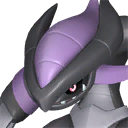 Xenovader Xenovader | #145 | Dark | 7 | Breeding or boss only |
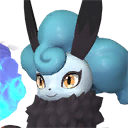 Nitemary Nitemary | #148 | Dark | 6 | Feybreak G1 · 2.75% |
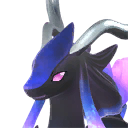 Celesdir Noct Celesdir Noct | #157B | Dark | 7 | World Tree G1 · 2.31% |
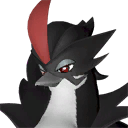 Roujay Roujay | #177 | Dark | 5 | World Tree G1 · 2.31% |
 Venusa Venusa | #178 | Dark | 5 | World Tree G1 · 2.31% |
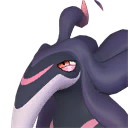 Loomen Loomen | #180 | Dark / Fire | 5 | World Tree G1 · 2.31% |
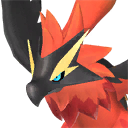
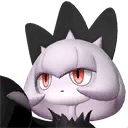 Solenne Solenne | #182 | Dark / Neutral | 7 | World Tree G1 · 2.31% |
Large Scorching Egg (17 Pals)
Mount Obsidian is the Scorching answer and it is not subtle — six of these seventeen have their best odds in the volcano's grade 2 pool, where Moldron alone shows up on 14.49% of nests. That is the single highest per-nest chance for any Large Egg Pal in the game. Sakurajima covers three more, and the two you cannot get from a nest at all are Pyrin Noct and Ghangler Ignis.
| Pal | No. | Element | Rarity | Best Nest Source |
|---|---|---|---|---|
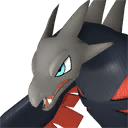 Vanwyrm Vanwyrm | #64 | Fire / Dark | 5 | Mount Obsidian G1 · 6.28% |
 Wixen Wixen | #78 | Fire | 6 | Mount Obsidian G2 · 7.25% |
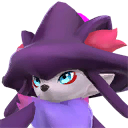 Wixen Noct Wixen Noct | #78B | Fire / Dark | 6 | Sakurajima G1 · 3.09% |
 Bushi Bushi | #85 | Fire | 7 | Snowfields G1 · 6.11% |
 Bushi Noct Bushi Noct | #85B | Fire / Dark | 7 | Sakurajima G1 · 0.88% |
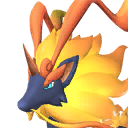 Pyrin Pyrin | #93 | Fire | 6 | Mount Obsidian G2 · 7.25% |
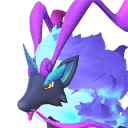 Pyrin Noct Pyrin Noct | #93B | Fire / Dark | 7 | Breeding or boss only |
 Ghangler Ignis Ghangler Ignis | #97B | Fire / Water | 6 | Breeding or boss only |
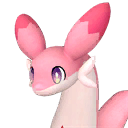 Chillet Ignis Chillet Ignis | #103B | Fire / Dragon | 5 | Sakurajima G1 · 1.77% |
| Ragnahawk | #104 | Fire | 7 | Mount Obsidian G2 · 7.25% |
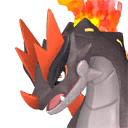 Moldron Moldron | #105 | Fire / Ground | 7 | Mount Obsidian G2 · 14.49% |
 Kitsun Kitsun | #111 | Fire | 6 | Grasslands G4 · 3.97% |
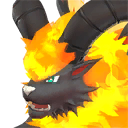 Blazehowl Blazehowl | #112 | Fire | 7 | Mount Obsidian G2 · 7.25% |
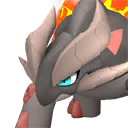 Reptyro Reptyro | #129 | Fire / Ground | 6 | Mount Obsidian G2 · 7.25% |
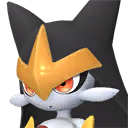 Flaracle Flaracle | #174 | Fire | 7 | Sunreach Isle G1 · 6.07% |
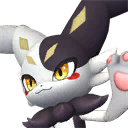 Dupin Dupin | #176 | Fire | 7 | World Tree G1 · 2.31% |
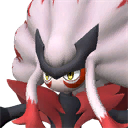 Renjishi Renjishi | #183 | Fire | 7 | World Tree G1 · 2.31% |
Large Frozen Egg (14 Pals)
Eight of these fourteen are the B-form of another Pal, nearly all of them Cryst variants, which is why four of the colour trace back to the World Tree rather than to a snowfield. Foxcicle and Sibelyx share the best odds in the colour at 13.25% from Grasslands grade 4 nests, and there are only 26 of those nests on the map — a very short route with a very high hit rate.
| Pal | No. | Element | Rarity | Best Nest Source |
|---|---|---|---|---|
 Sweepa Sweepa | #36 | Ice | 6 | Snowfields G1 · 6.11% |
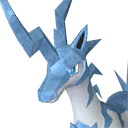 Univolt Cryst Univolt Cryst | #54B | Ice | 6 | World Tree G1 · 2.31% |
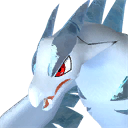 Vanwyrm Cryst Vanwyrm Cryst | #64B | Ice / Dark | 5 | Grasslands G4 · 5.30% |
 Polapup Polapup | #72 | Ice / Water | 5 | Snowfields G1 · 6.11% |
 Polapup Terra Polapup Terra | #72B | Ice / Ground | 6 | Breeding or boss only |
 Elgrove Cryst Elgrove Cryst | #81B | Ice | 7 | World Tree G1 · 2.31% |
 Foxcicle Foxcicle | #95 | Ice | 5 | Grasslands G4 · 13.25% |
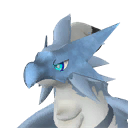 Beakon Cryst Beakon Cryst | #96B | Ice | 7 | World Tree G1 · 2.31% |
 Rayhound Cryst Rayhound Cryst | #98B | Ice | 6 | World Tree G1 · 2.31% |
 Sibelyx Sibelyx | #116 | Ice | 7 | Grasslands G4 · 13.25% |
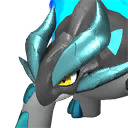 Reptyro Cryst Reptyro Cryst | #129B | Ice / Ground | 7 | Snowfields G2 · 1.72% |
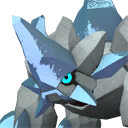 Pierdon Cryst Pierdon Cryst | #131B | Ice | 7 | Feybreak G1 · 1.72% |
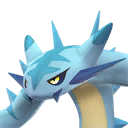 Cryolinx Cryolinx | #132 | Ice | 7 | Snowfields G2 · 2.87% |
 Wumpo Wumpo | #134 | Ice | 7 | Snowfields G2 · 2.87% |
Large Verdant Egg (13 Pals)
Verdant is the most scattered colour here: eleven nest Pals spread over eight different pools, so there is no single farming spot that covers it. Sunreach Isle is the closest thing, holding Leafan and Tropicaw at 6.07% each. Carnibora and Nitemary Botan never appear in a nest, so those two are breeding jobs.
| Pal | No. | Element | Rarity | Best Nest Source |
|---|---|---|---|---|
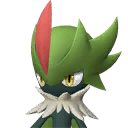 Robinquill Robinquill | #76 | Grass | 5 | Grasslands G3 · 1.37% |
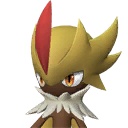 Robinquill Terra Robinquill Terra | #76B | Grass / Ground | 6 | Desert G1 · 1.16% |
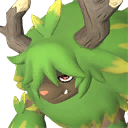 Elgrove Elgrove | #81 | Grass | 6 | Grasslands G2 · 0.58% |
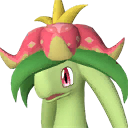 Dinossom Dinossom | #84 | Grass / Dragon | 6 | Grasslands G1 · 2.14% |
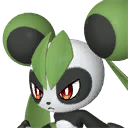 Leafan Leafan | #90 | Grass | 7 | Sunreach Isle G1 · 6.07% |
 Mossanda Mossanda | #102 | Grass | 6 | Grasslands G3 · 1.37% |
 Palumba Palumba | #106 | Grass | 6 | Desert G1 · 1.16% |
 Shroomer Noct Shroomer Noct | #118B | Grass / Dark | 5 | Sakurajima G1 · 4.42% |
 Carnibora Carnibora | #136 | Grass | 6 | Breeding or boss only |
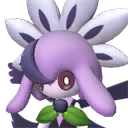 Prunelia Prunelia | #147 | Grass / Dark | 5 | Feybreak G1 · 3.44% |
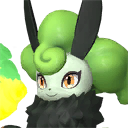 Nitemary Botan Nitemary Botan | #148B | Grass | 7 | Breeding or boss only |
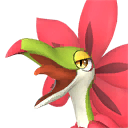 Tropicaw Tropicaw | #173 | Grass | 5 | Sunreach Isle G1 · 6.07% |
 Mycora Mycora | #179 | Grass | 6 | World Tree G1 · 2.31% |
Large Damp Egg (9 Pals)
Damp is a small list with an odd shape — five of the nine are element variants, and the best single roll belongs to Gloopie Primo at 12.35% in Feybreak's grade 2 nests. Those same nests are the game's alpha factory, so a Gloopie Primo pull there has a good chance of hatching as a boss version. Azurobe and Skutlass are the awkward ones at 0.58% apiece.
| Pal | No. | Element | Rarity | Best Nest Source |
|---|---|---|---|---|
 Croajiro Noct Croajiro Noct | #9B | Water / Dark | 5 | Feybreak G1 · 3.44% |
 Penking Penking | #18 | Water / Ice | 6 | Snowfields G1 · 3.06% |
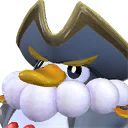 Penking Lux Penking Lux | #18B | Water / Electric | 7 | Breeding or boss only |
 Azurobe Azurobe | #41 | Water / Dragon | 7 | Grasslands G2 · 0.58% |
 Gloopie Gloopie | #48 | Water / Dark | 5 | Feybreak G1 · 3.44% |
 Gloopie Primo Gloopie Primo | #48B | Water / Neutral | 6 | Feybreak G2 · 12.35% |
 Skutlass Skutlass | #128 | Water | 5 | Grasslands G2 · 0.58% |
 Skutlass Ignis Skutlass Ignis | #128B | Water / Fire | 5 | Breeding or boss only |
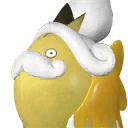 Solmora Lux Solmora Lux | #169B | Water / Electric | 5 | World Tree G1 · 2.31% |
Large Rocky Egg (9 Pals)
The Desert grade 1 pool is where three of these live, and Digtoise and Surfent Terra both sit at 5.82% there — the best Rocky odds anywhere. Gorirat Terra beats both at 11.59% but only in Mount Obsidian's grade 2 nests, which is a much longer trip. Pierdon and Eikthyrdeer Terra are nest-proof and have to be bred.
| Pal | No. | Element | Rarity | Best Nest Source |
|---|---|---|---|---|
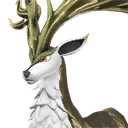 Eikthyrdeer Terra Eikthyrdeer Terra | #32B | Ground | 6 | Breeding or boss only |
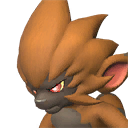 Gorirat Terra Gorirat Terra | #74B | Ground | 5 | Mount Obsidian G2 · 11.59% |
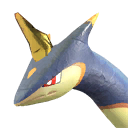 Surfent Terra Surfent Terra | #75B | Ground | 5 | Desert G1 · 5.82% |
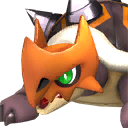 Digtoise Digtoise | #107 | Ground | 5 | Desert G1 · 5.82% |
 Dumud Gild Dumud Gild | #109B | Ground / Water | 5 | Snowfields G2 · 2.30% |
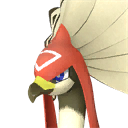 Dazemu Dazemu | #123 | Ground | 5 | Sakurajima G1 · 4.42% |
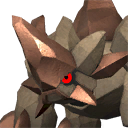 Pierdon Pierdon | #131 | Ground | 6 | Breeding or boss only |
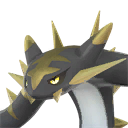 Cryolinx Terra Cryolinx Terra | #132B | Ground | 7 | Feybreak G1 · 2.75% |
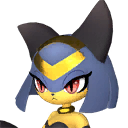 Sekhmet Sekhmet | #140 | Ground | 5 | Desert G1 · 1.16% |
Large Electric Egg (8 Pals)
Eight Pals across seven different pools, which makes Electric the most annoying colour to complete — no two of them share a best source except by coincidence. Rayhound at 6.11% from Snowfields grade 1 is the easiest, and Dynamoff at 6.07% from Sunreach Isle is the best of the late-game entries. Only Prixter Lux is locked out of nests entirely.
| Pal | No. | Element | Rarity | Best Nest Source |
|---|---|---|---|---|
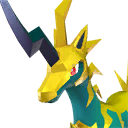 Univolt Univolt | #54 | Electric | 5 | Grasslands G2 · 1.44% |
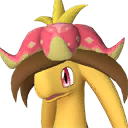 Dinossom Lux Dinossom Lux | #84B | Electric / Dragon | 7 | Desert G1 · 1.16% |
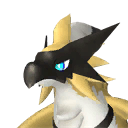 Beakon Beakon | #96 | Electric | 6 | Grasslands G3 · 3.43% |
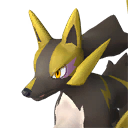 Rayhound Rayhound | #98 | Electric | 5 | Snowfields G1 · 6.11% |
 Mossanda Lux Mossanda Lux | #102B | Electric | 7 | World Tree G1 · 2.31% |
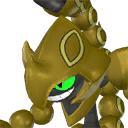 Prixter Lux Prixter Lux | #141B | Electric / Ground | 6 | Breeding or boss only |
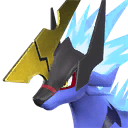 Azurmane Azurmane | #161 | Electric | 7 | Feybreak G1 · 2.75% |
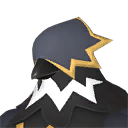 Dynamoff Dynamoff | #172 | Electric | 6 | Sunreach Isle G1 · 6.07% |
Large Common Egg (7 Pals)
The only colour with a clean sheet — every one of the seven comes out of a wild nest, no breeding required. Sakurajima carries two of them and Grintale leads the colour at 4.42%. Celesdir is the outlier at 0.69% from Feybreak grade 1, though with 496 nests in that pool the raw number of chances more than makes up for the thin rate.
| Pal | No. | Element | Rarity | Best Nest Source |
|---|---|---|---|---|
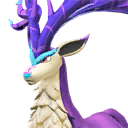 Eikthyrdeer Eikthyrdeer | #32 | Neutral | 5 | Grasslands G2 · 2.89% |
 Grintale Grintale | #70 | Neutral | 6 | Sakurajima G1 · 4.42% |
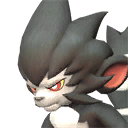 Gorirat Gorirat | #74 | Neutral | 5 | Grasslands G3 · 3.43% |
 Lunaris Lunaris | #82 | Neutral | 6 | Mount Obsidian G1 · 3.14% |
 Mimog Mimog | #144 | Neutral | 7 | World Tree G1 · 2.31% |
 Dogen Dogen | #155 | Neutral | 6 | Sakurajima G1 · 1.77% |
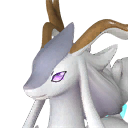 Celesdir Celesdir | #157 | Neutral | 6 | Feybreak G1 · 0.69% |
Large Dragon Egg (3 Pals)
Three Pals, and this is the thinnest colour in the band by a distance. Elphidran and Quivern both sit under 1% in their best pools, so nest farming them is a genuinely bad plan compared to breeding. Eidrolon does not appear in a nest at all, which is a shame given it is the fourth-fastest mount in the game.
| Pal | No. | Element | Rarity | Best Nest Source |
|---|---|---|---|---|
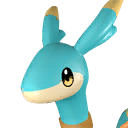 Elphidran Elphidran | #63 | Dragon | 7 | Grasslands G2 · 0.87% |
 Quivern Quivern | #124 | Dragon | 7 | Snowfields G1 · 0.61% |
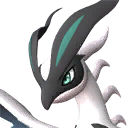 Eidrolon Eidrolon | #171 | Dragon / Dark | 7 | Breeding or boss only |
Best Nests to Farm Large Eggs
Every one of the fourteen nest pools can produce a Large egg, but the rate swings from two in three down to one in eight. Mount Obsidian grade 2 is the best per-nest pool in the game and its list is short enough that you roughly know what you are getting. Feybreak grade 1 is the one that actually fills your bag: 496 nests at better than a coin flip each, which is more Large eggs from a single pool than the next three pools put together.
| Nest Pool | Nests | Large Egg Chance | Large Eggs per Full Clear | Large Pals in Pool | Most Likely Roll |
|---|---|---|---|---|---|
| Mount Obsidian G2 | 70 | 65.36% | 46 | 7 | Moldron · 14.49% |
| Snowfields G2 | 161 | 52.73% | 85 | 16 | Foxcicle · 5.74% |
| Feybreak G1 | 496 | 51.20% | 254 | 20 | Prunelia · 3.44% |
| Grasslands G4 | 26 | 46.09% | 12 | 6 | Foxcicle · 13.25% |
| Snowfields G1 | 110 | 45.23% | 50 | 10 | Rayhound · 6.11% |
| World Tree G1 | 30 | 42.86% | 13 | 18 | Dupin · 2.31% |
| Sakurajima G1 | 36 | 38.55% | 14 | 14 | Dazemu · 4.42% |
| Feybreak G2 | 71 | 38.27% | 27 | 21 | Gloopie Primo · 12.35% |
| Desert G1 | 122 | 33.62% | 41 | 16 | Digtoise · 5.82% |
| Sunreach Isle G1 | 39 | 31.25% | 12 | 5 | Dynamoff · 6.07% |
| Mount Obsidian G1 | 240 | 24.54% | 59 | 7 | Vanwyrm · 6.28% |
| Grasslands G3 | 146 | 20.86% | 30 | 8 | Katress Ignis · 3.43% |
| Grasslands G2 | 144 | 20.26% | 29 | 13 | Sweepa · 2.89% |
| Grasslands G1 | 125 | 13.38% | 17 | 6 | Dinossom · 2.14% |
Read the two right-hand columns together before you commit to a route. Mount Obsidian grade 2 has the best rate but only seven Large Pals in the pool, so it is a targeting tool — you go there for Moldron, Ragnahawk or Blazehowl and you get them quickly. World Tree grade 1 has eighteen Large Pals but only 30 nests, so it is the opposite: enormous variety, tiny throughput. Feybreak grade 1 is the compromise and the reason most egg routes end up on that island.
The 13 Large Egg Pals No Nest Will Give You
Thirteen Pals in the band never appear in a wild nest pool, so no amount of route farming produces their egg. Eleven of them have exactly one exclusive parent pair, which makes them fast if you already own the parents and impossible if you do not. All but two can still be caught out in the world — it is only the egg that is locked away.
| Pal | Large Egg | How to Get It | Rarity |
|---|---|---|---|
| Penking Lux | Large Damp Egg | Breed Penking × Rayhound | 7 |
| Eikthyrdeer Terra | Large Rocky Egg | Breed Eikthyrdeer × Hangyu | 6 |
| Polapup Terra | Large Frozen Egg | Breed Polapup × Surfent Terra | 6 |
| Incineram Noct | Large Dark Egg | Breed Incineram × Maraith | 5 |
| Pyrin Noct | Large Scorching Egg | Breed Pyrin × Katress | 7 |
| Ghangler Ignis | Large Scorching Egg | Breed Ghangler × Sootseer | 6 |
| Skutlass Ignis | Large Damp Egg | Breed Skutlass × Gobfin Ignis | 5 |
| Pierdon | Large Rocky Egg | No exclusive pair — 182 different parent combos land on it | 6 |
| Carnibora | Large Verdant Egg | No exclusive pair — 240 different parent combos land on it | 6 |
| Prixter Lux | Large Electric Egg | Breed Prixter × Helzephyr Lux | 6 |
| Xenovader | Large Dark Egg | Two Xenovaders and nothing else; wild ones only turn up in Snowfields base invasions at Lv 23-26 | 7 |
| Nitemary Botan | Large Verdant Egg | Breed Nitemary × Petallia | 7 |
| Eidrolon | Large Dragon Egg | Sunreach Skies dungeon only, plus one level-69 alpha | 7 |
Xenovader is the genuinely hard one. It has no overworld spawn at all, no nest entry, and the only pairing that produces it is Xenovader with Xenovader — so the first one has to come from a Snowfields base invasion. Eidrolon is nearly as awkward, living in the Sunreach Skies dungeon and as a single level-69 alpha, but at least a caught pair breeds true afterwards. Carnibora and Pierdon are the easy end: no exclusive pair means hundreds of parent combos land on them by accident.
Best Large Egg Pals to Hatch
Rarity 5 to 7 is where the base-building Pals live, so a Large egg is far more likely to change how your camp runs than a Huge one is. Three Pals in the band hit work rank 8, which is the ceiling here, and one of them turns up on a nest every 43 tries. Mount rankings below compare against every ridable Pal in the game, not just this band.
| Pal | Large Egg | Why It's Worth Hatching |
|---|---|---|
| Solenne | Dark | Handiwork 8 — tied for the best work rank in the Large band, and it clears crafting queues faster than anything you will find at this rarity. World Tree G1 · 2.31% |
| Renjishi | Scorching | Kindling 8 — one Renjishi runs a furnace line that would otherwise need three Pals. World Tree G1 · 2.31% |
| Celesdir Noct | Dark | Lumbering 8, the best wood rank in the band, and a Ground mount with 260 stamina on top. World Tree G1 · 2.31% |
| Eidrolon | Dragon | The fourth-fastest mount in Palworld at 2,750 sprint, plus Transporting 6. Breeding only, and worth the trouble |
| Moldron | Scorching | Kindling 5 with 270 mount stamina, and the most common Large roll in the game at 14.49% from Mount Obsidian G2 |
| Digtoise | Rocky | Drill Crusher turns it into a mobile ore harvester — the classic early answer to a stone and ore shortage. Desert G1 · 5.82% |
| Ragnahawk | Scorching | A flying mount at 1,300 sprint that also brings Kindling 5, so it earns its slot in camp between flights. Mount Obsidian G2 · 7.25% |
| Wumpo | Frozen | Transporting 6, tied with Eidrolon for the best hauling rank in the band, which is exactly what a base drowning in nest loot needs. Snowfields G2 · 2.87% |
| Solmora Lux | Damp | Generating Electricity 6 — it powers a full late-game base on its own. World Tree G1 · 2.31% |
| Mycora | Verdant | Planting 6 keeps a berry and wheat plantation stocked without a second farmer. World Tree G1 · 2.31% |
| Sweepa | Frozen | Cooling 4 and the King of Fluff buff, which is the whole point of the Sweepa and 4 Swee team. Snowfields G1 · 6.11% |
| Foxcicle | Frozen | 13.25% from Grasslands G4, second only to Moldron for the best odds on any Large Pal, and a Farming worker you can have well before the mid-game |
If you only chase one pool for base Pals, make it the World Tree. Five of the twelve above come out of those 30 nests, and each sits at the same flat 2.31% because that pool spreads its odds evenly across 42 Pals. It is a slow grind at 30 nests per three-hour cycle, but no other pool puts this many rank-6-plus workers in one place. Everything else on the list is a targeted trip — you go to the volcano for Moldron and Ragnahawk, the desert for Digtoise, and the Grasslands grade 4 nests for Foxcicle.
How to Hatch Large Eggs Faster
Any incubator hatches any size, so the choice is about how many eggs you can run at once and whether you want to babysit the temperature. The basic Egg Incubator holds one egg and needs a campfire or a cooler beside it to keep the shell happy; everything above it regulates its own temperature. The Large Incubator at Technology 48 is the real breakpoint, because it takes several eggs at once and draws no power at all.
| Incubator | Tech Level | Power Draw | What It Adds |
|---|---|---|---|
| Egg Incubator | 10 | None | One egg, manual temperature — 10 Paldium Fragment, 5 Cloth, 30 Stone, 2 Ancient Civilization Parts |
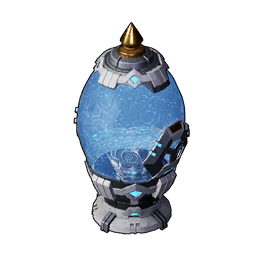 Electric Egg Incubator Electric Egg Incubator | 36 | 200 | One egg, self-regulating temperature — 50 Refined Ingot, 15 Circuit Board, 5 Ancient Civilization Parts, 2 Ancient Civilization Core |
 Large Incubator Large Incubator | 48 | None | Multiple eggs, self-regulating, no generator — 50 Pal Metal Ingot, 20 High Quality Cloth, 20 Ancient Civilization Parts, 4 Ancient Civilization Core |
 Large-Scale Electric Egg Incubator Large-Scale Electric Egg Incubator | 58 | 800 | Multiple eggs at optimal temperature — 100 Hexolite, 50 Circuit Board, 30 Ancient Civilization Parts, 20 Ancient Civilization Core |
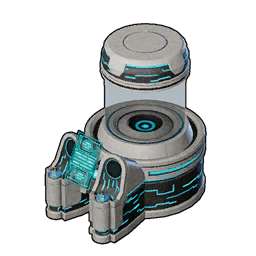 Ancient Hatchery Ancient Hatchery | 76 | 1,200 | Breeds and incubates in one box and raises rare skill inheritance — 100 Paloxite Ingot, 50 AI Core, 30 Ancient Civilization Parts, 20 Ancient Civilization Core |
The other half of the answer is the Pal Labor Research Lab. Its Egg Hatching category holds eight Incubation Acceleration projects, all feeding the same hatching-speed stat, so every one you finish shaves time off every egg in the rack. Four of them are startlingly cheap — the 15K to 150K workload set returns the same 30% as the set that costs up to 5M — so clear those first and come back for the rest when your research Pals have nothing better to do.
| Project | Speed Bonus | Research Workload |
|---|---|---|
| Incubation Acceleration Lv1 | +5% | 15K |
| Incubation Acceleration Lv2 | +10% | 30K |
| Incubation Acceleration Lv3 | +5% | 75K |
| Incubation Acceleration Lv4 | +10% | 150K |
| Incubation Acceleration Lv1 (second line) | +5% | 200K |
| Incubation Acceleration Lv2 (second line) | +10% | 500K |
| Incubation Acceleration Lv3 (second line) | +5% | 1.5M |
| Incubation Acceleration Lv4 (second line) | +10% | 5M |
World settings matter more than any of this if you are playing solo. Incubation speed is a slider in the world options, and turning it up removes the wait entirely — worth doing on a private save when you are hunting a 0.58% Pal like Azurobe and expect to crack a hundred shells.
Summary
Large eggs cover the rarity 5 to 7 band, which works out to 104 Pals across nine colours, 91 of which drop from wild nests. Mount Obsidian's grade 2 pool has the best rate at 65.36% per nest, Feybreak grade 1 has the volume at 496 nests and 51.20%, and and the World Tree's 30 nests hold the widest spread, including all three of the band's rank-8 workers. Thirteen Pals — Xenovader and Eidrolon among them — never come from a nest and have to be bred or hunted. Everything hatches in any incubator, so the only real upgrade decision is when to build the Large Incubator at Technology 48.
Related Guides
Egg guides
Farming and hatching
- Palworld Interactive Map — every nest, node and boss pinned
- How to Get the Large Incubator
- How to Get the Ancient Hatchery
- Alpha Pal Hunting Route: Every Field Boss by Level
Pals and planning