Stamina Explained: How to Increase It and Cut the Drain
How stamina works in Palworld — the 100 to 600 range from status points, both permanent-boost elixirs and where they drop, the effigy track that halves your drain, the Pals that stretch it, and why your mount's bar is a separate number entirely.

Stamina is the bar behind everything you do between fights — sprinting, dodge-rolling, jumping, climbing, swimming and hanging under a glider all pull from the same pool, and hitting zero halfway up a cliff or out over open water is how most avoidable deaths happen. This guide covers the exact numbers behind the stat, every way to raise the ceiling permanently, the upgrades that cut how fast it empties, and the separate stamina bar your mount runs on.
 Stamina at a Glance
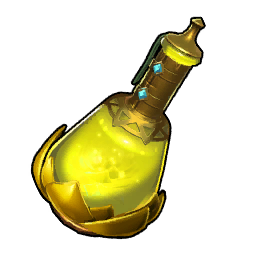
Every character starts at exactly 100 stamina and every status point you pour in adds 10, so this is a slow-moving stat compared to Health's +100 per point. The ceiling matters more than the rate: each individual stat stops at rank 50, which puts the levelling-only maximum at 600, six times where you started. Since level 80 is the cap and you only earn 79 status points across the whole run, maxing stamina eats most of your budget — which is why the drain-reduction upgrades further down usually beat buying more raw bar.
| Stamina | Value |
|---|---|
| Base at level 1 | 100 |
| Gain per status point | +10 |
| Rank cap on the stat | 50 |
| Maximum from levelling | 600 |
| Status points you earn by level 80 | 79 total, shared across all five stats |
| Actions that drain it | Sprinting, dodge-rolling, jumping, climbing, swimming, gliding |
| Shared with your mount? | No — mounts run a separate bar |
| Permanent boosts outside levelling | Stamina Remedy, Stamina Elixir |
The stat sits second in our status point priority order, behind Weight and ahead of Health, purely because traversal is what you spend most of a session doing. Ranks 0 through 25 are the ones you actually feel — going from 100 to 350 turns a cliff from a decision into a non-event.
| Points spent | Max stamina | What it changes |
|---|---|---|
| 0 | 100 | Roughly a few seconds of sprint, and most cliffs are out of reach in one go |
| 10 | 200 | Short climbs and river crossings stop needing a rest at the top |
| 25 | 350 | Comfortable glide-and-sprint chains; the sweet spot for most builds |
| 50 (rank cap) | 600 | Traversal effectively stops being a resource — but it cost 50 of your 79 points |
 How to Permanently Raise Your Stamina
Two consumables raise the stat without touching your status points, and both are among the rarest items in the game. The Stamina Remedy is the small one and the Stamina Elixir is the big one — the Remedy's own description admits it only raises the stat by a slight amount. Both are wasted on Pals: they only work on your character. Prices tell the same story as the rarity, with the Remedy valued at 120,000 gold and the Elixir at 264,000.
| Item | Rarity | Craft cost | Value | Where it turns up |
|---|---|---|---|---|
| Stamina Remedy | 3★ | 4 Stamina Lotus (S) + 1 Predator Core | 120,000 | 20% of supply drops in the Grasslands and Forest (2 at a time), and Forest dungeon elixir stands |
| Stamina Elixir | 4★ | 6 Stamina Lotus (L) + 2 Predator Core | 264,000 | 20% of supply drops in Desert, Mount Obsidian, Snowfields, Sakurajima, Feybreak and Sunreach Isle; Snowfields and Yakushima dungeon elixir stands; 200 Dog Coins at the Medal Shop |
The Medal Shop line is the one to circle. Everything else on that list is a random roll, but 200 Dog Coins buys a guaranteed Stamina Elixir, and Dog Coins accumulate from ordinary play whether you plan for them or not. If you are farming drops instead, the late-region supply drops are far better odds than the early ones — six regions roll the Elixir at 20% versus the Remedy's two.
 Farming Stamina Lotus
Crafting your own elixirs means lotuses, and the oil rigs are the reason to bother. The large flower — the one the Elixir needs — drops from ordinary oil rig crates at 20% and comes in stacks of up to 2, which is an order of magnitude better than the small flower's 4%. That inversion is worth knowing before you start farming: the harder item to obtain is the easier drop. Recycling old relics is a distant backup at well under 1% per roll, and the world nodes are the steady trickle — our map carries 866 stat lotus pins across the islands, covering every flower type.
| Source |  Stamina Lotus (S) Stamina Lotus (S) | Stamina Lotus (L) |
|---|---|---|
| Crates on the oil rigs | 4%, 1 per drop | 20%, 1 to 2 per drop |
| Crates on the large oil rig | 4%, 1 per drop | 10%, 1 to 3 per drop |
| Recycling Glistening Ancient Relics | 0.145% | 0.073% |
| Recycling Glowing Ancient Relics | 0.121% | 0.06% |
| Recycling Gorgeous Ancient Relics | 0.101% | 0.05% |
| Harvested in the world | 866 pinned lotus nodes | 866 pinned lotus nodes |
Both recipes also want Predator Cores, so a lotus stockpile alone will not get you there — plan the two farms together. Open the lotus layer on the interactive map and run a loop through whichever region you are already based in; nodes regrow, so a fixed route beats wandering.
 How to Reduce Stamina Drain
Raising the ceiling is only half the stat. The other half is spending less per second, and that side is far cheaper — it costs collectibles and party slots instead of the status points you cannot get back. Between the effigy tracks and a handful of Pals, you can roughly halve what traversal costs you without spending a single level-up point on stamina.
 The Statue of Power Tracks
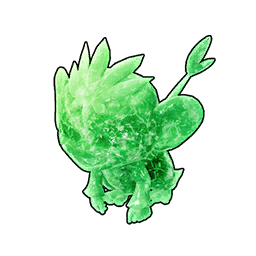
Offer effigies at a Statue of Power and four separate tracks feed straight into your stamina economy. The headline one is Stamina Reduction: 20 ranks for 20 relics, ending at 50% less drain — that is the single largest stamina upgrade available to a player, and it costs one relic per rank with no escalating curve. The three speed tracks pay indirectly but just as hard: swimming and climbing both double at max, so you cross the same water or cliff in half the time and burn roughly half the bar doing it.
| Track | Ranks | Relics needed | Max bonus | Why it matters for stamina |
|---|---|---|---|---|
| Stamina Reduction | 20 | 20 | 50% less drain | Applies to the drain itself — effectively doubles every point you own |
| Swim Speed | 20 | 20 | +100% | Half the time in the water is half the stamina spent crossing it |
| Climb Speed | 20 | 20 | +100% | Climbing bills you per second, so speed is the real climb-height upgrade |
| Glider Speed | 20 | 20 | +30% | More ground covered per glide before the bar empties |
The relics are everywhere once you start looking: 360 effigy pins sit across the main map with another 47 in the World Tree region, so 407 in total against the 80 relics those four tracks want. Turn on the effigy layer and collect on your way past — and note that every track can be reset for a single gold coin, so there is no wrong order to buy them in. The full effigy upgrade breakdown covers the other nine tracks.
 Pals That Save You Stamina
One passive skill in the entire game points at your stamina rather than a Pal's: Wellness Watcher, at −5% player stamina consumption. It is small, it stacks with the effigy track, and it costs nothing but a roll on a Pal you were already carrying — check the full passive list when you are sorting breeding results. Partner skills do more of the work. Gorirat Terra is the standout and almost nobody uses it: climbing charges you per second, so its +50% climb speed rising to +100% at five stars cuts a long cliff's stamina cost roughly in half on its own. Neptilius does the same trick for open water, and it is also the highest-stamina mount in the game — one party slot covering both sides of the problem.
| Pal | Partner skill | Scaling | What it saves |
|---|---|---|---|
| Gorirat Terra | Full-Power Gorilla | +50% → +100% climb speed | The best stamina saver on cliffs — you finish the climb before the bar cares |
 Neptilius Neptilius | Sentinel of the Great Sea | +10% → +25% swim speed | Shorter crossings, and it doubles as the top-stamina mount |
 Verdash Verdash | Grassland Gymnast | +1 jump | A second jump clears ledges you would otherwise have to climb |
 Starryon Starryon | Night Dancer | +25% jump power | Higher hops mean fewer climbs started in the first place |
 Valentail Valentail | Big Stretch | Low gravity | Longer, floatier hops for the same jump cost |
 Galeclaw Galeclaw | Galeclaw Glider | Glider modifier | High-speed gliding, and you can fire your weapon mid-air |
 Killamari Killamari | Fried Squid | Glider modifier | Gentle floating — the cheapest way to stay airborne a long time |
 Hangyu Cryst Hangyu Cryst | Winter Trapeze | Glider modifier | Slow ascension: the only glide that gains height instead of losing it |
The three glider Pals sit at the bottom of that table because their skills rewrite how your equipped glider behaves rather than touching the stamina stat directly — each one lowers what a glide costs as its partner skill levels, with Killamari the specialist for long, slow descents. Pair any of them with the best glider your tech level allows; the modifier scales off the glider you have equipped, so a Hyper Glider plus Killamari goes considerably further than the same Pal over a starter parachute.
Your Mount's Stamina Is a Different Bar
This is the one that catches people out: none of the above touches your mount. Ground and flying Pals carry their own stamina value, your status points do nothing for them, and a fully maxed 600-stamina character still gets dumped out of the sky when the flyer underneath runs dry. Mount stamina is a flat per-Pal number, and the spread is enormous — Neptilius runs 410 while Direhowl gets 70, a near six-fold gap. Twenty-one of the 115 rideable Pals sit at the baseline 100.
| Mount | Type | Stamina | Sprint speed |
|---|---|---|---|
| Neptilius | Water | 410 | 2,000 |
 Hartalis Hartalis | Ground | 400 | 1,900 |
 Paladius Paladius | Ground | 400 | 1,800 |
 Necromus Necromus | Ground | 350 | 1,900 |
 Suzaku Suzaku | Flying | 350 | 1,100 |
 Ghangler Ghangler | Water | 320 | 1,350 |
 Frostallion Frostallion | Flying | 300 | 1,800 |
 Selyne Selyne | Flying | 300 | 1,600 |
 Astegon Astegon | Flying | 300 | 1,100 |
 Jetragon Jetragon | Flying | 110 | 3,300 |
Jetragon is on that list to make the trade-off obvious. It is the fastest mount in the game by a wide margin at 3,300 sprint speed, and it carries 110 stamina to pay for it — barely above the baseline. Frostallion moves at 1,800 with nearly triple the tank, which is why it stays the better pick for long survey flights while Jetragon wins any short hop between fast travel points. On the ground the picture is cleaner: Hartalis and Necromus give you top-tier speed *and* 350 to 400 stamina, no compromise required. The full mount speed table has all 115.
 Passives That Raise Mount Stamina
Since status points are off the table for mounts, passives are the entire lever — and they are percentage-based, so they pay out biggest on Pals that already have a large bar. Eternal Engine on a 410-stamina Neptilius is worth over 300 extra stamina; the same passive on a 100-stamina starter mount adds 75. All four are explicitly rideable-only, so rolling Eternal Engine on a base worker does nothing at all. If you would rather not breed for them, the implants sold as Implant: Eternal Engine let you install the passive directly at the Pal Surgery Table.
| Passive | Effect | Rank | Implant available |
|---|---|---|---|
| Eternal Engine | Max stamina +75% | 4 | Implant: Eternal Engine |
| Infinite Stamina | Max stamina +50% | 3 | Implant: Infinite Stamina |
| Fit as a Fiddle | Max stamina +25% | 1 | Implant: Fit as a Fiddle |
| Sickly | Max stamina −25% | −1 | Negative trait — breed or implant it out |
Related Guides
Keep building the traversal kit:
- Best Stats to Level Up: Priority Order and Stat Caps
- All Pal Effigies and Player Upgrade Tracks Explained
- Best Glider in Palworld: Full Upgrade Ladder and Glider Pals
- Best Flying Mounts and the Full Saddle Upgrade Path
- Best Partner Skills and the Pals That Have Them
- How to Get the Pal Surgery Table
- Palworld Mount Speed Comparison
- Palworld Interactive Map