Heat Resistant Plasteel Armor Schematic Location and Stats
Where the Legendary Heat Resistant Plasteel Armor schematic drops in Palworld — the seven Sakurajima chest, camp, oil rig, dig and fishing routes, why no supply drop and no Pal carries it, the 400 defence stat card at Tech Lv 53, and every fast way to get 20 Flame Organ.
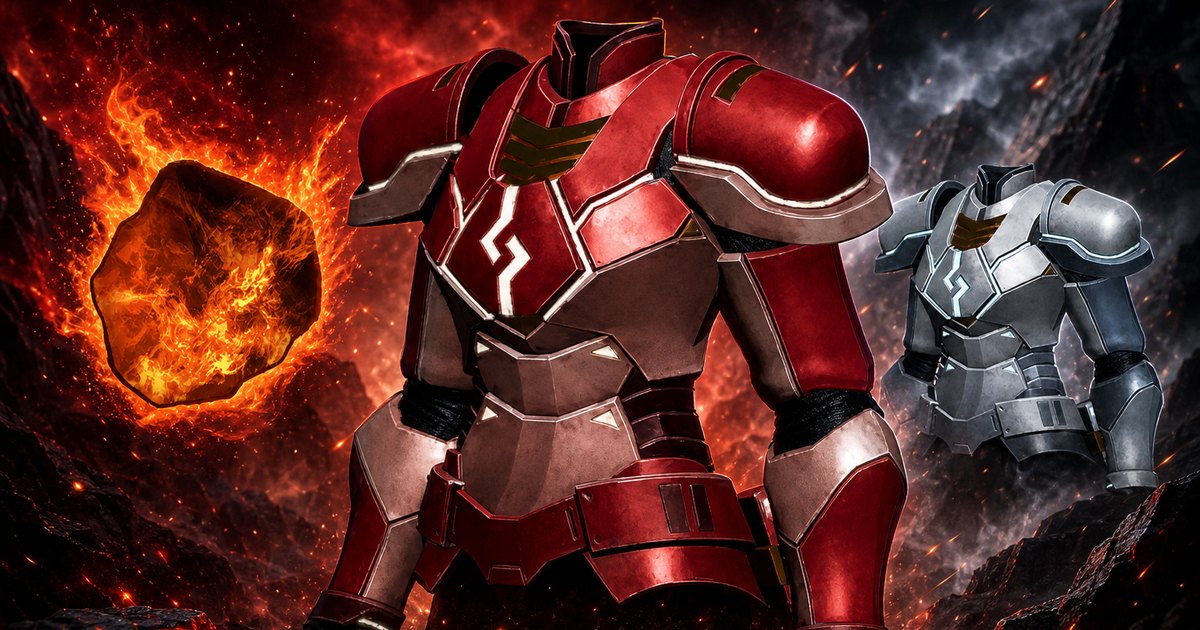
Heat Resistant Plasteel Armor unlocks at Technology Lv 53 with 400 defence, 1,300 HP and 18,000 durability, and it's the suit that carries you through Mount Obsidian and the volcanic half of Sakurajima without a single trip back to camp to swap gear. Its Legendary schematic behaves strangely compared with every other armor line, because the whole Plasteel family sits outside the supply-drop system and outside every Pal loot table — chests, camps, oil rigs, digs and fishing spots are the only ways it exists. This guide has the full stat card, all seven of those routes, the Drafting Table math, and the fastest ways to line up 20 Flame Organ before you ever start crafting.
 Heat Resistant Plasteel Armor Stats
The defence number is not where the value is. 400 defence is a mere 15 points above the plain Plasteel Armor two tech levels earlier, and the HP bonus and durability are byte-for-byte identical at 1,300 and 18,000. What you're paying the extra tech points for is the passive line — Heat 2 · Cold 1 · Fire damage reduction — against the plain body's Heat 1, Cold 1 and no elemental cut at all. Treat the +15 defence as noise and the heat rating plus the fire resistance as the whole reason to build it.
| Stat | Heat Resistant Plasteel Armor |
|---|---|
| Slot | Body armor |
| Defence | 400 |
| HP bonus | 1,300 |
| Durability | 18,000 |
| Weight | 35 |
| Resistances | Heat 2 · Cold 1 · Fire damage reduction |
| Technology level | Lv 53, 5 Technology Points |
| Earlier in the line | Plasteel Armor at Tech Lv 51 |
| Crafting station | Production Assembly Line II (unlocks at Lv 42) |
| Crafting work | 400,000 |
| Legendary schematic |  Heat Resistant Plasteel Armor Schematic 4 Heat Resistant Plasteel Armor Schematic 4 |
| Item value | 158,760 Gold |
Defence only means anything measured against other armor, so read 400 against the body slot rather than against any weapon's attack rating. On the heat ladder it sits third: 150 clear of Heat Resistant Pal Metal Armor at 250, and 200 behind Heat Resistant Hexolite Armor at 600 ten tech levels later. The under-rated number is durability — 18,000 against Pal Metal's 10,000 — and it's carried at 35 weight instead of 40. This is the tier where a heat suit stops eating your carry capacity and stops sending you home to repair.
Where the Legendary Schematic Drops
The whole situation fits in one sentence: no supply drop stocks it and no Pal drops it. Plasteel is the only armor family missing from both systems at once, so there is no percentage to quote and no repeatable boss pin to camp. What exists instead is a set of seven loot pools — six shared by every rarity in the line, and a seventh, tier 4 treasure map digs, that only opens up from Schematic 2 upward.
| Schematic | Crafts | Supply drops | Pal drop | Loot pools |
|---|---|---|---|---|
| Schematic 1 | Uncommon | None | None | 6 |
| Schematic 2 | Rare | None | None | 7 |
| Schematic 3 | Epic | None | None | 7 |
| Schematic 4 | Legendary | None | None | 7 |
There's good news buried in that table. Because all four rarities share the same pools, the Legendary is not gated behind harder content than the Uncommon — the crate that could hand you Schematic 1 is exactly the crate that could hand you Schematic 4. Compare that with the Hexolite heat armor, where the Legendary is a fractional roll off a Feybreak supply table you have to physically wait for. Here it's the same containers, over and over, with a real chance every time. Every schematic in the game also uses one rolled-scroll model in your bag, so the rarity border is the only visual tell between those four — which is why the art on this page shows the armor and its materials wherever possible.
The Seven Routes, Ranked
Six of the seven sit on Sakurajima or the Feybreak, and that's the practical headline: this is paper you collect while doing Sakurajima content, not a thing you make a dedicated trip for. Enemy camps are what you build a loop around, because a camp puts both a boss stash and ordinary camp loot in the pool — two rolls per clear — and camps come back. Chest sweeps are the volume play, oil rigs are the highest-grade pool, and the two fishing entries are the ones almost nobody checks.
| Route | Where | Map | Why it ranks here |
|---|---|---|---|
| Enemy camp boss stashes | Sakurajima | 58 enemy camps | Two rolls per clear with the loot row below, and camps respawn |
| Enemy camp loot | Sakurajima | 58 enemy camps | The ordinary pool inside the same camp — a free second chance |
| Treasure chests | Sakurajima | 68 chest pins | The densest fixed-pin route on the island |
| Crates on the oil rigs | Offshore | 185 oil field pins | Top-grade crate pool — and the same crates pay 5-300 Crude Oil |
| Treasure map digs (tier 4) | Anywhere | — | Needs a tier 4 map, and it's not in the Schematic 1 pool |
| Fishing | Sakurajima | 102 rare fishing spots | Zero combat, fully passive, in the pool for all four rarities |
| Fishing | Feybreak | 201 Feybreak chests nearby | Same pool on the harder island — pair it with a chest sweep |
Two rows deserve a second look. The oil rigs are the standout on this particular line, because the rig crates are both a schematic pool and the game's biggest Crude Oil payout — the large rig alone rolls 10 to 300 Crude Oil per crate, and you need 60 of it for one suit. One rig trip can hand you the schematic and the fuel for the armor it unlocks. Fishing is the other one to remember: it's the only zero-risk route here, so if you're parked at a spot farming materials you're rolling for the schematic for free. The Feybreak entry also means you never strictly have to be on Sakurajima. Full pin sets for all of these layers live on the Palworld interactive map.
 Why There's No Boss and No Supply Drop
This needs saying plainly, because players burn whole evenings on it: waiting at supply drops for a Plasteel schematic will never work. Five armor families cover the eight regional supply tables — Pelt, Metal, Refined Metal, Pal Metal and Hexolite — and Plasteel isn't one of them. The cruel part is that Sakurajima's own supply drops stock the Pal Metal heat schematics while you're standing on the exact island whose chests hold the Plasteel ones.
| Heat armor | Tech | Supply drop regions | Pal source |
|---|---|---|---|
 Heat-Resistant Ancient Armor Heat-Resistant Ancient Armor | 75 | None | None |
 Heat Resistant Hexolite Armor Heat Resistant Hexolite Armor | 63 | Feybreak | None |
| Heat Resistant Plasteel Armor | 53 | None | None |
| Heat Resistant Pal Metal Armor | 48 | Snowfields · Sakurajima | None |
 Heat Resistant Refined Metal Armor Heat Resistant Refined Metal Armor | 40 | Desert · Mount Obsidian |  Astegon at 3% Astegon at 3% |
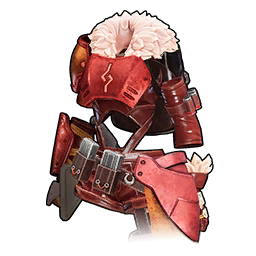 Heat Resistant Metal Armor Heat Resistant Metal Armor | 25 | Forest | None |
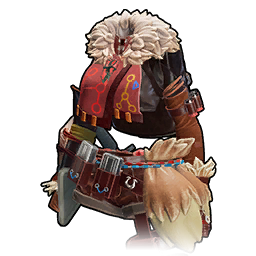 Heat Resistant Pelt Armor Heat Resistant Pelt Armor | 16 | Grasslands | None |
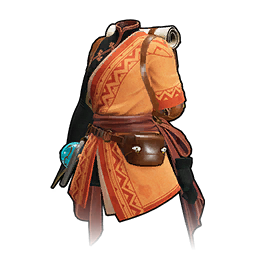 Tropical Outfit Tropical Outfit | 9 | None | None |
Read that table top to bottom and a pattern falls out: the ladder's bottom rung, its middle rung and its top rung are the three that supply drops never touch. The Tropical Outfit comes out of Grasslands chests, tier 1 digs and Grasslands fishing; Plasteel comes out of the seven Sakurajima pools above; and the Ancient suit comes from recycling relics, tier 5 digs and World Tree fishing. Only five armor schematics in the entire game have a Pal source, all of them Legendary, and on the heat side there is exactly one: the Refined Metal suit off Astegon at a flat 3%. If you want a boss you can kill repeatedly for heat gear, the Refined Metal heat armor thirteen tech levels earlier is the only one that exists — every other route is a container. Every Alpha Pal and its multipliers is on the Alpha database.
 How the Rest of the Plasteel Set Compares
Four of the five Plasteel schematics share the identical seven pools, and one doesn't. Lightweight Plasteel is the odd one out with only three sources — no Sakurajima chests, no ordinary camp loot, no fishing at all — which makes it far rarer than the heat suit despite sitting only two tech levels higher. If you're farming Sakurajima loot anyway, the heat and cold bodies are the two that will actually turn up in your bag.
| Legendary schematic | Tech | Loot pools | Missing routes |
|---|---|---|---|
| Heat Resistant Plasteel Armor Schematic 4 | 53 | 7 | — (full set) |
| Cold Resistant Plasteel Armor Schematic 4 | 54 | 7 | — (full set) |
| Plasteel Armor Schematic 4 | 51 | 7 | — (full set) |
| Plasteel Helmet Schematic 4 | 51 | 7 | — (full set) |
| Lightweight Plasteel Armor Schematic 4 | 55 | 3 | Chests, camp loot, both fishing pools |
One consequence is worth planning around: because five separate Plasteel schematic lines all draw from the same Sakurajima pools, each individual line is diluted. A boss stash that could pay a heat schematic could just as easily pay the helmet, the plain body or the cold version — so expect the set to fill in roughly together rather than one line completing quickly. That's a strong argument for banking every Plasteel schematic you find no matter which variant it is, because the Drafting Table only ever combines like with like and you want a full ladder ready on whichever line rolls hot.
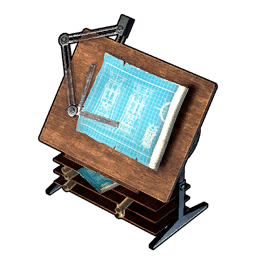 Build It Instead: The Drafting Table Ladder
The Drafting Table unlocks at Technology Lv 45 for 4 Technology Points and merges five identical schematics into one of the next rarity up. The Plasteel heat line supports the full ladder with no gaps, and with no boss shortcut and no supply-drop percentage to chase, combining is a much more serious plan here than it is on the Refined Metal armors. Timing works in your favour too: the table lands at Lv 45 and the armor at Lv 53, so you get eight levels of banking before the recipe even matters.
| Target | Combine cost | Equivalent in Schematic 1s |
|---|---|---|
| Schematic 2 | 5× Schematic 1 | 5 |
| Schematic 3 | 5× Schematic 2 | 25 |
| Schematic 4 (Legendary) | 5× Schematic 3 | 125 |
125 Schematic 1s is the paper worst case, and on most armor lines that's a reason to walk away. Here it's the actual route, because the alternative is an unknown roll out of a pool four other Plasteel lines are competing for. Only combine at the top of the ladder — hold Schematic 3s until you have five — and resist burning Uncommons early, because those are exactly the rolls you'll wish you had back when a lucky Epic lands and you're one short. Remember tier 4 digs sit outside the Schematic 1 pool, so digs feed the middle of the ladder, not the bottom. The table costs 30 Charcoal, 20 Refined Ingot and 10 High Quality Wooden Board; the schematic upgrade guide has the full rules.
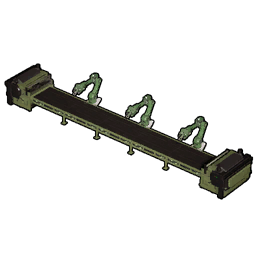 How to Craft Heat Resistant Plasteel Armor
Four materials on the Production Assembly Line II for 400,000 work. The bench isn't the obstacle — it opens eleven levels before the armor does. The real gate is the Electric Furnace at Tech Lv 44, because it smelts both of the heavy lines in this recipe, and it's the whole reason a Plasteel suit feels so much slower to produce than a Pal Metal one.
| Material | Qty | Made at / from |
|---|---|---|
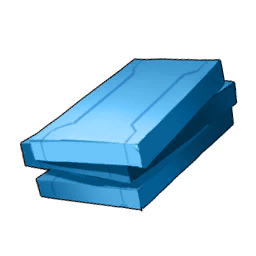 Plasteel Plasteel | 30 | Electric Furnace (Tech Lv 44) — 2 Crude Oil + 5 Ore each |
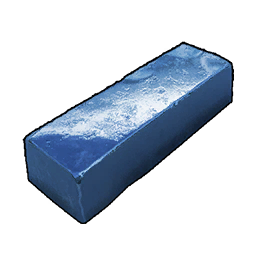 Pal Metal Ingot Pal Metal Ingot | 30 | Electric Furnace — 4 Ore + 1 Pure Quartz + 2 Paldium Fragment each |
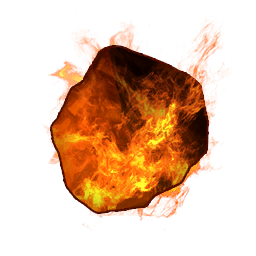 Flame Organ Flame Organ | 20 | Raw drop from Fire Pals — no crafting step at all |
 High Quality Cloth High Quality Cloth | 5 | Tech Lv 36 — 10 Wool + 1 Leather each |
Trace all four lines down to things you mine, shear, buy or pull off a corpse and one suit comes to 495 raw units. The line that dominates everything else is 270 Ore — 150 for the Plasteel and 120 for the ingots — more ore than any armor below the Hexolite tier asks for, and the single best reason to have a Mining team parked on a node cluster before you start. The 60 Crude Oil is the second worry, since it's the only material here you can't dig out of the ground; run an Oil Extractor, raid an oil rig, or bank the 30-40 that every Sakurajima supply drop pays at 100%.
| Raw material | Total for one suit | Where to get it |
|---|---|---|
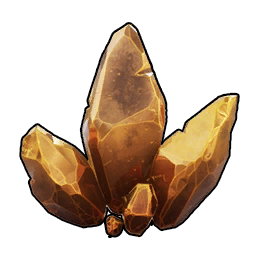 Ore Ore | 270 | 1,632 nodes |
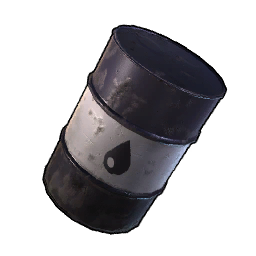 Crude Oil Crude Oil | 60 | 185 oil fields · 100% from six supply regions, up to 30-40 on Sakurajima |
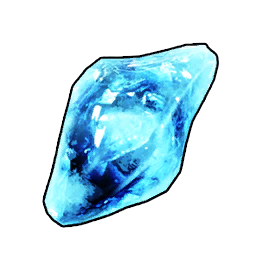 Paldium Fragment Paldium Fragment | 60 | 711 nodes |
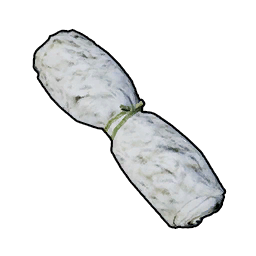 Wool Wool | 50 | Kingpaca 5 · Sweepa 3-5 · Melpaca 2-5, all 100% |
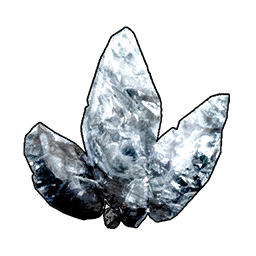 Pure Quartz Pure Quartz | 30 | 607 nodes |
| Flame Organ | 20 | Fire Pals at 100%, shops at 300 Gold, or a ranch — see below |
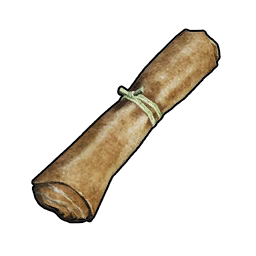 Leather Leather | 5 | Mammorest pays 5-10 at 100% |
Now the warning that decides how long this actually takes: the work cost isn't at the bench. The armor itself is 400,000 work, but smelting a single Plasteel is 200,000 — 6,000,000 on its own — plus 1,500,000 for the ingots and 12,500 for the cloth. End to end one suit is roughly 7.9 million work units, and three quarters of that is Plasteel. The fix is never a bigger assembly line; it's more Kindling Pals on the Electric Furnace, and starting the smelt before you go schematic hunting rather than after.
Twenty Flame Organ, the Easy Way
This is where the heat suit quietly beats its cold twin. Flame Organ drops at 100% from every Fire Pal, it's stocked by four different shop families at 300 Gold each, three Pals produce it on a ranch while you're offline, and fire-sealed chests pay 10-20 in a single open. The cold version's Cryogenic Coolant needs its own tech unlock and a separate bench pass; this needs a wallet or one dead Blazamut.
| Pal | Per kill | Wild spots | Why pick it |
|---|---|---|---|
 Blazamut Blazamut | 10 | 16 | Half the suit in one kill — flat 10, no roll |
 Suzaku Suzaku | 5-10 | 13 | The best per-kill range in the game, but only 13 spots |
 Bushi Noct Bushi Noct | 4-8 | 1,990 | The volume king — more spawn points than anything else on this list |
 Ragnahawk Ragnahawk | 5-7 | 150 | Best mix of payout and availability if you want a mount out of it |
 Reptyro Reptyro | 5-7 | 22 | Same payout as Ragnahawk, far fewer spots |
 Pyrin Noct Pyrin Noct | 4-5 | 411 | A night-only crowd — 411 spots after dark, 10 in daylight |
 Moldron Moldron | 4-5 | 101 | Mount Obsidian regular, right where you'll be wearing the suit |
 Flambelle Flambelle | 2-3 | 232 | Weak drop, but it produces Flame Organ on a ranch |
 Rooby Rooby | 2-3 | 134 | The other ranch producer, and trivially easy to catch early |
Two Blazamut kills is the entire suit at a flat 10 apiece, and it's a fight you can comfortably take at Tech 53. If you'd rather not hunt at all, Bushi Noct at 1,990 spawn points means you'll trip over 20 Flame Organ just crossing the map, and it pays 4-8 per kill on top. The genuinely lazy answer is the ranch: park Flambelle, Rooby or Kelpsea Ignis on one and the material accumulates without you. Everything else about organ drops is in the Pal organ guide.
| Non-combat source | Payout | Notes |
|---|---|---|
| Shops | 300 Gold each | 20 organs = 6,000 Gold at Caravan, Dungeon, Village and Volcano shops |
| Ranch | Passive | Flambelle · Rooby ·  Kelpsea Ignis Kelpsea Ignis |
| Fire-sealed chests | 10-20 | Forest · Desert · Sakurajima · Sunreach Isle — one chest is half a suit |
| Eternal Pyre's Forbidden Market | 10-20 | Very Hard expedition, 120 minutes, runs while you play |
| Field drops | 2-3 | Mount Obsidian, picked up as you walk |
Look at the shop row again, because it reframes the whole build: 6,000 Gold is nothing at Tech 53, and it removes an entire farming step from the recipe. Between that and the Very Hard expedition ticking away in the background at 10-20 per run, there's almost no reason to make a special hunting trip unless you happen to want the Blazamut fight. Two fire-sealed chests would also do it outright. The merchant buying guide covers which vendors are worth a standing visit, and how to farm Gold covers the funding.
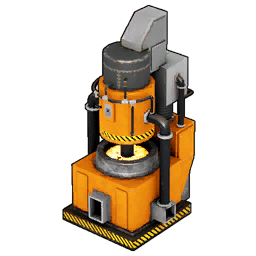 Plasteel and Pal Metal Ingot on One Furnace
The convenient part of this recipe is that both metal lines come off the same building. The Electric Furnace at Tech Lv 44 smelts Plasteel and Pal Metal Ingot, so there's exactly one structure to power and one place to station your Kindling Pals. The inconvenient part is that the furnace itself costs 10 Cryogenic Coolant to build — so even on the heat suit, which never uses coolant in its recipe, the Tech 31 coolant node is still mandatory.
| Line | Per unit | Work each | Total for one suit |
|---|---|---|---|
| Plasteel | 2 Crude Oil + 5 Ore | 200,000 | 6,000,000 work |
| Pal Metal Ingot | 4 Ore + 1 Pure Quartz + 2 Paldium Fragment | 50,000 | 1,500,000 work |
| High Quality Cloth | 10 Wool + 1 Leather | 2,500 | 12,500 work |
| Flame Organ | — (raw drop) | 0 | 0 work |
Read the work column and the priority order sorts itself. One Plasteel costs four times what one Pal Metal Ingot costs, so if furnace time is tight, smelt Plasteel first and let the ingots catch up. The bottom row is the quiet advantage of the heat variant — its fourth material adds zero crafting work, where the cold suit's coolant adds another 100,000 and a second bench. Paldium Fragment is the material people forget they still need at this tier: 60 per suit, 711 nodes on the map, and very easy to have spent on spheres. Everything else about these lines is on the Palworld items database.
Can You Even Build It Yet?
Technology Lv 53 is the headline gate, but six supporting nodes sit under it and two of them need electricity. Work down this checklist before you go schematic hunting, because a Legendary schematic in your bag does nothing until the furnace, the bench and the ore chain exist to feed it. Altogether the nodes below come to 25 Technology Points, every one of them the ordinary kind rather than the Ancient points you pry out of tower bosses.
| Requirement | Unlocks at | Why you need it |
|---|---|---|
| Cryogenic Coolant | Tech Lv 31, 2 points | Not in the recipe — but 10 are needed to build the furnace below |
| High Quality Cloth | Tech Lv 36, 2 points | 5 per suit |
| Production Assembly Line II | Tech Lv 42, 5 points | The bench the armor is built on — 100 Refined Ingot + 30 Cement + 10 Circuit Board + 5 Corrosive Solvent |
| Electric Furnace | Tech Lv 44, 5 points | The real gate — both metal lines — 50 Refined Ingot + 20 Polymer + 10 Cryogenic Coolant + 4 Bio Battery |
| Drafting Table | Tech Lv 45, 4 points | Combining schematics upward — eight levels before the armor |
| Plasteel | Tech Lv 50, 2 points | 30 per suit |
| Plasteel Armor | Tech Lv 51, 5 points | Not required — but it's 385 defence two levels earlier for 20 fewer raw units |
| Heat Resistant Plasteel Armor | Tech Lv 53, 5 points | The recipe itself |
Two rows in there catch people out. First, the coolant trap: the Electric Furnace costs 10 Cryogenic Coolant to build, so the Tech 31 node is compulsory even though this armor never uses coolant. Second, the row second from the bottom — at Tech 51 you can already build the plain Plasteel Armor for 385 defence, fifteen short of this suit and two levels sooner. If you're not spending time in the volcano, build that and skip straight past. The full tree is on the Palworld technology page.
How It Compares to Every Other Heat Armor
Eight body armors carry heat resistance and they form a clean ladder from Tech Lv 9 to Tech Lv 75. Heat Resistant Plasteel Armor sits third, and it occupies an unusually generous stretch of it — the five tech levels between Pal Metal at 48 and Plasteel at 53 buy +150 defence, +550 HP, +8,000 durability and 5 less weight, the best value-per-level step anywhere below the Hexolite tier. Worth noting too: the heat ladder arrives earlier than the cold one at every single rung above Tech 9, this suit included, at 53 against the cold body's 54.
| Armor | Tech | Defence | HP | Durability | Weight | Heat |
|---|---|---|---|---|---|---|
| Heat-Resistant Ancient Armor | 75 | 840 | 2,400 | 25,000 | 35 | Heat 3 |
| Heat Resistant Hexolite Armor | 63 | 600 | 1,750 | 18,000 | 35 | Heat 3 |
| Heat Resistant Plasteel Armor | 53 | 400 | 1,300 | 18,000 | 35 | Heat 2 |
| Heat Resistant Pal Metal Armor | 48 | 250 | 750 | 10,000 | 40 | Heat 2 |
| Heat Resistant Refined Metal Armor | 40 | 180 | 500 | 3,000 | 35 | Heat 2 |
| Heat Resistant Metal Armor | 25 | 105 | 250 | 1,400 | 30 | Heat 2 |
| Heat Resistant Pelt Armor | 16 | 45 | 140 | 600 | 10 | Heat 2 |
| Tropical Outfit | 9 | 25 | 70 | 300 | 4 | Heat 2 |
Read the last column before the first one. Everything from the Tropical Outfit at Tech 9 up to this suit gives identical Heat 2 protection — only Hexolite and Ancient reach Heat 3. Climbing the ladder never makes you cooler, it only makes you harder to kill while you're hot. If the weather is your only problem, the Tropical Outfit at Tech 9 solves it for 4 weight and always will — though it's also the one heat body that skips the fire damage reduction every other rung carries, which matters a lot against Fire Pals. Plasteel is where durability finally matches the top tier at 18,000, the same as Hexolite, so this is the last armor you'll be repairing constantly. Every armor piece in the game is compared on the armor database, and the best armor by tech level guide maps the whole upgrade path.
What the Legendary Version Actually Gains
Rarity raises the crafted armor's numbers, and Pal Metal Armor is the body-armor family whose five rarity steps are all laid out in the game to be read. It climbs 220 → 286 → 308 → 330 → 352 defence and 750 → 975 → 1,050 → 1,125 → 1,200 HP, which is ×1.3, ×1.4, ×1.5 and ×1.6 of base on both stats, while durability runs even harder from 5,000 to 26,000. Pocketpair has never published the multipliers, so apply that same curve to 400 and 1,300 and treat the right-hand columns as close estimates.
| Rarity | Pal Metal defence (measured) | HP | Durability | Plasteel Heat defence (estimated) | HP (estimated) |
|---|---|---|---|---|---|
| Common | 220 | 750 | 5,000 | 400 | 1,300 |
| Uncommon | 286 | 975 | 14,000 | ~520 | ~1,690 |
| Rare | 308 | 1,050 | 18,000 | ~560 | ~1,820 |
| Epic | 330 | 1,125 | 22,000 | ~600 | ~1,950 |
| Legendary | 352 | 1,200 | 26,000 | ~640 | ~2,080 |
400 and 1,300 are the only certain figures in that table — the rest is the measured line's own curve applied to this suit. The shape is what matters, and the shape is the whole pitch. At an estimated ~640 defence, a Legendary Heat Resistant Plasteel Armor at Tech Lv 53 would out-armor a Common Heat Resistant Hexolite Armor at Tech Lv 63 — ten tech levels, a Gigantic Furnace and the entire Hexolite ore chain, skipped. Even an Epic roll at an estimated ~600 matches it dead on. Budget for the recipe growing, though: on the Pal Metal line the Legendary version doubles the ingots to 40, adds 5 Ancient Civilization Parts and takes the work from 150,000 to 4,800,000. The schematic is the start of the job, not the end of it.
 Heat vs the Other Plasteel Body Armors
Four body armors and one helmet make up the Plasteel set across five tech levels, and the three variants are stat-identical at 400 / 1,300 / 18,000. What separates them is entirely the passive line and the fourth material, which makes this a pick-by-need decision rather than a pick-by-number one. The plain body is the only one that gives up defence, and only 15 of it.
| Piece | Tech | Defence | HP | Durability | Passives | Extra material |
|---|---|---|---|---|---|---|
| Plasteel Armor | 51 | 385 | 1,300 | 18,000 | Cold 1 · Heat 1 | — |
 Plasteel Helmet Plasteel Helmet | 51 | 260 | 600 | 18,000 | — | — (head slot) |
| Heat Resistant Plasteel Armor | 53 | 400 | 1,300 | 18,000 | Heat 2 · Cold 1 · Fire cut | 20 Flame Organ |
 Cold Resistant Plasteel Armor Cold Resistant Plasteel Armor | 54 | 400 | 1,300 | 18,000 | Cold 2 · Heat 1 · Ice cut | 10 Cryogenic Coolant |
| Lightweight Plasteel Armor | 55 | 400 | 1,300 | 18,000 | Cold 1 · Heat 1 · +carry weight | 8 Corrosive Solvent |
The heat and cold suits both work out to the same 495 raw units — 20 Flame Organs cost 20, and 10 coolant costs 20 raw materials — so total materials aren't the tiebreaker. Crafting steps are. Flame Organ goes straight into the recipe, while coolant needs its own Tech 31 unlock, its own bench pass and 100,000 extra work, which makes the heat suit meaningfully faster to throw together from scratch and one tech level earlier besides. Neither variant carries the other's protection, unlike at the Hexolite tier where the heat suit also gets Cold 2 — so at Plasteel you genuinely need both if you're bouncing between the volcano and the snow. Skip the Lightweight version unless carry weight is your bottleneck, since its schematic has less than half the drop routes of the rest of the set.
The Short Answer
No boss, no supply drop. The Legendary Heat Resistant Plasteel Armor schematic comes out of seven loot pools: Sakurajima enemy camp boss stashes, ordinary Sakurajima camp loot, Sakurajima treasure chests, oil rig crates, tier 4 treasure map digs, and fishing spots on both Sakurajima and the Feybreak. Every rarity shares those pools, so bank every tier you find and combine five-into-one at the Drafting Table from Tech Lv 45. Build the Common version the moment you hit Tech Lv 53 — 270 Ore, 60 Crude Oil, 60 Paldium Fragment, 50 Wool, 30 Pure Quartz, 20 Flame Organ and 5 Leather — buy the Flame Organ for 6,000 Gold rather than farming it, start the Plasteel smelting early because it's three quarters of the 7.9 million work, and remember the Heat 2 rating is identical at every rarity, so the suit you're wearing tonight beats the schematic you haven't found.
Related Guides
More on armor, schematics and endgame farming:
- Cold Resistant Plasteel Armor Schematic Location and Stats
- Heat Resistant Hexolite Armor Schematic Location and Stats
- Heat Resistant Refined Metal Armor Schematic Location
- Cold Resistant Hexolite Armor Schematic Location and Stats
- Best Armor at Every Tech Level: Full Upgrade Path
- How to Upgrade Schematics to Legendary at the Drafting Table
- Best Legendary Schematics and How to Get Them
- How to Get Legendary Ancient Armor: Every Schematic Source
- All Legendary Weapon Schematic Locations in Palworld
- How to Get Every Pal Organ and Which Pals Drop Them
- What to Buy From Merchants in Palworld
- How to Farm Gold Fast in Palworld
- Palworld Salvaging Guide: How to Salvage and Best Loot
- Palworld Endgame Checklist: What to Do After the Story
- Alpha Pal Hunting Route: Every Field Boss by Level
- Palworld armor database: every piece compared
- Every schematic in Palworld and where it drops
- Palworld supply drops: full loot pool by region
- Palworld technology tree: every unlock by level
- Palworld interactive map: every node, chest and camp
- All Palworld guides