How to Beat Moon Lord Raid Boss: Weak Points and Drops
Moon Lord summons at Level 50 with four separate health bars and no element at all, so nothing you bring counters it. Here's every weak point with its HP multiplier, all four attacks with power and cooldown, the sigil that summons it, the squad and gear that win the damage race, and the full drop list for both the standard and Master fights.
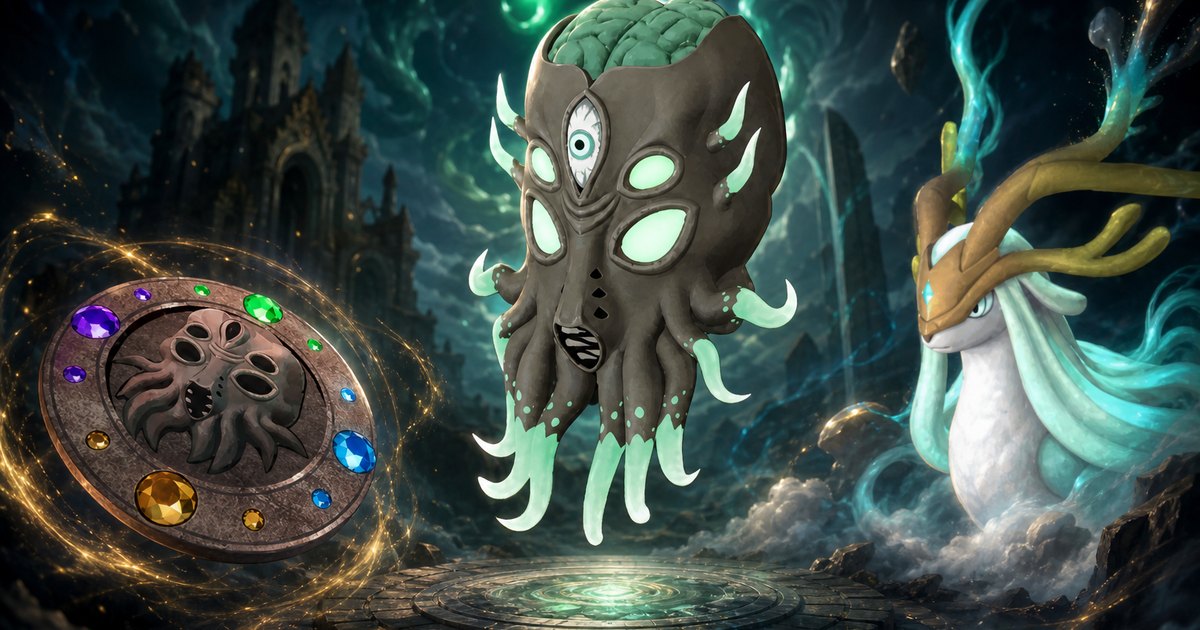
Moon Lord is the Tides of Terraria crossover raid, summoned at Level 50 with a Celestial Sigil instead of a slab, and it is the only raid in the game with no element — nothing you bring counters it and nothing it throws counters you. This guide covers its four separate weak points and what each one is worth, all four attacks with their power and cooldowns, the sigil and altar you need before you can even start, the squad and loadout that win the damage race, and everything both difficulties pay out.
 Moon Lord Raid Stats and Weak Points
The card below is the whole fight in nine rows, and two of them are unusual enough to change how you prepare. First, the element row is blank: Moon Lord is typeless, and so are all four of its attacks, so the element chart and counter finder simply does not apply here in either direction. Second, look at the damage rows — the standard fight takes full damage from you and deals normal damage back, where Hartalis shaves 50% off your output at ×4 damage and Xenolord shaves 65% off at ×5. On paper Moon Lord is the friendliest raid in the game. What makes it hard is that its health is split across four bars totalling ×210, it never flinches, and the clock is running.
| Standard Moon Lord Raid | |
|---|---|
| Boss | Moon Lord — Tides of Terraria crossover |
| Element | None — the only elementless raid boss |
| Weak to | No element. Weak *points* instead: two hands, the head, and the core |
| Summon level | 50 |
| Total HP multiplier | ×210 across four separate bars (×130 core, ×40 head, ×20 per hand) |
| Damage it deals | ×1 — the lowest of any raid |
| Damage it takes | ×1 — the only raid that doesn't reduce your damage |
| Cooldown rate | ×1 — every other raid runs ×2, so this one attacks twice as often |
| Crowd control | Immune to flinch, knockback and stun |
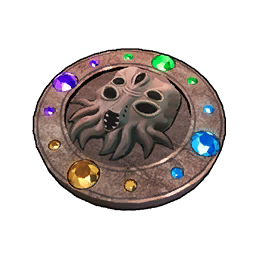
| Summon cost | Celestial Sigil — 100×  Hallowed Bar Hallowed Bar |
| Guaranteed rewards |  Ancient Civilization Core ×4–6, Ancient Civilization Core ×4–6,  Training Crystal ×4, Training Crystal ×4,  Celestial Sigil (Master) ×1 Celestial Sigil (Master) ×1 |
The crowd-control row is the one people learn the hard way. Every Pal raid boss shares its immunity to knockback, but Hartalis and Xenolord can still be stunned — Moon Lord cannot. There is no interrupt in this fight, no stagger window, no stopping a cast once it starts. Everything you might normally do to buy a breather has to be done with your feet instead. Compare the multipliers against every other raid on the raid boss list with battle multipliers.
 Every Weak Point and What It's Worth
Moon Lord doesn't have one health bar, it has four, and they are separate actors with separate multipliers. The two hands are the cheap ones at ×20 each, the head sits at ×40, and the core carries ×130 — 62% of the entire fight lives in that last bar. Shooting the hands and head first is not optional flavour: they are what's exposed early, they are the fastest bars in the fight, and clearing them is what opens the core. In the Master version the split gets even more lopsided, with the core alone at ×480 out of ×790 total, so the warm-up phase costs proportionally less of your ten minutes than it does on the standard run.
| Weak point | Standard HP multiplier | Master HP multiplier | Notes |
|---|---|---|---|
| Left hand | ×20 | ×80 | Cheapest bar in the fight — open here |
| Right hand | ×20 | ×80 | Same value as the left; clear both before the head |
| Head | ×40 | ×150 | Double a hand, and the gate to the core |
| Core | ×130 | ×480 | The heart — 62% of the standard fight, 61% of the Master fight |
| Whole fight | ×210 | ×790 | Applied to a base health stat of 100 |
One honest caveat on those numbers: Moon Lord's base health stat is 100, where the four Pal raid bosses all sit at 130, so its multipliers are being applied to a smaller starting figure. That still leaves the Master fight with the deepest health pool in the game by a distance — the standard version comes to roughly two-thirds of a million HP at Level 50, and the Master version runs into the millions at Level 80.
 All Four Moon Lord Attacks
Four attacks, all typeless, all on a 45-second base cooldown — but remember the cooldown rate: raids normally double their cooldowns, and Moon Lord doesn't, so it works through this list roughly twice as fast as Bellanoir Libero or Xenolord would. Phantasmal Deathray at 450 power is the one that kills you. It's a 5.6× jump over the next attack in the list and it ignores line of sight, so cover doesn't save you — movement does. Phantasmal Sphere at 180 is the one you'll eat most often while committing to a damage window, and Phantasmal Eye at 25 is chip damage you can mostly play through.
| Attack | Element | Power | Cooldown | What to do |
|---|---|---|---|---|
| Phantasmal Deathray | None | 450 | 45s | The fight-ender. Break line of the beam and keep moving — it tracks, so standing still behind cover doesn't help |
| Phantasmal Sphere | None | 180 | 45s | Big AoE. Take it on a Pal, not on yourself, and burst while it recovers |
| Phantasmal Bolt | None | 80 | 45s | Filler damage between the big casts — the window you should be shooting in |
| Phantasmal Eye | None | 25 | 45s | Chip damage on you, and the attack it uses on your base structures |
That last row matters more than 25 power suggests. Phantasmal Eye is the attack Moon Lord aims at your camp, and the standard version does zero damage to wooden and stone structures — it literally cannot break them. The Master version reverses that completely and hits wood and stone at ×5. Fight the standard one at home if you like; bring the Master fight anywhere near a base you care about and you will be rebuilding it.
 What You Need Before You Summon It
A sigil costs 100 Hallowed Bar and is consumed whether you win or lose, so treat this as a gate rather than a shopping list. The altar itself is cheap and early — Technology 33 for 3 Ancient Technology Points — and the real cost is the bar. The schematic is the part people miss: without the Celestial Sigil Schematic in your inventory the recipe simply doesn't exist, and it only comes out of the top-grade chests inside the Sealed Realm of Terraria.
| Requirement | What it costs |
|---|---|
| Celestial Sigil Schematic | One drop from a top-grade chest in the Sealed Realm of Terraria — mandatory to unlock the recipe |
| Celestial Sigil | 100× Hallowed Bar at a workbench |
| Summoning Altar | Technology 33, 3 Ancient Technology Points, then 100 Stone and 20 Paldium Fragment |
| A Level 50+ squad | The boss summons at 50 and never scales down |
| Endgame armour |  Ancient Armor at 1,040 defence, or Ancient Armor at 1,040 defence, or  Hallowed Plate Mail for the collab damage cut Hallowed Plate Mail for the collab damage cut |
| Ten minutes of uptime | The raid runs on a countdown — no second attempt on the same sigil |
How to Farm the Hallowed Bar
Hallowed Bar is the entire economy of the collab and it cannot be smelted, bought or found outside the Sealed Realm. Ordinary chests in there pay 4–10 a piece, the top-grade chests pay 20–40, and the Eye of Cthulhu at the end of the realm hands it over as a guaranteed drop. At 20–40 per big chest, a sigil is realistically three to five clean runs — and the same runs are what produce the schematic, so nobody farms these separately. Open the interactive map on the Sealed Realm entrance; there is exactly one pin for it on the whole island.
| Source | Hallowed Bar per pull |
|---|---|
| Regular chests in the Sealed Realm | 4–10 |
| Top-grade chests in the Sealed Realm | 20–40 — also the only source of the sigil schematic |
 Eye of Cthulhu Eye of Cthulhu | Guaranteed on kill |
| Sigil cost | 100 — budget three to five full runs |
 Best Pals to Bring Against Moon Lord
Because the boss is typeless, every counter-picking habit you built on the other raids is dead weight here. There is no ×1.5 matchup to chase and no defensive typing to protect, so the only question worth asking is which Pal puts out the most raw damage. Astralym answers it outright: 200 ranged attack is the highest figure of any Pal in the game, 33% clear of the next name on the list, and it happens to be elementless itself. Bellanoir and Bellanoir Libero tie for second at 150, and Frostallion Noct earns its place on partner skill rather than raw stat — Black Steed adds up to +40% ranged attack while you're riding it, on the bulkiest Dark frame in the game.
| Pal | Ranged Attack | Why it works here |
|---|---|---|
| Astralym | 200 | Highest attack stat in the game and elementless, so nothing about this fight blunts it |
 Bellanoir Libero Bellanoir Libero | 150 | Joint second-highest attack, and you already have one if you've run the earlier raids |
 Bellanoir Bellanoir | 150 | Same attack stat as Libero on a cheaper Pal to obtain |
 Necromus Necromus | 145 | Turns up with Legend and Lord of the Underworld baked in — +20% attack before you spend a passive slot |
 Neptilius Neptilius | 145 | 125 defence alongside that attack, the sturdiest of the top-five hitters |
 Frostallion Noct Frostallion Noct | 140 | Black Steed scales to +40% ranged attack, and 140 HP / 135 defence survives the Deathray |
 Jetragon Jetragon | 140 | Aerial Missile plus the mobility to leave an AoE the instant it starts |
 Jormuntide Ignis Jormuntide Ignis | 130 | 150 melee attack — the pick if you're fighting the hands up close |
On passives, the rule flips in a way that trips people up: element-boost passives like Lord of the Underworld still pay their full 30% because they scale your own skill's damage, not the matchup — what you never get here is the type multiplier on top. So a Dark team has no edge over a Fire team against Moon Lord; it just has whatever attack stat it brought. Stack Musclehead (+30% attack), Legend (+20% attack and defence), Ferocious (+20% attack) and Serenity (30% cooldown reduction, +10% attack) — that last one is worth more in this fight than in any other raid, because a countdown fight is decided by how many casts you fit into it. Full effect values are on the passive skills list, and the Pal min-maxing guide covers condensing and souls.
Best Weapons and Armor for the Fight
Two loadouts work, and they don't mix. The raw-numbers build is your Ancient-tier kit — the Charge Rifle leads every assault rifle in the game at 15,000 attack and the Laser Sword leads melee at 2,400 — and it simply hits harder than anything the collab makes. The collab build is the other option: Hallowed Plate Mail carries Hallowed Guard, a flat 30% defence bonus against collab damage, which is every attack in this fight, and each Hallowed head piece adds +20% damage while you hold the matching class of Terraria weapon. Pick one lane. Hallowed head bonuses do nothing for a Charge Rifle, and the collab weapons' attack numbers don't compete with Ancient gear.
| Gear | Class | Attack / Defence | Why bring it |
|---|---|---|---|
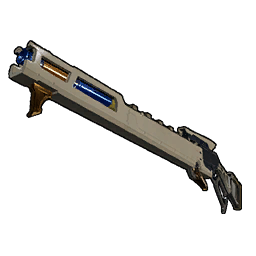 Charge Rifle Charge Rifle | Assault rifle | 15,000 attack | Highest attack of any assault rifle — the raw damage-race pick |
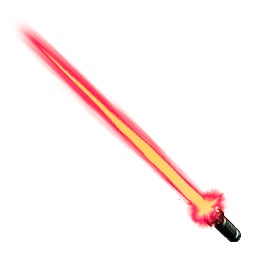 Laser Sword Laser Sword | Melee | 2,400 attack | Highest attack of any melee weapon, for hands-and-head work |
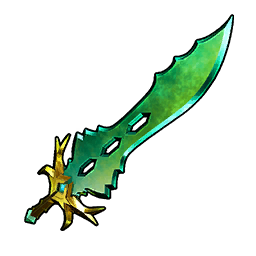 Terra Blade Terra Blade | Melee | 425 attack | Best attack of the collab weapons, and its shockwaves reach weak points you can't stand next to |
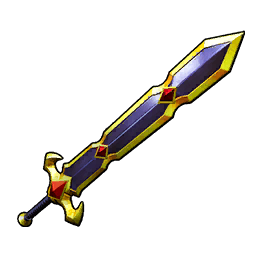 Excalibur Excalibur | Melee | 360 attack | Shockwaves in a ring around you — the answer when the True Eyes crowd in |
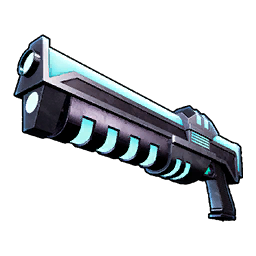 Vortex Beater Vortex Beater | Assault rifle | 300 attack | Homing missiles that track a weak point while you dodge |
| Legendary Meowmere | Melee | 222 attack | Moon Lord's own drop, and 22,222 durability means it never breaks mid-raid |
| Hallowed Plate Mail | Body armour | 320 defence, 1,040 HP | Hallowed Guard: −30% damage from every attack in this fight |
| Ancient Armor | Body armour | 1,040 defence, 3,120 HP | Triple the raw defence if you'd rather not run the collab set |
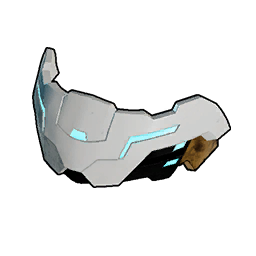 Ancient Helm Ancient Helm | Head armour | 650 defence, 1,560 HP | Best head slot in the game by defence, full stop |
If you go collab, match the head piece to your weapon or you're leaving the bonus on the floor: Hallowed Mask boosts melee, Hallowed Helmet boosts ranged, Hallowed Headgear boosts magic and Hallowed Hood boosts summon weapons — all four sit at 182 defence and 416 HP at max rarity, so the passive is the only thing separating them. Every version and its schematic tier is broken down in the Hallowed Plate Mail schematic guide, and the full armour list has the defence numbers for everything else.
Moon Lord Fight Strategy
There is no gimmick to solve here and no barrier phase to break — this is a pure damage race against a boss that cannot be staggered. Everything below is about spending the countdown well.
Clear the hands, then the head, then the core
The two hands are ×20 apiece and the head is ×40, so all three together cost less than two-thirds of what the core alone does. Take them in that order and you spend the opening minutes on the cheapest health in the fight while the boss is still working through its rotation for the first time. Homing and shockwave weapons earn their keep here because the parts sit at awkward angles — the Vortex Beater's missiles will track a hand you can't get a clean line on.
Move for the Deathray, don't hide from it
Phantasmal Deathray is 450 power against a boss whose other three attacks average 95, and it ignores line of sight entirely — walls, rocks and terrain do nothing. Watch for the cast, break away from the beam's line and keep moving through it. This is also the reason to keep a mount saddled: Jetragon can leave the beam's arc faster than you can run out of it.
Ignore the True Eyes unless they're on you
Moon Lord spawns three True Eyes of Cthulhu partway through the fight. They're small, elementless adds with a 135 base health stat and 130 ranged attack — respectable numbers, but nothing next to the boss's bars, and killing them costs seconds you don't get back. Burn them only if they're stacking damage on you. In the Master fight that calculation changes: the Master version's eyes hit at ×7, which is enough to end a run on its own, so clear those on sight.
Fight the Master version away from your base
The standard Moon Lord does no damage at all to wooden and stone structures, so hosting it at home is genuinely safe for the buildings — your working Pals are still fair game. The Master version multiplies structure damage by five, and with a ×7 damage multiplier on everything else it will flatten a camp in the time it takes you to notice. Use the raid area for that one, or a throwaway base built well away from anything you've invested in. The best base locations guide has the coordinates if you want a dedicated raid plot.
Moon Lord Drops and Rewards
The standard kill is one of the best-paying single fights in the game, and the headline is the Legendary Meowmere at 22% — Moon Lord is the only source. There's a quiet second chance at it too: the boss's own drop table rolls the sword again at 22.22% on top of the raid reward, so a run is closer to a coin-flip for the sword than the 22% line suggests. The Moon Lord Mask at 10% is the rarest thing on the list; at 350 defence and 800 HP it doesn't beat an Ancient Helm's 650, so wear it as the trophy it is. And every kill guarantees a Celestial Sigil (Master), which is the only way into the harder version.
| Drop | Rate | Amount |
|---|---|---|
| Ancient Civilization Core | 100% | 4–6 |
| Training Crystal | 100% | 4 |
| Celestial Sigil (Master) | 100% | 1 |
| Legendary Meowmere | 22% | 1 — plus a second 22.22% roll from the boss itself |
| Moon Lord Mask | 10% | 1 |
| Terra Blade Schematic 2 | 25% | 1 |
| Terraprisma Schematic 2 | 25% | 1 |
| Vortex Beater Schematic 2 | 25% | 1 |
| Nightglow Schematic 2 | 25% | 1 |
| Your pick of one fruit | 100% | 3× 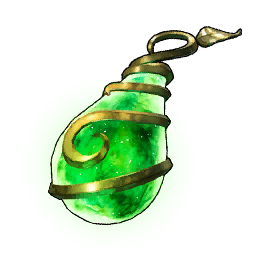 Life Fruit, Life Fruit, 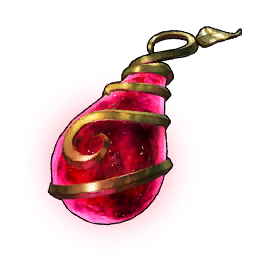 Power Fruit or Power Fruit or  Stout Fruit Stout Fruit |
Two things it does not drop, both worth knowing before you spend a sigil. There is no egg — Moon Lord isn't a Pal, so unlike every other raid boss there's nothing to incubate and nothing to add to your team afterwards. And there's no capture: no sphere works on it, so save them.
Moon Lord (Master): What Changes
The Master version is a different fight wearing the same model. Level 80 instead of 50, ×790 total health instead of ×210, your damage cut to a quarter, and everything it does multiplied by seven — including the True Eyes and the structure damage. That combination is why it reads as the hardest encounter in the game: the standard fight is a damage race you can lose by being slow, and the Master fight is one you lose by being hit. The rewards move up to match, with guaranteed Ancient Civilization Parts ×10–20, Diamond ×5–10, the tier-4 schematics for all four collab weapons, and the Moon Lord Statue Schematic at 100% — the only proof of the kill the game gives you.
| Standard | Master | |
|---|---|---|
| Summon level | 50 | 80 |
| Summon item | Celestial Sigil (crafted) | Celestial Sigil (Master) (dropped by the standard kill) |
| Total HP multiplier | ×210 | ×790 |
| Damage you deal | ×1 | ×0.25 |
| Damage it deals | ×1 | ×7 |
| Damage to wood and stone | ×0 — it can't break them | ×5 |
| True Eye damage | ×1 | ×7 |
| Signature reward | Legendary Meowmere at 22% |  Moon Lord Statue Schematic at 100% Moon Lord Statue Schematic at 100% |
Master drops also include Ancient Civilization Core ×3, Training Crystal ×2–3, a guaranteed Carrying Lotus (L), and a 20% roll each on the Life, Stamina, Power and Speed large lotuses. Every kill re-drops the Master sigil, so once you're through the first one the fight funds its own repeats.
The Short Version
Farm 100 Hallowed Bar and the schematic out of the Sealed Realm of Terraria, craft the sigil, and summon at an altar you don't mind losing. Bring the highest raw attack you own — typing is irrelevant here — clear both hands and the head before touching the core, and treat Phantasmal Deathray as the only attack worth respecting. Win and you walk away with a guaranteed Master sigil, four Training Crystals, and a 22% shot at the Legendary Meowmere. Then do it again at Level 80 with your damage quartered, well away from anything you've built.
Related Guides
Hubs: all Palworld guides · every raid boss and its battle multipliers · the interactive map
- Eye of Cthulhu location, drops, and how to beat it — the other collab boss, and your Hallowed Bar source
- Hallowed Plate Mail schematic location and stats — the armour that cuts collab damage by 30%
- How to beat the Hartalis raid boss — the Level 70 raid, and a proper elemental counter fight for contrast
- How to get Xenolord: slab locations and raid fight — the tankiest of the Pal raids at ×280 HP
- How to min-max Pals: IVs, passives, souls, and condensing — how to get a squad to raid-ready attack
- Strongest attack skills in Palworld 1.0 — what to slot when typing doesn't matter
- Best base locations in Palworld 1.0 — where to put a throwaway raid plot
- Full armour list with defence values and every weapon by class and attack